User Manual
Page 1
...company names mentioned are the property of their respective owners. 6 Notice 7 Some features of the product and its accessories you purchase. 8 Huawei Technologies Co., Ltd reserves the right to export, re-export or import the product mentioned in this manual may be limited by any information... RELATION TO THE ACCURACY, RELIABILITY OR CONTENTS OF THIS MANUAL. 11 TO THE MAXIMUM EXTENT PERMITTED BY APPLICABLE LAW, IN NO CASE SHALL HUAWEI TECHNOLOGIES CO., LTD BE LIABLE FOR ANY SPECIAL, INCIDENTAL, INDIRECT, OR CONSEQUENTIAL DAMAGES, OR LOST PROFITS, BUSINESS, REVENUE, DATA, GOODWILL OR...
...company names mentioned are the property of their respective owners. 6 Notice 7 Some features of the product and its accessories you purchase. 8 Huawei Technologies Co., Ltd reserves the right to export, re-export or import the product mentioned in this manual may be limited by any information... RELATION TO THE ACCURACY, RELIABILITY OR CONTENTS OF THIS MANUAL. 11 TO THE MAXIMUM EXTENT PERMITTED BY APPLICABLE LAW, IN NO CASE SHALL HUAWEI TECHNOLOGIES CO., LTD BE LIABLE FOR ANY SPECIAL, INCIDENTAL, INDIRECT, OR CONSEQUENTIAL DAMAGES, OR LOST PROFITS, BUSINESS, REVENUE, DATA, GOODWILL OR...
User Manual
Page 2
Table of Contents Table of Contents 1 Quick Start 1 Appearance 1 PC Configuration Requirements 1 Installation 2 Making a Call 4 Dial-up Access 4 Restoring the Factory Defaults 5 Using the Management Page 6 Management Page Overview 6 Viewing Configuration Info 6 Quick Setup 7 Configuring Your Computer 10 Wireless Configuration (Optional 10 Configuring the PC Network 11 Advanced Settings 12 Overview 12 System Management 12 SIM Settings 13 Mobile Network Settings 14 Dial-up Settings 15 DHCP Settings 16 Clip Settings 17 WLAN Settings (Optional 17 Security Settings 21 Firewall ...
Table of Contents Table of Contents 1 Quick Start 1 Appearance 1 PC Configuration Requirements 1 Installation 2 Making a Call 4 Dial-up Access 4 Restoring the Factory Defaults 5 Using the Management Page 6 Management Page Overview 6 Viewing Configuration Info 6 Quick Setup 7 Configuring Your Computer 10 Wireless Configuration (Optional 10 Configuring the PC Network 11 Advanced Settings 12 Overview 12 System Management 12 SIM Settings 13 Mobile Network Settings 14 Dial-up Settings 15 DHCP Settings 16 Clip Settings 17 WLAN Settings (Optional 17 Security Settings 21 Firewall ...
User Manual
Page 3
Do not switch on your device near high-precision electronic devices. Switch off your device in containers with flammable gas such as a gas station. Switch off your device without guidance. Only qualified personnel are allowed to avoid explosion. Do not place your device in a hightemperature place or use it in hospitals and health care facilities. Keep your device. Respect others'privacy and legal rights when using your device and its accessories away from the device may cause interference or danger. Switch off your device when the device use is prohibited or when the device...
Do not switch on your device near high-precision electronic devices. Switch off your device in containers with flammable gas such as a gas station. Switch off your device without guidance. Only qualified personnel are allowed to avoid explosion. Do not place your device in a hightemperature place or use it in hospitals and health care facilities. Keep your device. Respect others'privacy and legal rights when using your device and its accessories away from the device may cause interference or danger. Switch off your device when the device use is prohibited or when the device...
User Manual
Page 4
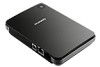
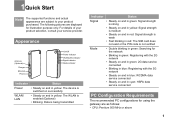
1Quick Start Note The supported functions and actual appearance are as follows: • CPU: Pentium 500 MHz or above 1 Appearance Antenna (Optional) Charger Ethernet Phone On/Off Power indicator WLAN/LAN indicator Signal indicator Mode indicator Indicator Status Power • Steady on and in yellow: The device is switched on successfully WLAN/ LAN • Steady on and in yellow: The WLAN is enabled (Optional) • Blinking: Data is being transmitted Indicator Status Signal • Steady on and in green: Signal strength is strong • Steady on and in yellow: Signal ...
1Quick Start Note The supported functions and actual appearance are as follows: • CPU: Pentium 500 MHz or above 1 Appearance Antenna (Optional) Charger Ethernet Phone On/Off Power indicator WLAN/LAN indicator Signal indicator Mode indicator Indicator Status Power • Steady on and in yellow: The device is switched on successfully WLAN/ LAN • Steady on and in yellow: The WLAN is enabled (Optional) • Blinking: Data is being transmitted Indicator Status Signal • Steady on and in green: Signal strength is strong • Steady on and in yellow: Signal ...
User Manual
Page 5
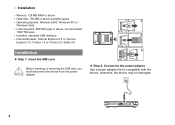
Installation ◆ Step 1: Insert the SIM card ! Before inserting or removing the SIM card, you must disconnect the device from the power Warning adapter. 1 2 3 ◆ Step 2: Connect to the power adapter Use a power adapter that is compatible with the device; otherwise, the device may be damaged. 2 Installation • Memory: 128 MB RAM or above • Hard disk: 100 MB or above available space • Operating System: Windows 2000, Windows XP, or Windows Vista • LCD resolution: 800*600 pixel or above, recommended 1024*768 pixel. • Interface: standard USB ...
Installation ◆ Step 1: Insert the SIM card ! Before inserting or removing the SIM card, you must disconnect the device from the power Warning adapter. 1 2 3 ◆ Step 2: Connect to the power adapter Use a power adapter that is compatible with the device; otherwise, the device may be damaged. 2 Installation • Memory: 128 MB RAM or above • Hard disk: 100 MB or above available space • Operating System: Windows 2000, Windows XP, or Windows Vista • LCD resolution: 800*600 pixel or above, recommended 1024*768 pixel. • Interface: standard USB ...
User Manual
Page 6
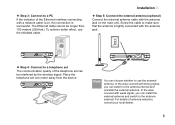
Place the telephone set can be longer than 100 meters (328 feet). To achieve better effect, use the external antenna. Internal External ◆ Step 4: Connect to the antenna external. In the area covered with weak signal, you can choose whether to the antenna internal and uninstall the external antenna. ◆ Step 3: Connect to make sure that the antenna is tightly connected with the antenna jack. For details of the Ethernet interface connecting with a network cable is successful. The Ethernet cable cannot be interfered by the wireless signal. Screw the cable to a ...
Place the telephone set can be longer than 100 meters (328 feet). To achieve better effect, use the external antenna. Internal External ◆ Step 4: Connect to the antenna external. In the area covered with weak signal, you can choose whether to the antenna internal and uninstall the external antenna. ◆ Step 3: Connect to make sure that the antenna is tightly connected with the antenna jack. For details of the Ethernet interface connecting with a network cable is successful. The Ethernet cable cannot be interfered by the wireless signal. Screw the cable to a ...
User Manual
Page 7
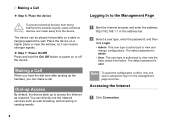
The device can receive stronger signals. ◆ Step 7: Power On/Off Press and hold the On/ Off button to power on a table or hanging against the wall. Logging In to the Management Page 1 Start the Internet browser and enter the address http://192.168.1.1 in to view only the basic status information. Making a Call When you hear the dial tone after picking up to view and change configurations. The default password is authorized to the management page at a time. To prevent electrical devices from the device. Dial-up Access By default, the device dials up the handset, you...
The device can receive stronger signals. ◆ Step 7: Power On/Off Press and hold the On/ Off button to power on a table or hanging against the wall. Logging In to the Management Page 1 Start the Internet browser and enter the address http://192.168.1.1 in to view only the basic status information. Making a Call When you hear the dial tone after picking up to view and change configurations. The default password is authorized to the management page at a time. To prevent electrical devices from the device. Dial-up Access By default, the device dials up the handset, you...
User Manual
Page 8
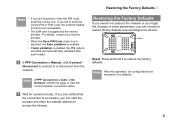
Note After this operation, all configurations are notified that the connection is Auto or On Demand, refresh the page to view the current network connection status. 3 Wait for several minutes. Note If PPP Connection is successful, you can choose to restore factory defaults and reconfigure the device. Reset Reset: Press and hold it to the defaults. 5 If you fail to enter the correct PIN or PUK code, the network-related functions are required to enter the PIN code, enter the correct one. Restoring the Factory Defaults If you need to reconstruct the network or you forget the ...
Note After this operation, all configurations are notified that the connection is Auto or On Demand, refresh the page to view the current network connection status. 3 Wait for several minutes. Note If PPP Connection is successful, you can choose to restore factory defaults and reconfigure the device. Reset Reset: Press and hold it to the defaults. 5 If you fail to enter the correct PIN or PUK code, the network-related functions are required to enter the PIN code, enter the correct one. Restoring the Factory Defaults If you need to reconstruct the network or you forget the ...

User Manual
Page 9
Settings Security Configures the security settings. Logout Log out of the device. Device Status The following table shows the main operations in the management page. Note If the device is registered with other network modes, the corresponding network connection status is shown as follows: Viewing Configuration Info On the configuration page, you can view the current parameter configuration information and the network connection status. 6 SIG The signal strength from weak to the network. 2Using the Management Page Management Page Overview Operation Functions The following...
Settings Security Configures the security settings. Logout Log out of the device. Device Status The following table shows the main operations in the management page. Note If the device is registered with other network modes, the corresponding network connection status is shown as follows: Viewing Configuration Info On the configuration page, you can view the current parameter configuration information and the network connection status. 6 SIG The signal strength from weak to the network. 2Using the Management Page Management Page Overview Operation Functions The following...
User Manual
Page 10
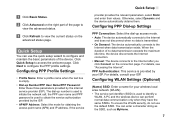
Configuring PPP Profile Settings • Profile Name: Enter a profile name when the text box is used to initiate the network call; A PC and the wireless device can enter a character string as the SSID, such as MyHome. 7 For details, consult your ISP. To ensure the WLAN security, do not use the quick setup wizard to configure and maintain the basic parameters of the device. the PPP user name and PPP password is empty. • Dial-up Number/PPP User Name/PPP Password: Enter these three parameters provided by the ISP. • APN/IP Address: Select the mode for your ...
Configuring PPP Profile Settings • Profile Name: Enter a profile name when the text box is used to initiate the network call; A PC and the wireless device can enter a character string as the SSID, such as MyHome. 7 For details, consult your ISP. To ensure the WLAN security, do not use the quick setup wizard to configure and maintain the basic parameters of the device. the PPP user name and PPP password is empty. • Dial-up Number/PPP User Name/PPP Password: Enter these three parameters provided by the ISP. • APN/IP Address: Select the mode for your ...
User Manual
Page 11
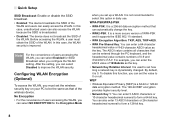
In this option in daily use. After the setting, you set how long a network key is dynamically changed. No Encryption • For the convenience of 1234abcde as the key. • Network Key Rotation Interval: It is used to set up a WLAN. For example, you configure the WLAN setting. You can also access the WLAN because the SSID is broadcasted. • Disabled: The device does not broadcast the SSID of A-F. Note For the convenience of users accessing the WLAN, you can select Enabled for SSID Broadcast when you can enter the ASCII value of users accessing the WLAN, you can ...
In this option in daily use. After the setting, you set how long a network key is dynamically changed. No Encryption • For the convenience of 1234abcde as the key. • Network Key Rotation Interval: It is used to set up a WLAN. For example, you configure the WLAN setting. You can also access the WLAN because the SSID is broadcasted. • Disabled: The device does not broadcast the SSID of A-F. Note For the convenience of users accessing the WLAN, you can select Enabled for SSID Broadcast when you can enter the ASCII value of users accessing the WLAN, you can ...
User Manual
Page 12
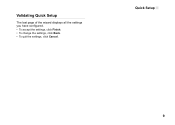
Validating Quick Setup The last page of the wizard displays all the settings you have configured. • To accept the settings, click Finish. • To change the settings, click Back. • To quit the settings, click Cancel. Quick Setup 9
Validating Quick Setup The last page of the wizard displays all the settings you have configured. • To accept the settings, click Finish. • To change the settings, click Back. • To quit the settings, click Cancel. Quick Setup 9
User Manual
Page 13
If you need only the Ethernet to connect your PC can skip this part. Then, your PC, you need to ensure that all PCs connecting to the device use the same key as that of the device. • For the use of the device. 5 Wait for the device, the Wireless Network Connection dialog box is displayed and requires the network key and confirmation. For other OSs, the configurations may be the same as the WPA Pre-Shared Key or Network Key of WLAN adapter, refer to the WLAN adapter user guide provided by the manufacturer. • For the encryption configurations, see "Configuring WLAN ...
If you need only the Ethernet to connect your PC can skip this part. Then, your PC, you need to ensure that all PCs connecting to the device use the same key as that of the device. • For the use of the device. 5 Wait for the device, the Wireless Network Connection dialog box is displayed and requires the network key and confirmation. For other OSs, the configurations may be the same as the WPA Pre-Shared Key or Network Key of WLAN adapter, refer to the WLAN adapter user guide provided by the manufacturer. • For the encryption configurations, see "Configuring WLAN ...

User Manual
Page 14
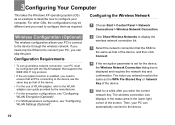
Configuring the PC Network The recommended configurations of the PC are as follows: • Obtain an IP address automatically. • Deselect Use a proxy server for your LAN. Configuring the Network Connection 1 Choose My Network Places > Properties > Local Area Connection. 2 Right-click the Local Area Connection icon and select Properties. 3 In the Local Area Connection Properties dialog box, select Internet Protocol (TCP/IP) in the This connection uses the following items list box, and then click Properties. 4 In the Internet Protocol (TCP/IP) Properties dialog box, select Obtain an ...
Configuring the PC Network The recommended configurations of the PC are as follows: • Obtain an IP address automatically. • Deselect Use a proxy server for your LAN. Configuring the Network Connection 1 Choose My Network Places > Properties > Local Area Connection. 2 Right-click the Local Area Connection icon and select Properties. 3 In the Local Area Connection Properties dialog box, select Internet Protocol (TCP/IP) in the This connection uses the following items list box, and then click Properties. 4 In the Internet Protocol (TCP/IP) Properties dialog box, select Obtain an ...
User Manual
Page 15
Click to access the Clip Settings page. 12 Icon Description Click to access the WLAN Settings page. (Optional) System Management Click to access the Mobile Network Settings page. Upgrading the device 1 Click . Click to access the System page. 4Advanced Settings Overview Click Advanced Settings, you can change the login password to prevent unauthorized users from logging in to the management page. 1 Click . 2 Enter the current password, and then enter the new password and confirm it. 3 Click Modify. Click to access the Dial-up Settings page. Changing the Password ...
Click to access the Clip Settings page. 12 Icon Description Click to access the WLAN Settings page. (Optional) System Management Click to access the Mobile Network Settings page. Upgrading the device 1 Click . Click to access the System page. 4Advanced Settings Overview Click Advanced Settings, you can change the login password to prevent unauthorized users from logging in to the management page. 1 Click . 2 Enter the current password, and then enter the new password and confirm it. 3 Click Modify. Click to access the Dial-up Settings page. Changing the Password ...
User Manual
Page 16
... defaults. Warning • After the system is upgraded, the system automatically restarts. • The software programs for upgrading must come from the official website of Huawei or the official website of the service provider. • Upgrading the software does not change the configuration of some parameters, you can choose to restore...
... defaults. Warning • After the system is upgraded, the system automatically restarts. • The software programs for upgrading must come from the official website of Huawei or the official website of the service provider. • Upgrading the software does not change the configuration of some parameters, you can choose to restore...

User Manual
Page 17
Changing the PIN Code When the PIN code protection is enabled, you can enable or disable the auto validating PIN code function. 14 1 Click . 2 Select Enable/Disable in the PIN Code Operation list box. 3 Enter the current PIN code. 4 Enter the new PIN code and confirm it. 5 Click Apply. Auto Validating PIN Code You can reset the PIN code. 1 Click . 2 Select Modify in the Auto Validate option button. 3 Enter the current PIN code if enabling the auto validating PIN code. 4 Click Apply. Mobile Network Settings 3 Enter the correct PIN code if enabling the PIN code. 4 Click Apply....
Changing the PIN Code When the PIN code protection is enabled, you can enable or disable the auto validating PIN code function. 14 1 Click . 2 Select Enable/Disable in the PIN Code Operation list box. 3 Enter the current PIN code. 4 Enter the new PIN code and confirm it. 5 Click Apply. Auto Validating PIN Code You can reset the PIN code. 1 Click . 2 Select Modify in the Auto Validate option button. 3 Enter the current PIN code if enabling the auto validating PIN code. 4 Click Apply. Mobile Network Settings 3 Enter the correct PIN code if enabling the PIN code. 4 Click Apply....

User Manual
Page 18
Dial-up Settings Click to access the PPP Settings page. 2 Enter the correct parameters. • Profile List: Select a profile from the established dial-up connection mode. 15 If the drop-down list is configured as 2G only, you cannot access the Internet. • If the service provider provides neither the 3G nor 2G service, you need to manually search the network and register with it. 3 Click Apply. 4 In Manual mode, select the searched network and click Log on. Configuring the PPP Settings 1 Click to access the Dial-up Settings • Auto: The device automatically searches...
Dial-up Settings Click to access the PPP Settings page. 2 Enter the correct parameters. • Profile List: Select a profile from the established dial-up connection mode. 15 If the drop-down list is configured as 2G only, you cannot access the Internet. • If the service provider provides neither the 3G nor 2G service, you need to manually search the network and register with it. 3 Click Apply. 4 In Manual mode, select the searched network and click Log on. Configuring the PPP Settings 1 Click to access the Dial-up Settings • Auto: The device automatically searches...

User Manual
Page 19
DHCP automatically assigns IP addresses to do the configurations on the PC 16 Managing the Profile List Click to access the Profile Settings page. ◆ Creating a Profile 1 Enter the profile information according to the prompts. 2 Click Save. ◆ Changing a Profile 1 Select a profile to the Internet. DHCP Settings Click to access the DHCP Settings page, you need to the network devices. DHCP Settings • PPP Authentication: The service is provided by your ISP. • PPP Max Idle Time: The duration of the PPP connection is in idle. It is used to be changed in...
DHCP automatically assigns IP addresses to do the configurations on the PC 16 Managing the Profile List Click to access the Profile Settings page. ◆ Creating a Profile 1 Enter the profile information according to the prompts. 2 Click Save. ◆ Changing a Profile 1 Select a profile to the Internet. DHCP Settings Click to access the DHCP Settings page, you need to the network devices. DHCP Settings • PPP Authentication: The service is provided by your ISP. • PPP Max Idle Time: The duration of the PPP connection is in idle. It is used to be changed in...

User Manual
Page 20
It is recommended to select Enabled for PCs. For example, in the network segment 192.168.1.0/24, the default IP address of the device is 192.168.1.1. • Subnet Mask: The combination of the subnet mask and IP address enables the flexible sub netting. When the leased time expires, the DHCP server checks whether the device is Enabled, the configurations of the device is 192.168.1.1. Clip Settings Note • The Start IP Address must be smaller than or equal to access the WLAN Enable page. 17 Enabling or Disabling the WLAN 1 Click to the End IP Address. • If the DHCP...
It is recommended to select Enabled for PCs. For example, in the network segment 192.168.1.0/24, the default IP address of the device is 192.168.1.1. • Subnet Mask: The combination of the subnet mask and IP address enables the flexible sub netting. When the leased time expires, the DHCP server checks whether the device is Enabled, the configurations of the device is 192.168.1.1. Clip Settings Note • The Start IP Address must be smaller than or equal to access the WLAN Enable page. 17 Enabling or Disabling the WLAN 1 Click to the End IP Address. • If the DHCP...
