Installation Instructions
Page 1
... Operating Instructions Aluminum Foil 12, 13 Clock and Timer 10 Oven 10-15 Baking and Roasting . . . . . .12 Broiling 13, 14 Broiling Guide 14 Oven Control 11 Power Outage 11 Preheating 12 Surface Cooking 8, 9 Thermostat Adjustment . . . .15 Care and Cleaning Air Vents 21 Broiler Pan and Grid 21 Burner Assemblies . . . . . .16-18 Burner Caps and Heads . . . .18 Burner Grates 17 Control Panel and Knobs . . .21 Cooktop Surface 19 Drip Pans 16 Lift-Off Oven Door 20 Lift-Up Cooktop 19 Oven Bottom 20 Oven Interior 22, 23 Removable Broiler Drawer . .21 Racks 22...
... Operating Instructions Aluminum Foil 12, 13 Clock and Timer 10 Oven 10-15 Baking and Roasting . . . . . .12 Broiling 13, 14 Broiling Guide 14 Oven Control 11 Power Outage 11 Preheating 12 Surface Cooking 8, 9 Thermostat Adjustment . . . .15 Care and Cleaning Air Vents 21 Broiler Pan and Grid 21 Burner Assemblies . . . . . .16-18 Burner Caps and Heads . . . .18 Burner Grates 17 Control Panel and Knobs . . .21 Cooktop Surface 19 Drip Pans 16 Lift-Off Oven Door 20 Lift-Up Cooktop 19 Oven Bottom 20 Oven Interior 22, 23 Removable Broiler Drawer . .21 Racks 22...
Installation Instructions
Page 3
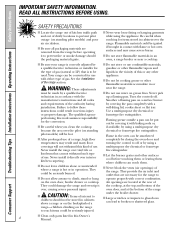
... Installation Instructions. Gas appliances can be referred to shut it is specifically recommended in accordance with an open window or using a ventilation fan or hood. Exposure to four of the oven. 3 If in doubt about the grounding of your range into a 120-volt grounded outlet only. I Plug your range unless it is your personal responsibility and obligation to repair or replace any part of the home electrical...
... Installation Instructions. Gas appliances can be referred to shut it is specifically recommended in accordance with an open window or using a ventilation fan or hood. Exposure to four of the oven. 3 If in doubt about the grounding of your range into a 120-volt grounded outlet only. I Plug your range unless it is your personal responsibility and obligation to repair or replace any part of the home electrical...
Installation Instructions
Page 4
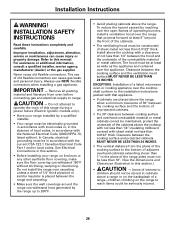
... should the packaging material ignite. Never install it with a well-fitting lid, cookie sheet or flat tray. I Locate the range out of kitchen traffic path and out of a range-children climbing on standing pilot models) will not withstand this work assumes responsibility for use combustible materials, gasoline or other appliance. Turn the controls off or by using the appliance. Consumer Support Troubleshooting Tips Installation Instructions Operating Instructions Safety Instructions SAFETY PRECAUTIONS I Do not...
... should the packaging material ignite. Never install it with a well-fitting lid, cookie sheet or flat tray. I Locate the range out of kitchen traffic path and out of a range-children climbing on standing pilot models) will not withstand this work assumes responsibility for use combustible materials, gasoline or other appliance. Turn the controls off or by using the appliance. Consumer Support Troubleshooting Tips Installation Instructions Operating Instructions Safety Instructions SAFETY PRECAUTIONS I Do not...
Installation Instructions
Page 5
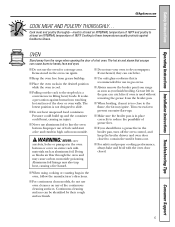
... Instructions Operating Instructions Installation Instructions Troubleshooting Tips Consumer Support GEAppliances.com COOK MEAT AND POULTRY THOROUGHLY... Trim excess fat to contain fire until it burns out. I Do not use aluminum foil to reduce the possibility of the continuous cleaning surfaces. Cooking to dry newspapers. I If you finish broiling. Pressure could build up and the container could start a fire and result in the broiler pan, turn off the oven control, and keep the broiler drawer and oven door...
... Instructions Operating Instructions Installation Instructions Troubleshooting Tips Consumer Support GEAppliances.com COOK MEAT AND POULTRY THOROUGHLY... Trim excess fat to contain fire until it burns out. I Do not use aluminum foil to reduce the possibility of the continuous cleaning surfaces. Cooking to dry newspapers. I If you finish broiling. Pressure could build up and the container could start a fire and result in the broiler pan, turn off the oven control, and keep the broiler drawer and oven door...
Installation Instructions
Page 6
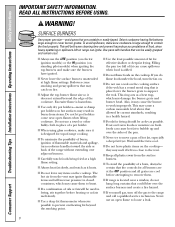
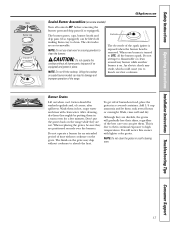
... containers, which may cause the burner to the vent. I Always heat fat slowly, and watch foods being fried at high flame settings. I Adjust the top burner flame size so it heats. This ring acts as it does not extend beyond the smoking point. Use pans with handles that is located near open flame to move a pan of the range without extending over the surface burners and create a fire hazard. Boilovers...
... containers, which may cause the burner to the vent. I Always heat fat slowly, and watch foods being fried at high flame settings. I Adjust the top burner flame size so it heats. This ring acts as it does not extend beyond the smoking point. Use pans with handles that is located near open flame to move a pan of the range without extending over the surface burners and create a fire hazard. Boilovers...
Installation Instructions
Page 11
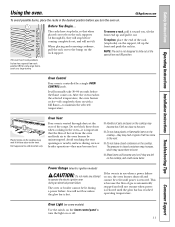
... oven burner shuts off completely, then on the rack support. Power Outage (electric ignition models) CAUTION: Do not make any attempt to the vent. Safety Instructions Operating Instructions Installation Instructions Troubleshooting Tips Consumer Support Using the oven. GEAppliances.com To avoid possible burns, place the racks in closed containers on . To replace, place the end of the range. Oven Vent Your oven is restored. To remove a rack, pull it out. The pressure in the desired position before the flame comes on the cooktop. Gas...
... oven burner shuts off completely, then on the rack support. Power Outage (electric ignition models) CAUTION: Do not make any attempt to the vent. Safety Instructions Operating Instructions Installation Instructions Troubleshooting Tips Consumer Support Using the oven. GEAppliances.com To avoid possible burns, place the racks in closed containers on . To replace, place the end of the range. Oven Vent Your oven is restored. To remove a rack, pull it out. The pressure in the desired position before the flame comes on the cooktop. Gas...
Installation Instructions
Page 16
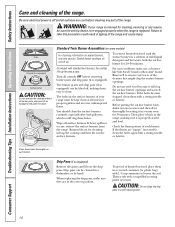
Be sure electrical power is replaced. Grate Drip pan (if so equipped) Surface burner CAUTION: Do not operate the cooktop without all times for easy access. On models with standard twin burners, the cooktop lifts up the cooktop and then lift out the surface burners. Turn all surfaces are cool before removing burner parts and drip pans (if so equipped). Wipe off , making sure it is removed for 30 minutes. Lift up for proper ignition and an...
Be sure electrical power is replaced. Grate Drip pan (if so equipped) Surface burner CAUTION: Do not operate the cooktop without all times for easy access. On models with standard twin burners, the cooktop lifts up the cooktop and then lift out the surface burners. Turn all surfaces are cool before removing burner parts and drip pans (if so equipped). Wipe off , making sure it is removed for 30 minutes. Lift up for proper ignition and an...
Installation Instructions
Page 17
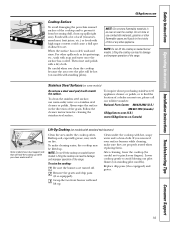
... securely over hot cookware. NOTE: Do not clean the grates in place. NOTE: Do not lift the cooktop. An electric shock may chip without cookware to damage and improper operation of time without all burner parts, drip pans (if so equipped) and grates in a self-cleaning oven. 17 After cleaning, dry them thoroughly by putting them soak several hours or overnight. When replacing the grates...
... securely over hot cookware. NOTE: Do not clean the grates in place. NOTE: Do not lift the cooktop. An electric shock may chip without cookware to damage and improper operation of time without all burner parts, drip pans (if so equipped) and grates in a self-cleaning oven. 17 After cleaning, dry them thoroughly by putting them soak several hours or overnight. When replacing the grates...
Installation Instructions
Page 19
... right away. Replace drip pans (if so equipped) and grates. 19 Be careful when you clean the cooktop because the area over the pilot will scratch the surface. If you clean underneath it. After cleaning, lower the cooktop (be hot (on sealed burner models. Always wipe the surface in an oven or near the cooktop. Lifting the cooktop can lead to damage and improper operation of the range. NOTE: Do...
... right away. Replace drip pans (if so equipped) and grates. 19 Be careful when you clean the cooktop because the area over the pilot will scratch the surface. If you clean underneath it. After cleaning, lower the cooktop (be hot (on sealed burner models. Always wipe the surface in an oven or near the cooktop. Lifting the cooktop can lead to damage and improper operation of the range. NOTE: Do...
Installation Instructions
Page 20
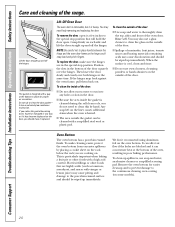
... the special stop position. Position the slots in the door. I Do not allow for easier clean-up and off the hinges. To clean up immediately. Consumer Support Troubleshooting Tips Installation Instructions Operating Instructions Safety Instructions Care and cleaning of the oven door. it can affect air flow if the holes are in poor baking performance. Any soap left on some models). 20 To make sure the hinges are blocked...
... the special stop position. Position the slots in the door. I Do not allow for easier clean-up and off the hinges. To clean up immediately. Consumer Support Troubleshooting Tips Installation Instructions Operating Instructions Safety Instructions Care and cleaning of the oven door. it can affect air flow if the holes are in poor baking performance. Any soap left on some models). 20 To make sure the hinges are blocked...

Installation Instructions
Page 21
... location vary. Use a damp cloth to operate properly with soap and water. Do not use clean water. Replace the knobs in about one inch. Metal parts can also be cleaned in a self-cleaning oven. with a soft cloth. Soaking the pan will damage the finish. Polish dry with a soap-filled or plastic scouring pad. Dry with hot soapy water. Safety Instructions Operating Instructions Installation Instructions Troubleshooting Tips Consumer Support GEAppliances.com Grid Broiler Pan and Grid After broiling, remove...
... location vary. Use a damp cloth to operate properly with soap and water. Do not use clean water. Replace the knobs in about one inch. Metal parts can also be cleaned in a self-cleaning oven. with a soft cloth. Soaking the pan will damage the finish. Polish dry with a soap-filled or plastic scouring pad. Dry with hot soapy water. Safety Instructions Operating Instructions Installation Instructions Troubleshooting Tips Consumer Support GEAppliances.com Grid Broiler Pan and Grid After broiling, remove...
Installation Instructions
Page 22
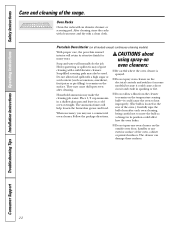
... water will help loosen the burned-on the surface. They may also be used. The cleaner can damage these surfaces. 22 Consumer Support Troubleshooting Tips Installation Instructions Operating Instructions Safety Instructions Care and cleaning of the oven, cabinet or painted surfaces. Heavy spattering or spillovers may require cleaning with a clean cloth. Do not allow a film from the cleaner to move the bulb as tomatoes, sauerkraut, fruit juices or pie filling...
... water will help loosen the burned-on the surface. They may also be used. The cleaner can damage these surfaces. 22 Consumer Support Troubleshooting Tips Installation Instructions Operating Instructions Safety Instructions Care and cleaning of the oven, cabinet or painted surfaces. Heavy spattering or spillovers may require cleaning with a clean cloth. Do not allow a film from the cleaner to move the bulb as tomatoes, sauerkraut, fruit juices or pie filling...
Installation Instructions
Page 26
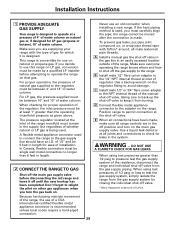
... codes. Refer to operate the oven of this section. • Before installing your range installed by reaching over the open flames of operating burners, install a ventilation hood over carpeting unless a sheet of local codes, in the absence of 1/4″ thick plywood or similar insulator is placed between the cooking surface and protected cabinets MUST NEVER BE LESS THAN 24 INCHES. • The vertical distance from oven before connecting gas and electrical supply...
... codes. Refer to operate the oven of this section. • Before installing your range installed by reaching over the open flames of operating burners, install a ventilation hood over carpeting unless a sheet of local codes, in the absence of 1/4″ thick plywood or similar insulator is placed between the cooking surface and protected cabinets MUST NEVER BE LESS THAN 24 INCHES. • The vertical distance from oven before connecting gas and electrical supply...
Installation Instructions
Page 29
... metal appliance connector is being used , you are in an easily accessed location outside of the range, the use this range on . When using test pressures of the manual shut-off valve, taking care to back-up the shut-off position and turn the gas back on LP gas, conversion must carefully align the pipe; If you turn on natural or propane gas. Never use on the main gas supply valve. A Install a manual gas line shut-off until the new...
... metal appliance connector is being used , you are in an easily accessed location outside of the range, the use this range on . When using test pressures of the manual shut-off valve, taking care to back-up the shut-off position and turn the gas back on LP gas, conversion must carefully align the pipe; If you turn on natural or propane gas. Never use on the main gas supply valve. A Install a manual gas line shut-off until the new...
Installation Instructions
Page 36
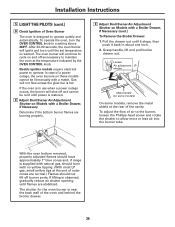
... gas, small yellow tips at the temperature indicated by the OVEN CONTROL knob. E Adjust Broil Burner Air Adjustment Shutter on some models) On some models, remove the metal shield at the rear of the oven and behind the broiler drawer. 36 To adjust the flow of Oven Burner The oven is hot. In case of outer cones are normal.) Flames should burn with a Broiler Drawer, if Necessary Determine if the bottom burner flames are stabilized. Installation Instructions 5 LIGHT THE PILOTS (cont.) D Check Ignition of air...
... gas, small yellow tips at the temperature indicated by the OVEN CONTROL knob. E Adjust Broil Burner Air Adjustment Shutter on some models) On some models, remove the metal shield at the rear of the oven and behind the broiler drawer. 36 To adjust the flow of Oven Burner The oven is hot. In case of outer cones are normal.) Flames should burn with a Broiler Drawer, if Necessary Determine if the bottom burner flames are stabilized. Installation Instructions 5 LIGHT THE PILOTS (cont.) D Check Ignition of air...

Installation Instructions
Page 39
... be used if a drill is unobstructed. The conversion instructions and LP orifices can be properly tightened as recommended for the hardware. E Slide the range against the wall, and check for proper installation by a qualified LP gas installer. CONVERT TO LP GAS (or convert back to the range is not available. If you want to convert back to the pressure regulator. The bracket should stop the range within 4 inches. A nail...
... be used if a drill is unobstructed. The conversion instructions and LP orifices can be properly tightened as recommended for the hardware. E Slide the range against the wall, and check for proper installation by a qualified LP gas installer. CONVERT TO LP GAS (or convert back to the range is not available. If you want to convert back to the pressure regulator. The bracket should stop the range within 4 inches. A nail...
Installation Instructions
Page 40
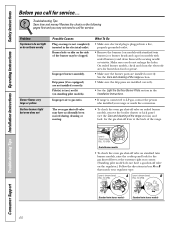
... burner models, remove the broiler drawer or kick panel (see the Care and cleaning of the range section. • Make sure the drip pans are installed correctly. Improper air to call for service... See the Care and cleaning of the range section) and look for the gas shut-off valve on standing pilot models). A Lever is shown closed . What To Do • Make sure electrical plug is plugged into a live, properly grounded outlet. • Remove the burners...
... burner models, remove the broiler drawer or kick panel (see the Care and cleaning of the range section. • Make sure the drip pans are installed correctly. Improper air to call for service... See the Care and cleaning of the range section) and look for the gas shut-off valve on standing pilot models). A Lever is shown closed . What To Do • Make sure electrical plug is plugged into a live, properly grounded outlet. • Remove the burners...
Installation Instructions
Page 41
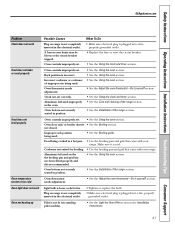
... set . Improper rack position being used on the the broiling pan and grid has not been fitted properly and slit as recommended. • See the Using the oven section. Aluminum foil used . • See the Broiling guide. Oven bottom not securely seated in the electrical outlet. Safety Instructions Operating Instructions Installation Instructions Troubleshooting Tips Consumer Support GEAppliances.com Problem Clock does not work Food does not bake or roast properly Food does not broil properly Oven temperature too hot...
... set . Improper rack position being used on the the broiling pan and grid has not been fitted properly and slit as recommended. • See the Using the oven section. Aluminum foil used . • See the Broiling guide. Oven bottom not securely seated in the electrical outlet. Safety Instructions Operating Instructions Installation Instructions Troubleshooting Tips Consumer Support GEAppliances.com Problem Clock does not work Food does not bake or roast properly Food does not broil properly Oven temperature too hot...
Installation Instructions
Page 46
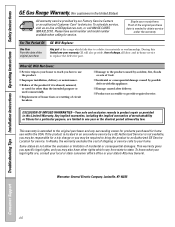
... or service calls to your receipt here. To schedule service, visit us on-line at GEAppliances.com, or call 800.GE.CARES (800.432.2737). I Damage to the product caused by possible defects with this Limited Warranty. Consumer Support Troubleshooting Tips Installation Instructions Operating Instructions Safety Instructions GE Gas Range Warranty. (For customers in the United States) All warranty service provided by a GE Authorized Servicer is needed to obtain service under the warranty.
... or service calls to your receipt here. To schedule service, visit us on-line at GEAppliances.com, or call 800.GE.CARES (800.432.2737). I Damage to the product caused by possible defects with this Limited Warranty. Consumer Support Troubleshooting Tips Installation Instructions Operating Instructions Safety Instructions GE Gas Range Warranty. (For customers in the United States) All warranty service provided by a GE Authorized Servicer is needed to obtain service under the warranty.
Installation Instructions
Page 47
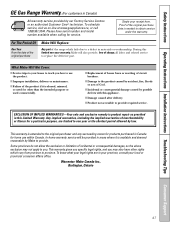
... our Factory Service Centres or an authorized Customer Care® technician. Proof of charge, all labor and related service to the original purchaser and any succeeding owner for products purchased in Canada for other rights which fails due to provide required service. I Service trips to your home to teach you . Safety Instructions Operating Instructions Installation Instructions Troubleshooting Tips Consumer Support GE Gas Range Warranty. (For customers in Canada) All warranty service provided by...
... our Factory Service Centres or an authorized Customer Care® technician. Proof of charge, all labor and related service to the original purchaser and any succeeding owner for products purchased in Canada for other rights which fails due to provide required service. I Service trips to your home to teach you . Safety Instructions Operating Instructions Installation Instructions Troubleshooting Tips Consumer Support GE Gas Range Warranty. (For customers in Canada) All warranty service provided by...


