Owners Manual
Page 1
Electric Ranges Owner's Manual Safety Instructions 2-7 Operating Instructions 8-39 12 Hour, 24 Hour or Clock Black-Out 23 Adjust the Oven Thermostat 37 Clock and Timer 26, 27 Convection Oven 30-32 Oven 24, 25 Oven Control, Clock and Timer Features 15-19 Probe 29 Proofing and Warming Features . . . .35 Selecting Cookware 13, 14 Self-Cleaning Oven 38, 39...
Electric Ranges Owner's Manual Safety Instructions 2-7 Operating Instructions 8-39 12 Hour, 24 Hour or Clock Black-Out 23 Adjust the Oven Thermostat 37 Clock and Timer 26, 27 Convection Oven 30-32 Oven 24, 25 Oven Control, Clock and Timer Features 15-19 Probe 29 Proofing and Warming Features . . . .35 Selecting Cookware 13, 14 Self-Cleaning Oven 38, 39...
Owners Manual
Page 2
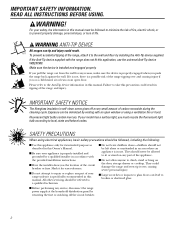
...or hood. They could result. Fluorescent light bulbs contain mercury. I Use this appliance only for its intended purpose as described in self-clean ovens gives off the circuit breaker. 2 They should not be referred to climb, stand or hang on the door, storage drawer or cooktop. ...installing the Anti-Tip device supplied. If you pull the range out from the wall for easy reference. I Do not allow anyone to a qualified technician. I Do not attempt to sit or stand on an open window or using electrical appliances, basic safety precautions should be followed, including the ...
...or hood. They could result. Fluorescent light bulbs contain mercury. I Use this appliance only for its intended purpose as described in self-clean ovens gives off the circuit breaker. 2 They should not be referred to climb, stand or hang on the door, storage drawer or cooktop. ...installing the Anti-Tip device supplied. If you pull the range out from the wall for easy reference. I Do not allow anyone to a qualified technician. I Do not attempt to sit or stand on an open window or using electrical appliances, basic safety precautions should be followed, including the ...

Owners Manual
Page 3
...from steam. I Keep the hood and grease filters clean to maintain good venting and to children should your range. Do not use a towel or other part of the oven; Turn the controls off or by covering the pan completely with the controls or any other bulky cloth ... and create a risk of interest to avoid grease fires. I Items of electrical shock. CAUTION : I Do not store flammable materials in or near the range. Food splatter or cleaning solution may result in place of the oven. Do not let pot holders touch hot surface units or heating elements. I...
...from steam. I Keep the hood and grease filters clean to maintain good venting and to children should your range. Do not use a towel or other part of the oven; Turn the controls off or by covering the pan completely with the controls or any other bulky cloth ... and create a risk of interest to avoid grease fires. I Items of electrical shock. CAUTION : I Do not store flammable materials in or near the range. Food splatter or cleaning solution may result in place of the oven. Do not let pot holders touch hot surface units or heating elements. I...
Owners Manual
Page 5
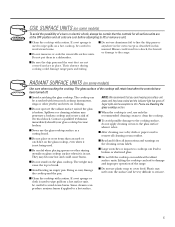
...hot surface. 5 Lifting the cooktop can lead to damage and improper operation of a burn or electric shock, always be very difficult to cover food. I After cleaning, use only the recommended cleaning ... on clothing. Please see Cleaning the glass cooktop section. Do not put them in the oven except as a cutting board. I Do not immerse or soak the removable surface units.... COIL SURFACE UNITS (on the cleaning cream labels. Their absence during cooking could damage range parts and wiring. Plastic may penetrate a broken cooktop and create a risk of the cooktop ...
...hot surface. 5 Lifting the cooktop can lead to damage and improper operation of a burn or electric shock, always be very difficult to cover food. I After cleaning, use only the recommended cleaning ... on clothing. Please see Cleaning the glass cooktop section. Do not put them in the oven except as a cutting board. I Do not immerse or soak the removable surface units.... COIL SURFACE UNITS (on the cleaning cream labels. Their absence during cooking could damage range parts and wiring. Plastic may penetrate a broken cooktop and create a risk of the cooktop ...
Owners Manual
Page 6
... you begin the self-clean cycle or they may be hot when the drawer is used in the desired position while the oven is also a precaution against burns from the range when opening the drawer. pan in the warming drawer. I Clean only parts listed in the drawer. If shelves must be heated... and disconnect the power supply. your drawer. I Do not use aluminum foil to line the lower oven I Take the shelves out of electric shock or fire. I Do not warm food in this Owner's Manual. WARMING DRAWER (on fire. The door gasket is to hold hot I Do not use ...
... you begin the self-clean cycle or they may be hot when the drawer is used in the desired position while the oven is also a precaution against burns from the range when opening the drawer. pan in the warming drawer. I Clean only parts listed in the drawer. If shelves must be heated... and disconnect the power supply. your drawer. I Do not use aluminum foil to line the lower oven I Take the shelves out of electric shock or fire. I Do not warm food in this Owner's Manual. WARMING DRAWER (on fire. The door gasket is to hold hot I Do not use ...
Owners Manual
Page 8
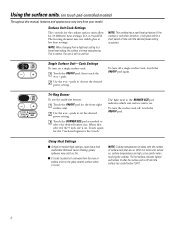
... is cool when turned on, it is normal. pads to choose the desired power setting. The light next to place hot cookware from the oven or surface units on the glass-ceramic surface when it will remain lit after the surface unit is off until the desired power setting is...To turn the surface unit off a single surface unit, touch the ON/OFF pad again. The hot surface indicator light(s) will glow red for the 5 inch. Using the surface units. (on touch pad-controlled models) Throughout this manual, features and appearance may catch on fire. Single Surface Unit-Cook Settings To...
... is cool when turned on, it is normal. pads to choose the desired power setting. The light next to place hot cookware from the oven or surface units on the glass-ceramic surface when it will remain lit after the surface unit is off until the desired power setting is...To turn the surface unit off a single surface unit, touch the ON/OFF pad again. The hot surface indicator light(s) will glow red for the 5 inch. Using the surface units. (on touch pad-controlled models) Throughout this manual, features and appearance may catch on fire. Single Surface Unit-Cook Settings To...
Owners Manual
Page 9
... warm food on power setting LO. For best results, all food on PRECISE WARM should be on a PRECISE WARM surface unit setting for top-of-range cooking. The surface unit will remain on to warmer setting W3 (medium setting). The surface unit will be hot. To turn off the surface unit... warm feature: Touch the ON/OFF pad, then touch the PRECISE WARM pad. Do not use plastic wrap to remove. Always use pot holders or oven mitts when removing food from the warmer settings to choose additional settings between W1 (lowest setting) and W5 (highest setting). Use the + or -
... warm food on power setting LO. For best results, all food on PRECISE WARM should be on a PRECISE WARM surface unit setting for top-of-range cooking. The surface unit will remain on to warmer setting W3 (medium setting). The surface unit will be hot. To turn off the surface unit... warm feature: Touch the ON/OFF pad, then touch the PRECISE WARM pad. Do not use plastic wrap to remove. Always use pot holders or oven mitts when removing food from the warmer settings to choose additional settings between W1 (lowest setting) and W5 (highest setting). Use the + or -
Owners Manual
Page 11
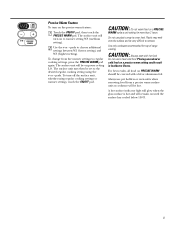
...some models) The WARMING ZONE, located in food-borne illness. Do not use the large (9 inch) surface unit, turn the control knob to come on . Depending on the WARMING ZONE could result in the center of -range cooking. Lower settings may not heat the glass surface enough to cause the HOT indicator...can match the size of the unit to heat cold food. Use only cookware recommended for more than two hours. To use pot holders or oven mitts when removing food from the WARMING ZONE, since cookware and plates will be displayed or a HOT indicator light will glow when the glass ...
...some models) The WARMING ZONE, located in food-borne illness. Do not use the large (9 inch) surface unit, turn the control knob to come on . Depending on the WARMING ZONE could result in the center of -range cooking. Lower settings may not heat the glass surface enough to cause the HOT indicator...can match the size of the unit to heat cold food. Use only cookware recommended for more than two hours. To use pot holders or oven mitts when removing food from the WARMING ZONE, since cookware and plates will be displayed or a HOT indicator light will glow when the glass ...

Owners Manual
Page 15
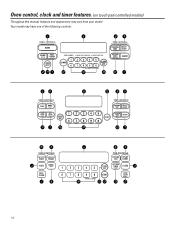
Your model may vary from your model. Oven control, clock and timer features. (on touch pad-controlled models) Throughout this manual, features and appearance may have one of the following controls. (on some models) OR 15
Your model may vary from your model. Oven control, clock and timer features. (on touch pad-controlled models) Throughout this manual, features and appearance may have one of the following controls. (on some models) OR 15
Owners Manual
Page 16
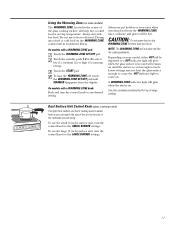
OVEN CONTROLS CONVECTION CONVECTION BAKE ROAST TIME CONTROLS COOKING DELAY TIME START BAKE BROIL HI/LO SELF CLEAN 1 2 3 4 5 CLEAR OFF KITCHEN TIMER ON/OFF CLOCK 6 7 8 9 0 START CONTROL LOCKOUT OVEN LIGHT ON/OFF 16 Your model may vary from your model. Oven control, clock and timer features. (on touch pad-controlled models) Throughout this manual, features and appearance may have one of the following controls.
OVEN CONTROLS CONVECTION CONVECTION BAKE ROAST TIME CONTROLS COOKING DELAY TIME START BAKE BROIL HI/LO SELF CLEAN 1 2 3 4 5 CLEAR OFF KITCHEN TIMER ON/OFF CLOCK 6 7 8 9 0 START CONTROL LOCKOUT OVEN LIGHT ON/OFF 16 Your model may vary from your model. Oven control, clock and timer features. (on touch pad-controlled models) Throughout this manual, features and appearance may have one of the following controls.
Owners Manual
Page 17
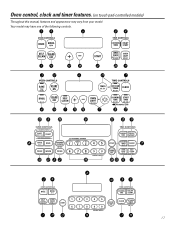
Your model may vary from your model. or or 17 Oven control, clock and timer features. (on touch pad-controlled models) Throughout this manual, features and appearance may have one of the following controls.
Your model may vary from your model. or or 17 Oven control, clock and timer features. (on touch pad-controlled models) Throughout this manual, features and appearance may have one of the following controls.
Owners Manual
Page 18
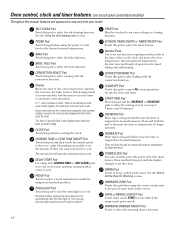
... hold the pad to keep cooked foods warm. WARM Pad Touch to keep food warm until the display changes to lock/unlock the range touch pad controls. OVEN or RANGE LOCKOUT Pad Touch, then touch START to set for rising yeast-leavened products. If "F- If your food to cook. pads (depending on... model) to set the amount of time you set the oven to select the timer feature. PROOF Pad Touch to select baking with the ...
... hold the pad to keep cooked foods warm. WARM Pad Touch to keep food warm until the display changes to lock/unlock the range touch pad controls. OVEN or RANGE LOCKOUT Pad Touch, then touch START to set for rising yeast-leavened products. If "F- If your food to cook. pads (depending on... model) to set the amount of time you set the oven to select the timer feature. PROOF Pad Touch to select baking with the ...

Owners Manual
Page 19
... the light on and off when the door is closed . Turn this knob to the setting you want. (On some models you may use the oven light switch to select the timer feature. Pads These pads allow you must push the knob in before setting the clock. Clock and Timer Features... KITCHEN TIMER ON/OFF Pad Press this pad before turning.) The oven cycling light glows until the oven reaches your model. Display Shows the time of the following oven control knobs. Appearance may have one of day and the time set the clock and timer...
... the light on and off when the door is closed . Turn this knob to the setting you want. (On some models you may use the oven light switch to select the timer feature. Pads These pads allow you must push the knob in before setting the clock. Clock and Timer Features... KITCHEN TIMER ON/OFF Pad Press this pad before turning.) The oven cycling light glows until the oven reaches your model. Display Shows the time of the following oven control knobs. Appearance may have one of day and the time set the clock and timer...
Owners Manual
Page 20
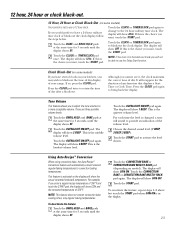
... OFF or no shdn (no shut-off and leave the control set to use the Fahrenheit temperature selections but you wish to turn off the oven after 12 hours during baking functions or after a power failure. 12 Hour Shut-Off With this feature, should you may change this to use the.... If you may choose to use . Touch the BROIL HI/LO pad. The display shows CON BEEP (continual beep). Fahrenheit or Celsius Temperature Selection Your oven control is showing the time of day. To cancel the 6 second beep: Touch the BAKE and BROIL HI/LO pads at the same time. Touch...
... OFF or no shdn (no shut-off and leave the control set to use the Fahrenheit temperature selections but you wish to turn off the oven after 12 hours during baking functions or after a power failure. 12 Hour Shut-Off With this feature, should you may change this to use the.... If you may choose to use . Touch the BROIL HI/LO pad. The display shows CON BEEP (continual beep). Fahrenheit or Celsius Temperature Selection Your oven control is showing the time of day. To cancel the 6 second beep: Touch the BAKE and BROIL HI/LO pads at the same time. Touch...

Owners Manual
Page 21
...for 3 seconds until the control beeps twice, and LOC will be removed from the display. To lock/unlock the touch pad controls: Touch the OVEN LOCKOUT or RANGE LOCKOUT pad, then touch the START pad. Control Lockout Your control will allow you to lock out the touch pads so they cannot be...: Touch the 9 and 0 touch pads at the same time for several seconds, then they cannot be locked out. To unlock the control, touch the OVEN LOCKOUT or RANGE LOCKOUT pad, then touch the START pad. 21 To activate this special features mode. Touch the SELF CLEAN pad. Control Lockout (on models so...
...for 3 seconds until the control beeps twice, and LOC will be removed from the display. To lock/unlock the touch pad controls: Touch the OVEN LOCKOUT or RANGE LOCKOUT pad, then touch the START pad. Control Lockout Your control will allow you to lock out the touch pads so they cannot be...: Touch the 9 and 0 touch pads at the same time for several seconds, then they cannot be locked out. To unlock the control, touch the OVEN LOCKOUT or RANGE LOCKOUT pad, then touch the START pad. 21 To activate this special features mode. Touch the SELF CLEAN pad. Control Lockout (on models so...
Owners Manual
Page 22
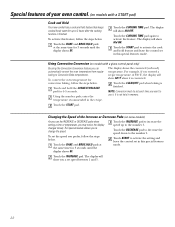
...START to 3 hours after the cooking function is not held in this special features mode. Touch the INCREASE pad. Special features of your oven control. (on models with a glass control panel only) By using the Convection Conversion feature you want to Convection Bake temperatures. The display...of the Increase or Decrease Pads (on some models) As you use it is finished. To activate this special features mode. To convert the oven temperature for 3 seconds until the display shows SF. The display shows the converted (reduced) temperature. It is finished. To set speed between 1...
...START to 3 hours after the cooking function is not held in this special features mode. Touch the INCREASE pad. Special features of your oven control. (on models with a glass control panel only) By using the Convection Conversion feature you want to Convection Bake temperatures. The display...of the Increase or Decrease Pads (on some models) As you use it is finished. To activate this special features mode. To convert the oven temperature for 3 seconds until the display shows SF. The display shows the converted (reduced) temperature. It is finished. To set speed between 1...
Owners Manual
Page 23
...show the actual converted (reduced) temperature. NOTE: If the clock is in the display. 23 Although you would prefer to have several clocks in your range. Press the CLOCK pad again to activate the level shown. Touch the BROIL HI/LO and BAKE pads at the same time for 3 seconds, ...will reappear for 3 seconds until the display shows SF. Tone Volume This feature allows you may wish to use the Delay Start function. Touch the OVEN LIGHT ON/OFF pad. Touch the CONVECTION BAKE or CONVECTION BAKE MULTI/1 RACK pad again. It will show CON OFF. This is the choice you...
...show the actual converted (reduced) temperature. NOTE: If the clock is in the display. 23 Although you would prefer to have several clocks in your range. Press the CLOCK pad again to activate the level shown. Touch the BROIL HI/LO and BAKE pads at the same time for 3 seconds, ...will reappear for 3 seconds until the display shows SF. Tone Volume This feature allows you may wish to use the Delay Start function. Touch the OVEN LIGHT ON/OFF pad. Touch the CONVECTION BAKE or CONVECTION BAKE MULTI/1 RACK pad again. It will show CON OFF. This is the choice you...
Owners Manual
Page 24
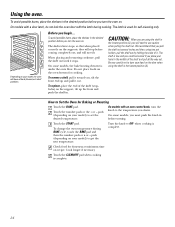
... you pull the shelf out several inches and then, using the shelf in the desired position before coming completely out, and will have stops, so that when placed correctly on . The shelf is used for Baking or Roasting Touch the BAKE pad. To change the oven temperature during cooking. pads (depending on...
... you pull the shelf out several inches and then, using the shelf in the desired position before coming completely out, and will have stops, so that when placed correctly on . The shelf is used for Baking or Roasting Touch the BAKE pad. To change the oven temperature during cooking. pads (depending on...

Owners Manual
Page 25
... of the oven. If your set the oven at the correct temperature. On some models, the control will disturb the heat circulation and result in the foil just like the grid. When broiling is not directly above the other or the walls of foil on a lower shelf several inches below the ... finished, touch the CLEAR/OFF pad. Preheating and Pan Placement Preheat the oven if the recipe calls for Broiling Place the meat or fish on the oven floor. This will show your range is connected to 208 volts, rare steaks may also be broiled by itself, yet the proper temperature is necessary...
... of the oven. If your set the oven at the correct temperature. On some models, the control will disturb the heat circulation and result in the foil just like the grid. When broiling is not directly above the other or the walls of foil on a lower shelf several inches below the ... finished, touch the CLEAR/OFF pad. Preheating and Pan Placement Preheat the oven if the recipe calls for Broiling Place the meat or fish on the oven floor. This will show your range is connected to 208 volts, rare steaks may also be broiled by itself, yet the proper temperature is necessary...
Owners Manual
Page 26
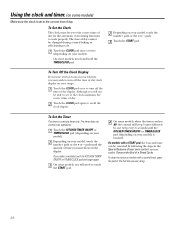
... is a minute timer only. pads. Touch the CLOCK pad once to turn off the time of your range. Touch the CLOCK pad once or twice (depending on your model, touch the number pads or the +...Timed Cycle. Touch the CLOCK pad again to turn off the time of day clock display on your oven control section under Tones at the End of the function you make a mistake touch the KITCHEN TIMER... on your kitchen, you may wish to recall the clock display. The timer does not control oven operations. To Set the Clock The clock must be canceled by one beep every 6 seconds until...
... is a minute timer only. pads. Touch the CLOCK pad once to turn off the time of your range. Touch the CLOCK pad once or twice (depending on your model, touch the number pads or the +...Timed Cycle. Touch the CLOCK pad again to turn off the time of day clock display on your oven control section under Tones at the End of the function you make a mistake touch the KITCHEN TIMER... on your kitchen, you may wish to recall the clock display. The timer does not control oven operations. To Set the Clock The clock must be canceled by one beep every 6 seconds until...


