Manual
Page 1
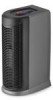
página E1 AIR PURIFIER www.hoover.com IMPORTANT: READ CAREFULLY BEFORE ASSEMBLY AND USE. Owner's Manual Operating and Servicing Instructions Español - PLEASE DO NOT RETURN THIS PRODUCT TO THE STORE. THIS PRODUCT IS INTENDED FOR HOUSEHOLD USE ONLY. Questions or concerns? All rights reserved. #961136005 ID101680-R2 For assistance, please call Customer Service at 1-800-944-9200 Mon-Fri 8am-7pm EST. IF USED COMMERCIALLY WARRANTY IS VOID. CAUTION: HIGH VOLTAGE. ©2010 Techtronic Floor Care Technology Limited.
página E1 AIR PURIFIER www.hoover.com IMPORTANT: READ CAREFULLY BEFORE ASSEMBLY AND USE. Owner's Manual Operating and Servicing Instructions Español - PLEASE DO NOT RETURN THIS PRODUCT TO THE STORE. THIS PRODUCT IS INTENDED FOR HOUSEHOLD USE ONLY. Questions or concerns? All rights reserved. #961136005 ID101680-R2 For assistance, please call Customer Service at 1-800-944-9200 Mon-Fri 8am-7pm EST. IF USED COMMERCIALLY WARRANTY IS VOID. CAUTION: HIGH VOLTAGE. ©2010 Techtronic Floor Care Technology Limited.
Manual
Page 2
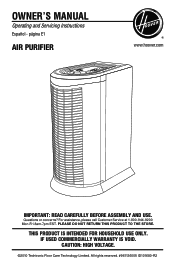
... 7 Troubleshooting...7 Specifications...7 Service...7 Warranty...8 If you for choosing a HOOVER® product. Please enter the complete model and Manufacturing Code in the spaces provided. XXHz XX.X Conforms to UL Std. 867 Certified to register by phone. Be sure to register your product online at hoover.com. CODE Hint: Attach your HOOVER® product. Manufacturing code (Label located on side of product.) Contents Important Safeguards 3 Set Up and How To Use 5 Product Description 5 Setup...5 Maintenance...
... 7 Troubleshooting...7 Specifications...7 Service...7 Warranty...8 If you for choosing a HOOVER® product. Please enter the complete model and Manufacturing Code in the spaces provided. XXHz XX.X Conforms to UL Std. 867 Certified to register by phone. Be sure to register your product online at hoover.com. CODE Hint: Attach your HOOVER® product. Manufacturing code (Label located on side of product.) Contents Important Safeguards 3 Set Up and How To Use 5 Product Description 5 Setup...5 Maintenance...
Manual
Page 3
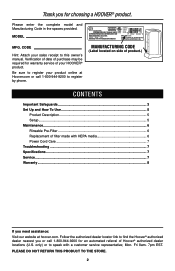
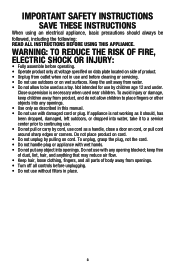
... assemble before cleaning or servicing. • Do not use with wet hands. • Do not put any object into any opening blocked; Keep the unit away from openings. • Turn off all parts of product. • Unplug from product, and do not allow to place fingers or other objects into openings. To unplug, grasp the plug, not the cord. • Do not handle plug or appliance with damaged cord...
... assemble before cleaning or servicing. • Do not use with wet hands. • Do not put any object into any opening blocked; Keep the unit away from openings. • Turn off all parts of product. • Unplug from product, and do not allow to place fingers or other objects into openings. To unplug, grasp the plug, not the cord. • Do not handle plug or appliance with damaged cord...
Manual
Page 4
...; Keep children and pets away from the product. • Never use this product. Do not change the plug in any items on top of electric shock, this appliance has a polarized plug (one way. Never use compressed gas dusters, canned air, flammable or aerosol cleaners on this product near...product. • Never open the rear grille while the unit is wider than the other hot objects / locations. • Do not disassemble the unit. • Do not place any way. This plug will fit in the outlet, reverse the plug. If it still does not fit, contact a qualified electrican to install...
...; Keep children and pets away from the product. • Never use this product. Do not change the plug in any items on top of electric shock, this appliance has a polarized plug (one way. Never use compressed gas dusters, canned air, flammable or aerosol cleaners on this product near...product. • Never open the rear grille while the unit is wider than the other hot objects / locations. • Do not disassemble the unit. • Do not place any way. This plug will fit in the outlet, reverse the plug. If it still does not fit, contact a qualified electrican to install...
Manual
Page 5
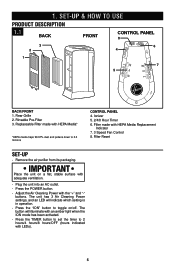
... Air Cleaning Power with LEDs). 5 Press the TIMER button to set the timer to 0.3 microns CONTROL PANEL 4. The unit has 3 Air Cleaning Power settings, and an LED will illuminate with HEPA Media Replacement Indicator 7. 3 Speed Fan Control 8. Press the POWER button. - Rinsable Pre-Filter 3. 1. SET-UP & HOW TO USE PRODUCT DESCRIPTION 1.1 BACK FRONT CONTROL PANEL 8 3 2 6 4 1 7 5 BACK/FRONT 1. Filter Reset Set-up - Plug the unit into an AC outlet. - Replaceable Filter made with an amber light...
... Air Cleaning Power with LEDs). 5 Press the TIMER button to set the timer to 0.3 microns CONTROL PANEL 4. The unit has 3 Air Cleaning Power settings, and an LED will illuminate with HEPA Media Replacement Indicator 7. 3 Speed Fan Control 8. Press the POWER button. - Rinsable Pre-Filter 3. 1. SET-UP & HOW TO USE PRODUCT DESCRIPTION 1.1 BACK FRONT CONTROL PANEL 8 3 2 6 4 1 7 5 BACK/FRONT 1. Filter Reset Set-up - Plug the unit into an AC outlet. - Replaceable Filter made with an amber light...

Manual
Page 6
... service representative. ! We recommend that the pre-filter is attached to dry. Press and hold until beep occurs and light turns off the unit, and unplug it under a running tap. (NOTE: Do not use any cleaning solutions, as proper use a paper clip to press the "Filter Reset" button next to ensure that the pre-filter is clean and therefore working most effectively. MaintenanCe Familiarize yourself with HEPA Media needs replacement...
... service representative. ! We recommend that the pre-filter is attached to dry. Press and hold until beep occurs and light turns off the unit, and unplug it under a running tap. (NOTE: Do not use any cleaning solutions, as proper use a paper clip to press the "Filter Reset" button next to ensure that the pre-filter is clean and therefore working most effectively. MaintenanCe Familiarize yourself with HEPA Media needs replacement...
Manual
Page 7
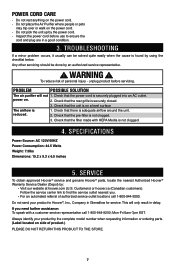
... product by using the checklist below. PROBLEM POSSIBLE SOLUTION The air purifier will only result in Glenwillow for service. This will not 1. Do not rest anything on . 2. Always identify your product to find the service outlet nearest you need further assistance: To speak with HEPA Media is found by the complete model number when requesting information or ordering parts. (Label located on the power cord...
... product by using the checklist below. PROBLEM POSSIBLE SOLUTION The air purifier will only result in Glenwillow for service. This will not 1. Do not rest anything on . 2. Always identify your product to find the service outlet nearest you need further assistance: To speak with HEPA Media is found by the complete model number when requesting information or ordering parts. (Label located on the power cord...
Manual
Page 8
... pre-filter, filter made with HEPA media, use of the product in a commercial operation, improper maintenance of the product, damage due to misuse, acts of God, nature, vandalism or other acts beyond the control of Hoover, owner's acts or omissions, use and in the U.S.A., phone: 1-800-944-9200 OR visit Hoover® online at no cost to you mail your product to Hoover® Authorized Warranty Service Dealer...
... pre-filter, filter made with HEPA media, use of the product in a commercial operation, improper maintenance of the product, damage due to misuse, acts of God, nature, vandalism or other acts beyond the control of Hoover, owner's acts or omissions, use and in the U.S.A., phone: 1-800-944-9200 OR visit Hoover® online at no cost to you mail your product to Hoover® Authorized Warranty Service Dealer...


