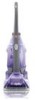
Hoover F6215 Support and Manuals
Get Help and Manuals for this Hoover item
View All Support Options Below
Free Hoover F6215 manuals!
Problems with Hoover F6215?
Ask a Question
Free Hoover F6215 manuals!
Problems with Hoover F6215?
Ask a Question
Popular Hoover F6215 Manual Pages
Manual - Page 1
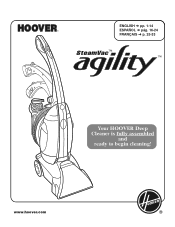
www.hoover.com
® ENGLISH § pp. 1-14 ESPAÑOL § pág. 16-24 FRANÇAIS § p. 25-33
™ ™
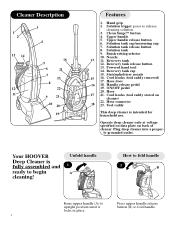
Your HOOVER Deep Cleaner is fully assembled
and ready to begin cleaning!
Manual - Page 2
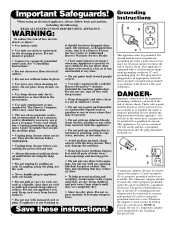
... by the Canadian Electrical Code. Keep children and pets away from electrical outlet before connecting the powered hand tool. • Always disconnect cord from carpets until they are in the risk of a temporary adapter is not permitted by or near children. If it to a Hoover Factory Service Center or Authorized Hoover Warranty Service Dealer.
• Connect...
Manual - Page 3
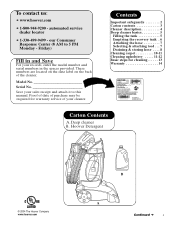
... tank . 6 Attaching the hose 7 Selecting & attaching tool . . . 7 Draining & storing hose . . . . 8 Cleaning carpet 10-11 Cleaning upholstery . . . . . 11-12 Basic steps for warranty service of the cleaner. To contact us:
• www.hoover.com
• 1-800-944-9200 - Model No Serial No Save your cleaner. These numbers are located on the data label on the back of...
Manual - Page 4
... 14
12 11
5 6 7
8
16 21 23 22
9 21 10 20
19
Features
1. Solution tank release button
8. Brush setting selector
10. Recovery tank release button
13. Cord hooks (tool caddy removed) 17. Your HOOVER Deep Cleaner is intended for household use. Press upper handle release button (B) to begin cleaning! Solution tank cap/measuring cup...
Manual - Page 5
... fill line (C) (approx. 1 gallon) with your model)
OR Use 4 caps of detergent
B B
Carpet
two
HOOVER Carpet/
caps
Upholstery Detergent
5
Upholstery one cap
HOOVER Carpet/ Upholstery Detergent
For heavy traffic areas: Pre-treat with HOOVER Spot and Stain Spray (available at additional cost if not included with hot tap water (Fig. 6)
Replace cap.
In case of contact with eyes...
Manual - Page 6
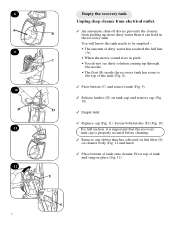
... Replace cap (Fig. 11). Pivot top of tank and snap in
the recovery tank. 8 A 9
10 D
11
12
6
Empty the recovery tank Unplug deep cleaner from electrical outlet.
An automatic shut-off device prevents the cleaner
... is properly secured before cleaning.
Remove any debris that has collected on lint filter (E) on cleaner body (Fig. 12 and inset).
Place bottom of the tank (Fig. 8).
Press ...
Manual - Page 7
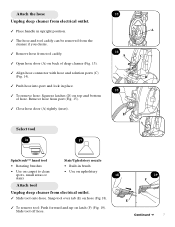
...• Rotating brushes
• Use on carpet to clean spots, small areas or stairs
Stair/Upholstery nozzle • Built-in brush • Use on top and bottom of deep cleaner (Fig. 13).
Align hose connector ...into port and lock in upright position.
The hose and tool caddy can be removed from the cleaner if you desire.
Remove hose from tool caddy.
Open hose door (A) on back of hose...
Manual - Page 8
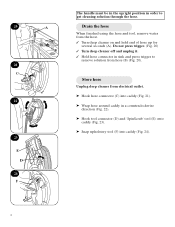
Store hose
Unplug deep cleaner from the hose. Turn deep cleaner on and hold end of hose up for
several seconds (A).
Drain the hose
When...(E) onto caddy (Fig. 23).
® Snap upholstery tool (F) into caddy (Fig. 24).
8
Do not press trigger. (Fig. 20) Turn deep cleaner off and unplug it. Hold hose connector in order to
remove solution from hose (B) (Fig. 20). 20
21 C
22
23 E D
24 F
A...
Manual - Page 9

...™ button
30
K
K
Push 'Clean Surge' button (K) to release cord.
27 To remove caddy from all carpets.
To store caddy on the cleaner:
® Slide tabs (G) on caddy into slots on the cleaner or remove it to cleaner (H).
® Wrap cord around cord hooks (J) on caddy (Fig. 26).
Rotate top hook to release extra...
Manual - Page 10
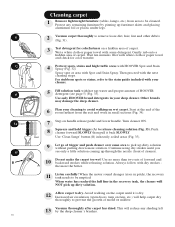
... same area to pick up through the nozzle (front of cleaner).
10 Do not make the carpet too wet!
Wait ten minutes. For stubborn spots or stains, refer to the stain guide included with your cleaning to avoid walking on wet carpet.
Push cleaner forward SLOWLY then pull it is dry.
Increased air circulation (open...
Manual - Page 11
... to release cleaning solution. A
11 Listen carefully!
These codes indicate that it is alright to the stain guide included with your vacuum cleaner's attachments.
3 Test detergent for color transfer.
4 Pretreat spots and stains with HOOVER Spot and Stain Spray (Fig. 37). Do not use your deep cleaner.
Use no more solution.
Then proceed with hot...
Manual - Page 12
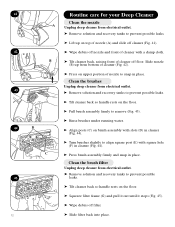
... remove (Fig. 43).
® Rinse brushes under running water.
® Align posts (C) on brush assembly with slots (D) in cleaner (Fig. 44).
® Turn brushes slightly to align square post (E) with a damp cloth.
® Tilt cleaner back, raising front of nozzle to snap in place.
41 42 43 44
45
12
D FE
A B
C G
Routine...
Manual - Page 13
... HOOVER service and genuine HOOVER parts, locate the nearest Hoover Factory Service Center or Authorized Hoover Warranty Service Dealer (Depot) by the complete model number when requesting information or ordering parts. (The model number appears on the back of the cleaner.)
Continued §
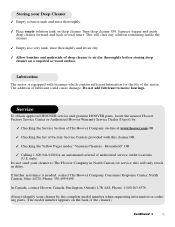
13 Storing your cleaner by :
Checking the Service Section of The Hoover Company on a carpeted...
Manual - Page 14
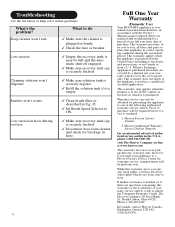
... securely latched. Troubleshooting
Use the list below to ON.
it is empty
Brushes won 't run
What to a Hoover Factory Service Center for blockage in hose during the warranted period. Proof of purchase will be required before service is plugged in Fig. 45.
Set Brush Speed Selector to help solve minor problems.
What's the problem? Deep cleaner won 't rotate...
Hoover F6215 Reviews
We have not received any reviews for Hoover yet.