User Guide
Page 1
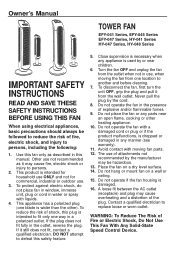
... manner (see warranty). 11. Do not hang or mount fan on a dry level surface. 14. Owner's Manual TOWER FAN EFY-041 Series, EFY-045 Series EFY-047 Series, HY-041 Series HY-047 Series, HY-048 Series IMPORTANT SAFETY INSTRUCTIONS READ AND SAVE THESE SAFETY INSTRUCTIONS BEFORE USING THIS FAN When using electrical appliances, basic precautions should always be...
... manner (see warranty). 11. Do not hang or mount fan on a dry level surface. 14. Owner's Manual TOWER FAN EFY-041 Series, EFY-045 Series EFY-047 Series, HY-041 Series HY-047 Series, HY-048 Series IMPORTANT SAFETY INSTRUCTIONS READ AND SAVE THESE SAFETY INSTRUCTIONS BEFORE USING THIS FAN When using electrical appliances, basic precautions should always be...
User Guide
Page 2
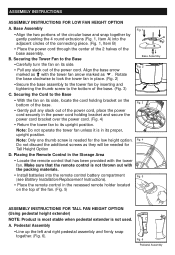
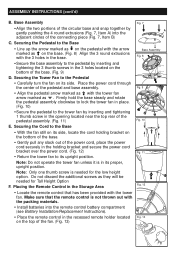
... with the packing materials. • Install batteries into the remote control battery compartment Fig. 5 (see Battery Installation/Replacement Instructions). • Place the remote control in place. (Fig. 2) •Secure the base assembly to the tower fan by gently pushing the 4 round extrusions (Fig. 1, Item A) into the adjacent circles of the connecting piece. (Fig...
... with the packing materials. • Install batteries into the remote control battery compartment Fig. 5 (see Battery Installation/Replacement Instructions). • Place the remote control in place. (Fig. 2) •Secure the base assembly to the tower fan by gently pushing the 4 round extrusions (Fig. 1, Item A) into the adjacent circles of the connecting piece. (Fig...
User Guide
Page 3
...pedestal assembly clockwise to lock the tower fan in place. (Fig. 10) • Secure the pedestal to the tower fan by gently pushing the 4 round extrusions (Fig. 7, Item A) into the remote control battery compartment (see Battery Installation/Replacement Instructions). • Place the remote ...control in the holding bracket and secure the power cord bracket over the power cord. (Fig. 12) • Return the tower fan to the Base • With the fan still on its proper, upright position...
...pedestal assembly clockwise to lock the tower fan in place. (Fig. 10) • Secure the pedestal to the tower fan by gently pushing the 4 round extrusions (Fig. 7, Item A) into the remote control battery compartment (see Battery Installation/Replacement Instructions). • Place the remote ...control in the holding bracket and secure the power cord bracket over the power cord. (Fig. 12) • Return the tower fan to the Base • With the fan still on its proper, upright position...

User Guide
Page 4
... of the remote (Fig 14). Fig. 14 Coin Fig. 15 Fig. 16 Fig. 17 + + NOTE: DO NOT MIX OLD AND NEW BATTERIES. BATTERY INSTALLATION/REPLACEMENT INSTRUCTIONS A. Pull the remote open, separating the halves (Fig. 15). This will automatically force the lens cover to dislodge. Separate the front and rear housing by...
... of the remote (Fig 14). Fig. 14 Coin Fig. 15 Fig. 16 Fig. 17 + + NOTE: DO NOT MIX OLD AND NEW BATTERIES. BATTERY INSTALLATION/REPLACEMENT INSTRUCTIONS A. Pull the remote open, separating the halves (Fig. 15). This will automatically force the lens cover to dislodge. Separate the front and rear housing by...
User Guide
Page 8
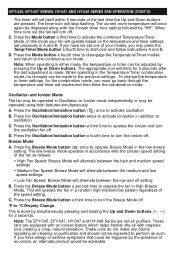
... by pressing the Up or Down buttons. A. Press the Oscillation/Ionization button twice to start over and follow instructions A and B. EFY-045, EFY-047 SERIES, HY-047 AND HY-048 SERIES FAN OPERATION (CONT'D) The timer will operate based on the temperature and timer settings set previously in A and B.... ionizer and turn the ionizer off D. This will alternate between the medium and low speed settings • Low Fan Speed: Breeze Mode will operate the fan in high Breeze Mode. Note: When operating in accordance with the chosen speed setting of an ionizer, an alternate product would be...
... by pressing the Up or Down buttons. A. Press the Oscillation/Ionization button twice to start over and follow instructions A and B. EFY-045, EFY-047 SERIES, HY-047 AND HY-048 SERIES FAN OPERATION (CONT'D) The timer will operate based on the temperature and timer settings set previously in A and B.... ionizer and turn the ionizer off D. This will alternate between the medium and low speed settings • Low Fan Speed: Breeze Mode will operate the fan in high Breeze Mode. Note: When operating in accordance with the chosen speed setting of an ionizer, an alternate product would be...
User Guide
Page 12
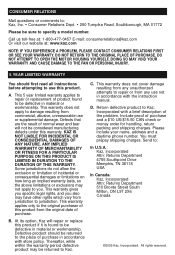
...of product found to be returned to you also may be defective in accordance with store policy. Defective product should first read all instructions before attempting to repair or from the original date of the problem. This warranty does not cover damage resulting from any unauthorized ...ORIGINAL PLACE OF PURCHASE. DO NOT ATTEMPT TO OPEN THE MOTOR HOUSING YOURSELF, DOING SO MAY VOID YOUR WARRANTY AND CAUSE DAMAGE TO THE FAN OR PERSONAL INJURY. 5 YEAR LIMITED WARRANTY You should be defective in accordance with a brief description of purchase. Return defective product to ...
...of product found to be returned to you also may be defective in accordance with store policy. Defective product should first read all instructions before attempting to repair or from the original date of the problem. This warranty does not cover damage resulting from any unauthorized ...ORIGINAL PLACE OF PURCHASE. DO NOT ATTEMPT TO OPEN THE MOTOR HOUSING YOURSELF, DOING SO MAY VOID YOUR WARRANTY AND CAUSE DAMAGE TO THE FAN OR PERSONAL INJURY. 5 YEAR LIMITED WARRANTY You should be defective in accordance with a brief description of purchase. Return defective product to ...