Operating Guide
Page 2
Index Index Overview of Your Safe Page 1 Opening Safe For The First Time Page 2 Installing Your Wall Safe Page 3 Programming a Personal Passcode Page 6 Using the Emergency Override Key Page 7 Checking, Changing and Installing New Batteries Page 8 Use, Care and ...Maintenance Page 9 Customer Support Page 10 For Your Protection • Do not remove the Serial Number tag from the safe. • Store ...
Index Index Overview of Your Safe Page 1 Opening Safe For The First Time Page 2 Installing Your Wall Safe Page 3 Programming a Personal Passcode Page 6 Using the Emergency Override Key Page 7 Checking, Changing and Installing New Batteries Page 8 Use, Care and ...Maintenance Page 9 Customer Support Page 10 For Your Protection • Do not remove the Serial Number tag from the safe. • Store ...
Operating Guide
Page 3
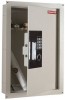
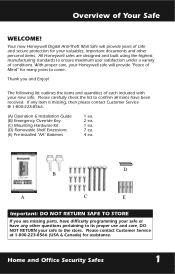
... Extensions (E) Pre-installed "AA" Batteries 1 ea. 2 ea. 1 ea. 7 ea. 4 ea. Home and Office Security Safes 1 Thank you are designed and built using the highest manufacturing standards to the store. Your new Honeywell Digital Anti-Theft Wall Safe will provide years of safe and secure protection for your valuables, important documents and other questions pertaining to its proper...
... Extensions (E) Pre-installed "AA" Batteries 1 ea. 2 ea. 1 ea. 7 ea. 4 ea. Home and Office Security Safes 1 Thank you are designed and built using the highest manufacturing standards to the store. Your new Honeywell Digital Anti-Theft Wall Safe will provide years of safe and secure protection for your valuables, important documents and other questions pertaining to its proper...
Operating Guide
Page 5
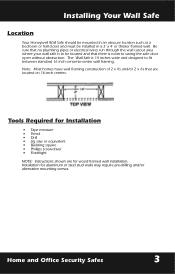
... that no plumbing pipes or electrical wires run through the wall cutout area where your wall safe is to swing the safe door open without obstruction. The Wall Safe is room to be installed in a 2' x 4' or thicker framed wall. Installation for wood framed wall installation. Installing Your Wall Safe Location Your Honeywell Wall Safe should be mounted in an obscure location such as...
... that no plumbing pipes or electrical wires run through the wall cutout area where your wall safe is to swing the safe door open without obstruction. The Wall Safe is room to be installed in a 2' x 4' or thicker framed wall. Installation for wood framed wall installation. Installing Your Wall Safe Location Your Honeywell Wall Safe should be mounted in an obscure location such as...
Operating Guide
Page 6
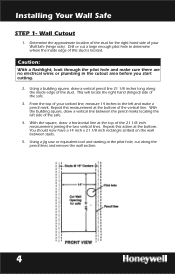
...draw a horizontal line at the bottom. Repeat this action at the top of your Wall Safe (hinge side). You should now have a 14 inch x 21 1/8 inch rectangle scribed on the wall between the pencil marks locating the left and make sure there are no electrical wires or... the pencil lines and remove the wall section. 4 Determine the approximate location of the stud for the right hand side of your scribed line, measure 14 inches to determine where the inside edge of the vertical line. Installing Your Wall Safe STEP 1- Wall Cutout 1. With the building square,...
...draw a horizontal line at the bottom. Repeat this action at the top of your Wall Safe (hinge side). You should now have a 14 inch x 21 1/8 inch rectangle scribed on the wall between the pencil marks locating the left and make sure there are no electrical wires or... the pencil lines and remove the wall section. 4 Determine the approximate location of the stud for the right hand side of your scribed line, measure 14 inches to determine where the inside edge of the vertical line. Installing Your Wall Safe STEP 1- Wall Cutout 1. With the building square,...
Operating Guide
Page 7
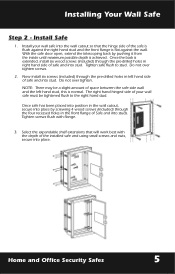
... screws flush with the depth of the safe is flush against the right hand stud and the front flange is extended, install six wood screws (included) through the pre-drilled holes in the wall cutout, secure into place. Select the expandable shelf extensions that the hinge side of ...the installed safe and using small screws and nuts, secure into place by pushing it from the inside ...
... screws flush with the depth of the safe is flush against the right hand stud and the front flange is extended, install six wood screws (included) through the pre-drilled holes in the wall cutout, secure into place. Select the expandable shelf extensions that the hinge side of ...the installed safe and using small screws and nuts, secure into place by pushing it from the inside ...


