HP W2558hc - 25.5" LCD Monitor Research
Related Manual Pages


Related Videos

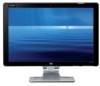
HP w2558hc 25.5-inch Vivid Color Full HD Widescreen Flat Panel Monitor
Duration: 1:06
Total Views: 9,471
Duration: 1:06
Total Views: 9,471
HP w2558hc
Duration: 8:11
Total Views: 6,706
Duration: 8:11
Total Views: 6,706
My New HP w2558hc Monitor
Duration: 2:02
Total Views: 2,295
Duration: 2:02
Total Views: 2,295
HP w2558hc Monitor Demo
Duration: 1:06
Total Views: 6,450
Duration: 1:06
Total Views: 6,450
HP W2558HC 26" by ingerasro !!!
Duration: 3:20
Total Views: 552
Duration: 3:20
Total Views: 552
Similar Questions

Webcam Support On Windows 10
Hi, Do you know if it is possible to use the HP W2558hc camera on Windows 10? If so, can you help me...
Hi, Do you know if it is possible to use the HP W2558hc camera on Windows 10? If so, can you help me...
(Posted by carloscsaraiva 3 years ago)

Replacing Screen
Where do i begin in dismantling the lcd monitor. i have a replacement screen i just dont know where ...
Where do i begin in dismantling the lcd monitor. i have a replacement screen i just dont know where ...
(Posted by txcharlie 10 years ago)

How To Load L 1810 Lcd Monitor Drivers Without In Built Hp Hard Disk
(Posted by Anonymous-112312 10 years ago)

How To Update Hp L1810 Lcd Monitor Drivers
(Posted by RAVI 12 years ago)