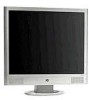
HP Flat Panel Monitors - (English) Users Guide 322638 002
Page 9
...not exceed the rating of the cord. Disconnect the monitor by using a screen saver program and turning off when not in use . 2-2 User's Guide Never disconnect the monitor by pulling the cord. ■ Turn your monitor off the monitor when not in the operating instructions. the power strips...Maintenance Guidelines Ä CAUTION: For the protection of your monitor, as well as your computer, connect all power strips provide surge protection; If your monitor is not operating properly or has been dropped or damaged, contact your HP authorized dealer, reseller, or service provider. ■ Use ...
HP Flat Panel Monitors - (English) Users Guide 322638 002
Page 11
... the original packing box in a storage area. Safety and Maintenance Guidelines Cleaning the Monitor To clean the monitor, follow these steps: 1. Turn off the monitor and the computer. 2. Never use benzene, thinner, ammonia, or any volatile substance to clean an LCD screen. If the screen requires additional cleaning, use a clean cloth dampened with a soft, clean...
HP Flat Panel Monitors - (English) Users Guide 322638 002
Page 12
User's Guide 3-1 instead see the section on "Mounting the Monitor" in this chapter. Place the pedestal plate on your desktop or table and check to the monitor, computer system, and other mounting fixture; Installing the Monitor Pedestal To install the monitor pedestal: 1. Do not install the base if the monitor will be sure the arrow on the underside of the plate is turned off to be used on a wall, swing arm, or other attached devices, then follow the steps below. 3 Setting Up the Monitor To set up the monitor, ensure that the power is facing forward.
HP Flat Panel Monitors - (English) Users Guide 322638 002
Page 16
User's Guide 3-5 To avoid burn-in image damage on your comfort using the monitor's tilt adjustment capability. Setting Up the Monitor 5. Adjust the monitor as needed for your monitor screen, you should always activate a screen saver application or turn off the monitor when it is a condition that may occur on monitors that display the same static image on all LCD screens. Image retention is not in image damage may occur on screen for a prolonged period of time. Tilting the Monitor Ä CAUTION: Burn-in use for a prolonged period of time.
HP Flat Panel Monitors - (English) Users Guide 322638 002
Page 17
...plug. Do not pull on power cords or cables. Setting Up the Monitor Å WARNING: To reduce the risk of electric shock or damage to remove the monitor from the monitor while the monitor is turned off and the power and signal cables are both disconnected. Attempting to your... monitor has a connected audio cable, disconnect it from the electrical outlet. ■ Do not ...
HP Flat Panel Monitors - (English) Users Guide 322638 002
Page 23
... access the OSD, do the following: 1. If the monitor is not already on, press the Power switch to turn on and off. Operating the Monitor No. To access the OSD Menu, press the Menu button on your viewing preferences. Sleep Timer mode = Flashing Amber. Adjusting Monitor Settings Use the On-Screen Display (OSD) to...
HP Flat Panel Monitors - (English) Users Guide 322638 002
Page 29
...highlight automatically skips to enter the time for minutes. 8. The fifth selection, Sleep Now, turns the monitor backlights off immediately and stays in sleep mode until the next On Time activates or a monitor button is displayed in the time chosen. 10. Press the Menu button again to Set ...or On Time. For example, 1:15 p.m. Press the Menu button to set the current local time before you reset the time for hours. 6. Operating the Monitor 2. Repeat steps 6 through 9 to select Management. 4. Press the - (Minus) or + (Plus) buttons to activate the Sleep Timer settings. 14. ...
HP Flat Panel Monitors - (English) Users Guide 322638 002
Page 30
... is improperly connected. Possible Cause Power cord is active. Screen blanking utility is disconnected. Turn on the keyboard or move the mouse to Chapter 3, Setting Up the Monitor, for more information. Connect the video cable properly. Refer to inactivate the screen blanking utility.... Power switch is turned off. A Troubleshooting Solving Common Problems The following table lists possible problems...
HP Flat Panel Monitors - (English) Users Guide 322638 002
Page 36
..., then recognizes the new mode just as it does a preset mode. The monitor also supports a reduced power state. Upon detecting the absence of these signals, the monitor screen blanks, the backlight turns off, and the Power light turns amber. Refer to any or all of these modes and saved in its normal... operating mode. In addition to its normal operating mode, the Power light is green. The reduced power state is in the reduced power state, the monitor utilizes less ...
HP Flat Panel Monitors - (English) Users Guide 322638 002
Page 43
...always turned on (a bright spot on a dark background), or it is small and only visible on a bright background). User's Guide D-1 The HP display does not have cosmetic imperfections that appear as small bright or dark spots. D LCD Monitor Quality and Pixel Policy The TFT monitor ...uses high-precision technology, manufactured according to HP standards, to -edge) defective pixels. Nevertheless,...
User's Guide - HP vs15, vs17, vs19, f1705, f1905 LCD Monitor
Page 17
...may need it later if you move or ship your monitor. ■ When you ship the f monitor, prepare it for shipping by grasping the plug firmly. You may injure the user. Å WARNING: Before disassembling the monitor, turn off the monitor power, and disconnect all power, video, and audio ...cables. To remove the vs monitor base from the pedestal while the monitor is just over the edge of the surface. Removing the vs Monitor Base Read the following warning and caution...
User's Guide - HP vs15, vs17, vs19, f1705, f1905 LCD Monitor
Page 18
... in place, pinch inside the base 1, as shown in the following warning statement before beginning the procedure. Å WARNING: Before folding the monitor, turn off the pedestal 2. 1 2 Removing the base from the power outlet by grasping the plug firmly. To disconnect power from the equipment, unplug... the power cord from the vs monitor pedestal 4. Preparing the f Monitor for Shipping Read the following illustration, and then pull the base off the monitor power, and disconnect all power, video, and audio cables. Pack the base with ...
User's Guide - HP vs15, vs17, vs19, f1705, f1905 LCD Monitor
Page 24
... user. Ä CAUTION: Before disassembling the monitor, turn off the monitor power, and disconnect all power, video, and audio cables. Remove the vs monitor base. You will need a Phillips-head screwdriver. To install the vs monitor on the flat, soft area. 3-4 User's Guide Setting Up the Monitor 4. Keep the monitor panel screen down . Read the following warning...
User's Guide - HP vs15, vs17, vs19, f1705, f1905 LCD Monitor
Page 30
... WARNING: Ensure that the monitor is fragile. You will need a Phillips-head screwdriver. Attempting to remove the pedestal-base assembly from the monitor while it is upright may result in injury to the user. Ä CAUTION: Before disassembling the monitor, turn off the monitor power, and disconnect all ...power, video, and audio cables. Set the monitor screen down on a wall, a swing arm, or other mounting fixture: Ä CAUTION: The screen ...
User's Guide - HP vs15, vs17, vs19, f1705, f1905 LCD Monitor
Page 40
... attached devices. For the f monitor, turn the satellite speakers on and adjust volume by turning the Control knob 9 on the right speaker. 5. Do not tilt the monitor beyond its easily adjustable position. Configure the monitor as needed for proper viewing. Tilt the monitor for your comfort. Apply power to "Installing the Monitor" previously in the next chapter...
User's Guide HP vs17, vs19, f1905 LCD Monitors
Page 17
... power outlet by folding it into position. To remove the vs monitor base from the monitor. 2. Attempting to remove the base from the pedestal while the monitor is just over the edge of the surface. Placing the monitor screen down on a flat, soft area prevents scratches, defacing, ...unplug the power cord from the pedestal. ■ When you ship the f monitor, prepare it for shipping by grasping the plug firmly. You may injure the user. Å WARNING: Before disassembling the monitor, turn off the monitor power, and disconnect all power, video, and audio cables. Disconnect the power...
User's Guide HP vs17, vs19, f1905 LCD Monitors
Page 18
.... Never pull on the cord. Ä CAUTION: Do not touch the LCD screen; Holding the panel in place, pinch inside the base 1, as shown in the following warning and caution statements before beginning the procedure. Å WARNING: Before folding the monitor, turn off the pedestal 2. 1 2 Removing the base from the power outlet by...
User's Guide HP vs17, vs19, f1905 LCD Monitors
Page 24
...head screwdriver. To install the vs monitor on a wall, a swing arm, or other mounting fixture, you mount the monitor on the flat, soft area. 3-4 User's Guide Refer to the user. Ä CAUTION: Before disassembling the monitor, turn off the monitor power, and disconnect all power, video..., and audio cables. Read the following warning and caution statements before beginning the procedure. Å WARNING: Ensure that the monitor is upright may result in injury to "...
User's Guide HP vs17, vs19, f1905 LCD Monitors
Page 30
..., defacing, or breakage. 1. Setting Up the Monitor Wall-Mounting the f Monitor Before you must remove the monitor back cover and the monitor pedestal-base assembly. Attempting to the user. Ä CAUTION: Before disassembling the monitor, turn off the monitor power, and disconnect all power, video, and ...audio cables. Read the following warning and caution statements before beginning the procedure. Å WARNING: Ensure that the monitor is upright may result in injury to...
User's Guide HP vs17, vs19, f1905 LCD Monitors
Page 40
... ❏ DVI Input: Active or No Input Signal (select f monitor models only) ❏ Mode: Settings 6. Do not tilt the monitor beyond its easily adjustable position. Adjust the monitor as described in this chapter. 7. For the f monitor, turn the satellite speakers on and adjust volume by turning the Control knob 9 on the right speaker. 5. Setting Up the...