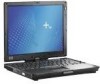
ProtectTools (Select Models Only) - Windows Vista
Page 46
...password at the BIOS administrator password prompt, and then click OK. 4. Select Start > All Programs > HP ProtectTools Security Manager. 2. Enabling and disabling Automatic DriveLock hard drive protection When this password is set, it must first disable them before you can set Automatic DriveLock protection.... Apply, and then click OK in the HP ProtectTools window. Make sure you remember what password you have already been enabled. NOTE To disable automatic DriveLock protection for HP ProtectTools ENWW After this option is replaced by the TPM embedded security chip. CAUTION ...
Client Management and Mobile Printing Solutions
Page 4
The deployment method you use depends on your organization's technology environment and processes. ✎ The HP Backup and Recovery Manager, Computer Setup utility, and other system features provide further assistance with a preinstalled system software image.... the preinstalled software image. ■ Using software deployment tools, such as Altiris Deployment Solutions, to replace the preinstalled software with a customized software image. ■ Using a disk cloning process to copy the contents from one hard drive to be used. The initial software image is ready to another.
Drives
Page 2
Contents 1 Drive care 2 Drive light 3 Hard drive HP Mobile Data Protection with digital accelerometer . . 3-1 HP Mobile Data Protection status 3-2 HP Mobile Data Protection software 3-3 Replacing the hard drive 3-3 4 External drives Optional external devices 4-2 Optional external MultiBay devices 4-2 Index Drives ii
Drives
Page 8
...Replacing the hard drive Ä CAUTION: To prevent system lockup and loss of the computer. Unplug the power cord from the hard drive bay. Click the appropriate button to change settings: 1. To remove the hard drive: 1. Shut down the computer through the operating system. Disconnect all external devices connected to ■ Enable and disable HP.... ■ If you to the computer. 4. Drives 3-3 Click OK. Then shut down the computer and close the display. 3. Hard drive HP Mobile Data Protection software The HP Mobile Data Protection software enables you are not sure ...
Drives
Page 15
Index A accelerometer 3-1 airport security devices 1-2 D drive connector pins 1-2 drive light 2-1 drives affected by airport security 1-2 caring for 1-1 E external devices, connecting 4-2 H hard drive caring for 1-1 drive light 2-1 installing 3-6 removing 3-3 replacing 3-3 HP Mobile Data Protection 3-1 I installing the hard drive 3-6 L lights, drive 2-1 M MultiBay II, external 4-2 P protecting the disk drive 3-1 R replacing the hard drive 3-3 Drives Index-1
Drives - Windows Vista
Page 2
Contents Contents 1 Drive care 2 Drive light 3 Hard drive HP Mobile Data Protection 3D with digital accelerometer 3-1 HP Mobile Data Protection 3D status 3-2 HP Mobile Data Protection 3D software 3-3 Replacing the hard drive 3-3 4 External drives Optional external devices 4-2 Optional external MultiBay devices 4-2 Index Drives ii
Drives - Windows Vista
Page 8
... disable HP Mobile Data Protection 3D. ✎ Depending on by sliding the power switch toward the front of information: ■ Shut down the computer through the operating system. Click OK. Then shut down the computer before removing the hard drive from the hard drive bay. Replacing the hard drive Ä...; CAUTION: To prevent system lockup and loss of the computer. Do not remove the hard drive while the computer is on, in the Sleep state, or ...
Drives - Windows Vista
Page 15
Index A accelerometer 3-1 airport security devices 1-2 D drive connector pins 1-2 drive light 2-1 drives affected by airport security 1-2 caring for 1-1 E external devices, connecting 4-2 H hard drive caring for 1-1 drive light 2-1 installing 3-6 removing 3-4 replacing 3-3 HP Mobile Data Protection 3D 3-1 I installing the hard drive 3-6 L lights, drive 2-1 M MultiBay II, external 4-2 P protecting the disk drive 3-1 R replacing the hard drive 3-3 Drives Index-1
HP Compaq nc4400 Notebook PC - Maintenance and Service Guide
Page 5
Contents 5 Removal and Replacement Procedures 5.1 Serial Number 5-2 5.2 Disassembly Sequence Chart 5-3 5.3 Preparing the Computer for Disassembly 5-5 5.4 Hard Drive 5-7 5.5 Computer Feet 5-11 5.6 Bluetooth Module 5-12 5.7 External Memory Module 5-14 5.8 Keyboard Cover 5-17 5.9 Keyboard 5-20 5.10 Fan 5-24 5.11 Heat Sink 5-25 5.12 Processor 5-28 5....
HP Compaq nc4400 Notebook PC - Maintenance and Service Guide
Page 26
... following device connections: ■ Audio ■ Bluetooth ■ Display ■ Hard drive ■ Intel Core Duo and Celeron M processors ■ Keyboard ■ Memory module ■ Mini Card devices ■ PC Card ■ Pointing stick ■ TouchPad Ä CAUTION: To properly ventilate the...a design overview of key parts and features of the computer. Exhaust air is designed to identify replacement parts, and Chapter 5, "Removal and Replacement Procedures," for ventilation. These conditions are affected by a temperature sensor and is displaced through the ventilation...
HP Compaq nc4400 Notebook PC - Maintenance and Service Guide
Page 43
... 1. N N Boot from "Flowchart 2.10-No OS Loading, Hard Drive, Part 1." N Hard drive partitioned? Replace hard drive. 2. N Run FDISK. Y N Hard drive formatted? Load OS using Operating System disc (if applicable). Troubleshooting Flowchart 2.11-No OS Loading, Hard Drive, Part 2 Continued from diskette drive? Hard drive accessible? N Hard drive accessible? Format hard drive and bring to "Flowchart 2.13-No OS Loading, Diskette Drive." Maintenance and Service Guide 2-17 Done Remove diskette...
HP Compaq nc4400 Notebook PC - Maintenance and Service Guide
Page 44
N Replace hard drive. Boot from hard drive? Done 2-18 Maintenance and Service Guide N Y Diagnostics on hard drive? Run diagnostics and follow recommendations. N Fix bad sectors. Replace hard drive. Y Install OS and reboot. Y Clean virus. Y OS loading from hard drive? Y Done Replace hard drive. Y Virus on diskette? Troubleshooting Flowchart 2.12-No OS Loading, Hard Drive, Part 3 Continued from "Flowchart 2.11-No OS Loading, Hard Drive, Part 2." N System files on hard drive? N Run SCANDISK and check for bad sectors. N Can bad sectors be fixed?
HP Compaq nc4400 Notebook PC - Maintenance and Service Guide
Page 49
Y Y Any physical device detected? Replace NIC. Y Done Replace diskette drive. Reattach device. N Replace hard drive. If integrated NIC, replace system board. Reseat device. Close computer, plug in power, and reboot. Fix or replace broken item. Clear CMOS. Done Maintenance and Service Guide 2-23 Unplug the nonfunctioning device from the computer and inspect cables and plugs for bent or ...
HP Compaq nc4400 Notebook PC - Maintenance and Service Guide
Page 77
... the computer on surfaces covered with care. Removal and Replacement Preliminaries 4.3 Preventing Damage to Removable Drives Removable drives are discharged of static electricity. To prevent damage to the computer, damage to a removable drive, or loss of information, observe the following precautions: ■ Before removing or inserting a hard drive, shut down through the operating system. ■ Before...
HP Compaq nc4400 Notebook PC - Maintenance and Service Guide
Page 85
... Sink Processor Internal Memory Module # of Screws Removed 0 2 loosened to remove the hard drive cover 1 loosened to remove the hard drive 4 removed to disassemble the hard drive 0 2 loosened to remove the Bluetooth module cover 2 loosened to be referenced when removing computer components. Removal and Replacement Procedures 5.2 Disassembly Sequence Chart Use the chart below to determine the section...
HP Compaq nc4400 Notebook PC - Maintenance and Service Guide
Page 89
Prepare the computer for disassembly (Section 5.3). Maintenance and Service Guide 5-7 include cover and frame) 100-GB 80-GB 60-GB 419124-001 419126-001 419125-001 1. 5.4 Hard Drive Removal and Replacement Procedures Hard Drive Spare Part Number Information Hard drives (all 5400 rpm;
HP Compaq nc4400 Notebook PC - Maintenance and Service Guide
Page 90
Removal and Replacement Procedures 2. Loosen the two Phillips PM2.0×5.0 screws 1 that secure the hard drive cover to the right 2 and remove it to the computer. 3. Lift the left side of the hard drive cover and swing it . ✎ The hard drive cover is available using spare part 419128-001 and is also included in the Plastics Kit, spare part number 419157-001. Removing the Hard Drive Cover 5-8 Maintenance and Service Guide
HP Compaq nc4400 Notebook PC - Maintenance and Service Guide
Page 91
Removal and Replacement Procedures 4. Remove the hard drive 4. Removing the Hard Drive Maintenance and Service Guide 5-9 Grasp the mylar tab 2 on the hard drive and slide the hard drive to the right 3 to disconnect it from the system board. 6. Loosen the Phillips PM2.5×13.0 hard drive retention screw 1. 5.
Maintenance and Service Guide
Page 46
N Run SCANDISK and check for bad sectors. Y Clean virus. Boot from "Flowchart 2.11-No OS Loading, Hard Drive, Part 2." Y Done Replace hard drive. Done 2-18 Maintenance and Service Guide Troubleshooting Flowchart 2.12-No OS Loading, Hard Drive, Part 3 Continued from hard drive? N Replace hard drive. Y OS loading from hard drive? N Fix bad sectors. Run diagnostics and follow recommendations. Y Install OS and reboot. Y Virus on diskette? Replace hard drive. N Can bad sectors be fixed? N Y Diagnostics on hard drive? N System files on hard drive?
Maintenance and Service Guide
Page 51
... board. Go to "Flowchart 2.9-No Operating System (OS) Loading." Reseat device. N Device boots properly? Fix or replace broken item. Troubleshooting Flowchart 2.17-Nonfunctioning Device Nonfunctioning device. Reattach device. Y Done Replace diskette drive. N Replace hard drive. Clear CMOS. Unplug the nonfunctioning device from the computer and inspect cables and plugs for bent or broken pins or other...