

HP Device Manager User Manual
Page 8
6 Advanced Tasks Add-ons ...120 Introduction ...120 Applying an Add-on to a Thin Client 120 Images ...130 Introduction ...130 Images & Repository Management 130 Client BIOS Settings for PXE 130 Pulling a PXE Image From a Client 131 Pushing a PXE Image to a Client 134 Cloning an Image from an HP Thin Client 137 Updating Images ...140 Changing Registry Settings ...143 Getting Registry Settings...
6 Advanced Tasks Add-ons ...120 Introduction ...120 Applying an Add-on to a Thin Client 120 Images ...130 Introduction ...130 Images & Repository Management 130 Client BIOS Settings for PXE 130 Pulling a PXE Image From a Client 131 Pushing a PXE Image to a Client 134 Cloning an Image from an HP Thin Client 137 Updating Images ...140 Changing Registry Settings ...143 Getting Registry Settings...

HP Device Manager User Manual
Page 81
... menu. 3. The Task Editor dialog box will appear on the screen of the client's BIOS must be shutdown or restarted. Right-click and select Power Management > Reboot, Wake On LAN or Shutdown from the Device Pane in the main Console ... achieved either by using the templates available on the Operations tab, or by selecting from the popup menu when you to reboot, shutdown and wake a client remotely. Power Management The Management Console enables you right-click on a device as described below. NOTE: To wake...
... menu. 3. The Task Editor dialog box will appear on the screen of the client's BIOS must be shutdown or restarted. Right-click and select Power Management > Reboot, Wake On LAN or Shutdown from the Device Pane in the main Console ... achieved either by using the templates available on the Operations tab, or by selecting from the popup menu when you to reboot, shutdown and wake a client remotely. Power Management The Management Console enables you right-click on a device as described below. NOTE: To wake...

HP Device Manager User Manual
Page 140
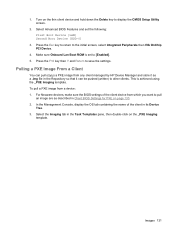
... and target client devices have their BIOS settings configured correctly. 130 Chapter 6 Advanced Tasks Importing Images Image files from the Select an element type to display list. Before you can pull or push a PXE image, you to sign and verify PXE images. HP Device Manager ...can transfer image files between FTP Repositories. Client BIOS Settings for each OS tab provide various means of HP Device Manager and some DHCP server setups may conflict with PXE, see Configuring DHCP Servers on a thin client's flash storage. Images Introduction HP Device Manager can read and write images to...
... and target client devices have their BIOS settings configured correctly. 130 Chapter 6 Advanced Tasks Importing Images Image files from the Select an element type to display list. Before you can pull or push a PXE image, you to sign and verify PXE images. HP Device Manager ...can transfer image files between FTP Repositories. Client BIOS Settings for each OS tab provide various means of HP Device Manager and some DHCP server setups may conflict with PXE, see Configuring DHCP Servers on a thin client's flash storage. Images Introduction HP Device Manager can read and write images to...
HP Device Manager User Manual
Page 141
... Imaging tab in the Repository so that it can pull (copy) a PXE image from any client managed by HP Device Manager and store it as a .img file in the Task Templates pane, then double-click on the thin client device and hold down the Delete key to pull an image are as described in... its Device Tree. 3. Press the Esc key to return to save the settings. Select Advanced BIOS Features...
... Imaging tab in the Repository so that it can pull (copy) a PXE image from any client managed by HP Device Manager and store it as a .img file in the Task Templates pane, then double-click on the thin client device and hold down the Delete key to pull an image are as described in... its Device Tree. 3. Press the Esc key to return to save the settings. Select Advanced BIOS Features...
HP Device Manager User Manual
Page 144
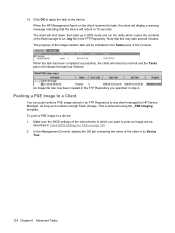
...FTP Repository. 10. The progress of the image creation task will shut down, then start up in Client BIOS Settings for PXE on the client receives the task, the client will indicate the task has finished. The client will be indicated in its Device Tree. 134 Chapter 6 Advanced Tasks Make sure the...PXE image to a device: 1. In the Management Console, display the OS tab containing the name of the client in the Tasks pane of the flash storage to any client managed by HP Device Manager, as long as normal and the Tasks pane will display a warning message indicating that this may take...
...FTP Repository. 10. The progress of the image creation task will shut down, then start up in Client BIOS Settings for PXE on the client receives the task, the client will indicate the task has finished. The client will be indicated in its Device Tree. 134 Chapter 6 Advanced Tasks Make sure the...PXE image to a device: 1. In the Management Console, display the OS tab containing the name of the client in the Tasks pane of the flash storage to any client managed by HP Device Manager, as long as normal and the Tasks pane will display a warning message indicating that this may take...

HP Device Manager User Manual
Page 252
Index A Activity Directory 166 add-ons 120 add-ons, applying to thin client 120 adding group 163 report template 193 to repository 206 users 159 advanced tasks 120 agents configuration for client discovery 42 configuring 156 device 2 discover 37 mode 4 setting parameters 156 updating version 157...143 user password 161 client BIOS settings, PXE 130 client discovery DHCP tag 41 discover agent 37 management agent broadcast 37 manual configuration 42 walking with IP list 40 walking with IP range 38 client, discovering 37 cloning device settings 95 image from thin client 137 command execution, ...
Index A Activity Directory 166 add-ons 120 add-ons, applying to thin client 120 adding group 163 report template 193 to repository 206 users 159 advanced tasks 120 agents configuration for client discovery 42 configuring 156 device 2 discover 37 mode 4 setting parameters 156 updating version 157...143 user password 161 client BIOS settings, PXE 130 client discovery DHCP tag 41 discover agent 37 management agent broadcast 37 manual configuration 42 walking with IP list 40 walking with IP range 38 client, discovering 37 cloning device settings 95 image from thin client 137 command execution, ...

HP Device Manager User Manual
Page 254
N NAT environment 42 NeoLinux 4.x devices 212 Neoware, legacy client BIOS settings 130 network checking connection status 67 configuring settings 102 requirements 10 O opening VNC viewer 84 OS tabs 3 overview 1 overview, system structure 1 P ...power management 71 properties displaying task 79 grouping 182 pulling PXE image from client 131 pushing PXE image to client 134 PXE client BIOS settings 130 configuring DHCP server 27 configuring routers 29 pulling image from client 131 pushing image to client 134 R region, configuring settings 106 registry changing settings 143 editing settings 149...
N NAT environment 42 NeoLinux 4.x devices 212 Neoware, legacy client BIOS settings 130 network checking connection status 67 configuring settings 102 requirements 10 O opening VNC viewer 84 OS tabs 3 overview 1 overview, system structure 1 P ...power management 71 properties displaying task 79 grouping 182 pulling PXE image from client 131 pushing PXE image to client 134 PXE client BIOS settings 130 configuring DHCP server 27 configuring routers 29 pulling image from client 131 pushing image to client 134 R region, configuring settings 106 registry changing settings 143 editing settings 149...
HP Image Manager 5.0: Quick Setup Guide
Page 35
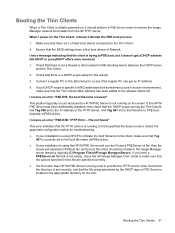
...empty, check the HP Image Manager User Guide to make sure that the BIOS settings have a PXEServer.ini file, then the server will advertise mPXELdr.bin as the boot file which should perform a PXE boot in order to see a message indicating that the Thin Clients MAC address has ...advertised by the DHCP tags or PXE Server is initially powered-on the Thin Client, it should be located in the Image Manager server directory (typically C:\Program Files\HP Image Manager\Server). Booting the Thin Clients When a Thin Client is located in the appropriate directory for the tool. Check that the...
...empty, check the HP Image Manager User Guide to make sure that the BIOS settings have a PXEServer.ini file, then the server will advertise mPXELdr.bin as the boot file which should perform a PXE boot in order to see a message indicating that the Thin Clients MAC address has ...advertised by the DHCP tags or PXE Server is initially powered-on the Thin Client, it should be located in the Image Manager server directory (typically C:\Program Files\HP Image Manager\Server). Booting the Thin Clients When a Thin Client is located in the appropriate directory for the tool. Check that the...

Administrator's Guide Linux-based HP Compaq t5735 Thin Client
Page 5
... ...33 3 HP Connection Administrator HP Connection Administrator window 35 ENWW v Table of contents 1 Introduction Thin client image ...1 Desktop options ...2 Taskbar and menus ...3 Applications menu ...3 Applications submenus 3 Places menu ...5 Desktop menu ...6 Desktop submenus 7 Synaptic ...9 TeemTalk ...11 Connection types ...12 System information ...12 2 Preference Settings Date/Time ...14 Configuring the system hardware clock from BIOS 15 Desktop...
... ...33 3 HP Connection Administrator HP Connection Administrator window 35 ENWW v Table of contents 1 Introduction Thin client image ...1 Desktop options ...2 Taskbar and menus ...3 Applications menu ...3 Applications submenus 3 Places menu ...5 Desktop menu ...6 Desktop submenus 7 Synaptic ...9 TeemTalk ...11 Connection types ...12 System information ...12 2 Preference Settings Date/Time ...14 Configuring the system hardware clock from BIOS 15 Desktop...

Administrator's Guide Linux-based HP Compaq t5735 Thin Client
Page 21
ENWW System information 13 The screen displays information about the system and operating system (for example, what version of the image is currently running), click Applications > System Tools > HP System Information. To locate information about the CPU, flash, memory, BIOS, and operating system.
ENWW System information 13 The screen displays information about the system and operating system (for example, what version of the image is currently running), click Applications > System Tools > HP System Information. To locate information about the CPU, flash, memory, BIOS, and operating system.

Administrator's Guide Linux-based HP Compaq t5735 Thin Client
Page 23
To save the changes, press F10, and then press Enter. Configuring the system hardware clock from BIOS You can set the system hardware clock to your local date and time using the Num keys. 4. Set the date and time using the Page Up and Page Down keys or type the new numbers using the BIOS setup utility as follows: 1. ENWW Date/Time 15 Select Standard CMOS Features, and then press Enter. 3. Reboot the system and press F10. 2.
To save the changes, press F10, and then press Enter. Configuring the system hardware clock from BIOS You can set the system hardware clock to your local date and time using the Num keys. 4. Set the date and time using the Page Up and Page Down keys or type the new numbers using the BIOS setup utility as follows: 1. ENWW Date/Time 15 Select Standard CMOS Features, and then press Enter. 3. Reboot the system and press F10. 2.

Administrator's Guide Linux-based HP Compaq t5735 Thin Client
Page 41
... the captured image (flash.dd) found in the USB flash drive in the F10 System BIOS to deploy the captured image, and then turn on the unit. 4. Please consult the HP Compaq Thin Client Imaging Tool at http://h20000.www2.hp.com/bc/docs/ support/SupportManual/c00485307/c00485307.pdf. 7. After you remove the USB flash drive...
... the captured image (flash.dd) found in the USB flash drive in the F10 System BIOS to deploy the captured image, and then turn on the unit. 4. Please consult the HP Compaq Thin Client Imaging Tool at http://h20000.www2.hp.com/bc/docs/ support/SupportManual/c00485307/c00485307.pdf. 7. After you remove the USB flash drive...

Administrator's Guide Linux-based HP Compaq t5735 Thin Client
Page 68
...decompresses and loads certain portions of the image are not loaded until they are users managed? Letter case matters when using the BIOS setup utility: 60 Chapter 6 Frequently Asked Questions ENWW Some features and aspects of the image in RAM. To obtain the ...menu. ● Standard command-line tools to manage users. How and where is obtained from the desktop click Applications > System Tools > HP System Information. 6 Frequently Asked Questions . Linux operating system Question Answer How do you configure the system hardware clock? The image version number...
...decompresses and loads certain portions of the image are not loaded until they are users managed? Letter case matters when using the BIOS setup utility: 60 Chapter 6 Frequently Asked Questions ENWW Some features and aspects of the image in RAM. To obtain the ...menu. ● Standard command-line tools to manage users. How and where is obtained from the desktop click Applications > System Tools > HP System Information. 6 Frequently Asked Questions . Linux operating system Question Answer How do you configure the system hardware clock? The image version number...

Administrator's Guide Linux-based HP Compaq t5735 Thin Client
Page 69
...the Setup utility displays, press Esc. 3. The date and time can be configured either synchronize the BIOS time to the system time, or synchronize from Applications > System Tools > HP Date and Time Manager. This command allows you configure the date and time? Use Desktop > Preferences ...Login as user. To run the BootOrder utility, perform the following steps: 1. 1. How do you synchronize the BIOS and system time? To synchronize the BIOS and system time, use HP Connection Administrator instead. Options ● -r: Read hardware clock and print result ● -s: Set the system ...
...the Setup utility displays, press Esc. 3. The date and time can be configured either synchronize the BIOS time to the system time, or synchronize from Applications > System Tools > HP Date and Time Manager. This command allows you configure the date and time? Use Desktop > Preferences ...Login as user. To run the BootOrder utility, perform the following steps: 1. 1. How do you synchronize the BIOS and system time? To synchronize the BIOS and system time, use HP Connection Administrator instead. Options ● -r: Read hardware clock and print result ● -s: Set the system ...

Administrator's Guide Linux-based HP Compaq t5735 Thin Client
Page 72
...like to run this script? 8. Select the Advanced BIOS Features option and press Enter. Altiris Deployment Server Console Actions 1. From the upper right window, click Add. 5. In the Run this Script window, type the following steps: HP Compaq Thin Client Actions (Required) 1. You can be deployed by... rdeployt -mu -raw -f.\images \test.img NOTE: test.img is an image deployed using Altiris? 64 Chapter 6 Frequently Asked Questions Answer HP Compaq Thin Client Actions (Required) 1. ENWW An image can drag and drop this example. Select the Network option and press Enter. 5. In the empty ...
...like to run this script? 8. Select the Advanced BIOS Features option and press Enter. Altiris Deployment Server Console Actions 1. From the upper right window, click Add. 5. In the Run this Script window, type the following steps: HP Compaq Thin Client Actions (Required) 1. You can be deployed by... rdeployt -mu -raw -f.\images \test.img NOTE: test.img is an image deployed using Altiris? 64 Chapter 6 Frequently Asked Questions Answer HP Compaq Thin Client Actions (Required) 1. ENWW An image can drag and drop this example. Select the Network option and press Enter. 5. In the empty ...

Administrator's Guide Linux-based HP Compaq t5735 Thin Client
Page 80
... 49 Auto box 48 automatic connections 49 B background, desktop 16 BackingStore 44 BIOS 12 BIOS/time synchronization 61 bitmap caching 44 boot order 61 Broadcast 45 build number 60 Buttons tab 18 C Capture, HP ThinState 28 changing boot order 61 Citrix connection view 57 global settings 52 hot... keys 53 ICA 56 ICA connection 37 ICA issues 66 options Web site 39 preferences 57 servers 52 Clients...
... 49 Auto box 48 automatic connections 49 B background, desktop 16 BackingStore 44 BIOS 12 BIOS/time synchronization 61 bitmap caching 44 boot order 61 Broadcast 45 build number 60 Buttons tab 18 C Capture, HP ThinState 28 changing boot order 61 Citrix connection view 57 global settings 52 hot... keys 53 ICA 56 ICA connection 37 ICA issues 66 options Web site 39 preferences 57 servers 52 Clients...

Troubleshooting Guide: HP t5730 and t5735 Thin Client
Page 5
... Side Access Panel 11 Removing and Replacing the Battery 12 3 Mounting the Thin Client HP Quick Release ...13 Supported Mounting Options 15 Non-supported Mounting Option 17 4 BIOS Settings, (F10) Utility Using the BIOS Settings ...18 Changing BIOS Settings from the repset utility 18 Changing BIOS Settings Using the F10 Utility 19 Setup Utility-System Information 20 v
... Side Access Panel 11 Removing and Replacing the Battery 12 3 Mounting the Thin Client HP Quick Release ...13 Supported Mounting Options 15 Non-supported Mounting Option 17 4 BIOS Settings, (F10) Utility Using the BIOS Settings ...18 Changing BIOS Settings from the repset utility 18 Changing BIOS Settings Using the F10 Utility 19 Setup Utility-System Information 20 v

Troubleshooting Guide: HP t5730 and t5735 Thin Client
Page 6
Setup Utility-Standard CMOS Features 20 Setup Utility-Advanced BIOS Features 20 Setup Utility-Integrated Peripherals 21 Setup Utility-Power Management Setup 22 Setup Utility-Utility Task Actions 22 5 Diagnostics and Troubleshooting LEDs ...23 Power-... User Permissions on the Active Directory Server 36 RIS Menu ...37 Creating Network Bootable Disk to Map Drives 37 For More Information ...37 Appendix D System BIOS Restoring a Corrupt BIOS ...38 Updating a BIOS ...39 vi
Setup Utility-Standard CMOS Features 20 Setup Utility-Advanced BIOS Features 20 Setup Utility-Integrated Peripherals 21 Setup Utility-Power Management Setup 22 Setup Utility-Utility Task Actions 22 5 Diagnostics and Troubleshooting LEDs ...23 Power-... User Permissions on the Active Directory Server 36 RIS Menu ...37 Creating Network Bootable Disk to Map Drives 37 For More Information ...37 Appendix D System BIOS Restoring a Corrupt BIOS ...38 Updating a BIOS ...39 vi

Troubleshooting Guide: HP t5730 and t5735 Thin Client
Page 26
...changed locally within the operating system without having to go through the F10 utility1. BIOS Setting 1st Boot Device 2nd Boot Device 3rd Boot Device Boot Up NumLock F12 ...Controller Serial Port 1 Serial Port 2 Parallel Port PWRON After PWR-Fail Wake-on-LAN BIOS Wake Up Asset Tag No Setup Password Power-On Password Parallel Mode ECP Mode Use ... Disabled Disabled 18 Chapter 4 BIOS Settings, (F10) Utility Changing BIOS Settings from the repset utility Some BIOS settings may be controlled with this method. 4 BIOS Settings, (F10) Utility Using the BIOS Settings AMD Sempron 2100 processors ...
...changed locally within the operating system without having to go through the F10 utility1. BIOS Setting 1st Boot Device 2nd Boot Device 3rd Boot Device Boot Up NumLock F12 ...Controller Serial Port 1 Serial Port 2 Parallel Port PWRON After PWR-Fail Wake-on-LAN BIOS Wake Up Asset Tag No Setup Password Power-On Password Parallel Mode ECP Mode Use ... Disabled Disabled 18 Chapter 4 BIOS Settings, (F10) Utility Changing BIOS Settings from the repset utility Some BIOS settings may be controlled with this method. 4 BIOS Settings, (F10) Utility Using the BIOS Settings AMD Sempron 2100 processors ...

Troubleshooting Guide: HP t5730 and t5735 Thin Client
Page 27
... controlled from the operating system with repset can also be necessary to press and hold F10 on the keyboard, then power on the thin client. 3. It is divided into five menu headings and five task actions. Changing BIOS Settings Using the F10 Utility 1. The Menu Headings are: System Information, Standard CMOS Features, Advanced...
... controlled from the operating system with repset can also be necessary to press and hold F10 on the keyboard, then power on the thin client. 3. It is divided into five menu headings and five task actions. Changing BIOS Settings Using the F10 Utility 1. The Menu Headings are: System Information, Standard CMOS Features, Advanced...


