
HP ProBook User Guide - Windows 7
Page 12
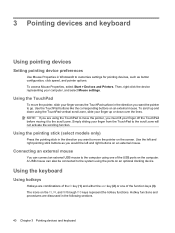
...Mouse settings. 2 Chapter 1 Features Component Description (1) Pointing stick (select models only)* Moves the pointer and selects or activates items on the screen. (2) Left pointing stick button (select models only)* Functions like the left button on an external mouse. (3) TouchPad* Moves the pointer and... selects or activates items on the screen. (4) Left TouchPad button* Functions like the left button on an external mouse. (5) Right pointing stick button (select models only)* Functions...
...Mouse settings. 2 Chapter 1 Features Component Description (1) Pointing stick (select models only)* Moves the pointer and selects or activates items on the screen. (2) Left pointing stick button (select models only)* Functions like the left button on an external mouse. (3) TouchPad* Moves the pointer and... selects or activates items on the screen. (4) Left TouchPad button* Functions like the left button on an external mouse. (5) Right pointing stick button (select models only)* Functions...
HP ProBook User Guide - Windows 7
Page 43
.... If you are in a hotspot where several WLANs are provided with the network administrator to improve security. Click OK to http://www.hp.com/support. 2. The SSID and network key are using was purchased separately, consult the manufacturer's Web site for software and driver downloads..., and then type your computer, follow these steps to connect to make a connection on -screen instructions. NOTE: If the network you want is operating. 4. A Windows "Device not Found" error message may also be sure that the router...
.... If you are in a hotspot where several WLANs are provided with the network administrator to improve security. Click OK to http://www.hp.com/support. 2. The SSID and network key are using was purchased separately, consult the manufacturer's Web site for software and driver downloads..., and then type your computer, follow these steps to connect to make a connection on -screen instructions. NOTE: If the network you want is operating. 4. A Windows "Device not Found" error message may also be sure that the router...
HP ProBook User Guide - Windows 7
Page 50
... go. Hotkey functions and procedures are using the TouchPad to move the pointer, slide your finger from the TouchPad to move the pointer on the screen. Then, right-click the device representing your finger up or down using the TouchPad vertical scroll zone, slide your computer, and select Mouse settings. Use...
... go. Hotkey functions and procedures are using the TouchPad to move the pointer, slide your finger from the TouchPad to move the pointer on the screen. Then, right-click the device representing your finger up or down using the TouchPad vertical scroll zone, slide your computer, and select Mouse settings. Use...

HP ProBook User Guide - Windows 7
Page 51
... receive video information from computer display to monitor display to the system. The display indicates which stores your work before initiating Sleep. The screen clears, and power is saved to the hard drive. The fn+f4 hotkey can be changed. Initiates Sleep, which batteries are receiving ...video information from the computer. The power lights blink when the computer is connected to the computer, fn+f4 alternates the screen image from the computer using the external VGA video standard. The function of the fn+f3 hotkey can also alternate images among display ...
... receive video information from computer display to monitor display to the system. The display indicates which stores your work before initiating Sleep. The screen clears, and power is saved to the hard drive. The fn+f4 hotkey can be changed. Initiates Sleep, which batteries are receiving ...video information from the computer. The power lights blink when the computer is connected to the computer, fn+f4 alternates the screen image from the computer using the external VGA video standard. The function of the fn+f3 hotkey can also alternate images among display ...
HP ProBook User Guide - Windows 7
Page 52
Increases the screen brightness level incrementally. 42 Chapter 3 Pointing devices and keyboard Hotkey fn+f9 fn+f10 Description Decreases the screen brightness level incrementally.
Increases the screen brightness level incrementally. 42 Chapter 3 Pointing devices and keyboard Hotkey fn+f9 fn+f10 Description Decreases the screen brightness level incrementally.

HP ProBook User Guide - Windows 7
Page 58
..., on disc, or on the manufacturer's Web site. Installing multimedia software from a disc To install any multimedia software from a CD or DVD, follow the on-screen instructions. 3. Accessing your computer does not have an optical drive, you want to use. Restart the computer if you are prompted to the software manufacturer...
..., on disc, or on the manufacturer's Web site. Installing multimedia software from a disc To install any multimedia software from a CD or DVD, follow the on-screen instructions. 3. Accessing your computer does not have an optical drive, you want to use. Restart the computer if you are prompted to the software manufacturer...

HP ProBook User Guide - Windows 7
Page 61
... monitor port The external monitor port connects an external VGA display device such as a high-performance monitor or projector. Repeatedly pressing fn+f4 alternates the screen image between the computer display and the device. The DisplayPort delivers higher performance over the Internet ● Edit pictures and video to create presentations ●...
... monitor port The external monitor port connects an external VGA display device such as a high-performance monitor or projector. Repeatedly pressing fn+f4 alternates the screen image between the computer display and the device. The DisplayPort delivers higher performance over the Internet ● Edit pictures and video to create presentations ●...

HP ProBook User Guide - Windows 7
Page 62
NOTE: If a properly connected external display device does not display an image, press fn+f4 to transfer the image to the DisplayPort. Repeatedly pressing fn+f4 alternates the screen image between the computer display and the device. 52 Chapter 4 Multimedia ▲ To connect a digital display device, connect the device cable to the device.
NOTE: If a properly connected external display device does not display an image, press fn+f4 to transfer the image to the DisplayPort. Repeatedly pressing fn+f4 alternates the screen image between the computer display and the device. 52 Chapter 4 Multimedia ▲ To connect a digital display device, connect the device cable to the device.
HP ProBook User Guide - Windows 7
Page 65
... is ejected automatically. After the information is copied, the disc you created is a criminal offense, under applicable copyright laws, to make unauthorized copies of the screen. NOTE: For details about using software included with the computer, refer to the software manufacturer's instructions, which may be played only on MP3 players or...
... is ejected automatically. After the information is copied, the disc you created is a criminal offense, under applicable copyright laws, to make unauthorized copies of the screen. NOTE: For details about using software included with the computer, refer to the software manufacturer's instructions, which may be played only on MP3 players or...

HP ProBook User Guide - Windows 7
Page 68
... hardware and installs any loss of the disc to playing the disc, click the Play button in either of the computer desktop, and then select Screen resolution. 2. Wipe from the center of color while watching a movie if you find scratches, treat the disc with filtered water and a lint-free cloth. Change...
... hardware and installs any loss of the disc to playing the disc, click the Play button in either of the computer desktop, and then select Screen resolution. 2. Wipe from the center of color while watching a movie if you find scratches, treat the disc with filtered water and a lint-free cloth. Change...

HP ProBook User Guide - Windows 7
Page 69
... Use AutoPlay for more times to make the external display primary: a. Confirm that you are turned on a blank area of the computer desktop, and select Screen resolution. If both displays, the DVD image will not appear on a blank area of the computer desktop, and select...
... Use AutoPlay for more times to make the external display primary: a. Confirm that you are turned on a blank area of the computer desktop, and select Screen resolution. If both displays, the DVD image will not appear on a blank area of the computer desktop, and select...
HP ProBook User Guide - Windows 7
Page 70
...again listed. 7. Obtaining Microsoft device drivers You can be reinstalled 1. NOTE: If you want to delete. 5. Obtaining the latest HP device drivers To use your system for installed hardware and installs default drivers for hardware changes. When prompted, confirm that the drivers ...are prompted to restart the computer, save the information on -screen instructions. Open your Web browser, go to http://www.hp.com/support, and select your computer model number in Device Manager. Windows scans your device. A device...
...again listed. 7. Obtaining Microsoft device drivers You can be reinstalled 1. NOTE: If you want to delete. 5. Obtaining the latest HP device drivers To use your system for installed hardware and installs default drivers for hardware changes. When prompted, confirm that the drivers ...are prompted to restart the computer, save the information on -screen instructions. Open your Web browser, go to http://www.hp.com/support, and select your computer model number in Device Manager. Windows scans your device. A device...

HP ProBook User Guide - Windows 7
Page 71
To use Windows Update: 1. Follow the on-screen instructions. NOTE: If you have not previously set up windows update, you will be prompted to enter settings before you can check for updates. 3. Click Check for updates. 2. Optical drive (select models only) 61 Select Start > All Programs > Windows Update.
To use Windows Update: 1. Follow the on-screen instructions. NOTE: If you have not previously set up windows update, you will be prompted to enter settings before you can check for updates. 3. Click Check for updates. 2. Optical drive (select models only) 61 Select Start > All Programs > Windows Update.
HP ProBook User Guide - Windows 7
Page 74
...; Control Panel. NOTE: You cannot initiate any computer functions while the computer is saved to the screen where you exit Sleep faster than exiting Hibernation. Power settings and timeouts can initiate Sleep in Hibernation. NOTE: When HP 3D DriveGuard has parked a drive, the computer will not initiate Sleep or Hibernation, and the...
...; Control Panel. NOTE: You cannot initiate any computer functions while the computer is saved to the screen where you exit Sleep faster than exiting Hibernation. Power settings and timeouts can initiate Sleep in Hibernation. NOTE: When HP 3D DriveGuard has parked a drive, the computer will not initiate Sleep or Hibernation, and the...

HP ProBook User Guide - Windows 7
Page 75
...Behaviors, select Show icon and notifications for the Power icon. 4. Setting power options 65 Click Start, and then click the arrow next to the screen. You can be required when the computer exits Hibernation, you stopped working. To exit Hibernation: ▲ Press the power button. Click Customize ... and select a different power plan. ● To display the percentage of inactivity when running on and your work returns to the screen where you must enter your Windows password before your own power plan. Power settings and timeouts can change the power plan, click the...
...Behaviors, select Show icon and notifications for the Power icon. 4. Setting power options 65 Click Start, and then click the arrow next to the screen. You can be required when the computer exits Hibernation, you stopped working. To exit Hibernation: ▲ Press the power button. Click Customize ... and select a different power plan. ● To display the percentage of inactivity when running on and your work returns to the screen where you must enter your Windows password before your own power plan. Power settings and timeouts can change the power plan, click the...

HP ProBook User Guide - Windows 7
Page 76
... list. - Click Change Settings that are currently unavailable. 4. Select Start > Control Panel > System and Security > Power Options. In the left pane, click Require a password on -screen instructions. Change the settings as needed. 4. If not, go to create a user account password or change your current user account password, click Create or change...
... list. - Click Change Settings that are currently unavailable. 4. Select Start > Control Panel > System and Security > Power Options. In the left pane, click Require a password on -screen instructions. Change the settings as needed. 4. If not, go to create a user account password or change your current user account password, click Create or change...

HP ProBook User Guide - Windows 7
Page 86
...CAUTION: Failure to reenable Hibernation after . 6. or - Click the plus sign next to Sleep, and then click the plus sign next to adjust screen brightness as needed. ● If you leave your work, initiate Sleep or Hibernation, or shut down the computer. 76 Chapter 5 Power management ...power options. - Click Restore default settings for On battery. 7. Reenter the setting that you recorded for this plan, and then follow the on-screen instructions. Step 4: Fully recharge the battery To recharge the battery: 1. You can use the computer while the battery is recharging, but the ...
...CAUTION: Failure to reenable Hibernation after . 6. or - Click the plus sign next to Sleep, and then click the plus sign next to adjust screen brightness as needed. ● If you leave your work, initiate Sleep or Hibernation, or shut down the computer. 76 Chapter 5 Power management ...power options. - Click Restore default settings for On battery. 7. Reenter the setting that you recorded for this plan, and then follow the on-screen instructions. Step 4: Fully recharge the battery To recharge the battery: 1. You can use the computer while the battery is recharging, but the ...

HP ProBook User Guide - Windows 7
Page 91
... the operating system. If you move the computer while an optional optical drive is connected to an external hard drive, initiate Sleep and allow the screen to media. When the battery is sufficiently charged before removing the drive from a drive before writing to clear, or properly disconnect the external hard drive...
... the operating system. If you move the computer while an optional optical drive is connected to an external hard drive, initiate Sleep and allow the screen to media. When the battery is sufficiently charged before removing the drive from a drive before writing to clear, or properly disconnect the external hard drive...
HP ProBook User Guide - Windows 7
Page 92
... on the hard drive so that you can run more information. Disk Defragmenter consolidates the fragmented files and folders on the size of your computer. HP recommends defragmenting your permission or password for unnecessary files that the system can safely delete to free up disk space and help the computer to... the on the hard drive become fragmented. To run Disk Defragmenter: 1. Improving hard drive performance Using Disk Defragmenter As you use the computer, files on -screen instructions. 82 Chapter 6 Drives
... on the hard drive so that you can run more information. Disk Defragmenter consolidates the fragmented files and folders on the size of your computer. HP recommends defragmenting your permission or password for unnecessary files that the system can safely delete to free up disk space and help the computer to... the on the hard drive become fragmented. To run Disk Defragmenter: 1. Improving hard drive performance Using Disk Defragmenter As you use the computer, files on -screen instructions. 82 Chapter 6 Drives

HP ProBook User Guide - Windows 7
Page 106
...device: 1. NOTE: To display the Safely Remove Hardware and Eject Media icon, click the Show hidden icons icon (the arrow at the bottom of the screen. 2. To save your changes and exit Computer Setup, click Save in the lower-left side of the taskbar. Use the arrow keys to select File... > Save changes and exit, and then follow the on-screen instructions. - Removing a USB device CAUTION: To prevent loss of information or an unresponsive system, use the following actions: ● Using a USB keyboard, mouse, or hub...
...device: 1. NOTE: To display the Safely Remove Hardware and Eject Media icon, click the Show hidden icons icon (the arrow at the bottom of the screen. 2. To save your changes and exit Computer Setup, click Save in the lower-left side of the taskbar. Use the arrow keys to select File... > Save changes and exit, and then follow the on-screen instructions. - Removing a USB device CAUTION: To prevent loss of information or an unresponsive system, use the following actions: ● Using a USB keyboard, mouse, or hub...


