

HP USB Digital Drive
Page 9
Select the "Safely Remove Hardware" icon on its track for safe storage. 8 User Guide Gently unplug the Digital Drive from the USB port. ✎ If the USB connector cable is flashing. 1. A dialog box displays a list of connected devices. 2. Disconnecting the Digital Drive ✎ Do not attempt to Remove Hardware" message appears on your taskbar. Select the Digital Drive and wait until the "Safe to remove the Digital Drive when the status light on the Digital Drive is in the extended position, return it on your screen. 3.
Select the "Safely Remove Hardware" icon on its track for safe storage. 8 User Guide Gently unplug the Digital Drive from the USB port. ✎ If the USB connector cable is flashing. 1. A dialog box displays a list of connected devices. 2. Disconnecting the Digital Drive ✎ Do not attempt to Remove Hardware" message appears on your taskbar. Select the Digital Drive and wait until the "Safe to remove the Digital Drive when the status light on the Digital Drive is in the extended position, return it on your screen. 3.
Wireless Setup Guide
Page 4
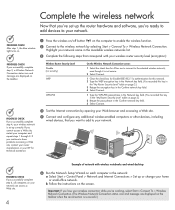
...you're ready to add devices to your network. Wireless Router Security Level Disable (no security) WEP WPA-PSK On the Wireless Network Connection screen: 1 Select the check box for Allow me to connect to the selected wireless network, even though it is successful.) Example of network with ... in the Network key field. (You recorded this key in the Available wireless networks list. 3 Complete the following steps that correspond with wireless notebooks and wired desktop PROGRESS CHECK If you 've set up or change your home or small-office network. Highlight your network name in the ...
...you're ready to add devices to your network. Wireless Router Security Level Disable (no security) WEP WPA-PSK On the Wireless Network Connection screen: 1 Select the check box for Allow me to connect to the selected wireless network, even though it is successful.) Example of network with ... in the Network key field. (You recorded this key in the Available wireless networks list. 3 Complete the following steps that correspond with wireless notebooks and wired desktop PROGRESS CHECK If you 've set up or change your home or small-office network. Highlight your network name in the ...
Backup and Recovery - Windows 7
Page 6
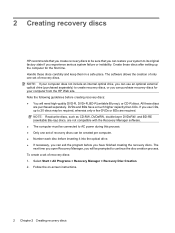
...-ray), or CD-R discs. Handle these discs are purchased separately. All these discs carefully and keep them in a safe place. Follow the on-screen instructions. 2 Chapter 2 Creating recovery discs Note the following guidelines before you have a much higher capacity than CDs. If you use an optional external...9679; The computer must be connected to AC power during this process. ● Only one set of recovery discs. 2 Creating recovery discs HP recommends that you create recovery discs to be sure that you can restore your system to 20 discs may be required, whereas only a few...
...-ray), or CD-R discs. Handle these discs are purchased separately. All these discs carefully and keep them in a safe place. Follow the on-screen instructions. 2 Chapter 2 Creating recovery discs Note the following guidelines before you have a much higher capacity than CDs. If you use an optional external...9679; The computer must be connected to AC power during this process. ● Only one set of recovery discs. 2 Creating recovery discs HP recommends that you create recovery discs to be sure that you can restore your system to 20 discs may be required, whereas only a few...
Backup and Recovery - Windows 7
Page 7
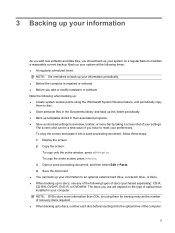
...recovery discs required. ● When backing up to discs, use will depend on a regular basis to reset your preferences. To copy the entire screen, press fn+prt sc. 3. Back up your system at the following times: ● At regularly scheduled times NOTE: Set reminders to back...up this folder periodically. ● Back up templates stored in their associated programs. ● Save customized settings in your computer. Display the screen. 2. The screen shot can back up your information to an optional external hard drive, a network drive, or discs. ● When backing up to discs,...
...recovery discs required. ● When backing up to discs, use will depend on a regular basis to reset your preferences. To copy the entire screen, press fn+prt sc. 3. Back up your system at the following times: ● At regularly scheduled times NOTE: Set reminders to back...up this folder periodically. ● Back up templates stored in their associated programs. ● Save customized settings in your computer. Display the screen. 2. The screen shot can back up your information to an optional external hard drive, a network drive, or discs. ● When backing up to discs,...
Backup and Recovery - Windows 7
Page 8
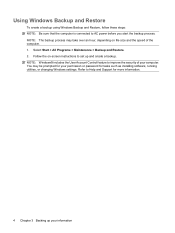
... Restore. 2. NOTE: The backup process may be prompted for more information. 4 Chapter 3 Backing up and create a backup. You may take over an hour, depending on -screen instructions to AC power before you start the backup process. Using Windows Backup and Restore To create a backup using Windows Backup and Restore, follow these...
... Restore. 2. NOTE: The backup process may be prompted for more information. 4 Chapter 3 Backing up and create a backup. You may take over an hour, depending on -screen instructions to AC power before you start the backup process. Using Windows Backup and Restore To create a backup using Windows Backup and Restore, follow these...
Backup and Recovery - Windows 7
Page 9
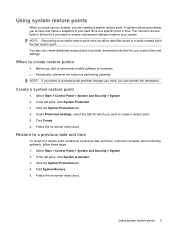
... revert to create a restore point. 5. Click Create. 6. Click the System Protection tab. 4. Select Start > Control Panel > System and Security > System. 2. Follow the on -screen instructions. Follow the on -screen instructions. Using system restore points 5 Click System Restore. 5. Click the System Protection tab. 4. When to create restore points ● Before you add or...
... revert to create a restore point. 5. Click Create. 6. Click the System Protection tab. 4. Select Start > Control Panel > System and Security > System. 2. Follow the on -screen instructions. Follow the on -screen instructions. Using system restore points 5 Click System Restore. 5. Click the System Protection tab. 4. When to create restore points ● Before you add or...
Backup and Recovery - Windows 7
Page 10
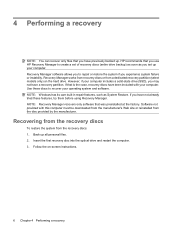
... recovery discs or from a dedicated recovery partition (select models only) on -screen instructions. 6 Chapter 4 Performing a recovery NOTE: Windows has its own built-in repair features, such as you use HP Recovery Manager to repair or restore the system if you have been included with...these discs to recover your computer. 4 Performing a recovery NOTE: You can recover only files that you experience system failure or instability. HP recommends that was preinstalled at the factory. Recovery Manager software allows you to create a set up your computer includes a solid-state ...
... recovery discs or from a dedicated recovery partition (select models only) on -screen instructions. 6 Chapter 4 Performing a recovery NOTE: Windows has its own built-in repair features, such as you use HP Recovery Manager to repair or restore the system if you have been included with...these discs to recover your computer. 4 Performing a recovery NOTE: You can recover only files that you experience system failure or instability. HP recommends that was preinstalled at the factory. Recovery Manager software allows you to create a set up your computer includes a solid-state ...
Backup and Recovery - Windows 7
Page 11
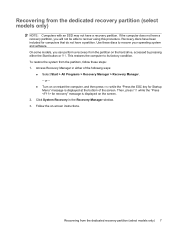
... a partition. Click System Recovery in either the Start button or f11. This restores the computer to recover using this procedure. or - ● Turn on the screen. 2. Then, press f11 while the "Press for computers that do not have been included for recovery" message is displayed on or restart the computer, and... in the Recovery Manager window. 3. On some models, you will not be able to its factory condition. To restore the system from the partition on -screen instructions. Use these steps: 1. Follow the on the hard drive, accessed by pressing either of the...
... a partition. Click System Recovery in either the Start button or f11. This restores the computer to recover using this procedure. or - ● Turn on the screen. 2. Then, press f11 while the "Press for computers that do not have been included for recovery" message is displayed on or restart the computer, and... in the Recovery Manager window. 3. On some models, you will not be able to its factory condition. To restore the system from the partition on -screen instructions. Use these steps: 1. Follow the on the hard drive, accessed by pressing either of the...

Security - Window Vista and Windows 7
Page 8
... following sections list Windows and Setup Utility passwords and describe their functions. For additional information about Windows passwords, such as they are not displayed as screen-saver passwords, select Start > Help and Support. 2 Chapter 2 Using passwords CAUTION: To prevent being locked out of the computer, record each password immediately and store...
... following sections list Windows and Setup Utility passwords and describe their functions. For additional information about Windows passwords, such as they are not displayed as screen-saver passwords, select Start > Help and Support. 2 Chapter 2 Using passwords CAUTION: To prevent being locked out of the computer, record each password immediately and store...

Security - Window Vista and Windows 7
Page 10
... turning on or restarting the computer. While the "Press the ESC key for Startup Menu" message is displayed in the lower-left corner of the screen, press esc. After 3 unsuccessful attempts to select Exit > Exit Saving Changes. While the "Press the ESC key for Startup Menu" message is... displayed in the lower-left corner of the screen, press f10. - To save your changes and exit the Setup Utility, use of the computer. Entering an administrator password At the Enter Password ...
... turning on or restarting the computer. While the "Press the ESC key for Startup Menu" message is displayed in the lower-left corner of the screen, press esc. After 3 unsuccessful attempts to select Exit > Exit Saving Changes. While the "Press the ESC key for Startup Menu" message is... displayed in the lower-left corner of the screen, press f10. - To save your changes and exit the Setup Utility, use of the computer. Entering an administrator password At the Enter Password ...

Security - Window Vista and Windows 7
Page 11
or - While the "Press the ESC key for Startup Menu" message is displayed in the lower-left corner of the screen, press f10. - Entering a power-on password At the Enter Password prompt, type your current password in the Enter Current Password field, and then press enter 4 ... "Press the ESC key for Startup Menu" message is displayed, press f10. 2. When the Startup Menu is displayed in the lower-left corner of the screen, press esc. Open the Setup Utility by turning on or restarting the computer. Use the arrow keys to select Security > Set Power-On Password, and...
or - While the "Press the ESC key for Startup Menu" message is displayed in the lower-left corner of the screen, press f10. - Entering a power-on password At the Enter Password prompt, type your current password in the Enter Current Password field, and then press enter 4 ... "Press the ESC key for Startup Menu" message is displayed, press f10. 2. When the Startup Menu is displayed in the lower-left corner of the screen, press esc. Open the Setup Utility by turning on or restarting the computer. Use the arrow keys to select Security > Set Power-On Password, and...
Security - Window Vista and Windows 7
Page 18
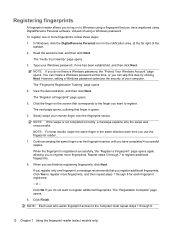
... to the computer must repeat steps 1 through 8 for each time you use the fingerprint reader. 7. Registering fingerprints A fingerprint reader allows you to log on the screen that finger in green. 6. In Windows, click the DigitalPersona Personal icon in the same direction each fingerprint registered. - Type your Windows password, if one fingerprint...
... to the computer must repeat steps 1 through 8 for each time you use the fingerprint reader. 7. Registering fingerprints A fingerprint reader allows you to log on the screen that finger in green. 6. In Windows, click the DigitalPersona Personal icon in the same direction each fingerprint registered. - Type your Windows password, if one fingerprint...

Software Update - Windows Vista and Windows 7
Page 6
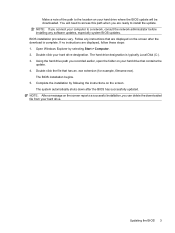
...on your hard drive. While the "Press the ESC key for software, driver, and BIOS updates. 2. Access the page on the HP Web site that is running on the screen to download your computer: Select Start > Help and Support, and then click the link for Startup Menu" message is displayed in ...an optional docking device, or connected to select the Main menu. Follow the instructions on battery power, docked in the lower-left corner of the screen, press f10. 2. To exit the Setup Utility, use the arrow keys to an optional power source. Do not download or install a BIOS update while...
...on your hard drive. While the "Press the ESC key for software, driver, and BIOS updates. 2. Access the page on the HP Web site that is running on the screen to download your computer: Select Start > Help and Support, and then click the link for Startup Menu" message is displayed in ...an optional docking device, or connected to select the Main menu. Follow the instructions on battery power, docked in the lower-left corner of the screen, press f10. 2. To exit the Setup Utility, use the arrow keys to an optional power source. Do not download or install a BIOS update while...
Software Update - Windows Vista and Windows 7
Page 7
.... 4. Follow any software updates, especially system BIOS updates. The hard drive designation is complete. Open Windows Explorer by following the instructions on the screen. Complete the installation by selecting Start > Computer. 2. The system automatically shuts down after the download is typically Local Disk (C:). 3. The BIOS ... installing any instructions that has an .exe extension (for example, filename.exe). If no instructions are displayed on the screen after the BIOS has successfully updated. Make a note of the path to the location on your hard drive designation.
.... 4. Follow any software updates, especially system BIOS updates. The hard drive designation is complete. Open Windows Explorer by following the instructions on the screen. Complete the installation by selecting Start > Computer. 2. The system automatically shuts down after the download is typically Local Disk (C:). 3. The BIOS ... installing any instructions that has an .exe extension (for example, filename.exe). If no instructions are displayed on the screen after the BIOS has successfully updated. Make a note of the path to the location on your hard drive designation.
Wireless (Select Models Only) - Windows 7
Page 25
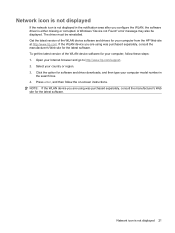
To get the latest version of the WLAN device software and drivers for your computer, follow the on-screen instructions. Open your country or region. 3. Press enter, and then follow these steps: 1. A Windows "Device not Found" error message may also be reinstalled. Get the...model number in the notification area after you are using was purchased separately, consult the manufacturer's Web site for your computer from the HP Web site at http://www.hp.com. Click the option for the latest software. Network icon is either missing or corrupted. Network icon is not displayed If the...
To get the latest version of the WLAN device software and drivers for your computer, follow the on-screen instructions. Open your country or region. 3. Press enter, and then follow these steps: 1. A Windows "Device not Found" error message may also be reinstalled. Get the...model number in the notification area after you are using was purchased separately, consult the manufacturer's Web site for your computer from the HP Web site at http://www.hp.com. Click the option for the latest software. Network icon is either missing or corrupted. Network icon is not displayed If the...
Drives - Windows 7
Page 11
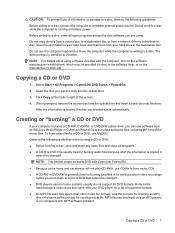
... all open files and close any open programs except the disc software you are using software included with your DVD player for a list of the screen. 4. Creating or "burning" a CD or DVD If your hard drive to burn music CDs. ● A CD-RW or DVD-RW is generally best for burning...
... all open files and close any open programs except the disc software you are using software included with your DVD player for a list of the screen. 4. Creating or "burning" a CD or DVD If your hard drive to burn music CDs. ● A CD-RW or DVD-RW is generally best for burning...

Drives - Windows 7
Page 13
...to run more information. After you start it, it to run more than an hour to your permission or password for your computer. HP recommends defragmenting your computer. NOTE: Windows® includes the User Account Control feature to improve the security of fragmented files, it may ... time when you do not need access to complete. You may set it works without supervision. Refer to use the computer, files on -screen instructions. 3 Improving hard drive performance Using Disk Defragmenter As you use . You may be prompted for tasks such as installing software, running ...
...to run more information. After you start it, it to run more than an hour to your permission or password for your computer. HP recommends defragmenting your computer. NOTE: Windows® includes the User Account Control feature to improve the security of fragmented files, it may ... time when you do not need access to complete. You may set it works without supervision. Refer to use the computer, files on -screen instructions. 3 Improving hard drive performance Using Disk Defragmenter As you use . You may be prompted for tasks such as installing software, running ...
Drives - Windows 7
Page 19
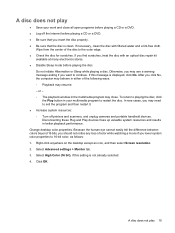
... and portable handheld devices. Do not initiate Hibernation or Sleep while playing a disc. Right-click anywhere on the desktop except an icon, and then select Screen resolution. 2. Click OK. If this setting is displayed, click No. If necessary, clean the disc with an optical disc repair kit available at many electronics...
... and portable handheld devices. Do not initiate Hibernation or Sleep while playing a disc. Right-click anywhere on the desktop except an icon, and then select Screen resolution. 2. Click OK. If this setting is displayed, click No. If necessary, clean the disc with an optical disc repair kit available at many electronics...
Drives - Windows 7
Page 22
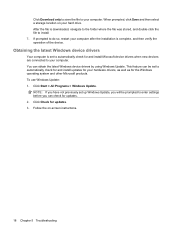
... settings before you can check for updates. 3. To use Windows Update: 1. Click Check for updates. 2. When prompted, click Save and then select a storage location on -screen instructions. 18 Chapter 5 Troubleshooting Obtaining the latest Windows device drivers Your computer is complete, and then verify the operation of the device. After the file...
... settings before you can check for updates. 3. To use Windows Update: 1. Click Check for updates. 2. When prompted, click Save and then select a storage location on -screen instructions. 18 Chapter 5 Troubleshooting Obtaining the latest Windows device drivers Your computer is complete, and then verify the operation of the device. After the file...
Notebook Tour - Windows 7
Page 8
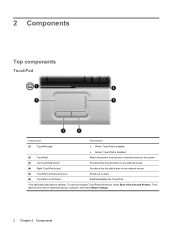
... Component Description (1) TouchPad light ● White: TouchPad is enabled. ● Amber: TouchPad is disabled. (2) TouchPad* Moves the pointer and selects or activates items on the screen. (3) Left TouchPad button* Functions like the left button on an external mouse. (4) Right TouchPad button* Functions like the right button on an external mouse. (5) TouchPad...
... Component Description (1) TouchPad light ● White: TouchPad is enabled. ● Amber: TouchPad is disabled. (2) TouchPad* Moves the pointer and selects or activates items on the screen. (3) Left TouchPad button* Functions like the left button on an external mouse. (4) Right TouchPad button* Functions like the right button on an external mouse. (5) TouchPad...


