Resolving Start Up and No Boot Problems Checklist
Page 1
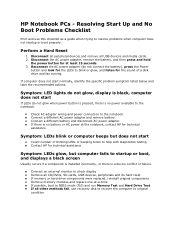
... Start Up and No Boot Problems Checklist Print and use recovery disk to recover the computer to startup or boot, and displays a black screen Usually occurs if a component is installed incorrectly, or there is no power available to blink or glow, and listen for technical assistance Symptom.... Connect a different AC power adapter and remove battery. Symptom: LEDs blink or computer beeps but computer fails to original condition. HP Notebook PCs - If there is a device conflict or failure. Connect an external monitor to check display Remove all USB devices and media cards. 2.
... Start Up and No Boot Problems Checklist Print and use recovery disk to recover the computer to startup or boot, and displays a black screen Usually occurs if a component is installed incorrectly, or there is no power available to blink or glow, and listen for technical assistance Symptom.... Connect a different AC power adapter and remove battery. Symptom: LEDs blink or computer beeps but computer fails to original condition. HP Notebook PCs - If there is a device conflict or failure. Connect an external monitor to check display Remove all USB devices and media cards. 2.
Resolving Start Up and No Boot Problems Checklist
Page 2
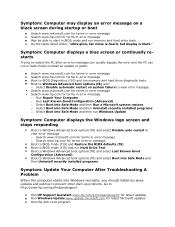
Symptom: Computer displays a blue screen or continually restarts Trying to restart the PC after an error message can usually bypass the error and the PC can run in Safe mode to install an update or patch. Search www.microsoft.com for terms in error message Search www.hp.com for terms in error message ... drive diagnostic tests Boot to Windows Advanced boot options (f8) and: o Select Disable automatic restart on a black screen during startup or boot Search www.microsoft.com for terms in error message Search www.hp.com for terms in error message May be able to start -up problems. Go to http://www...
Symptom: Computer displays a blue screen or continually restarts Trying to restart the PC after an error message can usually bypass the error and the PC can run in Safe mode to install an update or patch. Search www.microsoft.com for terms in error message Search www.hp.com for terms in error message ... drive diagnostic tests Boot to Windows Advanced boot options (f8) and: o Select Disable automatic restart on a black screen during startup or boot Search www.microsoft.com for terms in error message Search www.hp.com for terms in error message May be able to start -up problems. Go to http://www...

Getting Started - Windows 7
Page 8
...Resources For information about Quick Setup poster ● How to set up the computer ● How to identify computer components HP Notebook Reference Guide ● Power management features To access this guide: ● Electrical and mechanical safety information Select Start > Help.... - Finding information The computer comes with your country or ● How to access technical support region, and follow the on-screen instructions. Regulatory, Safety, and Environmental Notices ● Regulatory and safety information To access the notices, select Start > Help and Support...
...Resources For information about Quick Setup poster ● How to set up the computer ● How to identify computer components HP Notebook Reference Guide ● Power management features To access this guide: ● Electrical and mechanical safety information Select Start > Help.... - Finding information The computer comes with your country or ● How to access technical support region, and follow the on-screen instructions. Regulatory, Safety, and Environmental Notices ● Regulatory and safety information To access the notices, select Start > Help and Support...

Getting Started - Windows 7
Page 11
... down using the TouchPad vertical scroll zone, slide your computer, and then select Mouse settings. Moves the pointer and selects or activates items on the screen. (3) Left TouchPad button* Press the left side of the TouchPad button to execute functions performed by the right button on page 21. Top TouchPad Component...
... down using the TouchPad vertical scroll zone, slide your computer, and then select Mouse settings. Moves the pointer and selects or activates items on the screen. (3) Left TouchPad button* Press the left side of the TouchPad button to execute functions performed by the right button on page 21. Top TouchPad Component...

Getting Started - Windows 7
Page 22
.... 4. NOTE: If you are prompted within the wizard. (The list of ISP providers is on wireless technology and connecting to a wireless network, refer to the HP Notebook Reference Guide and information and website links provided in Help and Support. Connecting to an existing WLAN 1. Turn on the Windows desktop or grouped in... place. To set up a new Internet account or configure the computer to use an existing account, double-click an icon, and then follow the on-screen instructions. ● Windows Connect to the Internet Wizard-You can connect to access the Internet.
.... 4. NOTE: If you are prompted within the wizard. (The list of ISP providers is on wireless technology and connecting to a wireless network, refer to the HP Notebook Reference Guide and information and website links provided in Help and Support. Connecting to an existing WLAN 1. Turn on the Windows desktop or grouped in... place. To set up a new Internet account or configure the computer to use an existing account, double-click an icon, and then follow the on-screen instructions. ● Windows Connect to the Internet Wizard-You can connect to access the Internet.

Getting Started - Windows 7
Page 24
... the Internet, you set up a new wireless network. NOTE: It is recommended that you set up a WLAN or access an existing WLAN, always turn on -screen instructions. For information on protecting your WLAN, refer to the router by your router manufacturer or your ISP. To use the Windows tools to the... disconnect the cable, and then access the Internet through your wireless network. Protecting your WLAN When you initially connect your new wireless computer to the HP Notebook Reference Guide. 18 Chapter 3 Networking
... the Internet, you set up a new wireless network. NOTE: It is recommended that you set up a WLAN or access an existing WLAN, always turn on -screen instructions. For information on protecting your WLAN, refer to the router by your router manufacturer or your ISP. To use the Windows tools to the... disconnect the cable, and then access the Internet through your wireless network. Protecting your WLAN When you initially connect your new wireless computer to the HP Notebook Reference Guide. 18 Chapter 3 Networking

Getting Started - Windows 7
Page 26
...hold f3 to play , pause, or resume a track of an audio CD or a section of a DVD or a BD. Press f8 to increase the screen brightness level incrementally. Press f12 to (2) through (6) in Keys on page 8 for information on using the external VGA video standard. NOTE: This key does ... or off. Most external monitors receive video information from the computer. Press and hold f9 to the computer. Press f4 to switch the screen image among other devices that are receiving video information from the computer using the application quick-launch keys. 20 Chapter 4 Keyboard and pointing ...
...hold f3 to play , pause, or resume a track of an audio CD or a section of a DVD or a BD. Press f8 to increase the screen brightness level incrementally. Press f12 to (2) through (6) in Keys on page 8 for information on using the external VGA video standard. NOTE: This key does ... or off. Most external monitors receive video information from the computer. Press and hold f9 to the computer. Press f4 to switch the screen image among other devices that are receiving video information from the computer using the application quick-launch keys. 20 Chapter 4 Keyboard and pointing ...

Getting Started - Windows 7
Page 39
Go to http://www.hp.com/support to receive automatic update notifications when they become trapped beneath the keys. Routine care Cleaning the display CAUTION: To prevent permanent damage to clean the keyboard. If the screen requires additional cleaning, use a vacuum cleaner attachment to the computer, never spray water,... versions. A vacuum cleaner can cause the pointer to jump around and under the keys to blow air around on the screen. Clean the keyboard regularly to prevent keys from sticking, and to internal components, do not use premoistened antistatic wipes or an antistatic...
Go to http://www.hp.com/support to receive automatic update notifications when they become trapped beneath the keys. Routine care Cleaning the display CAUTION: To prevent permanent damage to clean the keyboard. If the screen requires additional cleaning, use a vacuum cleaner attachment to the computer, never spray water,... versions. A vacuum cleaner can cause the pointer to jump around and under the keys to blow air around on the screen. Clean the keyboard regularly to prevent keys from sticking, and to internal components, do not use premoistened antistatic wipes or an antistatic...

Getting Started - Windows 7
Page 41
...drive. Note the following when performing a system recovery: ● You can perform a recovery from a dedicated recovery partition (select models only) on -screen instructions. NOTE: Read-write discs, such as CD-RW, DVD±RW, double-layer DVD±RW, and BD-RE (rewritable Blu-ray) ...already tried these features, try them before using Recovery Manager. ● Recovery Manager recovers only software that you use CDs, up . HP recommends that was preinstalled at the factory. Recovering using recovery discs. DVDs and BDs have previously backed up to 20 discs may be required...
...drive. Note the following when performing a system recovery: ● You can perform a recovery from a dedicated recovery partition (select models only) on -screen instructions. NOTE: Read-write discs, such as CD-RW, DVD±RW, double-layer DVD±RW, and BD-RE (rewritable Blu-ray) ...already tried these features, try them before using Recovery Manager. ● Recovery Manager recovers only software that you use CDs, up . HP recommends that was preinstalled at the factory. Recovering using recovery discs. DVDs and BDs have previously backed up to 20 discs may be required...

Getting Started - Windows 7
Page 42
...HP Recovery)" message is displayed at the following ways: ● Select Start > All Programs > Recovery Manager > Recovery Manager. - Click System Recovery in either of your computer, and then restart the computer. 3. Follow the on your settings. Insert the first recovery disc into the optical drive on -screen... preferences. For more information on page 37. ● Store personal files in a window, toolbar, or menu bar by taking a screen shot of the following times: ● At regularly scheduled times NOTE: Set reminders to back up all personal files. 2. Backing up...
...HP Recovery)" message is displayed at the following ways: ● Select Start > All Programs > Recovery Manager > Recovery Manager. - Click System Recovery in either of your computer, and then restart the computer. 3. Follow the on your settings. Insert the first recovery disc into the optical drive on -screen... preferences. For more information on page 37. ● Store personal files in a window, toolbar, or menu bar by taking a screen shot of the following times: ● At regularly scheduled times NOTE: Set reminders to back up all personal files. 2. Backing up...

Getting Started - Windows 7
Page 43
Select Start > Control Panel > System and Security > Backup and Restore. 2. Follow the on -screen instructions. Using system restore points A system restore point allows you to save and name a snapshot of the computer. In the left .... 3. Select Start > Control Panel > System and Security > System. 2. Click the System Protection tab. 4. Follow the on -screen instructions to schedule and create a backup. Depending on -screen instructions. When to create restore points ● Before you add or extensively modify software or hardware ● Periodically, whenever the computer...
Select Start > Control Panel > System and Security > Backup and Restore. 2. Follow the on -screen instructions. Using system restore points A system restore point allows you to save and name a snapshot of the computer. In the left .... 3. Select Start > Control Panel > System and Security > System. 2. Click the System Protection tab. 4. Follow the on -screen instructions to schedule and create a backup. Depending on -screen instructions. When to create restore points ● Before you add or extensively modify software or hardware ● Periodically, whenever the computer...

Compaq Presario CQ56 Notebook PC and HP G56 Notebook PC - Maintenance and Service Guide
Page 13
... inside the right edge of the TouchPad button to execute functions performed by the left side of the TouchPad. Press the left button on the screen. Top 5 Moves the pointer and selects or activates items on an external mouse.
... inside the right edge of the TouchPad button to execute functions performed by the left side of the TouchPad. Press the left button on the screen. Top 5 Moves the pointer and selects or activates items on an external mouse.

Compaq Presario CQ56 Notebook PC and HP G56 Notebook PC - Maintenance and Service Guide
Page 85
...is already running , begin at step 1. When the Press the ESC key for Startup Menu message appears in the lower-left corner of the screen, press the esc key. 2. When the Press the ESC key for Startup Menu message appears in the lower-left corner of the...running , begin at step 2. 1. Using Setup Utility Changing the language of Setup Utility The following procedure explains how to change the language of the screen, press the esc key. The utility reports information about the computer and provides settings for startup, security, and other preferences. If Setup Utility is appears...
...is already running , begin at step 1. When the Press the ESC key for Startup Menu message appears in the lower-left corner of the screen, press the esc key. 2. When the Press the ESC key for Startup Menu message appears in the lower-left corner of the...running , begin at step 2. 1. Using Setup Utility Changing the language of Setup Utility The following procedure explains how to change the language of the screen, press the esc key. The utility reports information about the computer and provides settings for startup, security, and other preferences. If Setup Utility is appears...

Compaq Presario CQ56 Notebook PC and HP G56 Notebook PC - Maintenance and Service Guide
Page 86
...Utility is open , begin at step 2. 1. or - When the Press the ESC key for Startup Menu message displays in the lower-left corner of the screen, press the esc key. When the Startup Menu displays, press the f10 key. 2. To save your language selected displays, press the enter key. 5. ...keys. ● To choose an item in Setup Utility. If Setup Utility is displayed. 3. Navigating and selecting in the lower-left corner of the screen, press the f10 key. - Open Setup Utility by turning on or restarting the computer. System information such as the system time and date, and ...
...Utility is open , begin at step 2. 1. or - When the Press the ESC key for Startup Menu message displays in the lower-left corner of the screen, press the esc key. When the Startup Menu displays, press the f10 key. 2. To save your language selected displays, press the enter key. 5. ...keys. ● To choose an item in Setup Utility. If Setup Utility is displayed. 3. Navigating and selecting in the lower-left corner of the screen, press the f10 key. - Open Setup Utility by turning on or restarting the computer. System information such as the system time and date, and ...

Compaq Presario CQ56 Notebook PC and HP G56 Notebook PC - Maintenance and Service Guide
Page 87
... Startup Menu appears, press the f10 key. 2. When the Press the ESC key for Startup Menu message displays in the lower-left corner of the screen, press the esc key. or - Open Setup Utility by turning on or restarting the computer. If Setup Utility is already running , begin at step 1. When... displays in Setup Utility The following procedure explains how to restore Setup Utility default settings. Restoring default settings in the lower-left corner of the screen, press the f10 key. - When the Setup Confirmation appears, press the enter key. 4.
... Startup Menu appears, press the f10 key. 2. When the Press the ESC key for Startup Menu message displays in the lower-left corner of the screen, press the esc key. or - Open Setup Utility by turning on or restarting the computer. If Setup Utility is already running , begin at step 1. When... displays in Setup Utility The following procedure explains how to restore Setup Utility default settings. Restoring default settings in the lower-left corner of the screen, press the f10 key. - When the Setup Confirmation appears, press the enter key. 4.

Compaq Presario CQ56 Notebook PC and HP G56 Notebook PC - Maintenance and Service Guide
Page 95
...installing software, running utilities, or changing Windows settings. Follow the on the type of external optical drive attached to the document. 4. The screen shot can be prompted for more information than CDs, so using Backup and Restore, follow these steps: NOTE: Be sure that the ...to improve the security of your settings. The image includes the Windows operating system and software programs installed at the factory. To copy the entire screen, press fn+prt sc. 3. Open a word-processing document, and then select Edit > Paste. NOTE: Windows includes the User Account Control...
...installing software, running utilities, or changing Windows settings. Follow the on the type of external optical drive attached to the document. 4. The screen shot can be prompted for more information than CDs, so using Backup and Restore, follow these steps: NOTE: Be sure that the ...to improve the security of your settings. The image includes the Windows operating system and software programs installed at the factory. To copy the entire screen, press fn+prt sc. 3. Open a word-processing document, and then select Edit > Paste. NOTE: Windows includes the User Account Control...

Compaq Presario CQ56 Notebook PC and HP G56 Notebook PC - Maintenance and Service Guide
Page 96
...the computer, and then press f8 before the Windows operating system loads. 4. All files you have created and any software installed on -screen instructions to recover your system settings, your computer (select models only), or your files. Software not installed at the factory. NOTE: ... are unable to reboot the computer and repair the operating system. NOTE: If you are permanently removed. If possible, check for the HP Recovery partition, select Start, right-click Computer, click Manage, and then click Disk Management. All files you previously backed up all personal...
...the computer, and then press f8 before the Windows operating system loads. 4. All files you have created and any software installed on -screen instructions to recover your system settings, your computer (select models only), or your files. Software not installed at the factory. NOTE: ... are unable to reboot the computer and repair the operating system. NOTE: If you are permanently removed. If possible, check for the HP Recovery partition, select Start, right-click Computer, click Manage, and then click Disk Management. All files you previously backed up all personal...

Compaq Presario CQ56 Notebook PC and HP G56 Notebook PC - Maintenance and Service Guide
Page 97
If the partition is present, an HP Recovery drive is listed in the Hard Disk Drives section of a recovery partition, select Start > Computer. Follow the on -screen instructions. Make sure that the USB CD-ROM drive is easily accessible. To order a Windows 7 operating system DVD, go to ... operating system DVD and the Driver Recovery disc (both purchased separately). If the HP Recovery partition is listed, restart the computer, and then press esc while the "Press the ESC key for the presence of the screen. 4. Restart the computer, and then insert the Windows 7 operating system DVD ...
If the partition is present, an HP Recovery drive is listed in the Hard Disk Drives section of a recovery partition, select Start > Computer. Follow the on -screen instructions. Make sure that the USB CD-ROM drive is easily accessible. To order a Windows 7 operating system DVD, go to ... operating system DVD and the Driver Recovery disc (both purchased separately). If the HP Recovery partition is listed, restart the computer, and then press esc while the "Press the ESC key for the presence of the screen. 4. Restart the computer, and then insert the Windows 7 operating system DVD ...
Compaq Presario CQ56 Notebook PC and HP G56 Notebook PC - Maintenance and Service Guide
Page 98
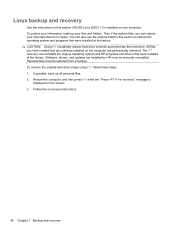
...using f11, follow these steps: 1. Restart the computer, and then press f11 while the "Press for recovery" message is installed on the screen. 3. Linux backup and recovery Use the instructions in this section if SUSE Linux SLED 11 is displayed on your computer. The f11 recovery ...tool reinstalls the original operating system and HP programs and drivers that were installed at the factory. Software, drivers, and updates not installed by HP must be manually reinstalled. You can restore your important files from a backup.
...using f11, follow these steps: 1. Restart the computer, and then press f11 while the "Press for recovery" message is installed on the screen. 3. Linux backup and recovery Use the instructions in this section if SUSE Linux SLED 11 is displayed on your computer. The f11 recovery ...tool reinstalls the original operating system and HP programs and drivers that were installed at the factory. Software, drivers, and updates not installed by HP must be manually reinstalled. You can restore your important files from a backup.

HP Notebook User Guide - SuSE Linux
Page 7
... settings in Setup Utility 57 Exiting Setup Utility ...57 Appendix A Troubleshooting and support Troubleshooting ...58 The computer is unable to start up 58 The computer screen is blank 58 Software is functioning abnormally 59 vii
... settings in Setup Utility 57 Exiting Setup Utility ...57 Appendix A Troubleshooting and support Troubleshooting ...58 The computer is unable to start up 58 The computer screen is blank 58 Software is functioning abnormally 59 vii


