Reference Guide
Page 6
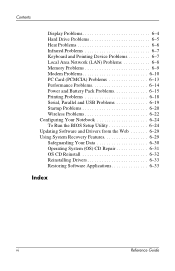
... Problems 6-6 Infrared Problems 6-7 Keyboard and Pointing Device Problems 6-7 Local Area Network (LAN) Problems 6-8 Memory Problems 6-9 Modem Problems 6-10 PC Card (PCMCIA) Problems 6-13 Performance Problems 6-14 Power and Battery Pack Problems 6-15 Printing Problems 6-18 Serial, Parallel and USB Problems ...6-19 Startup Problems 6-20 Wireless Problems 6-22 Configuring Your Notebook 6-24 To Run the BIOS Setup Utility 6-24 Updating Software and Drivers from the Web 6-29 Using System Recovery Features 6-29 Safeguarding Your Data 6-30 Operating ...
... Problems 6-6 Infrared Problems 6-7 Keyboard and Pointing Device Problems 6-7 Local Area Network (LAN) Problems 6-8 Memory Problems 6-9 Modem Problems 6-10 PC Card (PCMCIA) Problems 6-13 Performance Problems 6-14 Power and Battery Pack Problems 6-15 Printing Problems 6-18 Serial, Parallel and USB Problems ...6-19 Startup Problems 6-20 Wireless Problems 6-22 Configuring Your Notebook 6-24 To Run the BIOS Setup Utility 6-24 Updating Software and Drivers from the Web 6-29 Using System Recovery Features 6-29 Safeguarding Your Data 6-30 Operating ...
Reference Guide
Page 56
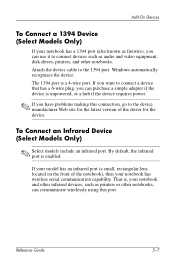
... Models Only) ✎ Select models include an infrared port. By default, the infrared port is a 4-wire port. Reference Guide 5-7 If your notebook has wireless serial communication capability. That is unpowered, or a hub if the device requires power. ✎ If you can communicate wirelessly using this...the 1394 port. Attach the device cable to the device manufacturer Web site for the latest version of the notebook), then your model has an infrared port (a small, rectangular lens located on the front of the driver for the device. Windows automatically recognizes the device.
... Models Only) ✎ Select models include an infrared port. By default, the infrared port is a 4-wire port. Reference Guide 5-7 If your notebook has wireless serial communication capability. That is unpowered, or a hub if the device requires power. ✎ If you can communicate wirelessly using this...the 1394 port. Attach the device cable to the device manufacturer Web site for the latest version of the notebook), then your model has an infrared port (a small, rectangular lens located on the front of the driver for the device. Windows automatically recognizes the device.

Reference Guide
Page 81
...Help and Support. If you are using such a printer, try selecting a compatible printer driver for a 300-dpi printer. If an Infrared Printer Does Not Print ■ Make...; Make sure you are using the Print troubleshooter in Windows Help. If the Left Edge of the notebook.) The ports should be able to solve most printing problems by using the correct printer cable or cable... adapter, and that the ports face each other as squarely as possible. (The notebook infrared port is located on and has paper in it . ■ Check for printer errors. Troubleshooting ...
...Help and Support. If you are using such a printer, try selecting a compatible printer driver for a 300-dpi printer. If an Infrared Printer Does Not Print ■ Make...; Make sure you are using the Print troubleshooter in Windows Help. If the Left Edge of the notebook.) The ports should be able to solve most printing problems by using the correct printer cable or cable... adapter, and that the ports face each other as squarely as possible. (The notebook infrared port is located on and has paper in it . ■ Check for printer errors. Troubleshooting ...
Reference Guide
Page 83
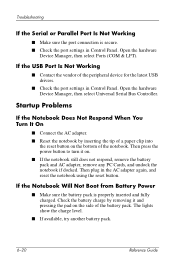
... does not respond, remove the battery pack and AC adapter, remove any PC Cards, and undock the notebook if docked. If the USB Port Is Not Working ■ Contact the vendor of the peripheral device for the latest USB drivers. ■ Check the port settings in Control Panel. Then plug in the AC... adapter again, and reset the notebook using the reset button. Check the battery charge by inserting the tip of a paper clip into...
... does not respond, remove the battery pack and AC adapter, remove any PC Cards, and undock the notebook if docked. If the USB Port Is Not Working ■ Contact the vendor of the peripheral device for the latest USB drivers. ■ Check the port settings in Control Panel. Then plug in the AC... adapter again, and reset the notebook using the reset button. Check the battery charge by inserting the tip of a paper clip into...

Reference Guide
Page 84
...using a USB diskette drive, use the BIOS Setup utility Boot menu to Resume After Entering Standby The notebook can cause a long delay at startup because DHCP is enabled. If the Notebook Takes a Long Time to make sure Legacy USB Support is enabled. Reference Guide 6-21 Contact your ...to a TCP/IP network with no DHCP server. While the operating system is loading drivers and checking hardware and network connections, you are connected to resume if it has a network card installed. If your notebook also has a built-in this guide for directions. ■ If you will appear....
...using a USB diskette drive, use the BIOS Setup utility Boot menu to Resume After Entering Standby The notebook can cause a long delay at startup because DHCP is enabled. If the Notebook Takes a Long Time to make sure Legacy USB Support is enabled. Reference Guide 6-21 Contact your ...to a TCP/IP network with no DHCP server. While the operating system is loading drivers and checking hardware and network connections, you are connected to resume if it has a network card installed. If your notebook also has a built-in this guide for directions. ■ If you will appear....

Reference Guide
Page 92
... Drivers from the Web Software and driver updates for your notebook without losing personal data. The OS CD also enables reinstallation of the operating system software provided with the notebook. System Restore and OS CDs (operating system CDs) enable you to recover optimal notebook ...best results, attempt to recover or repair your notebook are available for recovering optimal system functionality. For more information, visit the Web site at http://www.hp.com/support. Using System Recovery Features ✎ The notebook system recovery process provides several options for download....
... Drivers from the Web Software and driver updates for your notebook without losing personal data. The OS CD also enables reinstallation of the operating system software provided with the notebook. System Restore and OS CDs (operating system CDs) enable you to recover optimal notebook ...best results, attempt to recover or repair your notebook are available for recovering optimal system functionality. For more information, visit the Web site at http://www.hp.com/support. Using System Recovery Features ✎ The notebook system recovery process provides several options for download....
Reference Guide
Page 96
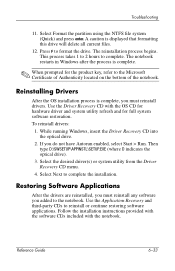
... complete. ✎ When prompted for full system software restoration. Use the Driver Recovery CD with the notebook. To reinstall drivers: 1. Then type D:\SWSETUP\APPINSTL\SETUP.EXE (where D indicates the optical drive). 3. Reinstalling Drivers After the OS installation process is complete, you do not have Autorun enabled... included with the OS CD for hardware driver and system utility refresh and for the product key, refer to the notebook. Select the desired driver(s) or system utility from the Driver Recovery CD menu. 4. The notebook restarts in Windows after the process is ...
... complete. ✎ When prompted for full system software restoration. Use the Driver Recovery CD with the notebook. To reinstall drivers: 1. Then type D:\SWSETUP\APPINSTL\SETUP.EXE (where D indicates the optical drive). 3. Reinstalling Drivers After the OS installation process is complete, you do not have Autorun enabled... included with the OS CD for hardware driver and system utility refresh and for the product key, refer to the notebook. Select the desired driver(s) or system utility from the Driver Recovery CD menu. 4. The notebook restarts in Windows after the process is ...
Reference Guide
Page 98
...CDs 2-12 inserting CD 2-10 location 1-2 removing CD 2-10 troubleshooting 6-3 changing the boot device 2-3 cleaning the notebook 2-17 Click buttons 1-2 components back panel 1-3 bottom panel 1-4 front panel 1-2 keyboard status lights 1-2 left panel 1-3 right panel 1-2 status ...1-3 display adjusting brightness 2-6 adjusting settings 5-5 extending the life 2-17 switching to external monitor 5-5 troubleshooting 6-4 using dual display mode 5-6 drivers reinstalling 6-33 DVD drive creating data disc 2-12 creating movie disc 2-12 inserting DVD 2-10 location 1-2 playing movies 2-11 removing DVD ...
...CDs 2-12 inserting CD 2-10 location 1-2 removing CD 2-10 troubleshooting 6-3 changing the boot device 2-3 cleaning the notebook 2-17 Click buttons 1-2 components back panel 1-3 bottom panel 1-4 front panel 1-2 keyboard status lights 1-2 left panel 1-3 right panel 1-2 status ...1-3 display adjusting brightness 2-6 adjusting settings 5-5 extending the life 2-17 switching to external monitor 5-5 troubleshooting 6-4 using dual display mode 5-6 drivers reinstalling 6-33 DVD drive creating data disc 2-12 creating movie disc 2-12 inserting DVD 2-10 location 1-2 playing movies 2-11 removing DVD ...


