
Maintenance and Service Guide
Page 3
......vii Product Information...1-1 Features ...1-8 Operation...1-14 Specifications ...1-18 Internal Design...1-24 Removal and Replacement 2-1 Disassembly Flowchart ...2-3 Removing the Battery ...2-4 Removing an SDRAM Module...2-5 Removing the Wireless LAN Mini PCI Card 2-7 Removing the Hard Disk Drive...2-9 Recovering the Factory Software...2-11 Replacing Small Parts ...2-12 Removing the Keyboard Cover...2-13 Removing the Speaker Assembly ...2-15...
......vii Product Information...1-1 Features ...1-8 Operation...1-14 Specifications ...1-18 Internal Design...1-24 Removal and Replacement 2-1 Disassembly Flowchart ...2-3 Removing the Battery ...2-4 Removing an SDRAM Module...2-5 Removing the Wireless LAN Mini PCI Card 2-7 Removing the Hard Disk Drive...2-9 Recovering the Factory Software...2-11 Replacing Small Parts ...2-12 Removing the Keyboard Cover...2-13 Removing the Speaker Assembly ...2-15...
Maintenance and Service Guide
Page 4
... Removing the RJ11/1394 Connector Module 2-49 Figure 2-34. Replaceable Module Diagram 1-24 Figure 2-1. Removing the Hard Disk Drive 2-9 Figure 2-8. Removing the Audio PCA ...2-39 Figure 2-26. Removing the Hard Disk Drive Guide 2-53 iv Service Manual Removing the Switchboard PCA 2-19...Removing the Mini PCI Card 2-7 Figure 2-6. Removing the CD/DVD Drive 2-22 Figure 2-17. Removing the Top Case...2-27 Figure 2-19. Removing the I/R PCA...2-37 Figure 2-25. Resetting the Notebook ...1-17 Figure 1-8. Disassembly Flow...2-3 Figure 2-2. Removing the Speaker Assembly...
... Removing the RJ11/1394 Connector Module 2-49 Figure 2-34. Replaceable Module Diagram 1-24 Figure 2-1. Removing the Hard Disk Drive 2-9 Figure 2-8. Removing the Audio PCA ...2-39 Figure 2-26. Removing the Hard Disk Drive Guide 2-53 iv Service Manual Removing the Switchboard PCA 2-19...Removing the Mini PCI Card 2-7 Figure 2-6. Removing the CD/DVD Drive 2-22 Figure 2-17. Removing the Top Case...2-27 Figure 2-19. Removing the I/R PCA...2-37 Figure 2-25. Resetting the Notebook ...1-17 Figure 1-8. Disassembly Flow...2-3 Figure 2-2. Removing the Speaker Assembly...
Maintenance and Service Guide
Page 31
... (page 2-16) • Door, Mini PCI (page 2-7) • Door, SDRAM (page 2-5) Doors, PCMCIA (page 2-60) Drive, CD/DVD (page 2-20) Drive, floppy (page 2-32) • Drive, hard disk (page 2-9) • Feet, rubber (page 2-12) Heat sink (with fan) (page 2-40) • Keyboard (page...: Reassembly steps are displayed throughout this chapter to remove and replace the notebook's components and assemblies. Reassembly notes are user-replaceable. Service Manual Removal and Replacement 2-1 Table 2-1. 2 Removal and Replacement This chapter tells you install them. The items marked by...
... (page 2-16) • Door, Mini PCI (page 2-7) • Door, SDRAM (page 2-5) Doors, PCMCIA (page 2-60) Drive, CD/DVD (page 2-20) Drive, floppy (page 2-32) • Drive, hard disk (page 2-9) • Feet, rubber (page 2-12) Heat sink (with fan) (page 2-40) • Keyboard (page...: Reassembly steps are displayed throughout this chapter to remove and replace the notebook's components and assemblies. Reassembly notes are user-replaceable. Service Manual Removal and Replacement 2-1 Table 2-1. 2 Removal and Replacement This chapter tells you install them. The items marked by...
Maintenance and Service Guide
Page 39
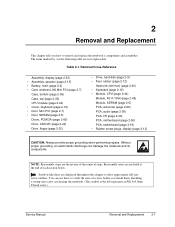
... then remove the battery. 2. On the bottom of the notebook, remove the hard disk drive rubber screw plugs and M2.5×6.0mm screws. (The number of the notebook. Removing the Hard Disk Drive (User-Replaceable) Required Equipment 1 Phillips screwdriver Removal Procedure NOTE: If you are installing a new hard disk drive, load the factory software and operating system on the...
... then remove the battery. 2. On the bottom of the notebook, remove the hard disk drive rubber screw plugs and M2.5×6.0mm screws. (The number of the notebook. Removing the Hard Disk Drive (User-Replaceable) Required Equipment 1 Phillips screwdriver Removal Procedure NOTE: If you are installing a new hard disk drive, load the factory software and operating system on the...
Maintenance and Service Guide
Page 40
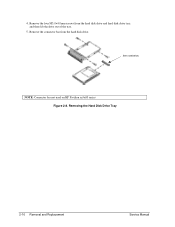
See note below NOTE: Connector bar not used on HP Pavilion ze5x00 series Figure 2-8. Removing the Hard Disk Drive Tray 2-10 Removal and Replacement Service Manual Remove the four M3.0×4.0mm screws from the hard disk drive. Remove the connector bar from the hard disk drive and hard disk drive tray, and then lift the drive out of the tray. 5. 4.
See note below NOTE: Connector bar not used on HP Pavilion ze5x00 series Figure 2-8. Removing the Hard Disk Drive Tray 2-10 Removal and Replacement Service Manual Remove the four M3.0×4.0mm screws from the hard disk drive. Remove the connector bar from the hard disk drive and hard disk drive tray, and then lift the drive out of the tray. 5. 4.
Maintenance and Service Guide
Page 41
... that appear. 8. select Advanced and then select to the notebook. 2. Then type D:\SWSETUP\APPINSTL\SETUP.EXE (assuming "D:" is running, replace the OS CD with the Driver Recovery CD. If the hard disk is partitioned into the notebook's CD/DVD drive. Connect the AC adapter to restore only the C partition.... 7. When the HP logo appears, press esc to select the CD/DVD drive as the first boot...
... that appear. 8. select Advanced and then select to the notebook. 2. Then type D:\SWSETUP\APPINSTL\SETUP.EXE (assuming "D:" is running, replace the OS CD with the Driver Recovery CD. If the hard disk is partitioned into the notebook's CD/DVD drive. Connect the AC adapter to restore only the C partition.... 7. When the HP logo appears, press esc to select the CD/DVD drive as the first boot...
Maintenance and Service Guide
Page 54
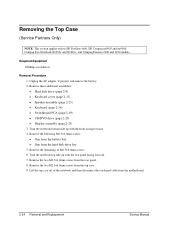
...Switchboard PCA (page 2-19) • CD/DVD drive (page 2-20) • Display assembly (page 2-23) 3. Remove the two M2.5×6.0mm screws from the motherboard. 2-24 Removal and Replacement Service Manual Lift the top case off of the notebook and then disconnect the touch pad cable from the...the hard disk drive bay 5. Remove the following M2.5×4.0mm screws: • One from the battery bay • One from the rear panel. 8. Removing the Top Case (Service Partners Only) NOTE: This section applies only to HP Pavilion 4x00, HP Compaq nx9005 and nx9000, Compaq Evo Notebook N1050v ...
...Switchboard PCA (page 2-19) • CD/DVD drive (page 2-20) • Display assembly (page 2-23) 3. Remove the two M2.5×6.0mm screws from the motherboard. 2-24 Removal and Replacement Service Manual Lift the top case off of the notebook and then disconnect the touch pad cable from the...the hard disk drive bay 5. Remove the following M2.5×4.0mm screws: • One from the battery bay • One from the rear panel. 8. Removing the Top Case (Service Partners Only) NOTE: This section applies only to HP Pavilion 4x00, HP Compaq nx9005 and nx9000, Compaq Evo Notebook N1050v ...
Maintenance and Service Guide
Page 56
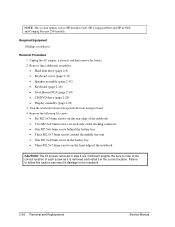
...Hard disk drive (page 2-9) • Keyboard cover (page 2-13) • Speaker assembly (page 2-15) • Keyboard (page 2-16) • Switchboard PCA (page 2-19) • CD/DVD drive (page 2-20) • Display assembly (page 2-23) 3. Remove the following 16 screws: • Six M2.5×7.0mm screws on the rear edge of the notebook...location of the notebook CAUTION: The 16 screws removed in damage to the notebook. 2-26 Removal and Replacement Service Manual Required Equipment 1 Phillips screwdriver Removal Procedure 1. Failure to HP Pavilion 5x00, HP Compaq nx9010 and HP nx9008, and ...
...Hard disk drive (page 2-9) • Keyboard cover (page 2-13) • Speaker assembly (page 2-15) • Keyboard (page 2-16) • Switchboard PCA (page 2-19) • CD/DVD drive (page 2-20) • Display assembly (page 2-23) 3. Remove the following 16 screws: • Six M2.5×7.0mm screws on the rear edge of the notebook...location of the notebook CAUTION: The 16 screws removed in damage to the notebook. 2-26 Removal and Replacement Service Manual Required Equipment 1 Phillips screwdriver Removal Procedure 1. Failure to HP Pavilion 5x00, HP Compaq nx9010 and HP nx9008, and ...
Maintenance and Service Guide
Page 59
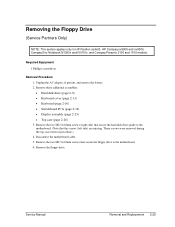
...battery. 2. Remove the two M2.5×4.0mm screws that secure the floppy drive to the motherboard. (Note that secure the hard disk drive guide to the motherboard. 6. Remove these additional assemblies: • Hard disk drive (page 2-9) • Keyboard cover (page 2-13) • Keyboard (... 1 Phillips screwdriver Removal Procedure 1. Service Manual Removal and Replacement 2-29 Removing the Floppy Drive (Service Partners Only) NOTE: This section applies only to HP Pavilion ze4x00, HP Compaq nx9005 and nx9000, Compaq Evo Notebook N1050v and N1010v, and Compaq Presario 2100 and 1100 models...
...battery. 2. Remove the two M2.5×4.0mm screws that secure the floppy drive to the motherboard. (Note that secure the hard disk drive guide to the motherboard. 6. Remove these additional assemblies: • Hard disk drive (page 2-9) • Keyboard cover (page 2-13) • Keyboard (... 1 Phillips screwdriver Removal Procedure 1. Service Manual Removal and Replacement 2-29 Removing the Floppy Drive (Service Partners Only) NOTE: This section applies only to HP Pavilion ze4x00, HP Compaq nx9005 and nx9000, Compaq Evo Notebook N1050v and N1010v, and Compaq Presario 2100 and 1100 models...
Maintenance and Service Guide
Page 60
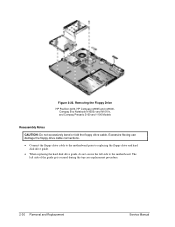
... to the motherboard prior to replacing the floppy drive and hard disk drive guide. • When replacing the hard disk drive guide, do not secure the left side of the guide gets secured during the top case replacement procedure. 2-30 Removal and Replacement Service Manual Removing the Floppy Drive HP Pavilion 4x00, HP Compaq nx9005 and nx9000, Compaq Evo Notebook N1050v and N1010v, and...
... to the motherboard prior to replacing the floppy drive and hard disk drive guide. • When replacing the hard disk drive guide, do not secure the left side of the guide gets secured during the top case replacement procedure. 2-30 Removal and Replacement Service Manual Removing the Floppy Drive HP Pavilion 4x00, HP Compaq nx9005 and nx9000, Compaq Evo Notebook N1050v and N1010v, and...
Maintenance and Service Guide
Page 61
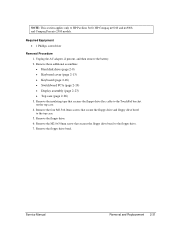
... drive and floppy drive bezel to HP Pavilion 5x00, HP Compaq nx9010 and nx9008, and Compaq Presario 2500 models. Service Manual Removal and Replacement 2-31 Unplug the AC adapter, if present, and then remove the battery. 2. Remove the floppy drive bezel. Remove the floppy drive. 6. Required Equipment • 1 Phillips screwdriver Removal Procedure 1. Remove these additional assemblies: • Hard disk drive...
... drive and floppy drive bezel to HP Pavilion 5x00, HP Compaq nx9010 and nx9008, and Compaq Presario 2500 models. Service Manual Removal and Replacement 2-31 Unplug the AC adapter, if present, and then remove the battery. 2. Remove the floppy drive bezel. Remove the floppy drive. 6. Required Equipment • 1 Phillips screwdriver Removal Procedure 1. Remove these additional assemblies: • Hard disk drive...
Maintenance and Service Guide
Page 63
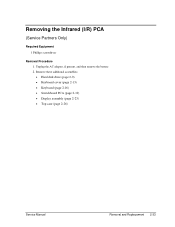
Remove these additional assemblies: • Hard disk drive (page 2-9) • Keyboard cover (page 2-13) • Keyboard (page 2-16) • Switchboard PCA (page 2-19) • Display assembly (page 2-23) • Top case (page 2-26) Service Manual Removal and Replacement 2-33 Unplug the AC adapter, if present, and then remove the battery. 2. Removing the Infrared (I/R) PCA (Service Partners Only) Required Equipment 1 Phillips screwdriver Removal Procedure 1.
Remove these additional assemblies: • Hard disk drive (page 2-9) • Keyboard cover (page 2-13) • Keyboard (page 2-16) • Switchboard PCA (page 2-19) • Display assembly (page 2-23) • Top case (page 2-26) Service Manual Removal and Replacement 2-33 Unplug the AC adapter, if present, and then remove the battery. 2. Removing the Infrared (I/R) PCA (Service Partners Only) Required Equipment 1 Phillips screwdriver Removal Procedure 1.
Maintenance and Service Guide
Page 65
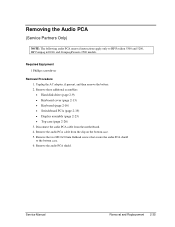
...Hard disk drive (page 2-9) • Keyboard cover (page 2-13) • Keyboard (page 2-16) • Switchboard PCA (page 2-19) • Display assembly (page 2-23) • Top case (page 2-26) 3. Remove the two M2.0×3.0mm flathead screws that secure the audio PCA shield to HP Pavilion 5300 and 5200, HP... Compaq nx9010, and Compaq Presario 2500 models. Service Manual Removal and Replacement 2-35 Required Equipment 1 Phillips screwdriver Removal Procedure 1. Removing the Audio PCA (...
...Hard disk drive (page 2-9) • Keyboard cover (page 2-13) • Keyboard (page 2-16) • Switchboard PCA (page 2-19) • Display assembly (page 2-23) • Top case (page 2-26) 3. Remove the two M2.0×3.0mm flathead screws that secure the audio PCA shield to HP Pavilion 5300 and 5200, HP... Compaq nx9010, and Compaq Presario 2500 models. Service Manual Removal and Replacement 2-35 Required Equipment 1 Phillips screwdriver Removal Procedure 1. Removing the Audio PCA (...
Maintenance and Service Guide
Page 67
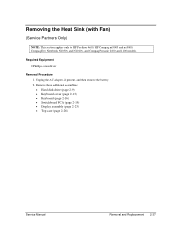
... additional assemblies: • Hard disk drive (page 2-9) • Keyboard cover (page 2-13) • Keyboard (page 2-16) • Switchboard PCA (page 2-19) • Display assembly (page 2-23) • Top case (page 2-26) Service Manual Removal and Replacement 2-37 Unplug the AC ...adapter, if present, and then remove the battery. 2. Required Equipment 0 Phillips screwdriver Removal Procedure 1. Removing the Heat Sink (with Fan) (Service Partners Only) NOTE: This section applies only to HP Pavilion 4x00, HP Compaq nx9005 and nx9000, Compaq Evo Notebook...
... additional assemblies: • Hard disk drive (page 2-9) • Keyboard cover (page 2-13) • Keyboard (page 2-16) • Switchboard PCA (page 2-19) • Display assembly (page 2-23) • Top case (page 2-26) Service Manual Removal and Replacement 2-37 Unplug the AC ...adapter, if present, and then remove the battery. 2. Required Equipment 0 Phillips screwdriver Removal Procedure 1. Removing the Heat Sink (with Fan) (Service Partners Only) NOTE: This section applies only to HP Pavilion 4x00, HP Compaq nx9005 and nx9000, Compaq Evo Notebook...
Maintenance and Service Guide
Page 100
.... If monitor is installed. If OS starts from hard disk or floppy drive, replace CPU module, replace motherboard. Startup Does not boot on page 1-25. If the power status light does not turn notebook on. If power status light and display turn notebook off , try again. Reinsert any PC cards, press the reset button to help determine...
.... If monitor is installed. If OS starts from hard disk or floppy drive, replace CPU module, replace motherboard. Startup Does not boot on page 1-25. If the power status light does not turn notebook on. If power status light and display turn notebook off , try again. Reinsert any PC cards, press the reset button to help determine...
Maintenance and Service Guide
Page 101
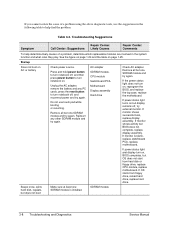
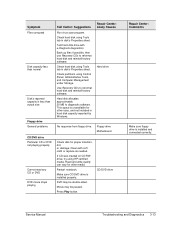
..." Call Center: Suggestions Make sure battery is restricted to reinstall factory software onto hard drive, replace hard drive. Restart notebook. Repair Center: Likely Causes Battery or contacts Motherboard Floppy disk or floppy drive Motherboard. Use BIOS Setup to optimize hard disk. CD/DVD drive Motherboard Hard drive Hard drive contacts Hard drive Password forgotten Verify proper ownership, and then follow removal procedure with owner and...
..." Call Center: Suggestions Make sure battery is restricted to reinstall factory software onto hard drive, replace hard drive. Restart notebook. Repair Center: Likely Causes Battery or contacts Motherboard Floppy disk or floppy drive Motherboard. Use BIOS Setup to optimize hard disk. CD/DVD drive Motherboard Hard drive Hard drive contacts Hard drive Password forgotten Verify proper ownership, and then follow removal procedure with owner and...
Maintenance and Service Guide
Page 105
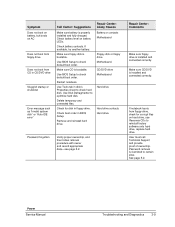
...notebook. If CD was created on CD-RW drive, try using Control Panel, Administrative Tools, and Computer Management under Storage. CD/DVD drive Repair Center: Comments Make sure floppy drive is installed properly. Test hard disk drive with soft cloth or replace as needed. Make sure CD/DVD drive... is installed and connected correctly. Check partitions using HP certified media. Use Recovery ...
...notebook. If CD was created on CD-RW drive, try using Control Panel, Administrative Tools, and Computer Management under Storage. CD/DVD drive Repair Center: Comments Make sure floppy drive is installed properly. Test hard disk drive with soft cloth or replace as needed. Make sure CD/DVD drive... is installed and connected correctly. Check partitions using HP certified media. Use Recovery ...
Maintenance and Service Guide
Page 111
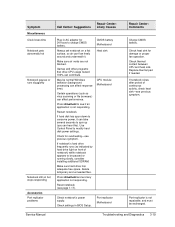
...files. Press ctrl+alt+del and end any application not responding. Replace thermal pad if needed. Symptom Miscellaneous Clock loses time Notebook gets abnormally hot Notebook pauses or runs sluggishly Notebook still on a flat surface, so air can flow freely around... Check notebook's power supply. Service Manual Troubleshooting and Diagnostics 3-19 If notebook's hard drive frequently runs (as virus scanning or file browsers) can affect performance. If notebook slows after period of notebook) while notebook appears to modify hard disk power settings. Make sure hard drive has ...
...files. Press ctrl+alt+del and end any application not responding. Replace thermal pad if needed. Symptom Miscellaneous Clock loses time Notebook gets abnormally hot Notebook pauses or runs sluggishly Notebook still on a flat surface, so air can flow freely around... Check notebook's power supply. Service Manual Troubleshooting and Diagnostics 3-19 If notebook's hard drive frequently runs (as virus scanning or file browsers) can affect performance. If notebook slows after period of notebook) while notebook appears to modify hard disk power settings. Make sure hard drive has ...
Hard Drive White Paper
Page 4
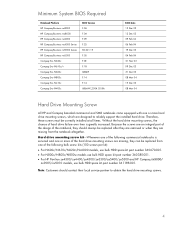
.... Hard drive mounting screw kit-Whenever one of the following bulk screw kits (100 screws per kit): • For N600c/N610c/N620c/Nc6000 models, use bulk HDD spare kit part number 360670-001. • For N800c/N800v/N800w models use bulk HDD spare kit part number 360380-001. • For HP Pavilion ze4300/ze4400/ze4500...
.... Hard drive mounting screw kit-Whenever one of the following bulk screw kits (100 screws per kit): • For N600c/N610c/N620c/Nc6000 models, use bulk HDD spare kit part number 360670-001. • For N800c/N800v/N800w models use bulk HDD spare kit part number 360380-001. • For HP Pavilion ze4300/ze4400/ze4500...
HP Pavilion ze4400 and ze5400 notebook series - Warranty
Page 3
... of the purchase or lease date. In the unlikely event that your HP product has a recurring failure, HP, at its sole discretion, to new. YOU SHOULD MAKE PERIODIC BACKUP COPIES OF THE DATA STORED ON YOUR HARD DRIVE OR OTHER STORAGE DEVICES AS A PRECAUTION AGAINST POSSIBLE FAILURES, ALTERATION, OR... a condition of receiving warranty service. All component parts or hardware products removed under normal use during the Limited Warranty Period. The replacement part or product takes on the date of purchase or lease from defects in which they are manufactured using new materials or new...
... of the purchase or lease date. In the unlikely event that your HP product has a recurring failure, HP, at its sole discretion, to new. YOU SHOULD MAKE PERIODIC BACKUP COPIES OF THE DATA STORED ON YOUR HARD DRIVE OR OTHER STORAGE DEVICES AS A PRECAUTION AGAINST POSSIBLE FAILURES, ALTERATION, OR... a condition of receiving warranty service. All component parts or hardware products removed under normal use during the Limited Warranty Period. The replacement part or product takes on the date of purchase or lease from defects in which they are manufactured using new materials or new...


