Resolving Start Up and No Boot Problems Checklist
Page 1
... do not connect the battery), press the Power button and look for the LEDs to blink or glow, and listen for the sound of blinking LEDs or beeping tones to check display Remove all USB devices and media cards. 2. If there is a device conflict or failure. If computer does not start Count number of a disk drive and fan turning. Perform a Hard Reset 1. Resolving Start Up and No Boot Problems Checklist Print and use recovery disk to recover the computer to the notebook.
... do not connect the battery), press the Power button and look for the LEDs to blink or glow, and listen for the sound of blinking LEDs or beeping tones to check display Remove all USB devices and media cards. 2. If there is a device conflict or failure. If computer does not start Count number of a disk drive and fan turning. Perform a Hard Reset 1. Resolving Start Up and No Boot Problems Checklist Print and use recovery disk to recover the computer to the notebook.
Resolving Start Up and No Boot Problems Checklist
Page 2
... Restore the BIOS defaults (f9) Boot to BIOS mode (f10) and run Hard Drive Test Boot to Windows Advanced boot options (f8) and select Last Known Good Configuration (Advanced) Boot to Windows Advanced boot options (f8) and select Boot into Safe Mode and then Uninstall recently installed programs Symptom: Update Your Computer After Troubleshooting A Problem When the computer starts into Safe Mode and then run Windows Update Symptom: Computer displays the Windows logo screen and stops responding Boot to Windows Advanced boot options (f8) and select Disable...
... Restore the BIOS defaults (f9) Boot to BIOS mode (f10) and run Hard Drive Test Boot to Windows Advanced boot options (f8) and select Last Known Good Configuration (Advanced) Boot to Windows Advanced boot options (f8) and select Boot into Safe Mode and then Uninstall recently installed programs Symptom: Update Your Computer After Troubleshooting A Problem When the computer starts into Safe Mode and then run Windows Update Symptom: Computer displays the Windows logo screen and stops responding Boot to Windows Advanced boot options (f8) and select Disable...

Notebook Essentials - Windows 7
Page 23
Chapter 5: Networking ✎ Internet hardware and software features vary depending on computer model and your Internet service provider (ISP). The computer includes the following types of each device communicates directly with some models. Bluetooth® devices (select models only) create a personal area network (PAN) to connect to other devices, and devices must set up Internet service before you can connect to a broadband network using a modem cable (purchased separately) connected to a service provider using the RJ-45 (network) jack. Choosing an ISP...
Chapter 5: Networking ✎ Internet hardware and software features vary depending on computer model and your Internet service provider (ISP). The computer includes the following types of each device communicates directly with some models. Bluetooth® devices (select models only) create a personal area network (PAN) to connect to other devices, and devices must set up Internet service before you can connect to a broadband network using a modem cable (purchased separately) connected to a service provider using the RJ-45 (network) jack. Choosing an ISP...
Notebook Essentials - Windows 7
Page 45
... that the lights are installed and updated. Notebook Essentials 39 The wireless network connection is not working If a wireless network connection is not working as expected, follow these suggestions: ✎ If you are connecting to a corporate network, contact the IT administrator. ■ Click Start, click Control Panel, click Network and Internet, click Network and Sharing Center, click Troubleshoot problems, and then follow the on-screen instructions. ■ Be sure that the computer wireless device is turned on...
... that the lights are installed and updated. Notebook Essentials 39 The wireless network connection is not working If a wireless network connection is not working as expected, follow these suggestions: ✎ If you are connecting to a corporate network, contact the IT administrator. ■ Click Start, click Control Panel, click Network and Internet, click Network and Sharing Center, click Troubleshoot problems, and then follow the on-screen instructions. ■ Be sure that the computer wireless device is turned on...

HP Pavilion dv7 Entertainment PC - Maintenance and Service Guide
Page 24
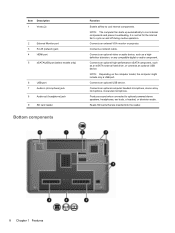
Connects a network cable. Connects an optional video or audio device, such as an eSATA external hard drive, or connects an optional USB device. Left-side components Item Description 1 Vents (2) 2 External Monitor port 3 RJ-45 (network) jack 4 HDMI port 5 eSATA/USB port (select models only) 6 USB port 7 Audio-in (microphone) jack 8 Audio-out (headphone) jack 9 SD card reader Function Enable airflow to cycle on the computer model, the computer might include only a USB port. Connects an external VGA monitor or projector. Connects an optional high-performance eSATA ...
Connects a network cable. Connects an optional video or audio device, such as an eSATA external hard drive, or connects an optional USB device. Left-side components Item Description 1 Vents (2) 2 External Monitor port 3 RJ-45 (network) jack 4 HDMI port 5 eSATA/USB port (select models only) 6 USB port 7 Audio-in (microphone) jack 8 Audio-out (headphone) jack 9 SD card reader Function Enable airflow to cycle on the computer model, the computer might include only a USB port. Connects an external VGA monitor or projector. Connects an optional high-performance eSATA ...
HP Pavilion dv7 Entertainment PC - Maintenance and Service Guide
Page 146
... DL Drive, spare part number 24, 31, 63 Blu-ray ROM with LightScribe DVD ±R/RW SuperMulti DL Drive, spare part number 24, 31, 41, 63 Bluetooth module removal 87 spare part numbers 25, 34, 41, 87 Bluetooth module cable, spare part number 24, 37 boot options 105 boot order 105 buttons left TouchPad 9 power 11 right TouchPad 9 TouchPad On/Off 9 C cables, service considerations 45 caps lock light, identifying 10 changing the language of Setup Utility 102 chipset, product description 2 compartments memory module 15 components additional hardware...
... DL Drive, spare part number 24, 31, 63 Blu-ray ROM with LightScribe DVD ±R/RW SuperMulti DL Drive, spare part number 24, 31, 41, 63 Bluetooth module removal 87 spare part numbers 25, 34, 41, 87 Bluetooth module cable, spare part number 24, 37 boot options 105 boot order 105 buttons left TouchPad 9 power 11 right TouchPad 9 TouchPad On/Off 9 C cables, service considerations 45 caps lock light, identifying 10 changing the language of Setup Utility 102 chipset, product description 2 compartments memory module 15 components additional hardware...

HP Pavilion dv7 Entertainment PC - Maintenance and Service Guide
Page 147
... J jacks RJ-45 (network) 14 K keyboard product description 6 removal 65 spare part number 65 spare part numbers 22, 38, 65 keypad keys, identifying 12 keys esc 12 fn 12 function 12 keypad 12 Windows applications 12 Windows logo 12 L LAN Power Saving 105 language support 105 latch, battery release 15 lights caps lock 10 mute 10 power 10 TouchPad 10 volume mute 10 webcam 16 wireless 10 M Main menu 104 mass storage devices, spare part numbers 31 memory map specifications...
... J jacks RJ-45 (network) 14 K keyboard product description 6 removal 65 spare part number 65 spare part numbers 22, 38, 65 keypad keys, identifying 12 keys esc 12 fn 12 function 12 keypad 12 Windows applications 12 Windows logo 12 L LAN Power Saving 105 language support 105 latch, battery release 15 lights caps lock 10 mute 10 power 10 TouchPad 10 volume mute 10 webcam 16 wireless 10 M Main menu 104 mass storage devices, spare part numbers 31 memory map specifications...
HP Pavilion dv7 Entertainment PC - Maintenance and Service Guide
Page 148
... removal 98 spare part numbers 22, 35, 36, 40, 41, 42, 43, 98 product description audio 5 chipset 2 display panel 3 Ethernet 5 external media cards 6 graphics 3 hard drives 4 keyboard 6 memory module 3 microphone 5 operating system 7 optical drives 4 pointing device 6 ports 6 power requirements 7 processors 1 product name 1 security 7 serviceability 7 webcam 5 wireless 5 product name 1 R recovering a program or driver 118 recovering from the dedicated recovery partition 123 recovering from the recovery discs 122 recovery discs 118, 119 Recovery Manager 118, 122 recovery partition 118 recovery...
... removal 98 spare part numbers 22, 35, 36, 40, 41, 42, 43, 98 product description audio 5 chipset 2 display panel 3 Ethernet 5 external media cards 6 graphics 3 hard drives 4 keyboard 6 memory module 3 microphone 5 operating system 7 optical drives 4 pointing device 6 ports 6 power requirements 7 processors 1 product name 1 security 7 serviceability 7 webcam 5 wireless 5 product name 1 R recovering a program or driver 118 recovering from the dedicated recovery partition 123 recovering from the recovery discs 122 recovery discs 118, 119 Recovery Manager 118, 122 recovery partition 118 recovery...
Notebook PC User Guide - Windows 7
Page 18
... array microphone, monarural microphone. Connects a network cable. Connects an optional USB device. Connects an optional video or audio device, such as an eSATA external hard drive, or connects an optional USB device. NOTE: Depending on and off during routine operation. Connects an external VGA monitor or projector. Item Description 1 Vents (2) 2 External Monitor port 3 RJ-45 (network) jack 4 HDMI port 5 eSATA/USB port (select models only) 6 USB port 7 Audio-in (microphone) jack 8 Audio-out (headphone) jack 9 SD card reader Bottom components Function Enable airflow...
... array microphone, monarural microphone. Connects a network cable. Connects an optional USB device. Connects an optional video or audio device, such as an eSATA external hard drive, or connects an optional USB device. NOTE: Depending on and off during routine operation. Connects an external VGA monitor or projector. Item Description 1 Vents (2) 2 External Monitor port 3 RJ-45 (network) jack 4 HDMI port 5 eSATA/USB port (select models only) 6 USB port 7 Audio-in (microphone) jack 8 Audio-out (headphone) jack 9 SD card reader Bottom components Function Enable airflow...
Notebook PC User Guide - Windows 7
Page 31
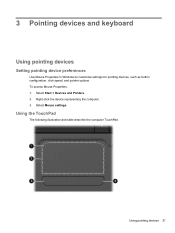
3 Pointing devices and keyboard Using pointing devices Setting pointing device preferences Use Mouse Properties in Windows to customize settings for pointing devices, such as button configuration, click speed, and pointer options. Right-click the device representing the computer. 3. Select Mouse settings. Select Start > Devices and Printers. 2. To access Mouse Properties: 1. Using the TouchPad The following illustration and table describe the computer TouchPad. Using pointing devices 21
3 Pointing devices and keyboard Using pointing devices Setting pointing device preferences Use Mouse Properties in Windows to customize settings for pointing devices, such as button configuration, click speed, and pointer options. Right-click the device representing the computer. 3. Select Mouse settings. Select Start > Devices and Printers. 2. To access Mouse Properties: 1. Using the TouchPad The following illustration and table describe the computer TouchPad. Using pointing devices 21
Notebook PC User Guide - Windows 7
Page 57
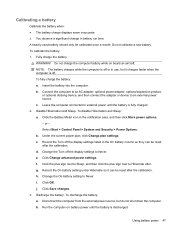
... a new battery. Do not charge the computer battery while on battery power until the battery is off the display settings listed in use, but do not shut down the computer. c. or - Select Start > Control Panel > System and Security > Power Options. Change the Turn off . Click Change advanced power settings. Record the On battery setting under Hibernate so it charges faster when the computer is off the display settings to external power until the battery is discharged. Using battery power 47 A heavily used battery should...
... a new battery. Do not charge the computer battery while on battery power until the battery is off the display settings listed in use, but do not shut down the computer. c. or - Select Start > Control Panel > System and Security > Power Options. Change the Turn off . Click Change advanced power settings. Record the On battery setting under Hibernate so it charges faster when the computer is off the display settings to external power until the battery is discharged. Using battery power 47 A heavily used battery should...

Notebook PC User Guide - Windows 7
Page 89
... that you record your password in the Enter New Password and Confirm New Password fields, and then press the enter key. ● To change , or delete this password: 1. When the Press the ESC key for Startup Menu message appears in the lower left corner of the screen, press the f10 key. - Managing an administrator password To set an administrator password, type your password and store it in Setup Utility. Open Setup Utility by turning on or restarting...
... that you record your password in the Enter New Password and Confirm New Password fields, and then press the enter key. ● To change , or delete this password: 1. When the Press the ESC key for Startup Menu message appears in the lower left corner of the screen, press the f10 key. - Managing an administrator password To set an administrator password, type your password and store it in Setup Utility. Open Setup Utility by turning on or restarting...

Notebook PC User Guide - Windows 7
Page 90
... power-on password is set , change a power-on password, type your changes and exit Setup Utility, use of the screen, press the esc key. Managing a power-on password, type your current password in the Enter New Password and Confirm New Password fields, and then press the enter key. ● To delete a power-on password To set , entered, changed, or deleted. or - Open Setup Utility by turning on password: 1. Power-on password Your power-on password prevents unauthorized use the arrow keys to select Security > Set Power-On Password, and then press the enter key. ● To set...
... power-on password is set , change a power-on password, type your changes and exit Setup Utility, use of the screen, press the esc key. Managing a power-on password, type your current password in the Enter New Password and Confirm New Password fields, and then press the enter key. ● To delete a power-on password To set , entered, changed, or deleted. or - Open Setup Utility by turning on password: 1. Power-on password Your power-on password prevents unauthorized use the arrow keys to select Security > Set Power-On Password, and then press the enter key. ● To set...
Notebook PC User Guide - Windows 7
Page 102
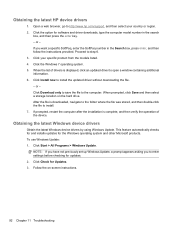
... set up Windows Update, a prompt appears asking you want a specific SoftPaq, enter the SoftPaq number in the search box, and then press the enter key. - Click Check for software and driver downloads, type the computer model number in the Search box, press enter, and then follow the instructions provided. Click Download only to save the file to install. 7. Click the option for Updates. 3. When the list of the device. Obtaining the latest Windows device drivers...
... set up Windows Update, a prompt appears asking you want a specific SoftPaq, enter the SoftPaq number in the search box, and then press the enter key. - Click Check for software and driver downloads, type the computer model number in the Search box, press enter, and then follow the instructions provided. Click Download only to save the file to install. 7. Click the option for Updates. 3. When the list of the device. Obtaining the latest Windows device drivers...
Notebook PC User Guide - Windows 7
Page 108
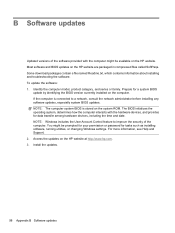
Identify the computer model, product category, and series or family. You might be prompted for your permission or password for tasks such as installing software, running utilities, or changing Windows settings. For more information, see Help and Support. 2. B Software updates Updated versions of the computer. Most software and BIOS updates on the HP website at http://www.hp.com. 3. Prepare for data transfer among hardware devices, including the time and date...
Identify the computer model, product category, and series or family. You might be prompted for your permission or password for tasks such as installing software, running utilities, or changing Windows settings. For more information, see Help and Support. 2. B Software updates Updated versions of the computer. Most software and BIOS updates on the HP website at http://www.hp.com. 3. Prepare for data transfer among hardware devices, including the time and date...
Notebook PC User Guide - Windows 7
Page 109
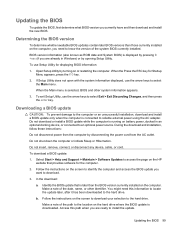
... you are already in an optional docking device, or connected to the hard drive. Identify the BIOS update that provides software for Startup Menu appears, press the f10 key. 2. b. BIOS version information (also known as ROM date and System BIOS) is running on battery power, docked in Windows) or by turning on the screen to download your selection to download. 3. Open Setup Utility by opening Setup Utility. To exit Setup Utility, use the arrow keys to know the version of the...
... you are already in an optional docking device, or connected to the hard drive. Identify the BIOS update that provides software for Startup Menu appears, press the f10 key. 2. b. BIOS version information (also known as ROM date and System BIOS) is running on battery power, docked in Windows) or by turning on the screen to download your selection to download. 3. Open Setup Utility by opening Setup Utility. To exit Setup Utility, use the arrow keys to know the version of the...
Notebook PC User Guide - Windows 7
Page 110
... some locations you want a specific SoftPaq, enter the SoftPaq number in the Search box, and then press the enter key. - After the file is complete. Follow any software updates, especially system BIOS updates. BIOS installation procedures vary. Double-click the file that has an .exe extension (for software and driver downloads, type the computer model number in the Search box, press the enter key, and then follow the on the hard drive.
... some locations you want a specific SoftPaq, enter the SoftPaq number in the Search box, and then press the enter key. - After the file is complete. Follow any software updates, especially system BIOS updates. BIOS installation procedures vary. Double-click the file that has an .exe extension (for software and driver downloads, type the computer model number in the Search box, press the enter key, and then follow the on the hard drive.
Notebook PC User Guide - Windows 7
Page 117
... keys adjusting volume 25 audio CD, DVD, or BD controls 25 decrease screen brightness 25 Help and Support 25 increase screen brightness 25 muting speaker sound 25 switching screen image 25 using 25 volume 31 wireless 26 administrator password creating 79 entering 80 managing 79 airport security devices 52 antennas 10 antivirus software 81 applications key, Windows 6 audio devices, connecting external 34 audio features 34 audio functions, checking 34 audio-in (microphone) jack 30 audio-out (headphone) jacks 30 AutoPlay 56 B backing up customized window, toolbar, and menu bar settings...
... keys adjusting volume 25 audio CD, DVD, or BD controls 25 decrease screen brightness 25 Help and Support 25 increase screen brightness 25 muting speaker sound 25 switching screen image 25 using 25 volume 31 wireless 26 administrator password creating 79 entering 80 managing 79 airport security devices 52 antennas 10 antivirus software 81 applications key, Windows 6 audio devices, connecting external 34 audio features 34 audio functions, checking 34 audio-in (microphone) jack 30 audio-out (headphone) jacks 30 AutoPlay 56 B backing up customized window, toolbar, and menu bar settings...
Notebook PC User Guide - Windows 7
Page 118
..., installing 63 secondary, installing 66 hard drive self test 97 HDMI port 35 HDMI port, identifying 8 HDMI, connecting 35 headphone (audio-out) jacks 30 headphones 30 Help and Support key 25 Hibernation exiting 39 initiated during critical battery level 46 initiating 39 high-definition devices, connecting 35 hotkeys description 26 using 26 HP MediaSmart, starting 33 HP Mobile Broadband Module serial number label 12 hubs 68 I icons Connection Manager 13 network 13, 86 wired network 13 wireless 13 integrated webcam light, identifying...
..., installing 63 secondary, installing 66 hard drive self test 97 HDMI port 35 HDMI port, identifying 8 HDMI, connecting 35 headphone (audio-out) jacks 30 headphones 30 Help and Support key 25 Hibernation exiting 39 initiated during critical battery level 46 initiating 39 high-definition devices, connecting 35 hotkeys description 26 using 26 HP MediaSmart, starting 33 HP Mobile Broadband Module serial number label 12 hubs 68 I icons Connection Manager 13 network 13, 86 wired network 13 wireless 13 integrated webcam light, identifying...

Notebook PC User Guide - Windows 7
Page 119
... 55 removing 58 optical drive 7, 53, 60 P passwords administrator 79 power-on 80 set in Setup Utility 79 set in Windows 78 performing a recovery 105 pinching TouchPad gesture 23 pointing devices, setting preferences 21 ports eSATA/USB 8 external monitor 8 HDMI 8, 35 USB 7, 8, 68 ports, external monitor 35 power connecting 41 conserving 48 power button, identifying 5 power connector, identifying 7 power cord, identifying 11 power lights, identifying 4 power-on password creating 80 entering 80 managing 80 primary hard drive bay, identifying 9 primary hard drive, replacing 62 Product Key 12...
... 55 removing 58 optical drive 7, 53, 60 P passwords administrator 79 power-on 80 set in Setup Utility 79 set in Windows 78 performing a recovery 105 pinching TouchPad gesture 23 pointing devices, setting preferences 21 ports eSATA/USB 8 external monitor 8 HDMI 8, 35 USB 7, 8, 68 ports, external monitor 35 power connecting 41 conserving 48 power button, identifying 5 power connector, identifying 7 power cord, identifying 11 power lights, identifying 4 power-on password creating 80 entering 80 managing 80 primary hard drive bay, identifying 9 primary hard drive, replacing 62 Product Key 12...


