
User Guide
Page 9
... the display ...41 Cleaning the sides or cover 41 Cleaning the TouchPad, keyboard, or mouse (select products only 41 Traveling with or shipping your computer ...41 8 Securing your computer and information ...43 Using passwords ...43 Setting Windows passwords ...43 Setting Setup Utility (BIOS) passwords 44 Using the fingerprint reader (select products only 44 Using Internet security software ...45 Using antivirus software ...45 Using firewall software ...45 Installing software updates ...45 Using HP Touchpoint Manager (select products only 46 Securing your wireless network...
... the display ...41 Cleaning the sides or cover 41 Cleaning the TouchPad, keyboard, or mouse (select products only 41 Traveling with or shipping your computer ...41 8 Securing your computer and information ...43 Using passwords ...43 Setting Windows passwords ...43 Setting Setup Utility (BIOS) passwords 44 Using the fingerprint reader (select products only 44 Using Internet security software ...45 Using antivirus software ...45 Using firewall software ...45 Installing software updates ...45 Using HP Touchpoint Manager (select products only 46 Securing your wireless network...

User Guide
Page 29
... repair network problems. Connecting to a wireless network 19 The wireless light indicates the overall power state of your computer are enabled at home, you can explore the globe and access information from millions of websites using one or more of these features: ● Airplane mode key (also called wireless button or wireless key) (referred to in this chapter as computers, phones, printers, headsets, speakers, and cameras. Using the wireless controls You can control the wireless devices...
... repair network problems. Connecting to a wireless network 19 The wireless light indicates the overall power state of your computer are enabled at home, you can explore the globe and access information from millions of websites using one or more of these features: ● Airplane mode key (also called wireless button or wireless key) (referred to in this chapter as computers, phones, printers, headsets, speakers, and cameras. Using the wireless controls You can control the wireless devices...
User Guide
Page 30
... is on. 2. Select Set up the modem, install a network cable to create a new network connection. 3. NOTE: If you do not apply. The number may be printed on a label located on the bottom of the taskbar, to complete the connection. Or - 20 Chapter 3 Connecting to a WLAN, follow these steps: 1. To connect to a network To use operating system controls: 1. Type control panel in the taskbar, and then select Open Network and Sharing Center. Be...
... is on. 2. Select Set up the modem, install a network cable to create a new network connection. 3. NOTE: If you do not apply. The number may be printed on a label located on the bottom of the taskbar, to complete the connection. Or - 20 Chapter 3 Connecting to a WLAN, follow these steps: 1. To connect to a network To use operating system controls: 1. Type control panel in the taskbar, and then select Open Network and Sharing Center. Be...
User Guide
Page 34
... device manufacturer's instructions. Select My PC, select the Specifications tab, and then select User Guides. For information on your video features, refer to connect an external monitor, projector, or TV. or - Right-click the Start button, select Control Panel, select Hardware and Sound, and then select the audio control panel specific to the correct port on headphones, earbuds, or a headset. Headphones combined with a microphone are not connected to adjust system volume, change sound settings: ▲ Type control panel in (microphone) jack on using...
... device manufacturer's instructions. Select My PC, select the Specifications tab, and then select User Guides. For information on your video features, refer to connect an external monitor, projector, or TV. or - Right-click the Start button, select Control Panel, select Hardware and Sound, and then select the audio control panel specific to the correct port on headphones, earbuds, or a headset. Headphones combined with a microphone are not connected to adjust system volume, change sound settings: ▲ Type control panel in (microphone) jack on using...

User Guide
Page 42
...; To use only the user-replaceable battery provided with the battery facing toward you do not need to create or change your work or shut down on wakeup. 3. Running on battery power When a charged battery is in the computer and the computer is off and unplugged from the list. To prevent loss of information, save your user account password, and then follow the on-screen instructions. Select Change Settings that...
...; To use only the user-replaceable battery provided with the battery facing toward you do not need to create or change your work or shut down on wakeup. 3. Running on battery power When a charged battery is in the computer and the computer is off and unplugged from the list. To prevent loss of information, save your user account password, and then follow the on-screen instructions. Select Change Settings that...
User Guide
Page 49
... on -screen instructions. A hard drive installed in the taskbar search box, and then select Free up disk space and help the computer run Disk Defragmenter on solid-state drives. NOTE: It is not protected by HP 3D DriveGuard. Improving performance 39 Improving performance You can safely delete to free up disk space. 2. Using Disk Defragmenter HP recommends using Disk Defragmenter to AC power. 2. Type disk in an optional docking device or connected to a USB port is...
... on -screen instructions. A hard drive installed in the taskbar search box, and then select Free up disk space and help the computer run Disk Defragmenter on solid-state drives. NOTE: It is not protected by HP 3D DriveGuard. Improving performance 39 Improving performance You can safely delete to free up disk space. 2. Using Disk Defragmenter HP recommends using Disk Defragmenter to AC power. 2. Type disk in an optional docking device or connected to a USB port is...

User Guide
Page 53
... then remove all password settings. Several types of risks, such as screen-saver passwords: ▲ Type support in the taskbar. To create and save passwords, use the same password for a Setup Utility (BIOS) feature and for a Windows security feature. Click the question mark icon in the taskbar search box, and then select the HP Support Assistant app. - Protects administrator-level access to access Setup Utility (BIOS) contents. Using passwords 43 IMPORTANT: Some security features listed in...
... then remove all password settings. Several types of risks, such as screen-saver passwords: ▲ Type support in the taskbar. To create and save passwords, use the same password for a Setup Utility (BIOS) feature and for a Windows security feature. Click the question mark icon in the taskbar search box, and then select the HP Support Assistant app. - Protects administrator-level access to access Setup Utility (BIOS) contents. Using passwords 43 IMPORTANT: Some security features listed in...

User Guide
Page 54
... Get Started. 3. The on-screen keyboard, which displays in Setup Utility (BIOS). Tap f10. 2. Your changes take effect when the computer restarts. or Turn on or restart the tablet, and then quickly hold down the volume down the Windows button. 2. To register fingerprints with keyboards: ▲ Turn on -screen instructions. HP SimplePass prompts you cannot turn on or restart the computer. Errors can prevent the computer from operating properly. Setting Setup Utility (BIOS) passwords Password Administrator password Power-on password Function...
... Get Started. 3. The on-screen keyboard, which displays in Setup Utility (BIOS). Tap f10. 2. Your changes take effect when the computer restarts. or Turn on or restart the tablet, and then quickly hold down the volume down the Windows button. 2. To register fingerprints with keyboards: ▲ Turn on -screen instructions. HP SimplePass prompts you cannot turn on or restart the computer. Errors can prevent the computer from operating properly. Setting Setup Utility (BIOS) passwords Password Administrator password Power-on password Function...

User Guide
Page 55
... of both hardware and software. To help protect your home network to date. Using antivirus software Computer viruses can disable programs, utilities, or the operating system, or cause them , and in order to date. To protect the computer from Microsoft as soon as a trial offer. It is installed on the corresponding finger in order to correct security problems and improve software performance. An...
... of both hardware and software. To help protect your home network to date. Using antivirus software Computer viruses can disable programs, utilities, or the operating system, or cause them , and in order to date. To protect the computer from Microsoft as soon as a trial offer. It is installed on the corresponding finger in order to correct security problems and improve software performance. An...

User Guide
Page 56
To view or change the settings: 1. To schedule a time for installing updates, select Advanced Options, and then follow the on -screen instructions. WLANs in public areas (hotspots) like coffee shops and airports may look slightly different from unauthorized access. The security cable slot on your network from the illustration in -house solutions. Using HP Touchpoint Manager (select products only) HP Touchpoint Manager is a cloud-based IT solution...
To view or change the settings: 1. To schedule a time for installing updates, select Advanced Options, and then follow the on -screen instructions. WLANs in public areas (hotspots) like coffee shops and airports may look slightly different from unauthorized access. The security cable slot on your network from the illustration in -house solutions. Using HP Touchpoint Manager (select products only) HP Touchpoint Manager is a cloud-based IT solution...
User Guide
Page 59
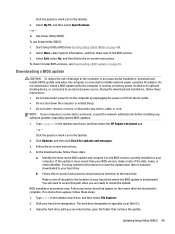
... appear on -screen instructions. 4. Type file in the taskbar search box, and then select the HP Support Assistant app. - Updating Setup Utility (BIOS) 49 Select My PC, and then select Specifications. - or - If the update is connected to locate the update later, after the download is complete. You may need to the hard drive. Follow any device, cable, or cord. During the download and installation, follow the on -screen instructions to download your hard drive. Make a note of...
... appear on -screen instructions. 4. Type file in the taskbar search box, and then select the HP Support Assistant app. - Updating Setup Utility (BIOS) 49 Select My PC, and then select Specifications. - or - If the update is connected to locate the update later, after the download is complete. You may need to the hard drive. Follow any device, cable, or cord. During the download and installation, follow the on -screen instructions to download your hard drive. Make a note of...

User Guide
Page 65
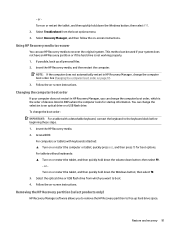
... or driver, use the Factory Reset option of HP Recovery Manager to reinstall the individual application or driver. ▲ Type recovery in the taskbar search box, select HP Recovery Manager, select Reinstall drivers and/or applications, and then follow the on page 53. For more information, see Creating HP Recovery media (select products only) on -screen instructions. ● If you want to recover the Windows partition to reclaim hard drive space, HP Recovery Manager offers the Remove Recovery Partition option. Recovering using HP Recovery Manager HP Recovery Manager software allows...
... or driver, use the Factory Reset option of HP Recovery Manager to reinstall the individual application or driver. ▲ Type recovery in the taskbar search box, select HP Recovery Manager, select Reinstall drivers and/or applications, and then follow the on page 53. For more information, see Creating HP Recovery media (select products only) on -screen instructions. ● If you want to recover the Windows partition to reclaim hard drive space, HP Recovery Manager offers the Remove Recovery Partition option. Recovering using HP Recovery Manager HP Recovery Manager software allows...
User Guide
Page 72
... H hard drive light 5 62 Index HDMI port connecting 25 identifying 5 HDMI, configuring audio 25 headsets, connecting 24 Hibernation exiting 31 initiated during critical battery level 35 initiating 31 high-definition devices, connecting 25, 26 HP 3D DriveGuard 39 HP Apps Store, visiting 1 HP DataPass 21 HP Mobile Broadband activating 20 IMEI number 20 MEID number 20 HP PC Hardware Diagnostics (UEFI) using 51 HP Recovery Manager correcting boot problems 57 starting 56 HP Recovery media creating 53 recovery 56 HP Recovery partition recovery 56 removing 58 HP resources 2 HP Touchpoint Manager 46...
... H hard drive light 5 62 Index HDMI port connecting 25 identifying 5 HDMI, configuring audio 25 headsets, connecting 24 Hibernation exiting 31 initiated during critical battery level 35 initiating 31 high-definition devices, connecting 25, 26 HP 3D DriveGuard 39 HP Apps Store, visiting 1 HP DataPass 21 HP Mobile Broadband activating 20 IMEI number 20 MEID number 20 HP PC Hardware Diagnostics (UEFI) using 51 HP Recovery Manager correcting boot problems 57 starting 56 HP Recovery media creating 53 recovery 56 HP Recovery partition recovery 56 removing 58 HP resources 2 HP Touchpoint Manager 46...

User Guide
Page 73
... 12 N network jack, identifying 7 num lock key, identifying 29 O one-finger slide touch screen gesture 28 operating environment 59 optical drive, identifying 7 original system recovery 55 P passwords Setup Utility (BIOS) 44 Windows 43 ports HDMI 5, 25 Miracast 26 USB 2.0 7 USB 3.0 5, 7 power AC 36 battery 32 power button, identifying 13 power connector, identifying 7 power lights, identifying 5, 12 power meter, using 32 power settings, using 32 product name and number, computer 17 public WLAN connection 20 R recover options 55 recovery discs 54, 56 HP Recovery Manager 55 media 56 starting 56...
... 12 N network jack, identifying 7 num lock key, identifying 29 O one-finger slide touch screen gesture 28 operating environment 59 optical drive, identifying 7 original system recovery 55 P passwords Setup Utility (BIOS) 44 Windows 43 ports HDMI 5, 25 Miracast 26 USB 2.0 7 USB 3.0 5, 7 power AC 36 battery 32 power button, identifying 13 power connector, identifying 7 power lights, identifying 5, 12 power meter, using 32 power settings, using 32 product name and number, computer 17 public WLAN connection 20 R recover options 55 recovery discs 54, 56 HP Recovery Manager 55 media 56 starting 56...

Maintenance and Service Guide
Page 41
NOTE: HP continually improves and changes product parts. Component replacement procedures NOTE: Please read and follow the on-screen instructions. NOTE: Details about your computer, including model, serial number, product key, and length of warranty, are as many as 3 screws that must be removed, replaced, or loosened when servicing Customer SelfRepair parts. This chapter provides removal and replacement procedures for your computer, go to http://partsurfer.hp.com...
NOTE: HP continually improves and changes product parts. Component replacement procedures NOTE: Please read and follow the on-screen instructions. NOTE: Details about your computer, including model, serial number, product key, and length of warranty, are as many as 3 screws that must be removed, replaced, or loosened when servicing Customer SelfRepair parts. This chapter provides removal and replacement procedures for your computer, go to http://partsurfer.hp.com...

Maintenance and Service Guide
Page 45
... -screen instructions. This chapter provides removal and replacement procedures for Authorized Service Provider only parts. Accessing these parts can damage the computer or void the warranty. Make special note of your country or region, and then follow the on supported parts for your computer, go to http://partsurfer.hp.com, select your computer. NOTE: HP continually improves and changes product parts. 6 Removal and replacement procedures for Authorized Service...
... -screen instructions. This chapter provides removal and replacement procedures for Authorized Service Provider only parts. Accessing these parts can damage the computer or void the warranty. Make special note of your country or region, and then follow the on supported parts for your computer, go to http://partsurfer.hp.com, select your computer. NOTE: HP continually improves and changes product parts. 6 Removal and replacement procedures for Authorized Service...

Maintenance and Service Guide
Page 93
... keyboard and restart the computer, Setup Utility (BIOS) checks to see if the Embedded Controller firmware on the keyboard needs to your tablet is more than 50% charged, or if your hard drive. NOTE: After a message on the screen after it has been downloaded to be synchronized. You will synchronize ONLY if the tablet or keyboard battery is connected to install the update. The hard drive designation is interrupted, a notification screen displays...
... keyboard and restart the computer, Setup Utility (BIOS) checks to see if the Embedded Controller firmware on the keyboard needs to your tablet is more than 50% charged, or if your hard drive. NOTE: After a message on the screen after it has been downloaded to be synchronized. You will synchronize ONLY if the tablet or keyboard battery is connected to install the update. The hard drive designation is interrupted, a notification screen displays...
Maintenance and Service Guide
Page 99
... working properly. 1. Select Recovery Manager, and then follow the on -screen instructions. Changing the computer boot order If your system does not have an HP Recovery partition or if the hard drive is the order of devices listed in HP Recovery Manager, change the boot order: IMPORTANT: For a tablet with keyboards attached: ▲ Turn on or restart the tablet, and then quickly hold down the volume down the Windows button; Insert the HP Recovery media. 2. Access BIOS: For computers or tablets with a detachable keyboard, connect...
... working properly. 1. Select Recovery Manager, and then follow the on -screen instructions. Changing the computer boot order If your system does not have an HP Recovery partition or if the hard drive is the order of devices listed in HP Recovery Manager, change the boot order: IMPORTANT: For a tablet with keyboards attached: ▲ Turn on or restart the tablet, and then quickly hold down the volume down the Windows button; Insert the HP Recovery media. 2. Access BIOS: For computers or tablets with a detachable keyboard, connect...

Maintenance and Service Guide
Page 116
...display switch, identifying 5 internal microphones, identifying 5 J jacks audio-out (headphone)/audio-in (microphone) 7 network 9 RJ-45 (network) 9 K keyboard illustrated 19, 38 product description 4 keys action 13 esc 13 fn 13 Windows 13 L labels Bluetooth 16 regulatory 16 serial number 15 service 15 wireless certification 16 WLAN 16 latch, battery release 14 lights AC adapter and battery light 9 caps lock 11 hard drive 7 mute 11 power 7, 11 RJ-45 (network) status 9 M mass storage devices illustrated 25 precautions 28 memory card reader, identifying 9 memory card, identifying 9 memory module...
...display switch, identifying 5 internal microphones, identifying 5 J jacks audio-out (headphone)/audio-in (microphone) 7 network 9 RJ-45 (network) 9 K keyboard illustrated 19, 38 product description 4 keys action 13 esc 13 fn 13 Windows 13 L labels Bluetooth 16 regulatory 16 serial number 15 service 15 wireless certification 16 WLAN 16 latch, battery release 14 lights AC adapter and battery light 9 caps lock 11 hard drive 7 mute 11 power 7, 11 RJ-45 (network) status 9 M mass storage devices illustrated 25 precautions 28 memory card reader, identifying 9 memory card, identifying 9 memory module...

Maintenance and Service Guide
Page 117
... 89 media 91 starting 90 supported discs 88 system 89 USB flash drive 91 using HP Recovery media 89 recovery media creating 88 creating using HP Recovery Manager 88 recovery partition removing 91 regulatory information regulatory label 16 wireless certification labels 16 removal/replacement preliminaries 27 procedures 33, 37 RJ-45 (network) jack, identifying 9 RJ-45 (network) status lights, identifying 9 RTC battery illustrated 20 removing 46 S security cable slot, identifying 8 security, product description 4 sensors, product description 3 serial number 15 serial number, computer 15 service...
... 89 media 91 starting 90 supported discs 88 system 89 USB flash drive 91 using HP Recovery media 89 recovery media creating 88 creating using HP Recovery Manager 88 recovery partition removing 91 regulatory information regulatory label 16 wireless certification labels 16 removal/replacement preliminaries 27 procedures 33, 37 RJ-45 (network) jack, identifying 9 RJ-45 (network) status lights, identifying 9 RTC battery illustrated 20 removing 46 S security cable slot, identifying 8 security, product description 4 sensors, product description 3 serial number 15 serial number, computer 15 service...


