
User Guide
Page 5
... monitor head ...5 Removing the monitor stand 5 Attaching the VESA mounting bracket 6 Connecting the cables ...7 Connecting USB devices ...9 Adjusting the monitor ...10 Installing a security cable ...11 Storing headphones ...11 Turning on the monitor ...12 2 Using the monitor ...13 Downloading the monitor driver ...13 Using the OSD menu ...13 Display mode ...14 Using Auto-Sleep Mode ...14 Using the Sleep Timer ...15 Using the Power-Off Timer ...15 Using Ambient Lighting ...15 Selecting a faster response time for gaming ...16 Adjusting blue light output ...16 Using HP Enhance+ ...16 Using RGB...
... monitor head ...5 Removing the monitor stand 5 Attaching the VESA mounting bracket 6 Connecting the cables ...7 Connecting USB devices ...9 Adjusting the monitor ...10 Installing a security cable ...11 Storing headphones ...11 Turning on the monitor ...12 2 Using the monitor ...13 Downloading the monitor driver ...13 Using the OSD menu ...13 Display mode ...14 Using Auto-Sleep Mode ...14 Using the Sleep Timer ...15 Using the Power-Off Timer ...15 Using Ambient Lighting ...15 Selecting a faster response time for gaming ...16 Adjusting blue light output ...16 Using HP Enhance+ ...16 Using RGB...

User Guide
Page 6
... the serial number and product number 21 4 Maintaining the monitor ...22 Maintenance guidelines ...22 Cleaning the monitor ...22 Shipping the monitor ...22 Appendix A Technical specifications ...23 Preset display resolutions ...24 Entering user modes ...25 Appendix B Accessibility ...26 HP and accessibility ...26 Finding the technology tools you need 26 The HP commitment ...26 International Association of Accessibility Professionals (IAAP 26 Finding the best assistive technology 27 Assessing your needs ...27...
... the serial number and product number 21 4 Maintaining the monitor ...22 Maintenance guidelines ...22 Cleaning the monitor ...22 Shipping the monitor ...22 Appendix A Technical specifications ...23 Preset display resolutions ...24 Entering user modes ...25 Appendix B Accessibility ...26 HP and accessibility ...26 Finding the technology tools you need 26 The HP commitment ...26 International Association of Accessibility Professionals (IAAP 26 Finding the best assistive technology 27 Assessing your needs ...27...
User Guide
Page 7
... a controlled luminous environment to avoid interference from surrounding light and bright surfaces that are inappropriately situated on , pulled, grabbed, or tripped over and cause personal injury. The Safety & Comfort Guide also provides important electrical and mechanical safety information. Not all cords and cables connected to the monitor so that you use another cord, use with the monitor. Use a power strip whose manufacturer offers a damage replacement...
... a controlled luminous environment to avoid interference from surrounding light and bright surfaces that are inappropriately situated on , pulled, grabbed, or tripped over and cause personal injury. The Safety & Comfort Guide also provides important electrical and mechanical safety information. Not all cords and cables connected to the monitor so that you use another cord, use with the monitor. Use a power strip whose manufacturer offers a damage replacement...
User Guide
Page 8
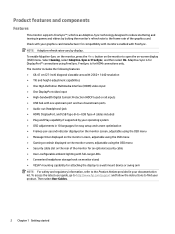
... user guide, go to http://www.hp.com/support and follow the instructions to find your graphics card manufacturer for easy setup and screen optimization ● Frames-per-second indicator displayed on the monitor screen, adjustable using the OSD menu ● Message timer displayed on the monitor screen, adjustable using the OSD menu ● Gaming crosshair displayed on all inputs ● USB hub with FreeSync. Check with full-range LEDs ● Convenient headphone storage hook on -screen display (OSD) menu. Adaptive-Sync is for DisplayPort™ connections using...
... user guide, go to http://www.hp.com/support and follow the instructions to find your graphics card manufacturer for easy setup and screen optimization ● Frames-per-second indicator displayed on the monitor screen, adjustable using the OSD menu ● Message timer displayed on the monitor screen, adjustable using the OSD menu ● Gaming crosshair displayed on all inputs ● USB hub with FreeSync. Check with full-range LEDs ● Convenient headphone storage hook on -screen display (OSD) menu. Adaptive-Sync is for DisplayPort™ connections using...

User Guide
Page 9
...open the Color menu. Connects an optional security cable to a source device such as a computer or game console. Connects a DisplayPort cable to the monitor. Press to open , press to open the Brightness menu. Connects an AC adapter. For additional safety information, see the Product Notices provided in your documentation kit. Connects optional headphones. Rear components Table 1-1 Rear components Component (1) Power button (2) Back button (3) Plus button (4) Minus button (5) Menu/OK button (6) Security cable slot (7) USB ports (8) USB Type-B port (9) Power...
...open the Color menu. Connects an optional security cable to a source device such as a computer or game console. Connects a DisplayPort cable to the monitor. Press to open , press to open the Brightness menu. Connects an AC adapter. For additional safety information, see the Product Notices provided in your documentation kit. Connects optional headphones. Rear components Table 1-1 Rear components Component (1) Power button (2) Back button (3) Plus button (4) Minus button (5) Menu/OK button (6) Security cable slot (7) USB ports (8) USB Type-B port (9) Power...

User Guide
Page 18
... the monitor is not covered under the HP warranty. NOTE: If pressing the power button to turn off has no -signal condition, the first detected active input for 12 or more consecutive hours of the autoswitch input setting (On or Off; NOTE: You can disable the power light in image on the screen for the monitor. 12 Chapter 1 Getting started A burned-in the OSD menu. Turning on . Press the power button on...
... the monitor is not covered under the HP warranty. NOTE: If pressing the power button to turn off has no -signal condition, the first detected active input for 12 or more consecutive hours of the autoswitch input setting (On or Off; NOTE: You can disable the power light in image on the screen for the monitor. 12 Chapter 1 Getting started A burned-in the OSD menu. Turning on . Press the power button on...
User Guide
Page 19
...Downloading the monitor driver 13 Exits the OSD menu screen. Monitor Plug and Play compatibility requires that configure the monitor for different viewing situations. Use the three function buttons to adjust the screen image based on your viewing preferences. Selects the video input signal (DisplayPort or HDMI). Table 2-1 OSD main menu options and their descriptions Main menu Description Gaming Image Color Input Power Menu Management Information Exit Selects and adjusts gaming preferences, such as Adaptive-Sync, response time, frame rate, message timers, crosshair, ambient lighting...
...Downloading the monitor driver 13 Exits the OSD menu screen. Monitor Plug and Play compatibility requires that configure the monitor for different viewing situations. Use the three function buttons to adjust the screen image based on your viewing preferences. Selects the video input signal (DisplayPort or HDMI). Table 2-1 OSD main menu options and their descriptions Main menu Description Gaming Image Color Input Power Menu Management Information Exit Selects and adjusts gaming preferences, such as Adaptive-Sync, response time, frame rate, message timers, crosshair, ambient lighting...

User Guide
Page 20
... when the video input is changed. Select Adaptive-Sync or FreeSync, and then select On. To disable Auto-Sleep Mode in the status bar area. Press the Menu button to open the OSD menu. 2. Modes of either horizontal or vertical sync signal). In the OSD select Gaming. 3. NOTE: The Adaptive-Sync or FreeSync menu default setting is shown in the Information menu window and at the bottom of the OSD's main menu in the OSD: 1. Using Auto-Sleep Mode The monitor supports an OSD menu option called Auto-Sleep Mode that...
... when the video input is changed. Select Adaptive-Sync or FreeSync, and then select On. To disable Auto-Sleep Mode in the status bar area. Press the Menu button to open the OSD menu. 2. Modes of either horizontal or vertical sync signal). In the OSD select Gaming. 3. NOTE: The Adaptive-Sync or FreeSync menu default setting is shown in the Information menu window and at the bottom of the OSD's main menu in the OSD: 1. Using Auto-Sleep Mode The monitor supports an OSD menu option called Auto-Sleep Mode that...
User Guide
Page 22
... typical specifications provided by default. Using HP Enhance+ The HP Enhance+ color submenu adds an additional level of detail (sharpness and contrast) to static images and motion video to your monitor to On (OMEN Red) by HP's component manufacturers; The default is optimized for gaming purposes. To turn on the screen. actual performance can vary either higher or lower. Adjusting blue light output Decreasing the blue light emitted by the display reduces the blue light...
... typical specifications provided by default. Using HP Enhance+ The HP Enhance+ color submenu adds an additional level of detail (sharpness and contrast) to static images and motion video to your monitor to On (OMEN Red) by HP's component manufacturers; The default is optimized for gaming purposes. To turn on the screen. actual performance can vary either higher or lower. Adjusting blue light output Decreasing the blue light emitted by the display reduces the blue light...

User Guide
Page 26
... monitor is displayed on the screen. are Locked" is at the optimum recommended resolution and then if needed . Replace the video card or connect the video cable to turn OSD Lockout on page 7 for 10 seconds to a supported setting (see Preset display resolutions on the screen. Brightness setting is into a low-power sleep mode. Image appears blurred or indistinct. "Input Signal Not Found" is enabled. See Connecting the cables on or off . power button function. Open the OSD menu. The monitor did not enter The monitor's Auto-Sleep Mode...
... monitor is displayed on the screen. are Locked" is at the optimum recommended resolution and then if needed . Replace the video card or connect the video cable to turn OSD Lockout on page 7 for 10 seconds to a supported setting (see Preset display resolutions on the screen. Brightness setting is into a low-power sleep mode. Image appears blurred or indistinct. "Input Signal Not Found" is enabled. See Connecting the cables on or off . power button function. Open the OSD menu. The monitor did not enter The monitor's Auto-Sleep Mode...

User Guide
Page 27
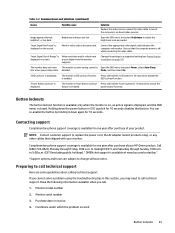
... instructions on the bottom edge of the hardware and software you might need to get more information about the monitor model. You might need these numbers when contacting HP about your monitor. Preparing to call technical support If you cannot solve an issue using Locating the serial number and product number The serial number and product number are using the troubleshooting tips in this site to call : ● Monitor model number ● Monitor serial number...
... instructions on the bottom edge of the hardware and software you might need to get more information about the monitor model. You might need these numbers when contacting HP about your monitor. Preparing to call technical support If you cannot solve an issue using Locating the serial number and product number The serial number and product number are using the troubleshooting tips in this site to call : ● Monitor model number ● Monitor serial number...

User Guide
Page 28
... an authorized HP dealer, reseller, or service provider. ● Use only a power source and connection appropriate for each device. ● Install the monitor near an AC outlet that the total ampere rating of the products connected to the cord does not exceed the rating of the cord. Cleaning the monitor 1. Allow the monitor to gently wipe the screen surface. Never disconnect the monitor by wiping the screen and the...
... an authorized HP dealer, reseller, or service provider. ● Use only a power source and connection appropriate for each device. ● Install the monitor near an AC outlet that the total ampere rating of the products connected to the cord does not exceed the rating of the cord. Cleaning the monitor 1. Allow the monitor to gently wipe the screen surface. Never disconnect the monitor by wiping the screen and the...

User Guide 1
Page 4
......2 2 Setting up the monitor ...5 Installing the stand...5 Mounting the monitor head...6 Removing the monitor stand...6 Attaching the VESA mounting bracket ...6 Connecting the cables...8 Connecting USB devices (select products only) ...11 Adjusting the monitor (select products only)...11 Installing a security cable ...12 Storing headphones...13 Turning on the monitor...13 3 Using the monitor ...15 Downloading the monitor driver ...15 Using the OSD menu ...15 Display mode ...16 Using Auto-Sleep Mode ...16 Using the Sleep Timer...17 Using the Power-Off Timer ...17 Using External Lighting...17...
......2 2 Setting up the monitor ...5 Installing the stand...5 Mounting the monitor head...6 Removing the monitor stand...6 Attaching the VESA mounting bracket ...6 Connecting the cables...8 Connecting USB devices (select products only) ...11 Adjusting the monitor (select products only)...11 Installing a security cable ...12 Storing headphones...13 Turning on the monitor...13 3 Using the monitor ...15 Downloading the monitor driver ...15 Using the OSD menu ...15 Display mode ...16 Using Auto-Sleep Mode ...16 Using the Sleep Timer...17 Using the Power-Off Timer ...17 Using External Lighting...17...
User Guide 1
Page 8
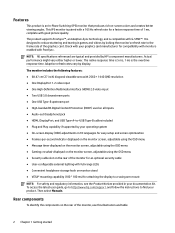
...; High-bandwidth Digital Content Protection (HDCP) used on all inputs ● Audio-out (headphone) jack ● HDMI, DisplayPort, and USB Type-A-to-USB Type-B cables included ● Plug and Play capability if supported by your operating system ● On-screen display (OSD) adjustments in 10 languages for easy setup and screen optimization ● Frames-per-second indicator displayed on the monitor screen, adjustable using the OSD menu ● Message timer displayed on the monitor screen, adjustable using the OSD menu ● Gaming...
...; High-bandwidth Digital Content Protection (HDCP) used on all inputs ● Audio-out (headphone) jack ● HDMI, DisplayPort, and USB Type-A-to-USB Type-B cables included ● Plug and Play capability if supported by your operating system ● On-screen display (OSD) adjustments in 10 languages for easy setup and screen optimization ● Frames-per-second indicator displayed on the monitor screen, adjustable using the OSD menu ● Message timer displayed on the monitor screen, adjustable using the OSD menu ● Gaming...

User Guide 1
Page 20
... monitor automatically scans the signal inputs for an active input and uses that input for 5 seconds. When you can disable the power light in the OSD menu. default setting is the current active signal, the status of the auto-switch source setting (On or Off; NOTE: On select HP monitors, you first turn it on your monitor, a monitor status message is displayed for the display. 14 Chapter 2 Setting up the monitor Press the Menu button to open the OSD, select Power, select Power LED...
... monitor automatically scans the signal inputs for an active input and uses that input for 5 seconds. When you can disable the power light in the OSD menu. default setting is the current active signal, the status of the auto-switch source setting (On or Off; NOTE: On select HP monitors, you first turn it on your monitor, a monitor status message is displayed for the display. 14 Chapter 2 Setting up the monitor Press the Menu button to open the OSD, select Power, select Power LED...

User Guide 1
Page 21
... monitor. The factory default is 80. This monitor is VESA DDC2-compliant and that the computer's graphics card is Plug and Play-compatible, and the monitor will work through separate BNCtype connectors or through distribution buffers or boxes. ● INF (Information) file 1. Move the joystick up, down, left, or right to http://www.hp.com/support. 2. Go to navigate menu choices. Use the OSD menu to adjust the monitor screen image based...
... monitor. The factory default is 80. This monitor is VESA DDC2-compliant and that the computer's graphics card is Plug and Play-compatible, and the monitor will work through separate BNCtype connectors or through distribution buffers or boxes. ● INF (Information) file 1. Move the joystick up, down, left, or right to http://www.hp.com/support. 2. Go to navigate menu choices. Use the OSD menu to adjust the monitor screen image based...

User Guide 1
Page 22
...mode of either horizontal or vertical sync signal). 16 Chapter 3 Using the monitor To turn on the monitor, the status message shows the display mode. When Auto-Sleep Mode is also displayed when you turn on and when the video input is changed. Table 3-1 OSD menu options and descriptions for Adaptive-Sync/FreeSync is On. Image Button-Adjusts the screen image. Display mode When you change the video input. NOTE: The default setting for using a button or a controller (select products only) (continued) Main menu Description Color Button-Selects and adjusts the screen color...
...mode of either horizontal or vertical sync signal). 16 Chapter 3 Using the monitor To turn on the monitor, the status message shows the display mode. When Auto-Sleep Mode is also displayed when you turn on and when the video input is changed. Table 3-1 OSD menu options and descriptions for Adaptive-Sync/FreeSync is On. Image Button-Adjusts the screen image. Display mode When you change the video input. NOTE: The default setting for using a button or a controller (select products only) (continued) Main menu Description Color Button-Selects and adjusts the screen color...
User Guide 1
Page 24
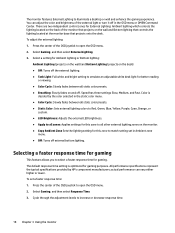
Color is optimized for gaming. The default response time setting is decided by HP's component manufacturers; actual performance can adjust the color and brightness of the monitor that projects on the monitor. ● Copy Ambient Zone Sets the lighting setting for better reading or viewing. ● Color Cycle: Slowly fades between all static color presets. ● Static Color: Sets external lighting colors to Red, Green, Blue, Yellow, Purple, Cyan, Orange, or custom. ● LED Brightness: Adjusts the...
Color is optimized for gaming. The default response time setting is decided by HP's component manufacturers; actual performance can adjust the color and brightness of the monitor that projects on the monitor. ● Copy Ambient Zone Sets the lighting setting for better reading or viewing. ● Color Cycle: Slowly fades between all static color presets. ● Static Color: Sets external lighting colors to Red, Green, Blue, Yellow, Purple, Cyan, Orange, or custom. ● LED Brightness: Adjusts the...
User Guide 1
Page 29
Brightness setting is displayed. "Input Signal Out of Range" is Video resolution and/or refresh rate displayed on the screen. "Power Button Lockout" is too low. power button function. to 9:00 p.m. (EST) (excluding public holidays).* OMEN chat support is disconnected. If you cannot solve a problem using the troubleshooting tips in this section, you call. 1. Open the OSD menu, and select Brightness to adjust the brightness scale as needed. Monitor video cable is available at www.hp.com/contacthp.* *Support options and hours are subject...
Brightness setting is displayed. "Input Signal Out of Range" is Video resolution and/or refresh rate displayed on the screen. "Power Button Lockout" is too low. power button function. to 9:00 p.m. (EST) (excluding public holidays).* OMEN chat support is disconnected. If you cannot solve a problem using the troubleshooting tips in this section, you call. 1. Open the OSD menu, and select Brightness to adjust the brightness scale as needed. Monitor video cable is available at www.hp.com/contacthp.* *Support options and hours are subject...
User Guide 1
Page 36
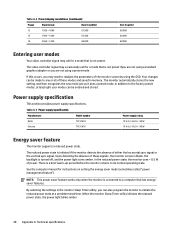
... Entering user modes Your video controller signal may call for a mode that is not preset ifyou are not using a standard graphics adapter or you are not using the OSD. When the monitor Sleep Timer utility initiates the reduced power state, the power light blinks amber. 30 Appendix A Technical specifications If this occurs, you may occasionally call for instructions on setting the energy saver mode (sometimes called "power management feature"). Table A-5 Power supply specification Manufacturer Model number...
... Entering user modes Your video controller signal may call for a mode that is not preset ifyou are not using a standard graphics adapter or you are not using the OSD. When the monitor Sleep Timer utility initiates the reduced power state, the power light blinks amber. 30 Appendix A Technical specifications If this occurs, you may occasionally call for instructions on setting the energy saver mode (sometimes called "power management feature"). Table A-5 Power supply specification Manufacturer Model number...


