HP Notebook Reference Guide - Windows 7
Page 7
...38 Removing a smart card ...38 Using a USB device ...38 Connecting a USB device 38 Removing a USB device ...39 Using 1394 devices (select models only 39 Connecting a 1394 device 40 Removing a 1394 device 40 Using an eSATA device (select models only 40 Connecting an eSATA device 41 Removing an eSATA device 41 Using optional external devices ...42 Using optional external drives 42 Using the expansion port (select models only 42 Using the docking connector (select models only 43 6 Drives ...44 Handling drives ...44 Using hard drives ...45 Improving hard drive performance 45 Using Disk...
...38 Removing a smart card ...38 Using a USB device ...38 Connecting a USB device 38 Removing a USB device ...39 Using 1394 devices (select models only 39 Connecting a 1394 device 40 Removing a 1394 device 40 Using an eSATA device (select models only 40 Connecting an eSATA device 41 Removing an eSATA device 41 Using optional external devices ...42 Using optional external drives 42 Using the expansion port (select models only 42 Using the docking connector (select models only 43 6 Drives ...44 Handling drives ...44 Using hard drives ...45 Improving hard drive performance 45 Using Disk...
HP Notebook Reference Guide - Windows 7
Page 32
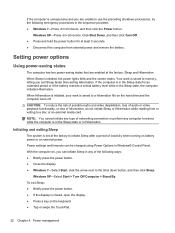
...; Control Panel. Initiating and exiting Sleep The system is set at the factory: Sleep and Hibernation. With the computer on, you can be changed using Power Options in Hibernation. When Hibernation is initiated, your work is saved to a disc or an external media card. Click Shut Down, and then click Turn Off. ● Press and hold the power button for an extended period or if the battery reaches a critical battery...
...; Control Panel. Initiating and exiting Sleep The system is set at the factory: Sleep and Hibernation. With the computer on, you can be changed using Power Options in Hibernation. When Hibernation is initiated, your work is saved to a disc or an external media card. Click Shut Down, and then click Turn Off. ● Press and hold the power button for an extended period or if the battery reaches a critical battery...
HP Notebook Reference Guide - Windows 7
Page 36
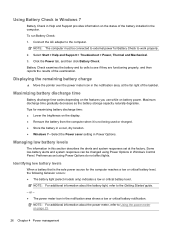
... 4 Power management Select Start > Help and Support > Troubleshoot > Power, Thermal and Mechanical. 3. Managing low battery levels The information in this section describes the alerts and system responses set using Power Options in Windows Control Panel. Preferences set at the far right of the taskbar. NOTE: For additional information about the power meter, refer to see if they are functioning properly, and then reports the results of the battery installed in...
... 4 Power management Select Start > Help and Support > Troubleshoot > Power, Thermal and Mechanical. 3. Managing low battery levels The information in this section describes the alerts and system responses set using Power Options in Windows Control Panel. Preferences set at the far right of the taskbar. NOTE: For additional information about the power meter, refer to see if they are functioning properly, and then reports the results of the battery installed in...
HP Notebook Reference Guide - Windows 7
Page 52
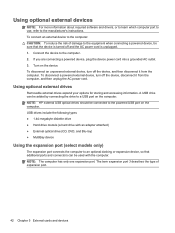
... port. Connect the device to the manufacturer's instructions. To disconnect an unpowered external device, turn off and the AC power cord is unplugged. 1. Using optional external drives Removable external drives expand your options for storing and accessing information. USB drives include the following types: ● 1.44-megabyte diskette drive ● Hard drive module (a hard drive with an adapter attached) ● External optical drive (CD, DVD, and Blu-ray) ● MultiBay device Using the expansion port (select models only) The expansion port connects the computer to the powered USB...
... port. Connect the device to the manufacturer's instructions. To disconnect an unpowered external device, turn off and the AC power cord is unplugged. 1. Using optional external drives Removable external drives expand your options for storing and accessing information. USB drives include the following types: ● 1.44-megabyte diskette drive ● Hard drive module (a hard drive with an adapter attached) ● External optical drive (CD, DVD, and Blu-ray) ● MultiBay device Using the expansion port (select models only) The expansion port connects the computer to the powered USB...
HP Notebook Reference Guide - Windows 7
Page 55
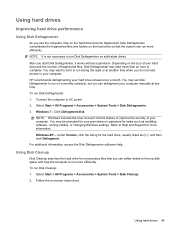
To run Disk Cleanup: 1. To run Disk Defragmenter: 1. Select Start > All Programs > Accessories > System Tools > Disk Cleanup. 2. Depending on the hard drive so that you do not need access to Help and Support for more efficiently. HP recommends defragmenting your hard drive and the number of fragmented files, Disk Defragmenter may set it works without supervision. Select Start > All Programs > Accessories > System Tools > Disk Defragmenter. 3. Windows 7-Click Defragment disk. Windows XP- Refer...
To run Disk Cleanup: 1. To run Disk Defragmenter: 1. Select Start > All Programs > Accessories > System Tools > Disk Cleanup. 2. Depending on the hard drive so that you do not need access to Help and Support for more efficiently. HP recommends defragmenting your hard drive and the number of fragmented files, Disk Defragmenter may set it works without supervision. Select Start > All Programs > Accessories > System Tools > Disk Defragmenter. 3. Windows 7-Click Defragment disk. Windows XP- Refer...
HP Notebook Reference Guide - Windows 7
Page 70
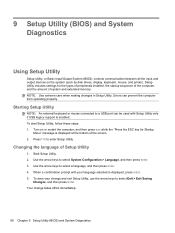
...drives, display, keyboard, mouse, and printer). Use the arrow keys to select a language, and then press enter. 4. Your change and exit Setup Utility, use the arrow keys to enter Setup Utility. Starting Setup Utility NOTE: An external keyboard or mouse connected to a USB port can prevent the computer from operating properly. Changing the language of system and extended memory. Errors can be used with your change takes effect immediately. 60 Chapter 9 Setup Utility (BIOS) and System Diagnostics Setup Utility includes settings for Startup Menu" message is displayed, press enter...
...drives, display, keyboard, mouse, and printer). Use the arrow keys to select a language, and then press enter. 4. Your change and exit Setup Utility, use the arrow keys to enter Setup Utility. Starting Setup Utility NOTE: An external keyboard or mouse connected to a USB port can prevent the computer from operating properly. Changing the language of system and extended memory. Errors can be used with your change takes effect immediately. 60 Chapter 9 Setup Utility (BIOS) and System Diagnostics Setup Utility includes settings for Startup Menu" message is displayed, press enter...
HP Notebook Reference Guide - Windows 7
Page 72
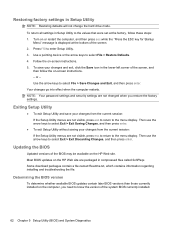
... Setup Utility menus are packaged in Setup Utility NOTE: Restoring defaults will not change the hard drive mode. Your changes go into effect when the computer restarts. Then use the arrow keys to the menu display. Most BIOS updates on the HP Web site. Use a pointing device or the arrow keys to enter Setup Utility. 3. Restoring factory settings in compressed files called SoftPaqs. To return all settings in the lower-left corner of the system BIOS currently installed. 62 Chapter 9 Setup Utility (BIOS...
... Setup Utility menus are packaged in Setup Utility NOTE: Restoring defaults will not change the hard drive mode. Your changes go into effect when the computer restarts. Then use the arrow keys to the menu display. Most BIOS updates on the HP Web site. Use a pointing device or the arrow keys to enter Setup Utility. 3. Restoring factory settings in compressed files called SoftPaqs. To return all settings in the lower-left corner of the system BIOS currently installed. 62 Chapter 9 Setup Utility (BIOS...
HP Notebook Reference Guide - Windows 7
Page 73
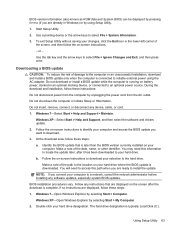
... external power using Setup Utility. 1. Windows 7-Open Windows Explorer by selecting Start > My Computer. 2. Double-click your hard drive where the BIOS update is later than the BIOS version currently installed on -screen instructions. - The hard drive designation is connected to a network, consult the network administrator before installing any device, cable, or cord. 1. To exit Setup Utility without saving your changes, click the Exit icon in the lower-left corner of the path to the location on -screen instructions to download your hard drive...
... external power using Setup Utility. 1. Windows 7-Open Windows Explorer by selecting Start > My Computer. 2. Double-click your hard drive where the BIOS update is later than the BIOS version currently installed on -screen instructions. - The hard drive designation is connected to a network, consult the network administrator before installing any device, cable, or cord. 1. To exit Setup Utility without saving your changes, click the Exit icon in the lower-left corner of the path to the location on -screen instructions to download your hard drive...
HP Notebook Reference Guide - Windows 7
Page 79
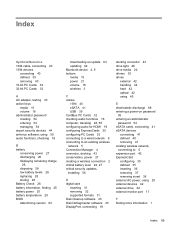
... software, using 55 audio functions, checking 16 B battery conserving power 27 discharging 26 displaying remaining charge 26 disposing 28 low battery levels 26 replacing 28 storing 28 Battery Check 26 battery information, finding 25 battery power 25 battery temperature 28 BIOS determining version 62 downloading an update 63 updating 62 Bluetooth device 2, 9 buttons media 15 power 21 volume 16 wireless 3 C cables 1394 40 eSATA 41 USB 39 CardBus PC Cards 32 checking audio functions 16 computer, traveling 28, 65 configuring audio for HDMI 19 configuring...
... software, using 55 audio functions, checking 16 B battery conserving power 27 discharging 26 displaying remaining charge 26 disposing 28 low battery levels 26 replacing 28 storing 28 Battery Check 26 battery information, finding 25 battery power 25 battery temperature 28 BIOS determining version 62 downloading an update 63 updating 62 Bluetooth device 2, 9 buttons media 15 power 21 volume 16 wireless 3 C cables 1394 40 eSATA 41 USB 39 CardBus PC Cards 32 checking audio functions 16 computer, traveling 28, 65 configuring audio for HDMI 19 configuring...

HP Notebook Reference Guide - Windows 7
Page 80
... media activity controls 15 media hotkeys 15 MediaSmart 20 modems connecting a modem cable 10 connecting a modem cable adapter 10 selecting a location setting 11 N network cable, connecting 13 network icon 2 inserting 33 removing 34 removing insert 33 software and drivers 33 supported types 32 ports DisplayPort 18 expansion 42 external monitor 17 HDMI 18 Intel Wireless Display 19 VGA 17 power battery 25 conserving 27 options 22 power button 21 power meter 23 power plans customizing 24 selecting 24 viewing current 23 power switch 21 power-on password creating 55 entering 55 managing...
... media activity controls 15 media hotkeys 15 MediaSmart 20 modems connecting a modem cable 10 connecting a modem cable adapter 10 selecting a location setting 11 N network cable, connecting 13 network icon 2 inserting 33 removing 34 removing insert 33 software and drivers 33 supported types 32 ports DisplayPort 18 expansion 42 external monitor 17 HDMI 18 Intel Wireless Display 19 VGA 17 power battery 25 conserving 27 options 22 power button 21 power meter 23 power plans customizing 24 selecting 24 viewing current 23 power switch 21 power-on password creating 55 entering 55 managing...
HP Limited Warranty and Techincal Support - 3-year - North America
Page 10
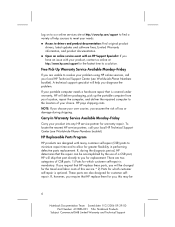
... Numbers booklet). NOTE: If you choose your own courier, you are two categories of your portable computer needs a hardware repair that part directly to you diagnose the problem. To locate the nearest HP service partner, call your needs: „ Access to drivers and product documentation: Find original product drivers, latest updates and software fixes, Limited Warranty information, and product documentation. „ Open an online service event with an HP Support...
... Numbers booklet). NOTE: If you choose your own courier, you are two categories of your portable computer needs a hardware repair that part directly to you diagnose the problem. To locate the nearest HP service partner, call your needs: „ Access to drivers and product documentation: Find original product drivers, latest updates and software fixes, Limited Warranty information, and product documentation. „ Open an online service event with an HP Support...

HP Limited Warranty and Technical Support - 90 day - North America
Page 10
... computer needs a hardware repair that the repair can be accomplished by the use of a CSR part, HP will be 6 Notebook Documentation Team Saved date: 8/2/2006 20:29:00 Part Number: 410837-001 Title: Notebook Products Subject: Commercial-SMB Limited Warranty and Technical Support If your choice. NOTE: If you choose your needs: „ Access to drivers and product documentation: Find original product drivers, latest updates and software fixes, Limited...
... computer needs a hardware repair that the repair can be accomplished by the use of a CSR part, HP will be 6 Notebook Documentation Team Saved date: 8/2/2006 20:29:00 Part Number: 410837-001 Title: Notebook Products Subject: Commercial-SMB Limited Warranty and Technical Support If your choice. NOTE: If you choose your needs: „ Access to drivers and product documentation: Find original product drivers, latest updates and software fixes, Limited...
HP Limited Worldwide Warranty and Technical Support 3-yr - North America
Page 10
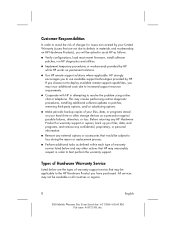
This may reasonably request in order to best perform the warranty support. Before returning any HP Hardware Product for issues not covered by your Limited Warranty (issues that are the types of warranty support service that HP may involve performing routine diagnostic procedures, installing additional software updates or patches, removing third-party options, and/or substituting options. „ Make periodic backup copies of your files, data, or programs...
This may reasonably request in order to best perform the warranty support. Before returning any HP Hardware Product for issues not covered by your Limited Warranty (issues that are the types of warranty support service that HP may involve performing routine diagnostic procedures, installing additional software updates or patches, removing third-party options, and/or substituting options. „ Make periodic backup copies of your files, data, or programs...
HP Limited Worldwide Warranty and Technical Support 3-yr - North America
Page 14
... in all manufacturers labels (such as serial numbers) are in your installation questions (how to, first steps, and prerequisites). „ Setting up and configuring the software and options supplied or purchased with : „ Answering your End User License Agreement (EULA). „ Subject to its reasonable security requirements, provide HP with sufficient, free, and safe access to and use of all facilities, information, and...
... in all manufacturers labels (such as serial numbers) are in your installation questions (how to, first steps, and prerequisites). „ Setting up and configuring the software and options supplied or purchased with : „ Answering your End User License Agreement (EULA). „ Subject to its reasonable security requirements, provide HP with sufficient, free, and safe access to and use of all facilities, information, and...
Worldwide Waranty and Technical Support - HP - 90day - North America
Page 6
... modification or service by HP that has been damaged or rendered defective (a) as a result of a replacement. As with all batteries, the maximum capacity of the battery included in the HP Product will decrease with the product; (c) by software, interfacing, parts or supplies not supplied by operation outside the usage parameters stated in which the serial number has been removed or that is...
... modification or service by HP that has been damaged or rendered defective (a) as a result of a replacement. As with all batteries, the maximum capacity of the battery included in the HP Product will decrease with the product; (c) by software, interfacing, parts or supplies not supplied by operation outside the usage parameters stated in which the serial number has been removed or that is...
Worldwide Waranty and Technical Support - HP - 90day - North America
Page 14
Excludes system optimization, customization and network configuration. „ Interpreting system error messages. „ Isolating system problems to software usage problems. „ Obtaining HP Care Pack information or updates for ninety (90) days from HP via multiple contact methods, including electronic media and telephone, for software supplied or purchased with HP Hardware Products (how-to this will be available in your installation questions (how to http...
Excludes system optimization, customization and network configuration. „ Interpreting system error messages. „ Isolating system problems to software usage problems. „ Obtaining HP Care Pack information or updates for ninety (90) days from HP via multiple contact methods, including electronic media and telephone, for software supplied or purchased with HP Hardware Products (how-to this will be available in your installation questions (how to http...

Getting Started HP Notebook - Windows 7
Page 32
... To turn the TouchPad on and off, quickly double-tap the TouchPad on the computer. Off Indicates that the TouchPad is on an external mouse. Setting pointing device preferences Use Mouse Properties in the direction you can use an external USB mouse (purchased separately) by connecting it to one finger across the TouchPad in Windows to customize settings for pointing devices, such as button configuration, click speed, and pointer options. Use the left and right TouchPad buttons...
... To turn the TouchPad on and off, quickly double-tap the TouchPad on the computer. Off Indicates that the TouchPad is on an external mouse. Setting pointing device preferences Use Mouse Properties in the direction you can use an external USB mouse (purchased separately) by connecting it to one finger across the TouchPad in Windows to customize settings for pointing devices, such as button configuration, click speed, and pointer options. Use the left and right TouchPad buttons...

Getting Started HP Notebook - Windows 7
Page 46
... you cannot restore using HP Recovery Manager. Creating restore media HP recommends that you create either a set of a recovery partition, click Start, right-click Computer, click Manage, and then click Disk Management. Restore In the event of hard drive failure, to restore your system to its factory image you will be prompted to continue the backup creation process. If the recovery partition is present, a Recovery drive is listed in a safe place. NOTE: Recovery discs have finished creating the recovery discs or recovery flash drive. Create these discs or flash drive carefully...
... you cannot restore using HP Recovery Manager. Creating restore media HP recommends that you create either a set of a recovery partition, click Start, right-click Computer, click Manage, and then click Disk Management. Restore In the event of hard drive failure, to restore your system to its factory image you will be prompted to continue the backup creation process. If the recovery partition is present, a Recovery drive is listed in a safe place. NOTE: Recovery discs have finished creating the recovery discs or recovery flash drive. Create these discs or flash drive carefully...
HP Mini 210 Maintenance and Service Guide
Page 99
... 7 D device specifications 72 devices, mass storage 21 Diagnostics Menu, Setup Utility 71 Digital Media Slot, identifying 8 diskette drive precautions 32 display specifications 73, 74 display assembly removal 59 spare part numbers 14, 25, 26, 27, 59 drive light, identifying 9 drives, preventing damage 32 E electrostatic discharge 33 Ethernet, product description 1 exiting Setup Utility 69 external media cards, product description 2 external monitor port 9 F f11 79 fan, spare part number 18, 27 fan/heat sink removal 63 spare part numbers 63 feet locations 36 spare part number 36 fn key...
... 7 D device specifications 72 devices, mass storage 21 Diagnostics Menu, Setup Utility 71 Digital Media Slot, identifying 8 diskette drive precautions 32 display specifications 73, 74 display assembly removal 59 spare part numbers 14, 25, 26, 27, 59 drive light, identifying 9 drives, preventing damage 32 E electrostatic discharge 33 Ethernet, product description 1 exiting Setup Utility 69 external media cards, product description 2 external monitor port 9 F f11 79 fan, spare part number 18, 27 fan/heat sink removal 63 spare part numbers 63 feet locations 36 spare part number 36 fn key...

HP Mini 210 Maintenance and Service Guide
Page 100
... media cards 2 graphics 1 hard drive 1 internal media cards 2 keyboard 2 memory module 1 modem 1 operating system 3 optical drive 1 panels 1 pointing device 2 ports 2 power requirements 2 processors 1 product name 1 security 3 serviceability 3 video 1 wireless 2 product name 1 Q QuickWeb button 6 R recovering from the dedicated recovery partition 79 recovering from the recovery discs 79 recovery discs 77 recovery, system 77 recycling battery 85 display 85 removal/replacement preliminaries 31 procedures 36 restore points 82 restoring default settings in Setup Utility 69 RJ-45 (network) jack...
... media cards 2 graphics 1 hard drive 1 internal media cards 2 keyboard 2 memory module 1 modem 1 operating system 3 optical drive 1 panels 1 pointing device 2 ports 2 power requirements 2 processors 1 product name 1 security 3 serviceability 3 video 1 wireless 2 product name 1 Q QuickWeb button 6 R recovering from the dedicated recovery partition 79 recovering from the recovery discs 79 recovery discs 77 recovery, system 77 recycling battery 85 display 85 removal/replacement preliminaries 31 procedures 36 restore points 82 restoring default settings in Setup Utility 69 RJ-45 (network) jack...


