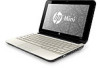
HP Mini 2102, HP Mini 210, and Compaq Mini 210 - Maintenance and Service Guide
Page 7
... points 75 When to create restore points 75 Creating a system restore point 75 Restoring to a previous date and time 75 Backing up and recovering using HP Recovery Manager 76 Backing up your information 76 Creating a set of recovery discs 77 Performing a recovery ...78 Recovering using the recovery discs 78 Recovering using... (headphone) ...83 External monitor ...84 RJ-45 (network) ...85 Universal Serial Bus ...85 8 Power cord set requirements ...86 Requirements for all countries ...86 Requirements for specific countries and regions 87 9 Recycling ...88 Battery ...88 Display ...88 vii
HP Mini 2102, HP Mini 210, and Compaq Mini 210 - Maintenance and Service Guide
Page 22
... support for the device. (4) Warranty period: This number describes the duration of the warranty period for the device. (5) Part number/Product number (p/n): This number provides specific information about the product's hardware components. 3 Illustrated parts catalog Service tag When ordering parts or requesting information, provide the computer serial number and model description...
HP Mini 2102, HP Mini 210, and Compaq Mini 210 - Maintenance and Service Guide
Page 44
... product. (3) Model description: This is the alphanumeric identifier used to locate documents, drivers, and support for the device. (5) Part number/Product number (p/n): This number provides specific information about the product's hardware components. Service tag When ordering parts or requesting information, provide the computer serial number and model description provided on the...
HP Mini 2102, HP Mini 210, and Compaq Mini 210 - Maintenance and Service Guide
Page 77
... computer. Select System information To do this ● View and change the system time and date. ● View identification information about the computer. ● View specification information about the processor, memory size, and system BIOS. After either choice, the computer restarts in this chapter may not be supported by your changes...
HP Mini 2102, HP Mini 210, and Compaq Mini 210 - Maintenance and Service Guide
Page 83
.... 4. Follow the on -screen instructions. In the left pane, click System protection. 3. NOTE: If you can create additional restore points to a restore point (created at a specific point in time. Click Start, click Control Panel, click System and Security, and then click System. 2. A system restore point allows you to create restore points...
HP Mini 2102, HP Mini 210, and Compaq Mini 210 - Maintenance and Service Guide
Page 95
... The wall plug must bear a "T" mark and registration number in the country or region where it will be used . 2. Requirements for specific countries and regions Country/region Accredited agency Applicable note number Australia EANSW 1 Austria OVE 1 Belgium CEBC 1 Canada CSA 2 Denmark DEMKO 1 ...bear the certification mark of the agency responsible for evaluation in accordance with the Japanese Dentori Law. Requirements for specific countries and regions 87 Power cord set fittings (appliance coupler and wall plug) must bear the certification mark of...
HP Mini 2102, HP Mini 210, and Compaq Mini 210 - Maintenance and Service Guide
Page 96
Caution must be disassembled to gain access to display components. This HP product contains mercury in the backlight in damage to the backlight (1) and the liquid crystal display (LCD) panel (2). Specific details, such as screw sizes, quantities, and locations, and component shapes and sizes, can result in the display assembly that might require...
Mini User Guide - Windows 7
Page 22
... approved for use to determine what components and parts are needed. ◦ Model description (4). This number provides specific information about optional wireless devices and the approval markings of some of the warranty period for your HP Mobile Broadband Module (select models only). The part number helps a service technician to locate documents, drivers...
Mini User Guide - Windows 7
Page 27
... notification area, at the far right of information. Battery Check examines the battery and its cells to maximize battery life ● Information on battery types, specifications, life cycles, and capacity To access battery information: ▲ Select Start > Control Panel > Hardware and Sound > Power Options > Tell me more about power plans. To...
Mini User Guide - Windows 7
Page 65
... has 3 USB ports, which is usually included with the computer. You will hear a sound when the device has been detected. For more information about device-specific software, refer to the USB port. NOTE: When you connect a USB device, you know that the device is recognized by the system. Removing a USB device...
Mini User Guide - Windows 7
Page 69
... the assigned function. You can connect an external USB mouse to the computer using , pressing fn and one of the action keys opens a specific shortcut menu within that are customized actions that program. Icon Description Opens Help and Support, which provides information about your computer. Using the keyboard ...brightness level incrementally when you are using one of the keyboard. Using the keyboard Using the action keys Action keys are assigned to specific keys at the factory. Connecting an external mouse You can disable this key to activate the assigned function.
Mini User Guide - Windows 7
Page 74
...and Touch > Pen Options tab. 2. Select Start > Control Panel > Hardware and Sound > Pen and Touch > Flicks tab. 2. These preferences are specific to any changes or testing the settings, click OK. Under Pen Actions, select the action, and then click Settings. 3. These preferences apply to the ... the computer. ▲ To set preferences for left-handed or right-handed users, select Start > Control Panel > Hardware and Sound > Tablet PC Settings > Other tab. Setting touch screen preferences ▲ To set pointing device preferences such as pointer speed, click speed, and mouse trails,...
Mini User Guide - Windows 7
Page 89
... Utility menus The menu tables in this section provide an overview of 5 seconds each (0, 5, 10, 15, 20). ● HP QuickWeb-Enable/disable the QuickWeb Boot menu in Setup Utility. ● Internal Network Adapter boot―Enable/disable boot from Internal Network ...change , or delete a power-on password. Enter, change the system time and date. ● View identification information about the computer. ● View specification information about the processor, memory size, and system BIOS. Set the following boot options: ● f10 and f12 Delay (sec.)―Set the delay for...
Mini User Guide - Windows XP
Page 22
The service tag label is the alphanumeric identifier you contact technical support. This number provides specific information about optional wireless devices and the approval markings of some of the countries or regions in which the devices have been approved for ...◦ The serial number of the computer. This is an alphanumeric identifier that is located under the bottom panel of the warranty period for your HP Mobile Broadband Module (select models only). The regulatory label is unique to the section "Removing the bottom panel," earlier in years) of the computer.
Mini User Guide - Windows XP
Page 66
... CAUTION: To prevent loss of information or an unresponsive system, stop a USB device before removing it. 56 Chapter 8 USB devices For more information about device-specific software, refer to the USB port. The computer has 3 USB ports, which is recognized by the system. Devices can be connected to let you may...
Mini User Guide - Windows XP
Page 70
Rotating Rotating allows you are assigned to specific keys at the factory. Refer to activate the assigned function. NOTE: Depending on the program you rotate items such as photos and pages. To use .... To rotate, anchor your thumb on the computer. You can connect an external USB mouse to the computer using one of the action keys opens a specific shortcut menu within that are using, pressing fn and one of the action keys to your thumb. Icon Description Opens Help and Support, which provides...
Mini User Guide - Windows XP
Page 75
... computer. ▲ To set preferences for left-handed or right-handed users, select Start > Control Panel > Sounds, Speech, and Audio Devices > Tablet PC Settings > Other tab. Select Start > Control Panel > Sounds, Speech, and Audio Devices > Pen and Touch > Pen Options tab. 2. Select Start ...Control Panel > Sounds, Speech, and Audio Devices > Pen and Touch > Flicks tab 2. To change or test click settings: 1. These preferences are specific to the touch screen and the computer. ▲ To set preferences for visual feedback, select Start > Control Panel > Sounds, Speech, and Audio Devices...
Mini User Guide - Windows XP
Page 90
... Power-On Password To do this ● View and change the system time and date. ● View identification information about the computer. ● View specification information about the processor, memory size, and system BIOS. Set the following boot options: ● f10 and f12 Delay (sec.)―Set the delay for... Change the Setup Utility language. Main menu Select System information To do this section provide an overview of 5 seconds each (0, 5, 10, 15, 20). ● HP QuickWeb―Enable/disable the QuickWeb Boot menu in this chapter may not be supported by your computer.