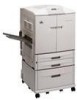
HP Color LaserJet 9500n and 9500hdn - Software Technical Reference
Page 27
... the User Reference Guide that came with the printer, the following guides for the HP Color LaserJet 9500 is installed inside the front doors of the User Reference Guide for the HP Color LaserJet 9500 printer are available on the HP Color LaserJet 9500 printingsystem software CD-ROM. HP Color LaserJet 9500 printing-system release notes The HP Color LaserJet 9500 Printing-System Release notes, late-breaking information...
HP Color LaserJet 9500n and 9500hdn - Software Technical Reference
Page 41
... Path. 9. Click OK. 11. Click Security. 15. Printer Status and Alerts The HP Color LaserJet 9500 printing-system software includes a utility called Printer Status and Alerts that you can install Internet Explorer after installing Printer Status and Alerts. • Netscape browsers do not support Printer Status and Alerts with the printer only during an active print job, which...
HP Color LaserJet 9500n/9500hdn - User Reference Guide
Page 15
Remove the packing materials 1 Remove all of the packaging from the top, 2 inside the tray. 3 1 Printer setup 13 To remove the packaging 1 Remove the orange tape from the outside of the front doors and from tray 1 on the right side of the tray, and also remove the orange plastic spacers inside edge of the printer. 2 Remove the protective film from the printer control panel. 3 Open each tray and remove the orange tape from the printer. Step 2.
HP Color LaserJet 9500n/9500hdn - User Reference Guide
Page 17
... space around the printer for opening doors and clearing jams Regulate the environment The location you choose for your printer should have the following characteristics: q a well-ventilated area q no abrupt temperature or humidity changes Printer weight (without print cartridges or image drums) q HP color LaserJet 9500n printer: 100 kg (221 lb) q HP color LaserJet 9500hdn printer: 130 kg (287 lb) 1 Printer setup 15 Step...
HP Color LaserJet 9500n/9500hdn - User Reference Guide
Page 21
... the HP Jetdirect print services) server RJ-45 connector 15 the parallel cable 12 the HP Jet-Link connector (IEEE-1284c)* 7 high-capacity tray 4 (included with HP color LaserJet 9500hdn) connector 16 the accessory power connector 17 the power-cord connector *Products labeled "IEEE" meet the standards established by the Institute of Electrical and Electronic Engineers. 1 Printer...
HP Color LaserJet 9500n/9500hdn - User Reference Guide
Page 22
Slide the back cover of the printer. Close the printer door. The HP Paper Sample Guide 20 Introduction ENWW Step 7. Open the left-front door of the paper sample guide into the slot on your printer. Install the HP Paper Sample Guide (optional) Note This guide might already be installed on the door. Remove the HP Paper Sample Guide from its packaging.
HP Color LaserJet 9500n/9500hdn - User Reference Guide
Page 24
Load staples 1 If you have purchased a stapler/stacker or multifunction finisher, use this procedure to load staples in the stapler/stacker or multifunction finisher. (In this example, the multifunction finisher is shown.) To load staples 1 Move the stapler/stacker or multifunction finisher away from the printer. 2 2 Open the stapler-unit door. 3 On the empty staple cartridge, squeeze the tabs together and pull the empty cartridge out. 4 Insert the new staple cartridge so that it snaps into place. continued on the next page 3 4 22 Introduction ENWW
HP Color LaserJet 9500n/9500hdn - User Reference Guide
Page 25
5 5 Close the stapler-unit door. 6 Reattach the stapler/stacker or multifunction finisher to the printer. 6 1 Printer setup 23
HP Color LaserJet 9500n/9500hdn - User Reference Guide
Page 26
The cartridges can snag on parts inside the printer. 1 Open the front doors of the cartridge with cold water. To install the print cartridges 2 Note Before you begin, you are installing the correct color cartridge in the correct slot for the blue lever that corresponds to the yellow print...the arrow label on your clothes or hands, wash them with the arrow label above the empty slot. Install the four print cartridges 1 The printer uses four print cartridges: yellow, magenta, cyan, and black. Note 4 Shaking the cartridge is being installed. Hot water causes toner to adhere...
HP Color LaserJet 9500n/9500hdn - User Reference Guide
Page 29
... the orange tape and discard them. Pull the orange handle on your clothes or hands, wash them . 5 Note Do not shake the drum. 1 Printer setup 27 Remove any sequence, but each drum must be installed in cold water. Use the following procedure to remove them in the correct slot... protective cover on the side of the drum until it clicks and the image drum door unlatches. 3 Open the image drum door completely. Step 12. The drums can be installed in any styrofoam packing material that color. Do not touch the green component inside the drum. Pull the two orange rings...
HP Color LaserJet 9500n/9500hdn - User Reference Guide
Page 30
6 6 Make sure that the four blue levers above the image-drum door are completely inserted into the printer, that the image drum door is closed securely, and that the image transfer cleaner is completely in place. 11 28 Introduction ENWW Note If the drum does not fit into ... installed. 7 7 Hold the gray protective cover in the horizontal position. Close the front doors. Rest the end of the door until it stops. 10 11 Swing the large, green lever up , make sure that you are installing the correct color drum in the correct slot, and that you cannot rotate the green lever...
HP Color LaserJet 9500n/9500hdn - User Reference Guide
Page 68
... The accessory is on and ready. The accessory is on and ready. q The accessory is experiencing a hardware malfunction. q The lower-right door might be removed from the tray, even if the page is not jammed. q The accessory is not jammed. Solid amber The accessory is ... accessory has a jam, or a page needs to be in service mode. Interpreting the lights on the accessories Use the following table to the printer. The accessory is not receiving power. mode. Press any button. The accessory is not receiving power. 66 Control panel ENWW q The accessory is...
HP Color LaserJet 9500n/9500hdn - User Reference Guide
Page 181
...seals to the empty cartridge you are installing the correct color in cold water. The gauge that corresponds to the empty cartridge blinks. 2 2 Open the front doors of the printer and locate the blue lever that you are four color print cartridges: yellow, magenta, cyan, and black. ...Note If the cartridge does not fit, make sure that corresponds to remove. 4 5 Align the arrow label on the top of the printer. 1 Replacing print...
HP Color LaserJet 9500n/9500hdn - User Reference Guide
Page 182
For recycling information, see the recycling guide that the cartridge is included with the new cartridge. 8 9 180 Print cartridges ENWW 6 6 Turn the blue lever to the left until it clicks into place. 7 Repeat steps 2 through 6 for each cartridge that needs to be replaced, and then close the front doors. 8 Make sure that READY appears on the control panel display, and the gauge for the replaced cartridge indicates that is new. 9 Pack and seal the used cartridge in the packaging from the 7 new cartridge.
HP Color LaserJet 9500n/9500hdn - User Reference Guide
Page 184
...four color image drums: yellow, magenta, cyan, and black. Use this procedure, you might want to remove your hands, wash them with cold water. 5 182 Image drums ENWW Note The blue print cartridge latches must be installed. 4 5 Pull the used drum blinks. 2 Open the front doors of the printer ...green lever down. 3 3 Rotate the blue dial up until it clicks, and the image-drum door unlatches. 4 Open the door completely. The gauge that the image drums can snag on parts inside the printer. 1 Replace the image drum when REPLACE DRUM appears on the control panel display. Grasp the ...
HP Color LaserJet 9500n/9500hdn - User Reference Guide
Page 185
... top of the drum all the way out to slide the drum firmly and completely into the printer. Save the gray protective cover. 9 Note If the drum does not fit into place. 10 6 Managing the printer 183 6 6 Remove the new drum from inside the cartridge. 7 Place the drum on a level...slot and that you have the drum aligned correctly. 10 Repeat steps 5 through 9 for each cartridge that the four blue levers above the door are installing the correct color in the horizontal position. Do not touch the green component inside the cartridge. Note Do not shake the drum. 8 8 Make sure ...
HP Color LaserJet 9500n/9500hdn - User Reference Guide
Page 186
For recycling information, see the recycling guide that the drum is included with the new drum. 12 13 14 184 Image drums ENWW 11 11 Rotate the blue dial downward until it stops. 12 Swing the large green lever up. Close the front doors. 13 READY appears on the control panel display, and the gauge for the replaced image drum indicates that is new. 14 Pack and seal the used drum and the protective slide in the packaging from the new drum.
HP Color LaserJet 9500n/9500hdn - User Reference Guide
Page 188
... the belt, prepare a paper-covered surface on which can snag on parts inside the printer. 1 Replace the image transfer kit when REPLACE TRANSFER KIT 2 appears on the control panel...loaded in cold water. Hot water sets toner into fabric. 5 Pull the blue handle on the bottom of the printer. 3 Note Residual toner might be on the transfer belt; Note Remove your clothing, wipe it . If toner... in the tray, and then close the tray. 3 Open the front doors of the printer, and then swing the large green lever down. 4 Open the upper door on the right side of the belt until the belt 4 stops. 5...
HP Color LaserJet 9500n/9500hdn - User Reference Guide
Page 189
... surface of the new transfer belt. 8 Grasp both sides of the belt, press the blue levers on the belt with the blue arrows inside the printer. Close the right door. Note If the right door does not close, make sure that the transfer belt is heavy. 6 Grasp both sides of the...
HP Color LaserJet 9500n/9500hdn - User Reference Guide
Page 190
... If the lever does not move freely, make sure that the transfer roller and the transfer belt are pushed into the printer completely. 13 14 On the right side of the printer, pull the blue tab to remove the old filter from the slot. 15 Remove the new filter from its packaging... Do not touch the black foam roller, and take care not to scratch the underside of the belt as you insert the roller into the printer. 12 Using one hand to a 45-degree angle and align the roller with the slot. Close all of the roller, turn the 12 roller to...