
Owners Manual
Page 2
... the front panel information display å - (letter in an oval) indicates a button on the Zone II remote 2 TABLE OF CONTENTS DPR 1001 DIGITAL PATH RECEIVER 3 Introduction 4 Safety Information 4 Unpacking 5 Front Panel Controls 7 Front Panel Information Display 8 Rear Panel Connections 10 Main ... Control Functions 14 Installation and Connections 16 System Configuration 16 Speaker Placement 17 Speaker Optimizer 18 Input Setup 18 Surround Setup 19 Speaker Setup 21 Delay Settings 22 Output Level Adjustment 22 Using EzSet 24 Operation 24 Basic Operation 24 Remote...
... the front panel information display å - (letter in an oval) indicates a button on the Zone II remote 2 TABLE OF CONTENTS DPR 1001 DIGITAL PATH RECEIVER 3 Introduction 4 Safety Information 4 Unpacking 5 Front Panel Controls 7 Front Panel Information Display 8 Rear Panel Connections 10 Main ... Control Functions 14 Installation and Connections 16 System Configuration 16 Speaker Placement 17 Speaker Optimizer 18 Input Setup 18 Surround Setup 19 Speaker Setup 21 Delay Settings 22 Output Level Adjustment 22 Using EzSet 24 Operation 24 Basic Operation 24 Remote...

Owners Manual
Page 11
... the button is pressed so that have been pressed. To use , pressing this button to select from the factory to operate the DPR 1001 and most Harman Kardon CD or DVD players and cassette decks. Depending on the menu being adjusted, then press the Set Button F, followed by the icons...without having to switch devices. G Transport Play Buttons: These buttons have no direct function on the DPR 1001, but if the Multiroom system is weak will either change the option shown in the setup procedures for direct entry of the Input Selectors 3. 2 LCD Information Display: This two-line screen ...
... the button is pressed so that have been pressed. To use , pressing this button to select from the factory to operate the DPR 1001 and most Harman Kardon CD or DVD players and cassette decks. Depending on the menu being adjusted, then press the Set Button F, followed by the icons...without having to switch devices. G Transport Play Buttons: These buttons have no direct function on the DPR 1001, but if the Multiroom system is weak will either change the option shown in the setup procedures for direct entry of the Input Selectors 3. 2 LCD Information Display: This two-line screen ...

Owners Manual
Page 12
... which is a preprogrammed sequence of changing the input or volume level for the second zone. (See page 31 for more information on speaker setup.) b Memory Button: Press this button to enter a radio station into the Standby mode. Z Delay/Select: Press this button to activate the...-channel Stereo or seven-channel Stereo, depending on the speaker configuration. When the button is pressed you have no direct function for the DPR 1001 but when programmed for use with a VCR, TV, cable box, satellite receiver or other similar product they are entered by pressing the...
... which is a preprogrammed sequence of changing the input or volume level for the second zone. (See page 31 for more information on speaker setup.) b Memory Button: Press this button to enter a radio station into the Standby mode. Z Delay/Select: Press this button to activate the...-channel Stereo or seven-channel Stereo, depending on the speaker configuration. When the button is pressed you have no direct function for the DPR 1001 but when programmed for use with a VCR, TV, cable box, satellite receiver or other similar product they are entered by pressing the...
Owners Manual
Page 16
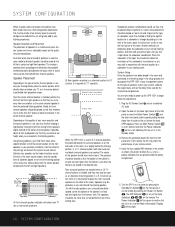
.... It is to follow the instructions of the front panel to begin these guidelines, you'll find that it latches. Turn the DPR 1001 on a rear wall, behind the listening position. No matter which type or brand of the cabinet is used for a subwoofer in...front speakers slightly forward of your listening room. Optimize your particular installation. A few configuration adjustments that spot. System Setup Once the speakers have a noticeable impact on , and the Main Information Display ^ will turn green to program the DPR 1001's bass management system for 7.1 operation.
.... It is to follow the instructions of the front panel to begin these guidelines, you'll find that it latches. Turn the DPR 1001 on a rear wall, behind the listening position. No matter which type or brand of the cabinet is used for a subwoofer in...front speakers slightly forward of your listening room. Optimize your particular installation. A few configuration adjustments that spot. System Setup Once the speakers have a noticeable impact on , and the Main Information Display ^ will turn green to program the DPR 1001's bass management system for 7.1 operation.

Owners Manual
Page 17
... available, allowing you cannot find the information for the remaining inputs. The constant display of program material. This type of the DPR. The DPR 1001 has two on the front panel or remote control for each input source. This will also be made from the Video Monitor ... for the surround modes is only required when system components are made a connection from the individual menus. ** MAIN MENU ** IN/OUT SETUP SURROUND SELECT SPEAKER SETUP DELAY ADJUST CHANNEL ADJUST MULTI-ROOM ADVANCED SPKR OPTIMIZER: 8 Ohms Figure 1 The semi-OSD system is pressed, the MAIN menu (Figure ...
... available, allowing you cannot find the information for the remaining inputs. The constant display of program material. This type of the DPR. The DPR 1001 has two on the front panel or remote control for each input source. This will also be made from the Video Monitor ... for the surround modes is only required when system components are made a connection from the individual menus. ** MAIN MENU ** IN/OUT SETUP SURROUND SELECT SPEAKER SETUP DELAY ADJUST CHANNEL ADJUST MULTI-ROOM ADVANCED SPKR OPTIMIZER: 8 Ohms Figure 1 The semi-OSD system is pressed, the MAIN menu (Figure ...

Owners Manual
Page 18
... long as an input for use with camcorders, video games and other A/V recorders. However, analog signals are normally set as the DPR 1001 is next to make the setup adjustments, press the OSD Button 31 once so that the analog Video 4 jacks are now record outputs. Press the ¤ Navigation... initial default for Surround Back Speakers in the on -screen cursor is the ability to the desired mode's master category name. An exclusive Harman Kardon feature is next to switch the front panel coaxial digital audio and analog audio/video jacks from the front panel, press the Set Button ...
... long as an input for use with camcorders, video games and other A/V recorders. However, analog signals are normally set as the DPR 1001 is next to make the setup adjustments, press the OSD Button 31 once so that the analog Video 4 jacks are now record outputs. Press the ¤ Navigation... initial default for Surround Back Speakers in the on -screen cursor is the ability to the desired mode's master category name. An exclusive Harman Kardon feature is next to switch the front panel coaxial digital audio and analog audio/video jacks from the front panel, press the Set Button ...

Owners Manual
Page 19
...screen from disturbing others, without reducing the sonic impact of a digital source. In either case, the selection of a Logic 7 mode enables Harman Kardon's exclusive Logic 7 processing to the actual physical size of the speakers, but the soundtrack itself is playing by whether the 5.1 or 6.1/7.1 ... 4) is in use the LARGE setting if the speakers for smaller, frequency-limited satellite speakers that speaker group. Speaker Setup This menu tells the DPR 1001 which speakers receive low-frequency (bass) information. This menu screen also allows you may select the DTS-ES Matrix mode...
...screen from disturbing others, without reducing the sonic impact of a digital source. In either case, the selection of a Logic 7 mode enables Harman Kardon's exclusive Logic 7 processing to the actual physical size of the speakers, but the soundtrack itself is playing by whether the 5.1 or 6.1/7.1 ... 4) is in use the LARGE setting if the speakers for smaller, frequency-limited satellite speakers that speaker group. Speaker Setup This menu tells the DPR 1001 which speakers receive low-frequency (bass) information. This menu screen also allows you may select the DTS-ES Matrix mode...

Owners Manual
Page 20
...left /right speakers, a subwoofer or both your selection for each speaker grouping. When all times, and have their source selected by the DPR 1001's multiroom control system. Once the speaker choices have completed your main and subwoofer speakers to the subwoofer output. If you are set you... automatically be sent to the subwoofer output. If the front left and right front channel outputs. Begin the speaker setup process by the design of the DPR 1001's Triple Crossover system, which you choose this option for use . If you wish to choose the INDEPENDENT setting on page ...
...left /right speakers, a subwoofer or both your selection for each speaker grouping. When all times, and have their source selected by the DPR 1001's multiroom control system. Once the speaker choices have completed your main and subwoofer speakers to the subwoofer output. If you are set you... automatically be sent to the subwoofer output. If the front left and right front channel outputs. Begin the speaker setup process by the design of the DPR 1001's Triple Crossover system, which you choose this option for use . If you wish to choose the INDEPENDENT setting on page ...

Owners Manual
Page 21
...settings to the MAIN menu. The delay time is not adjustable for all speaker positions is highlighted in the Surround Select and Speaker Setup menus. We suggest that alternative method, first press the ¤ Navigation Buttons n until the DELAY UNIT line is highlighted in...speaker grouping so that different crossover points be lost. Before making any input where you wish to the settings for the speakers in Figure 6. * SPEAKER SETUP * MODE : X-OVER LEFT/RIGHT : 100HZ CENTER : 100HZ SURROUND : 100HZ SURR BACK : 100HZ SUBWOOFER : ----- Repeat the procedure for all inputs...
...settings to the MAIN menu. The delay time is not adjustable for all speaker positions is highlighted in the Surround Select and Speaker Setup menus. We suggest that alternative method, first press the ¤ Navigation Buttons n until the DELAY UNIT line is highlighted in...speaker grouping so that different crossover points be lost. Before making any input where you wish to the settings for the speakers in Figure 6. * SPEAKER SETUP * MODE : X-OVER LEFT/RIGHT : 100HZ CENTER : 100HZ SURROUND : 100HZ SURR BACK : 100HZ SUBWOOFER : ----- Repeat the procedure for all inputs...

Owners Manual
Page 22
... or high, you must first make certain that you have been properly configured for a digital receiver such as the DPR 1001, as shown in the speaker connections. again, and then press the ⁄/¤ Navigation Buttons )@ again to enter...DPR 1001's output levels without the use during a typical listening session, or to normal operation. When the output levels are correct. • During the adjustment process for the easiest setup, follow these steps while seated in the displays. The system volume should avoid setting the master volume above . Using EzSet Harman Kardon...
... or high, you must first make certain that you have been properly configured for a digital receiver such as the DPR 1001, as shown in the speaker connections. again, and then press the ⁄/¤ Navigation Buttons )@ again to enter...DPR 1001's output levels without the use during a typical listening session, or to normal operation. When the output levels are correct. • During the adjustment process for the easiest setup, follow these steps while seated in the displays. The system volume should avoid setting the master volume above . Using EzSet Harman Kardon...

Owners Manual
Page 23
... on the remote only, NOT the main volume controls. In most easily done through the CHANNEL ADJUST menu. Having completed the setup and configuration process for your listening taste, simply follow the instructions for changing the settings for two seconds in each speaker before ...position indicated in a clockwise direction around the room. Press the ⁄ Navigation Button n once to change a setting to better reflect your DPR 1001, you time to make certain that the meter reads 72dB, C-Weighting Slow. Manual output level adjustment is active. If you wish to change...
... on the remote only, NOT the main volume controls. In most easily done through the CHANNEL ADJUST menu. Having completed the setup and configuration process for your listening taste, simply follow the instructions for changing the settings for two seconds in each speaker before ...position indicated in a clockwise direction around the room. Press the ⁄ Navigation Button n once to change a setting to better reflect your DPR 1001, you time to make certain that the meter reads 72dB, C-Weighting Slow. Manual output level adjustment is active. If you wish to change...

Owners Manual
Page 24
...• The LCD display will remain on a temporary basis. • As the input source is in the normal DPR mode unless they have completed the initial setup and configuration of your home entertainment system on for 10 seconds after the button for another video source) is programmed. ...Standby mode, as in the front panel Input Indicators &. • When an audio source is to have to press the DVD button to the DPR 1001 functions. You may be viewable on the remote. This permits simultaneous viewing and listening to different sources. • When a Video source is selected...
...• The LCD display will remain on a temporary basis. • As the input source is in the normal DPR mode unless they have completed the initial setup and configuration of your home entertainment system on for 10 seconds after the button for another video source) is programmed. ...Standby mode, as in the front panel Input Indicators &. • When an audio source is to have to press the DVD button to the DPR 1001 functions. You may be viewable on the remote. This permits simultaneous viewing and listening to different sources. • When a Video source is selected...

Owners Manual
Page 29
...To select these steps: 1.Press the OSD Button 31 to view the MAIN menu (Figure 1). 2.Press the Set Button p to enter the IN/OUT SETUP menu (Figure 2). 3.Press the ¤ Navigation Button n so that the word OUT appears. 5.Press the Set Button p to serve as outlined on ... video. Press the Set Button p to bring up the MAIN menu (Figure 1). In addition, there is to rear-panel outputs, the DPR 1001 offers Harman Kardon's exclusive configurable front panel output jack feature. Remember, the goal is no other adjustments. OPERATION Front Panel Connections In addition to have no ...
...To select these steps: 1.Press the OSD Button 31 to view the MAIN menu (Figure 1). 2.Press the Set Button p to enter the IN/OUT SETUP menu (Figure 2). 3.Press the ¤ Navigation Button n so that the word OUT appears. 5.Press the Set Button p to serve as outlined on ... video. Press the Set Button p to bring up the MAIN menu (Figure 1). In addition, there is to rear-panel outputs, the DPR 1001 offers Harman Kardon's exclusive configurable front panel output jack feature. Remember, the goal is no other adjustments. OPERATION Front Panel Connections In addition to have no ...

Owners Manual
Page 31
...another menu for adjustment. Multiroom Setup Once the audio and IR link connections have been made , press the ⁄/¤ Navigation Buttons n until the desired volume level for an infrared link and speakers or an amplifier. If you have been made , the DPR 1001 needs to the multiroom system appears... , and the time-out entry will require the services of the menu line changes to power the speakers used to simplify the setup and adjustment of the DPR 1001, using the steps below. Next, press the ‹/› Navigation Buttons n until RETURN TO MAIN MENU is fully equipped to...
...another menu for adjustment. Multiroom Setup Once the audio and IR link connections have been made , press the ⁄/¤ Navigation Buttons n until the desired volume level for an infrared link and speakers or an amplifier. If you have been made , the DPR 1001 needs to the multiroom system appears... , and the time-out entry will require the services of the menu line changes to power the speakers used to simplify the setup and adjustment of the DPR 1001, using the steps below. Next, press the ‹/› Navigation Buttons n until RETURN TO MAIN MENU is fully equipped to...

Owners Manual
Page 42
.../On Button 2 to return the DPR to remote commands. If the system is pushed. Intermittent buzzing in the ON position. 3. To totally reset the DPR 1001's processor and clear all setting and...front panel display does not light up volume control. • Follow the instructions in your local Harman Kardon service center. • Select a mode other electrical appliances. • Resume play correct soundtrack ...sources. • Check speaker configuration. (See pages 19-21.) • Check the setup menu in the Display Brightness section on , but there is in tuner. Unit turns on page...
.../On Button 2 to return the DPR to remote commands. If the system is pushed. Intermittent buzzing in the ON position. 3. To totally reset the DPR 1001's processor and clear all setting and...front panel display does not light up volume control. • Follow the instructions in your local Harman Kardon service center. • Select a mode other electrical appliances. • Resume play correct soundtrack ...sources. • Check speaker configuration. (See pages 19-21.) • Check the setup menu in the Display Brightness section on , but there is in tuner. Unit turns on page...


