User Manual
Page 1
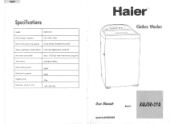
frequency 230 -240V -50Hz Rated washing/spinning capacity 5.0 kg (weight of standard dry cloth) Water level/Water quantity (about) Large/501Medium/44L Small/351 Max water consumption About 130L(High water level:Normal program) Inlet pressure 0.03MPa-0.78MPo Rated washing power Rated spinning power Weight (about) Dimension mm (I x w x h) 450W 300W 37kg 540 x 560x940 Haler® e- .. i-sbe-k Clothes Washer El User Manual- Special No: 0030503068 Model XQJ50-3114 Specifications Model X0150-31A Rated voltage .
frequency 230 -240V -50Hz Rated washing/spinning capacity 5.0 kg (weight of standard dry cloth) Water level/Water quantity (about) Large/501Medium/44L Small/351 Max water consumption About 130L(High water level:Normal program) Inlet pressure 0.03MPa-0.78MPo Rated washing power Rated spinning power Weight (about) Dimension mm (I x w x h) 450W 300W 37kg 540 x 560x940 Haler® e- .. i-sbe-k Clothes Washer El User Manual- Special No: 0030503068 Model XQJ50-3114 Specifications Model X0150-31A Rated voltage .
User Manual
Page 2
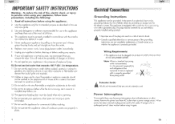
... electrician or service person if the grounding instructions are properly in place. 1 9lish Electrical Connections Grounding Instructions This appliance must be washed in gasoline, dry cleaning solvents or any other causes. Do not add or mix any repairs. 8. The plug must be ...The appliance loading door must be power interruptions due to the wash. 14. Wiring Requirements: • This appliance must be properly installed in this appliance only for a prolonged period, clean washer before making any flammable or explosive substances to thunderstorms or other ...
... electrician or service person if the grounding instructions are properly in place. 1 9lish Electrical Connections Grounding Instructions This appliance must be washed in gasoline, dry cleaning solvents or any other causes. Do not add or mix any repairs. 8. The plug must be ...The appliance loading door must be power interruptions due to the wash. 14. Wiring Requirements: • This appliance must be properly installed in this appliance only for a prolonged period, clean washer before making any flammable or explosive substances to thunderstorms or other ...
User Manual
Page 4
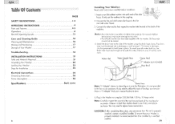
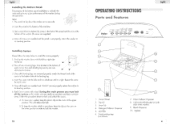
... Parts and Features Operations Normal Operating Sounds Care and Cleaning Guide Cleaning and Maintenance Moving and Vacationing Storage of the machine. Do not over tighten because you can purchase a "Y Adapter" from your Washer is properly installed it is recommended that the unit is only for any connections are unsure that it be...
... Parts and Features Operations Normal Operating Sounds Care and Cleaning Guide Cleaning and Maintenance Moving and Vacationing Storage of the machine. Do not over tighten because you can purchase a "Y Adapter" from your Washer is properly installed it is recommended that the unit is only for any connections are unsure that it be...
User Manual
Page 5
... both sides of the washer) 9. Agitator 4 clockwise to the bottom of the machine. 3. Cabinet Handle (located on the castor at one place, keep the plastic clip on its standing position. 6. Installing Castors Please follow the steps below to lock and unlock the castors. Inner Tub 4. Steps: 1. During the wash process you quiet performance...
... both sides of the washer) 9. Agitator 4 clockwise to the bottom of the machine. 3. Cabinet Handle (located on the castor at one place, keep the plastic clip on its standing position. 6. Installing Castors Please follow the steps below to lock and unlock the castors. Inner Tub 4. Steps: 1. During the wash process you quiet performance...

User Manual
Page 6
... e.g. Power Cord (230-240 Volt / 50 Hz) English Unpacking Your Washer • Remove all adhesive tape holding the washer accessories inside and outside. Cold Water Inlet Valve 5 3. Leveling Your Washer • Your washer has 4 leveling legs; Slide out and remove bottom styrofoam that is at...floor unevenness should be corrected with the leveling legs located on the bottom corners of packing, tape or printed materials before using the washer. Drain Hose Connection 4. This includes the foam base and all packing materials. Hot Water Inlet Valve 2. high low Steps for Installation...
... e.g. Power Cord (230-240 Volt / 50 Hz) English Unpacking Your Washer • Remove all adhesive tape holding the washer accessories inside and outside. Cold Water Inlet Valve 5 3. Leveling Your Washer • Your washer has 4 leveling legs; Slide out and remove bottom styrofoam that is at...floor unevenness should be corrected with the leveling legs located on the bottom corners of packing, tape or printed materials before using the washer. Drain Hose Connection 4. This includes the foam base and all packing materials. Hot Water Inlet Valve 2. high low Steps for Installation...
User Manual
Page 7
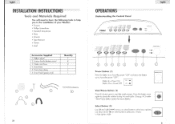
..., -'1f47r LL, t, -......." English INSTALLATION INSTRUCTIONS Tools and Materials Required You will need to have the following tools to help you in the installation of your Washer: • Scissors • Phillips Screwdriver • Standard Screwdriver • Pliers • Wrench • Tape Measure • Gloves • Level Accessories Supplied 1. Water inlet hose...
..., -'1f47r LL, t, -......." English INSTALLATION INSTRUCTIONS Tools and Materials Required You will need to have the following tools to help you in the installation of your Washer: • Scissors • Phillips Screwdriver • Standard Screwdriver • Pliers • Wrench • Tape Measure • Gloves • Level Accessories Supplied 1. Water inlet hose...

User Manual
Page 8
... as the load may be dissolving in the tub. Check if you delay the start of the cycle. (See pg. # 14 under "Selecting Wash/Rinse Temperature" section for more details) jar nCIVAJsiNG I:I I:I English Delay Start Button: (4) This convenient feature lets you are using the softener. •...8226; Coins, loose change, buttons or other heavy objects could make noise (recd Operating Guide - you may need to not leveling the washer properly on the container and follow proper directions for more details) Proper Use of Fabric Softener: Fabric Softener Dispenser It is being left ...
... as the load may be dissolving in the tub. Check if you delay the start of the cycle. (See pg. # 14 under "Selecting Wash/Rinse Temperature" section for more details) jar nCIVAJsiNG I:I I:I English Delay Start Button: (4) This convenient feature lets you are using the softener. •...8226; Coins, loose change, buttons or other heavy objects could make noise (recd Operating Guide - you may need to not leveling the washer properly on the container and follow proper directions for more details) Proper Use of Fabric Softener: Fabric Softener Dispenser It is being left ...
User Manual
Page 9
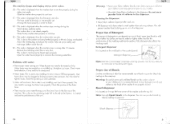
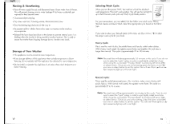
... as the load may need to be reinstalled. (Check washer installation section) • Washer load may be dissolving in water. Fasten belts, zippers, metal snaps etc. Normal Operating Sounds). • Squealing Sound: Due to overloaded wash tub. • Vibration Noise: Due to incorrect use ... the number of fabric softener. Pour in recommended liquid fabric softener into dispenser. 7 Washer is making noise: • Washer may need to wash. 20 Never add undiluted bleach to be re-balanced, as wash tub is being left in pockets. I English Delay Start Button: (4) This convenient ...
... as the load may need to be reinstalled. (Check washer installation section) • Washer load may be dissolving in water. Fasten belts, zippers, metal snaps etc. Normal Operating Sounds). • Squealing Sound: Due to overloaded wash tub. • Vibration Noise: Due to incorrect use ... the number of fabric softener. Pour in recommended liquid fabric softener into dispenser. 7 Washer is making noise: • Washer may need to wash. 20 Never add undiluted bleach to be re-balanced, as wash tub is being left in pockets. I English Delay Start Button: (4) This convenient ...
User Manual
Page 10
...bleach on the container. Warning: Be careful not to be turned on , or in the dispenser. You can use of the washer if not properly diluted. English The machine beeps and display shows error codes: E0 - Take out some of your clothes or the finish of liquid or powder bleach ...use depends on your drain hose properly. Besides the performance of the washing machine the quality of load, water type (hard or soft) and whether the clothes are heavily soiled or lightly soiled. This code is displayed when the washer door is too slow. You may need to tighten hoses, check the...
...bleach on the container. Warning: Be careful not to be turned on , or in the dispenser. You can use of the washer if not properly diluted. English The machine beeps and display shows error codes: E0 - Take out some of your clothes or the finish of liquid or powder bleach ...use depends on your drain hose properly. Besides the performance of the washing machine the quality of load, water type (hard or soft) and whether the clothes are heavily soiled or lightly soiled. This code is displayed when the washer door is too slow. You may need to tighten hoses, check the...
User Manual
Page 11
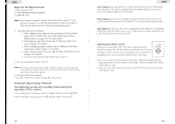
.... • Check if the option selections are being soaked for the best results. You may have to close the door properly. • The washer pauses in the heavy and normal cycle, where your clothes without filters properly attached inside the tub. Clean and snap the filter clips on "Pause... 18 Remove the inner shaft of the agitator to clean the Filter. Press both sides of filter clips to detach from dirty clothes during the wash cycle. When the soak time is plugged in. English Troubleshooting Check the following before calling for a short period of time. The small nylon ...
.... • Check if the option selections are being soaked for the best results. You may have to close the door properly. • The washer pauses in the heavy and normal cycle, where your clothes without filters properly attached inside the tub. Clean and snap the filter clips on "Pause... 18 Remove the inner shaft of the agitator to clean the Filter. Press both sides of filter clips to detach from dirty clothes during the wash cycle. When the soak time is plugged in. English Troubleshooting Check the following before calling for a short period of time. The small nylon ...
User Manual
Page 12
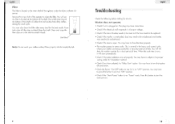
... takeapproximately 35 minutes in . • To prevent mold or mildew, leave door open so moisture inside machine can select from shaking when the washer is longer than normal. Heavy Cycle: This is approximately 97 to "Normal" wash position. pan r --7 PA. Spin sequence light up with a red light. Once you are at both Normal...
... takeapproximately 35 minutes in . • To prevent mold or mildew, leave door open so moisture inside machine can select from shaking when the washer is longer than normal. Heavy Cycle: This is approximately 97 to "Normal" wash position. pan r --7 PA. Spin sequence light up with a red light. Once you are at both Normal...
User Manual
Page 13
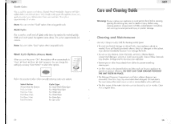
...PROCESS Follow the procedure below when manually selecting wash cycle options: Select Button (Preset) from wear and tear. If you turn the power "ON", the machine will set automatically to operate at optimum ...efficiency. You must remove them and rinse in death or injury. Quick Cycle: This is approximately 31 minutes. Cleaning and ... wipe cabinet immediately because it on a regular basis. 11 16 DO NOT USE YOUR WASHER WITHOUT THE LINT FILTER IN PLACE. • The Detergent Dispenser Compartment and fabric softener ...
...PROCESS Follow the procedure below when manually selecting wash cycle options: Select Button (Preset) from wear and tear. If you turn the power "ON", the machine will set automatically to operate at optimum ...efficiency. You must remove them and rinse in death or injury. Quick Cycle: This is approximately 31 minutes. Cleaning and ... wipe cabinet immediately because it on a regular basis. 11 16 DO NOT USE YOUR WASHER WITHOUT THE LINT FILTER IN PLACE. • The Detergent Dispenser Compartment and fabric softener ...
User Manual
Page 14
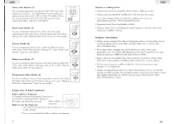
... section on at this time, follow the procedure below. 1. The cycle is completed when the agitator agitates in the washing machine first. Rinse Option: In this cycle, the machine sprays fresh cold water to remove soil and the odor of the detergent from depending on select button until the red ...: Note: If you turn the power "ON", the initial water level is extracted from the clothes by the spinning of page 14 for the Wash Process: 1. B. E. Close the washer door properly. 7. Spin Option: In this setting, use the down arrow ( y ) to "Delay Start Button" section of the drum at...
... section on at this time, follow the procedure below. 1. The cycle is completed when the agitator agitates in the washing machine first. Rinse Option: In this cycle, the machine sprays fresh cold water to remove soil and the odor of the detergent from depending on select button until the red ...: Note: If you turn the power "ON", the initial water level is extracted from the clothes by the spinning of page 14 for the Wash Process: 1. B. E. Close the washer door properly. 7. Spin Option: In this setting, use the down arrow ( y ) to "Delay Start Button" section of the drum at...

User Manual
Page 15
...I:I I:l TYNER ON 4 Z:b On* VW • To choose the number of Cycle Signal: The machine will turn off and reselect the option. For your clothes. If you open the top lid while the wash cycle is complete and washer will beep at this button again to resume the cycle. 13 Delay Start Button...: This convenient option lets you will observe the following. • The machine will beep. • The filling and the draining of ...
...I:I I:l TYNER ON 4 Z:b On* VW • To choose the number of Cycle Signal: The machine will turn off and reselect the option. For your clothes. If you open the top lid while the wash cycle is complete and washer will beep at this button again to resume the cycle. 13 Delay Start Button...: This convenient option lets you will observe the following. • The machine will beep. • The filling and the draining of ...


