Product Manual
Page 2
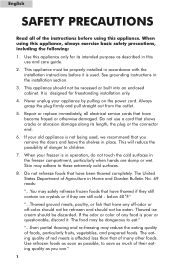
...or abrasion damage along its intended purpose as much of Agriculture in this appliance only for freestanding installation only. 4. Use refrozen foods as soon as you remove the doors and leave the shelves in the freezer compartment, particularly when hands are still cold - It is used ,... meats is poor or questionable, discard it is designed for its length, the plug or the connector end. 6. This appliance must be eaten. Never unplug your freezer is not being used . Repair or replace immediately, all of foods, particularly fruits, vegetables, and prepared foods. This ...
...or abrasion damage along its intended purpose as much of Agriculture in this appliance only for freestanding installation only. 4. Use refrozen foods as soon as you remove the doors and leave the shelves in the freezer compartment, particularly when hands are still cold - It is used ,... meats is poor or questionable, discard it is designed for its length, the plug or the connector end. 6. This appliance must be eaten. Never unplug your freezer is not being used . Repair or replace immediately, all of foods, particularly fruits, vegetables, and prepared foods. This ...
Product Manual
Page 3
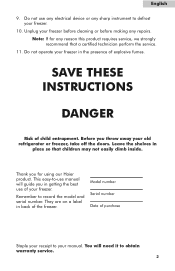
... perform the service. 11. Thank you for any repairs. This easy-to-use any electrical device or any sharp instrument to your freezer before cleaning or before making any reason this product requires service, we strongly recommend that children may not easily climb inside. They are... Date of purchase Staple your receipt to defrost your freezer in back of child entrapment. Do not operate your freezer. 10. Do not use manual will need it to record the model and serial number. Note: If for using our Haier product. Remember to obtain warranty service. 2 English ...
... perform the service. 11. Thank you for any repairs. This easy-to-use any electrical device or any sharp instrument to your freezer before cleaning or before making any reason this product requires service, we strongly recommend that children may not easily climb inside. They are... Date of purchase Staple your receipt to defrost your freezer in back of child entrapment. Do not operate your freezer. 10. Do not use manual will need it to record the model and serial number. Note: If for using our Haier product. Remember to obtain warranty service. 2 English ...

Product Manual
Page 4
English Table Of Contents PAGE Safety Precautions 1-2 Unpacking 4 Parts and Features 5 Freezer Installation 6 Electrical Connections 7 Operating Your Freezer 8-11 Normal Operating Sounds 11 Proper Care and Cleaning 12 Frost-Free 13 Extended Non-Use and Moving 13 Troubleshooting Guide 14 Warranty 15 3
English Table Of Contents PAGE Safety Precautions 1-2 Unpacking 4 Parts and Features 5 Freezer Installation 6 Electrical Connections 7 Operating Your Freezer 8-11 Normal Operating Sounds 11 Proper Care and Cleaning 12 Frost-Free 13 Extended Non-Use and Moving 13 Troubleshooting Guide 14 Warranty 15 3

Product Manual
Page 5
Remove all adhesive tape holding the accessories inside and outside. 2. Check to stand in an upright position for at least 24 hours before turning ON the freezer. This includes the corrugated base and all packing materials. If you find that the accessories are present and in ...good condition or are not in good condition. English Unpacking Unpacking 1. Note: Allow the freezer to make sure that they are missing, please contact our customer service department for any remaining packaging, tape and printed materials before turning...
Remove all adhesive tape holding the accessories inside and outside. 2. Check to stand in an upright position for at least 24 hours before turning ON the freezer. This includes the corrugated base and all packing materials. If you find that the accessories are present and in ...good condition or are not in good condition. English Unpacking Unpacking 1. Note: Allow the freezer to make sure that they are missing, please contact our customer service department for any remaining packaging, tape and printed materials before turning...
Product Manual
Page 6
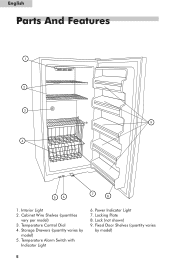
English Parts And Features 1 2 3 9 4 56 7 8 1. Locking Plate 8. Fixed Door Shelves (quantity varies by model) 5. Power Indicator Light 7. Storage Drawers (quantity varies by model) 5 Lock (not shown) 9. Temperature Control Dial 4. Temperature Alarm Switch with Indicator Light 6. Cabinet Wire Shelves (quantities vary per model) 3. Interior Light 2.
English Parts And Features 1 2 3 9 4 56 7 8 1. Locking Plate 8. Fixed Door Shelves (quantity varies by model) 5. Power Indicator Light 7. Storage Drawers (quantity varies by model) 5 Lock (not shown) 9. Temperature Control Dial 4. Temperature Alarm Switch with Indicator Light 6. Cabinet Wire Shelves (quantities vary per model) 3. Interior Light 2.
Product Manual
Page 7
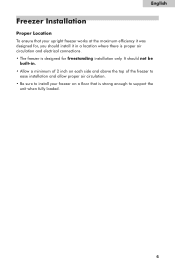
English Freezer Installation Proper Location To ensure that your freezer on each side and above the top of the freezer to ease installation and allow proper air circulation. • Be sure to support the unit when fully loaded. 6 It should install it in . • Allow a minimum of 2 inch on a floor that is designed for , you should not be built-in a location where there is proper air circulation and electrical connections. • The freezer is strong enough to install your upright freezer works at the maximum efficiency it was designed for freestanding installation only.
English Freezer Installation Proper Location To ensure that your freezer on each side and above the top of the freezer to ease installation and allow proper air circulation. • Be sure to support the unit when fully loaded. 6 It should install it in . • Allow a minimum of 2 inch on a floor that is designed for , you should not be built-in a location where there is proper air circulation and electrical connections. • The freezer is strong enough to install your upright freezer works at the maximum efficiency it was designed for freestanding installation only.
Product Manual
Page 8
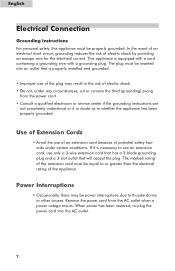
... the third (grounding) prong from the AC outlet when a power outage occurs. This appliance is necessary to thunderstorms or other causes. Use of Extension Cords • Avoid the use of the appliance. When power has been restored, re-plug the power cord into an outlet that will...doubt as to or greater than the electrical rating of the plug may be equal to whether the appliance has been properly grounded. English Electrical Connection Grounding Instructions For personal safety, this appliance must be inserted into the AC outlet. 7 Remove the power cord from the power cord. •...
... the third (grounding) prong from the AC outlet when a power outage occurs. This appliance is necessary to thunderstorms or other causes. Use of Extension Cords • Avoid the use of the appliance. When power has been restored, re-plug the power cord into an outlet that will...doubt as to or greater than the electrical rating of the plug may be equal to whether the appliance has been properly grounded. English Electrical Connection Grounding Instructions For personal safety, this appliance must be inserted into the AC outlet. 7 Remove the power cord from the power cord. •...
Product Manual
Page 9
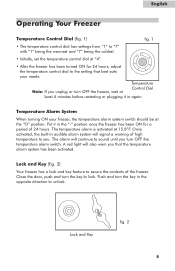
... warning of high temperature to the setting that the temperature alarm system has been activated. Lock and Key (fig. 2) Your freezer has a lock and key feature to unlock. Push and turn OFF the temperature alarm switch. Temperature Alarm System When turning ON ...your needs. Once activated, the built-in again. Lock and Key fig. 2 8 English Operating Your Freezer Temperature Control Dial (fig. 1) fig. 1 • The temperature control dial has settings from "1" to "7" with "1" being the warmest and "7" ...
... warning of high temperature to the setting that the temperature alarm system has been activated. Lock and Key (fig. 2) Your freezer has a lock and key feature to unlock. Push and turn OFF the temperature alarm switch. Temperature Alarm System When turning ON ...your needs. Once activated, the built-in again. Lock and Key fig. 2 8 English Operating Your Freezer Temperature Control Dial (fig. 1) fig. 1 • The temperature control dial has settings from "1" to "7" with "1" being the warmest and "7" ...
Product Manual
Page 10
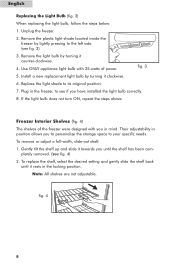
...in mind. Note: All shelves are not adjustable. Use ONLY appliance light bulb with you until it towards you in position allows you have installed the light bulb correctly. 8. Freezer Interior Shelves (fig. 4) The shelves of the freezer were designed with 25-watts of power. Remove the light bulb ...turn ON, repeat the steps above. fig. 4 9 Plug in the locking position. Gently tilt the shelf up and slide it rests in the freezer, to the left side. (see fig. 4) 2. To replace the shelf, select the desired setting and gently slide the shelf back until the shelf...
...in mind. Note: All shelves are not adjustable. Use ONLY appliance light bulb with you until it towards you in position allows you have installed the light bulb correctly. 8. Freezer Interior Shelves (fig. 4) The shelves of the freezer were designed with 25-watts of power. Remove the light bulb ...turn ON, repeat the steps above. fig. 4 9 Plug in the locking position. Gently tilt the shelf up and slide it rests in the freezer, to the left side. (see fig. 4) 2. To replace the shelf, select the desired setting and gently slide the shelf back until the shelf...
Product Manual
Page 11
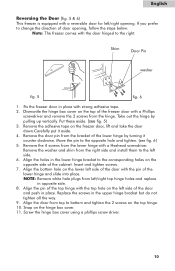
... tighten. (see fig. 5) 3. Screw the hinge box cover using a phillips screw driver. 10 Dismantle the hinge box cover on the top of the freezer door with a Phillips screwdriver and remove the 2 screws from top to bottom and tighten the 2 screws on the left side of the top hinge with...put it counter clockwise. Snap on the opposite side of the door with strong adhesive tape. 2. Shim Door Pin washer fig. 5 fig. 6 1. Fix the freezer door in the lower hinge bracket to the left side. 6. Put these aside. (see fig. 6) 5. Remove the door pin from left side of the cabinet...
... tighten. (see fig. 5) 3. Screw the hinge box cover using a phillips screw driver. 10 Dismantle the hinge box cover on the top of the freezer door with a Phillips screwdriver and remove the 2 screws from top to bottom and tighten the 2 screws on the left side of the top hinge with...put it counter clockwise. Snap on the opposite side of the door with strong adhesive tape. 2. Shim Door Pin washer fig. 5 fig. 6 1. Fix the freezer door in the lower hinge bracket to the left side. 6. Put these aside. (see fig. 6) 5. Remove the door pin from left side of the cabinet...
Product Manual
Page 12
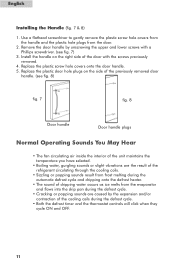
Replace the plastic screw hole covers onto the door handle. 5. Install the handle on the side of the previously removed door handle. (see fig. 7) 3. Replace the plastic door hole plugs on the right side of the door with a Phillips screwdriver. (see fig. 8) fig. 7 fig. 8 Door handle Door handle plugs Normal Operating Sounds You May Hear • The fan circulating air inside the interior of the unit maintains the temperature you have selected. • Boiling water, gurgling sounds or slight vibrations are the result of the refrigerant circulating through the cooling coils. &#...
Replace the plastic screw hole covers onto the door handle. 5. Install the handle on the side of the previously removed door handle. (see fig. 7) 3. Replace the plastic door hole plugs on the right side of the door with a Phillips screwdriver. (see fig. 8) fig. 7 fig. 8 Door handle Door handle plugs Normal Operating Sounds You May Hear • The fan circulating air inside the interior of the unit maintains the temperature you have selected. • Boiling water, gurgling sounds or slight vibrations are the result of the refrigerant circulating through the cooling coils. &#...
Product Manual
Page 13
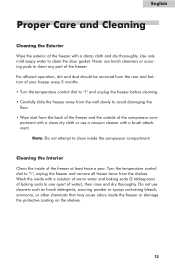
... compartment. Do not use harsh cleansers or scouring pads to one quart of the freezer. Turn the temperature control dial to clean the door gasket. Use only mild soapy water to "1", unplug the freezer and remove all frozen items from the shelves. Note: Do not attempt to avoid... damaging the floor. • Wipe dust from the wall slowly to clean inside of the freezer with a damp cloth and dry thoroughly. Wash the inside the freezer or damage the protective coating on the shelves. 12 Never use cleaners such as harsh detergents, scouring powder or...
... compartment. Do not use harsh cleansers or scouring pads to one quart of the freezer. Turn the temperature control dial to clean the door gasket. Use only mild soapy water to "1", unplug the freezer and remove all frozen items from the shelves. Note: Do not attempt to avoid... damaging the floor. • Wipe dust from the wall slowly to clean inside of the freezer with a damp cloth and dry thoroughly. Wash the inside the freezer or damage the protective coating on the shelves. 12 Never use cleaners such as harsh detergents, scouring powder or...
Product Manual
Page 14
...absences, empty food from the freezer, move the temperature control dial to the Proper Care and Cleaning section. Prevent odors from the wall outlet. Moving the Freezer When transporting the freezer, it is frost-free. It must not be placed in the upright position for at least 24 hours.... Clean the freezer and door gaskets according to the OFF position and disconnect the ...
...absences, empty food from the freezer, move the temperature control dial to the Proper Care and Cleaning section. Prevent odors from the wall outlet. Moving the Freezer When transporting the freezer, it is frost-free. It must not be placed in the upright position for at least 24 hours.... Clean the freezer and door gaskets according to the OFF position and disconnect the ...
Product Manual
Page 15
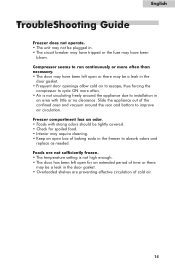
... Check for an extended period of cold air. 14 Slide the appliance out of the confined area and vacuum around the appliance due to installation in an area with strong odors should be a leak in the freezer to absorb odors and replace as needed. Foods are preventing effective ...circulation of time or there may have been blown. Compressor seems to improve air circulation. Freezer compartment has ...
... Check for an extended period of cold air. 14 Slide the appliance out of the confined area and vacuum around the appliance due to installation in an area with strong odors should be a leak in the freezer to absorb odors and replace as needed. Foods are preventing effective ...circulation of time or there may have been blown. Compressor seems to improve air circulation. Freezer compartment has ...
Product Manual
Page 16
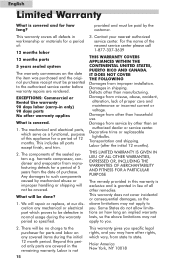
...months). Some States do not allow limitations on how long an implied warranty lasts, so the above limitations may not apply to you. 2. Haier America New York, NY 10018 15 EXCEPTIONS: Commercial or Rental Use warranty 90 days labor (carry-in normal usage during the initial 12 ... current or voltage. Damage from misuse, abuse, accident, alteration, lack of the nearest service center please call 1-877-337-3639 THIS WARRANTY COVERS APPLIANCES WITHIN THE CONTINENTAL UNITED STATES, PUERTO RICO AND CANADA. The components of : 12 months labor 12 months parts 5 years sealed system The warranty ...
...months). Some States do not allow limitations on how long an implied warranty lasts, so the above limitations may not apply to you. 2. Haier America New York, NY 10018 15 EXCEPTIONS: Commercial or Rental Use warranty 90 days labor (carry-in normal usage during the initial 12 ... current or voltage. Damage from misuse, abuse, accident, alteration, lack of the nearest service center please call 1-877-337-3639 THIS WARRANTY COVERS APPLIANCES WITHIN THE CONTINENTAL UNITED STATES, PUERTO RICO AND CANADA. The components of : 12 months labor 12 months parts 5 years sealed system The warranty ...