
User Manual
Page 41
... CMOS. Select No or press to return to the CMOS. Select No or press to return to boot immediately. Always load the Optimized defaults after updating the BIOS or after saving the changes. && Discard Changes and Reset Press on this item and select Yes to save the changes to the CMOS and.... Reboot the system without saving the changes made in optimum state. This saves the changes to the CMOS. This exits the BIOS Setup without saving any changes. && Save Changes Press on this item and select Yes. Reboot the system after clearing the CMOS values. && Save as User ...
... CMOS. Select No or press to return to the CMOS. Select No or press to return to boot immediately. Always load the Optimized defaults after updating the BIOS or after saving the changes. && Discard Changes and Reset Press on this item and select Yes to save the changes to the CMOS and.... Reboot the system without saving the changes made in optimum state. This saves the changes to the CMOS. This exits the BIOS Setup without saving any changes. && Save Changes Press on this item and select Yes. Reboot the system after clearing the CMOS values. && Save as User ...
User Manual
Page 51
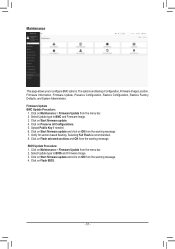
... - Verify for section based flashing. Maintenance This page allows you to BMC and Firmware Image. 3. Firmware Update BMC Update Procedure: 1. Click on OK from the menu bar. 2. BIOS Update Procedure: 1. Click on Start firmware update and click on Maintenance > Firmware Update from the warning message. 4. The options are Backup Configuration, Firmware Image Location, Firmware Information, Firmware...
... - Verify for section based flashing. Maintenance This page allows you to BMC and Firmware Image. 3. Firmware Update BMC Update Procedure: 1. Click on OK from the menu bar. 2. BIOS Update Procedure: 1. Click on Start firmware update and click on Maintenance > Firmware Update from the warning message. 4. The options are Backup Configuration, Firmware Image Location, Firmware Information, Firmware...


