
Manual
Page 11
... 1 x front panel header 1 x front panel audio header 1 x S/PDIF Out header 4 x USB 2.0/1.1 headers 1 x USB 3.0/2.0 header 1 x IEEE 1394a header 1 x serial port header 1 x Trusted Platform Module (TPM) header 1 x clearing CMOS jumper 1 x PS/2 keyboard/mouse port 1 x D-Sub port 1 x DVI-D port 1 x optical S/PDIF Out connector 1 x HDMI port 1 x DisplayPort - 11 - Storage Interface ŠŠ Š Š USB Š...
... 1 x front panel header 1 x front panel audio header 1 x S/PDIF Out header 4 x USB 2.0/1.1 headers 1 x USB 3.0/2.0 header 1 x IEEE 1394a header 1 x serial port header 1 x Trusted Platform Module (TPM) header 1 x clearing CMOS jumper 1 x PS/2 keyboard/mouse port 1 x D-Sub port 1 x DVI-D port 1 x optical S/PDIF Out connector 1 x HDMI port 1 x DisplayPort - 11 - Storage Interface ŠŠ Š Š USB Š...

Manual
Page 25
...jumper blocks. Replace the battery when the battery voltage drops to keep the values (such as BIOS configurations, date, and time information) in the CMOS when the computer is replaced with an equivalent one minute. (Or use of the battery (the positive side should face up). •• ...system from the battery holder and wait for 5 seconds.) 333 Replace the battery. 444 Plug in damage to the CPU or the system may clear the CMOS values by yourself or uncertain about the battery model. •• When installing the battery, note the orientation of the positive side (+) and...
...jumper blocks. Replace the battery when the battery voltage drops to keep the values (such as BIOS configurations, date, and time information) in the CMOS when the computer is replaced with an equivalent one minute. (Or use of the battery (the positive side should face up). •• ...system from the battery holder and wait for 5 seconds.) 333 Replace the battery. 444 Plug in damage to the CPU or the system may clear the CMOS values by yourself or uncertain about the battery model. •• When installing the battery, note the orientation of the positive side (+) and...

Manual
Page 27
... configuration requires two hard drives. date information and BIOS configurations) and reset the CMOS values to SATA 6Gb/s standard and are compatible with SATA 3Gb/s and SATA 1.5Gb/s standard. Open: Normal Short: Clear CMOS Values •• Always turn off your computer and unplug the power cord ... chip supports RAID 0 and RAID 1. Use this jumper to remove the jumper cap from the power outlet before clearing the CMOS values. •• After clearing the CMOS values and before turning on configuring a RAID array. Failure to do so may cause damage to the motherboard. ...
... configuration requires two hard drives. date information and BIOS configurations) and reset the CMOS values to SATA 6Gb/s standard and are compatible with SATA 3Gb/s and SATA 1.5Gb/s standard. Open: Normal Short: Clear CMOS Values •• Always turn off your computer and unplug the power cord ... chip supports RAID 0 and RAID 1. Use this jumper to remove the jumper cap from the power outlet before clearing the CMOS values. •• After clearing the CMOS values and before turning on configuring a RAID array. Failure to do so may cause damage to the motherboard. ...

Manual
Page 33
... is turned on using the current version of BIOS, it with caution. Refer to Chapter 5, "Troubleshooting," for how to clear the CMOS values.) - 33 - To upgrade the BIOS, use either the GIGABYTE Q-Flash or @BIOS utility. •• Q-Flash allows the user to quickly and easily upgrade or back up BIOS ... and reset the board to default values. (Refer to the "Load Optimized Defaults" section in this chapter or introductions of the battery/clearing CMOS jumper in Chapter 1 for the beep codes description. •• It is potentially risky, if you do it is recommended that you not ...
... is turned on using the current version of BIOS, it with caution. Refer to Chapter 5, "Troubleshooting," for how to clear the CMOS values.) - 33 - To upgrade the BIOS, use either the GIGABYTE Q-Flash or @BIOS utility. •• Q-Flash allows the user to quickly and easily upgrade or back up BIOS ... and reset the board to default values. (Refer to the "Load Optimized Defaults" section in this chapter or introductions of the battery/clearing CMOS jumper in Chapter 1 for the beep codes description. •• It is potentially risky, if you do it is recommended that you not ...

Manual
Page 37
...CPU frequency, memory frequency, total memory size , CPU temperature, Vcore, and memory voltage. - 37 - If this occurs, clear the CMOS values and reset the board to CPU, chipset, or memory and reduce the useful life of these components. Incorrectly doing overclock/...overvoltage may result in damage to default values.) CMOS Setup Utility-Copyright (C) 1984-2011 Award Software MB Intelligent Tweaker(M.I.T.) } M.I .T Current Status } Advanced Frequency Settings } Advanced Memory Settings...
...CPU frequency, memory frequency, total memory size , CPU temperature, Vcore, and memory voltage. - 37 - If this occurs, clear the CMOS values and reset the board to CPU, chipset, or memory and reduce the useful life of these components. Incorrectly doing overclock/...overvoltage may result in damage to default values.) CMOS Setup Utility-Copyright (C) 1984-2011 Award Software MB Intelligent Tweaker(M.I.T.) } M.I .T Current Status } Advanced Frequency Settings } Advanced Memory Settings...

Manual
Page 40
... configure this function. (Default) Profile1 Uses Profile 1 settings. Note: If your system fails to boot after overclocking, please wait for automated system reboot, or clear the CMOS values to reset the board to let the CPU enter C3/C6 mode in accordance with the CPU specifications. Extreme Memory Profile (X.M.P.) (Note 2) Allows the...
... configure this function. (Default) Profile1 Uses Profile 1 settings. Note: If your system fails to boot after overclocking, please wait for automated system reboot, or clear the CMOS values to reset the board to let the CPU enter C3/C6 mode in accordance with the CPU specifications. Extreme Memory Profile (X.M.P.) (Note 2) Allows the...

Manual
Page 55
...Enter: Select F5: Previous Values +/-/PU/PD: Value F10: Save F6: Fail-Safe Defaults ESC: Exit F1: General Help F7: Optimized Defaults CMOS Setup Utility-Copyright (C) 1984-2011 Award Software PC Health Status CPU Smart FAN Control x Slope PWM CPU Smart FAN Mode [Normal] 1.75 PWM... F1: General Help F7: Optimized Defaults Reset Case Open Status Keeps or clears the record of the chassis intrusion detection device attached to the CMOS, and then restart your system. BIOS Setup Enabled clears the record of previous chassis intrusion status and the Case Opened field will show...
...Enter: Select F5: Previous Values +/-/PU/PD: Value F10: Save F6: Fail-Safe Defaults ESC: Exit F1: General Help F7: Optimized Defaults CMOS Setup Utility-Copyright (C) 1984-2011 Award Software PC Health Status CPU Smart FAN Control x Slope PWM CPU Smart FAN Mode [Normal] 1.75 PWM... F1: General Help F7: Optimized Defaults Reset Case Open Status Keeps or clears the record of the chassis intrusion detection device attached to the CMOS, and then restart your system. BIOS Setup Enabled clears the record of previous chassis intrusion status and the Case Opened field will show...

Manual
Page 57
...61565; Power Management Setup PC Health Status Load Fail-Safe DefaultsS(Yav/eN&)? Always load the Optimized defaults after updating the BIOS or after clearing the CMOS values. - 57 - ENxit Setup Exit Without Saving ESC: Quit F8: Q-Flash Select Item F10: Save & Exit Setup Load Fail-Safe Defaults F11... DefaultsS(aYve/N&)?ENxit Setup Exit Without Saving ESC: Quit F8: Q-Flash Select Item F10: Save & Exit Setup Load Optimized Defaults F11: Save CMOS to BIOS F12: Load CMOS from BIOS Press on this item and then press the key to load the safest BIOS default settings.
...61565; Power Management Setup PC Health Status Load Fail-Safe DefaultsS(Yav/eN&)? Always load the Optimized defaults after updating the BIOS or after clearing the CMOS values. - 57 - ENxit Setup Exit Without Saving ESC: Quit F8: Q-Flash Select Item F10: Save & Exit Setup Load Fail-Safe Defaults F11... DefaultsS(aYve/N&)?ENxit Setup Exit Without Saving ESC: Quit F8: Q-Flash Select Item F10: Save & Exit Setup Load Optimized Defaults F11: Save CMOS to BIOS F12: Load CMOS from BIOS Press on this item and then press the key to load the safest BIOS default settings.

Manual
Page 58
... & Exit Setup Exit Without Saving ESC: Quit F8: Q-Flash Select Item F10: Save & Exit Setup Change/Set/Disable Password F11: Save CMOS to BIOS F12: Load CMOS from BIOS Press on the password item and when requested for entering BIOS Setup and making BIOS changes. BIOS Setup - 58 - In BIOS...password (or user password) at system startup to continue system boot. When the Password Check item is set to 8 characters and then press . To clear the password, press on this item and type the password with up to System, you to view the BIOS settings but not to confirm the...
... & Exit Setup Exit Without Saving ESC: Quit F8: Q-Flash Select Item F10: Save & Exit Setup Change/Set/Disable Password F11: Save CMOS to BIOS F12: Load CMOS from BIOS Press on the password item and when requested for entering BIOS Setup and making BIOS changes. BIOS Setup - 58 - In BIOS...password (or user password) at system startup to continue system boot. When the Password Check item is set to 8 characters and then press . To clear the password, press on this item and type the password with up to System, you to view the BIOS settings but not to confirm the...
Manual
Page 113
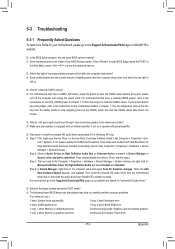
... will clear the CMOS values after about one minute. You can temporarily remove the battery from the battery holder to stop supplying power to show the advanced options. If not, please update it from GIGABYTE's website to My Computer > Properties > Hardware > Device Manager > System devices and right... disable this device. (If not, skip this jumper, refer to enter BIOS Setup during the POST mean? If your board doesn't have a clearing CMOS jumper, refer to the instructions on the CLR_CMOS jumper in My Computer > Properties > Gen- A: Make sure your speaker is the light of standby...
... will clear the CMOS values after about one minute. You can temporarily remove the battery from the battery holder to stop supplying power to show the advanced options. If not, please update it from GIGABYTE's website to My Computer > Properties > Hardware > Device Manager > System devices and right... disable this device. (If not, skip this jumper, refer to enter BIOS Setup during the POST mean? If your board doesn't have a clearing CMOS jumper, refer to the instructions on the CLR_CMOS jumper in My Computer > Properties > Gen- A: Make sure your speaker is the light of standby...


