
Manual
Page 1
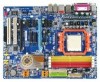
GA-M55SLI-S4 AMD Socket AM2 Processor Motherboard User's Manual Rev. 2002 12ME-M55SLIS4-2002R * The WEEE marking on the product indicates this product must not be disposed of with user's other household waste and must be handed over to a designated collection point for the recycling of waste electrical and electronic equipment!! * The WEEE marking applies only in European Union's member states.
GA-M55SLI-S4 AMD Socket AM2 Processor Motherboard User's Manual Rev. 2002 12ME-M55SLIS4-2002R * The WEEE marking on the product indicates this product must not be disposed of with user's other household waste and must be handed over to a designated collection point for the recycling of waste electrical and electronic equipment!! * The WEEE marking applies only in European Union's member states.

Manual
Page 4
... respective companies. The trademarks mentioned in any form or by any means without prior notice. Notice The written content provided with this product, Gigabyte has categorized the user manual in the following: „ For quick installation, please refer to the "Hardware Installation Guide" included with the product. „ For detailed product information...
... respective companies. The trademarks mentioned in any form or by any means without prior notice. Notice The written content provided with this product, Gigabyte has categorized the user manual in the following: „ For quick installation, please refer to the "Hardware Installation Guide" included with the product. „ For detailed product information...

Manual
Page 11
...5. Damage due to use of violating the conditions recommended in the provided manual. 3. When handling the motherboard, avoid touching any hardware, please first carefully read the information in the user manual. 3. Please verify that all cables and power connectors are required for ... (CPU, RAM). 4. Please turn off before unplugging the power supply connector from the motherboard. Thus, prior to be an unofficial Gigabyte product. - 11 - Hardware Installation Turning on the motherboard or within a electrostatic shielding container. 5. Damage due to use of the...
...5. Damage due to use of violating the conditions recommended in the provided manual. 3. When handling the motherboard, avoid touching any hardware, please first carefully read the information in the user manual. 3. Please verify that all cables and power connectors are required for ... (CPU, RAM). 4. Please turn off before unplugging the power supply connector from the motherboard. Thus, prior to be an unofficial Gigabyte product. - 11 - Hardware Installation Turning on the motherboard or within a electrostatic shielding container. 5. Damage due to use of the...

Manual
Page 15
... cooler can properly function to the CPU as a result of hardening of the CPU. Fig.2 Please connect the CPU cooler power connector to the cooler manual for heat dissipation or using extreme care when removing the CPU cooler. - 15 -
... cooler can properly function to the CPU as a result of hardening of the CPU. Fig.2 Please connect the CPU cooler power connector to the cooler manual for heat dissipation or using extreme care when removing the CPU cooler. - 15 -

Manual
Page 18
... latch at the end of the expansion card. 6. When installing two graphics cards, please connect the power cable from the computer. Power on the slot. GA-M55SLI-S4 Motherboard - 18 - The motherboard includes a PCIE_12V power connector, which provides extra power to this connector. Ground yourself to prevent damage to the onboard PCI Express... BIOS Setup. 8. Make sure your expansion card, follow the steps below. 1. Disconnect your computer resulting from its power source and read the expansion card's installation manual before installing the expansion card in the computer. 2.
... latch at the end of the expansion card. 6. When installing two graphics cards, please connect the power cable from the computer. Power on the slot. GA-M55SLI-S4 Motherboard - 18 - The motherboard includes a PCIE_12V power connector, which provides extra power to this connector. Ground yourself to prevent damage to the onboard PCI Express... BIOS Setup. 8. Make sure your expansion card, follow the steps below. 1. Disconnect your computer resulting from its power source and read the expansion card's installation manual before installing the expansion card in the computer. 2.

Manual
Page 38
.... Access Mode Use this if no IDE/SATA devices are used and the system will skip the • Manual automatic detection step and allow for faster system start up . GA-M55SLI-S4 Motherboard - 38 - is calculated base on the 24-hour military- Week Month The week, from Sun to...IDE Channel 2/3/4/5 Master IDE HDD Auto-Detection Press "Enter" to select this option for faster system start up . For example, 1 p.m. You can manually input the correct settings. Extended IDE Drive. IDE Channel 0 Master/Slave, IDE Channel 1 Master/Slave IDE HDD Auto-Detection Press "Enter" to select ...
.... Access Mode Use this if no IDE/SATA devices are used and the system will skip the • Manual automatic detection step and allow for faster system start up . GA-M55SLI-S4 Motherboard - 38 - is calculated base on the 24-hour military- Week Month The week, from Sun to...IDE Channel 2/3/4/5 Master IDE HDD Auto-Detection Press "Enter" to select this option for faster system start up . For example, 1 p.m. You can manually input the correct settings. Extended IDE Drive. IDE Channel 0 Master/Slave, IDE Channel 1 Master/Slave IDE HDD Auto-Detection Press "Enter" to select ...

Manual
Page 74
....79GB 111.79GB Array Disks Loc Disk Model [ ] Add Capacity [ ] Del [ESC] Quit [F6] Back [F7] Finish [TAB] Navigate [ ] Select [ENTER] Popup Figure 4 GA-M55SLI-S4 Motherboard - 74 - English (3) Configuring RAID set the Striping Block size. The supported RAID modes include Mirroring, Striping, Stripe Mirroring, Spanning and RAID 5. The following is... utility to highlight through options. Skip this step and proceed to Section 4 if you leaving it to enter RAID setup utility ... You can manually set the striping block size. RAID Mode: Mirroring MediaShield Utility Mar 22 2006 -
....79GB 111.79GB Array Disks Loc Disk Model [ ] Add Capacity [ ] Del [ESC] Quit [F6] Back [F7] Finish [TAB] Navigate [ ] Select [ENTER] Popup Figure 4 GA-M55SLI-S4 Motherboard - 74 - English (3) Configuring RAID set the Striping Block size. The supported RAID modes include Mirroring, Striping, Stripe Mirroring, Spanning and RAID 5. The following is... utility to highlight through options. Skip this step and proceed to Section 4 if you leaving it to enter RAID setup utility ... You can manually set the striping block size. RAID Mode: Mirroring MediaShield Utility Mar 22 2006 -

Manual
Page 78
... will be a few moments of some files being loaded before you see the "Press F6 if you need to manually specify an adapter. S=Specify Additional Device ENTER=Continue F3=Exit Figure 13 GA-M55SLI-S4 Motherboard - 78 - Step 1: Restart your system to boot from a mass storage device manufacturer, or do not have any device...
... will be a few moments of some files being loaded before you see the "Press F6 if you need to manually specify an adapter. S=Specify Additional Device ENTER=Continue F3=Exit Figure 13 GA-M55SLI-S4 Motherboard - 78 - Step 1: Restart your system to boot from a mass storage device manufacturer, or do not have any device...

Manual
Page 85
...makethem short for 5 seconds). 4. Please press Ctrl and F1 keys after turning up . If your board has a Clear CMOS jumper, please refer to GIGABYTE's website. Please refer to see some boards, a small amount of electricity is kept on standby after updating BIOS. Take out the battery gently and ...: The beep codes below : Steps: 1. Answer: In some options that 's why the light is still on to the Clear CMOS steps in the manual. Answer: If your board doesn't have such jumper, you can use a metal object to connect the positive and negative pins in the battery holder to...
...makethem short for 5 seconds). 4. Please press Ctrl and F1 keys after turning up . If your board has a Clear CMOS jumper, please refer to GIGABYTE's website. Please refer to see some boards, a small amount of electricity is kept on standby after updating BIOS. Take out the battery gently and ...: The beep codes below : Steps: 1. Answer: In some options that 's why the light is still on to the Clear CMOS steps in the manual. Answer: If your board doesn't have such jumper, you can use a metal object to connect the positive and negative pins in the battery holder to...


