Manual
Page 35
... CMOS value from CMOS, only for GA-8IPE775 Pro. - 31 - When the power is a Windows-based utility that does not require users to boot to a new BIOS, either Gigabyte's Q-Flash or @BIOS utility can enter the BIOS setup screen by pressing "Ctrl + F1". BIOS Setup You can be reset to activate... the CMOS SETUP screen. Exit current page and return to the CMOS SRAM. When the power is recommended that BIOS needs to be used. English Chapter 3 BIOS Setup BIOS (Basic Input and Output System) includes a CMOS SETUP utility which allows user to configure required settings or to...
... CMOS value from CMOS, only for GA-8IPE775 Pro. - 31 - When the power is a Windows-based utility that does not require users to boot to a new BIOS, either Gigabyte's Q-Flash or @BIOS utility can enter the BIOS setup screen by pressing "Ctrl + F1". BIOS Setup You can be reset to activate... the CMOS SETUP screen. Exit current page and return to the CMOS SRAM. When the power is recommended that BIOS needs to be used. English Chapter 3 BIOS Setup BIOS (Basic Input and Output System) includes a CMOS SETUP utility which allows user to configure required settings or to...
Manual
Page 38
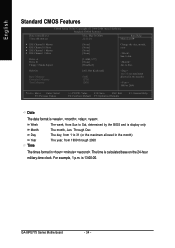
... Enter: Select F5: Previous Values +/-/PU/PD: Value F10: Save ESC: Exit F6: Fail-Save Default F7: Optimized Defaults F1: General Help Date The date format is display only The month, Jan. is calculated base on the 24-hour military-time clock. Jan. GA-8IPE775 Series Motherboard ...- 34 - Through Dec. For example, 1 p.m. Holt On Base Memory Extended Memory Total Memory [All, But Keyboard] 640K 127M 128M 1 to 31 (or maximum allowed in the month) < Ye a r > 1999 to Sat, determined by the BIOS and is , , , ....
... Enter: Select F5: Previous Values +/-/PU/PD: Value F10: Save ESC: Exit F6: Fail-Save Default F7: Optimized Defaults F1: General Help Date The date format is display only The month, Jan. is calculated base on the 24-hour military-time clock. Jan. GA-8IPE775 Series Motherboard ...- 34 - Through Dec. For example, 1 p.m. Holt On Base Memory Extended Memory Total Memory [All, But Keyboard] 640K 127M 128M 1 to 31 (or maximum allowed in the month) < Ye a r > 1999 to Sat, determined by the BIOS and is , , , ....
Manual
Page 41
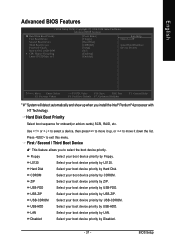
...CDROM. Select your boot device priority by USB-HDD. Select your boot device priority by LS120. Select your boot device priority by Disabled. - 37 - BIOS Setup to 3 [Press Enter] [Floppy] [Hard Disk] [CDROM] [Setup] [No] [Enabled] [Enabled] Item Help Menu Level` Select Hard Disk... Boot Device Priority KLJI: Move Enter: Select F5: Previous Values +/-/PU/PD: Value F10: Save ESC: Exit F6: Fail-Save Default F7: Optimized Defaults F1: General Help " # " System will detect automatically...
...CDROM. Select your boot device priority by USB-HDD. Select your boot device priority by LS120. Select your boot device priority by Disabled. - 37 - BIOS Setup to 3 [Press Enter] [Floppy] [Hard Disk] [CDROM] [Setup] [No] [Enabled] [Enabled] Item Help Menu Level` Select Hard Disk... Boot Device Priority KLJI: Move Enter: Select F5: Previous Values +/-/PU/PD: Value F10: Save ESC: Exit F6: Fail-Save Default F7: Optimized Defaults F1: General Help " # " System will detect automatically...
Manual
Page 43
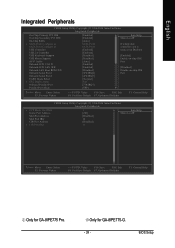
BIOS Setup English Integrated Peripherals CMOS Setup Utility-Copyright (C) 1984-2004 Award... set at Disabled [Enabled] Enable on-chip IDE Port [Disabled] Disable on-chip IDE Port KLJI: Move Enter: Select F5: Previous Values +/-/PU/PD: Value F10: Save ESC: Exit F6: Fail-Save Default F7: Optimized Defaults F1: General Help... [201] [Disabled] 10 [Disabled] 11 Item Help Menu Level` KLJI: Move Enter: Select F5: Previous Values +/-/PU/PD: Value F10: Save ESC: Exit F6: Fail-Save Default F7: Optimized Defaults F1: General Help Only for GA-8IPE775-G. - 39 - Only for GA-8IPE775 Pro.
BIOS Setup English Integrated Peripherals CMOS Setup Utility-Copyright (C) 1984-2004 Award... set at Disabled [Enabled] Enable on-chip IDE Port [Disabled] Disable on-chip IDE Port KLJI: Move Enter: Select F5: Previous Values +/-/PU/PD: Value F10: Save ESC: Exit F6: Fail-Save Default F7: Optimized Defaults F1: General Help... [201] [Disabled] 10 [Disabled] 11 Item Help Menu Level` KLJI: Move Enter: Select F5: Previous Values +/-/PU/PD: Value F10: Save ESC: Exit F6: Fail-Save Default F7: Optimized Defaults F1: General Help Only for GA-8IPE775-G. - 39 - Only for GA-8IPE775 Pro.
Manual
Page 47
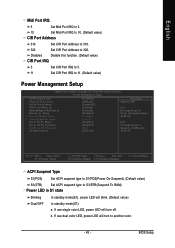
...] Set suspend type to Power On Suspend under ACPI OS [S3] Set suspend type to Suspend to RAM under ACPI OS KLJI: Move Enter: Select F5: Previous Values +/-/PU/PD: Value F10: Save ESC: Exit F6: Fail-Save Default F7: Optimized Defaults F1: General Help ACPI Suspend Type S1(POS) Set... to 10. (Default value) CIR Port Address 310 Set CIR Port Address to 310. 320 Set CIR Port Address to S3/STR(Suspend To RAM). BIOS Setup Power LED in S1 state Off by Power button PME Event Wake Up ModemRingOn/WakeOnLan Resume by Alarm x Date (of Month) Alarm x Time (hh...
...] Set suspend type to Power On Suspend under ACPI OS [S3] Set suspend type to Suspend to RAM under ACPI OS KLJI: Move Enter: Select F5: Previous Values +/-/PU/PD: Value F10: Save ESC: Exit F6: Fail-Save Default F7: Optimized Defaults F1: General Help ACPI Suspend Type S1(POS) Set... to 10. (Default value) CIR Port Address 310 Set CIR Port Address to 310. 320 Set CIR Port Address to S3/STR(Suspend To RAM). BIOS Setup Power LED in S1 state Off by Power button PME Event Wake Up ModemRingOn/WakeOnLan Resume by Alarm x Date (of Month) Alarm x Time (hh...

Manual
Page 49
...5 IRQ Assignment PCI 2 IRQ Assignment PCI 3 IRQ Assignment PCI 4 IRQ Assignment [Auto] [Auto] [Auto] [Auto] Item Help Menu Level` KLJI: Move Enter: Select F5: Previous Values +/-/PU/PD: Value F10: Save ESC: Exit F6: Fail-Save Default F7: Optimized Defaults F1: General Help PCI 1/PCI 5 IRQ Assignment Auto Auto... assign IRQ to PCI 1/PCI 5. (Default value) 3,4,5,7,9,10,11,12,14,15 Set IRQ 3,4,5,7,9,10,11,12,14,15 to PCI 4. - 45 - BIOS Setup PCI 2 IRQ Assignment Auto 3,4,5,7,9,10,11,12,14,15 PCI 3 IRQ Assignment Auto assign IRQ to PCI 2. (Default value) Set IRQ 3,4,5,7,9,10,11,...
...5 IRQ Assignment PCI 2 IRQ Assignment PCI 3 IRQ Assignment PCI 4 IRQ Assignment [Auto] [Auto] [Auto] [Auto] Item Help Menu Level` KLJI: Move Enter: Select F5: Previous Values +/-/PU/PD: Value F10: Save ESC: Exit F6: Fail-Save Default F7: Optimized Defaults F1: General Help PCI 1/PCI 5 IRQ Assignment Auto Auto... assign IRQ to PCI 1/PCI 5. (Default value) 3,4,5,7,9,10,11,12,14,15 Set IRQ 3,4,5,7,9,10,11,12,14,15 to PCI 4. - 45 - BIOS Setup PCI 2 IRQ Assignment Auto 3,4,5,7,9,10,11,12,14,15 PCI 3 IRQ Assignment Auto assign IRQ to PCI 2. (Default value) Set IRQ 3,4,5,7,9,10,11,...
Manual
Page 63
... SST 49LF003A 512K 512K Wide Range Protection Disable 8KNXPU.Fba Bo1ot fFilreo(ms) foMunadin Bios Auto Recovery Enable 512K Halt On Error Disable Total size: 1.39MCopy Main ROM Data tForeBeacskizuep: 911.50K F5 : Refresh Load Default Settings DEL : Delete Save Settings to CMOS Enter : Run... Q-Flash Utility Load Main BIOS from Floppy Load Backup BIOS from Floppy Save Main BIOS to Floppy Save Backup BIOS to Floppy KL:Move ESC:Reset 512K 512K ...
... SST 49LF003A 512K 512K Wide Range Protection Disable 8KNXPU.Fba Bo1ot fFilreo(ms) foMunadin Bios Auto Recovery Enable 512K Halt On Error Disable Total size: 1.39MCopy Main ROM Data tForeBeacskizuep: 911.50K F5 : Refresh Load Default Settings DEL : Delete Save Settings to CMOS Enter : Run... Q-Flash Utility Load Main BIOS from Floppy Load Backup BIOS from Floppy Save Main BIOS to Floppy Save Backup BIOS to Floppy KL:Move ESC:Reset 512K 512K ...

Manual
Page 67
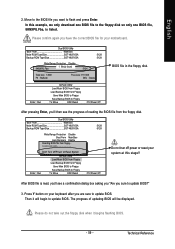
...8GE800.F4 Save1BIfOileS(sto) fFoluonpdpy 256K Enter : RTuontal size: 1K.3L9M:Move F5 : Refresh ESC:RFerseeet size:1.14FM10:Power Off DEL : Delete BIOS file in the "Before you begin Step 1 with "Save BIOS to update BIOS?" Please confirm again you have entered the Q-Flash utility, please follow the ...steps below to your motherboard and insert it begins flashing BIOS. - 63 - Please do not take out the floppy disk when it to flash BIOS. Technical Reference Steps: 1. After BIOS file is listed. Press arrow buttons on your keyboard to move the light bar...
...8GE800.F4 Save1BIfOileS(sto) fFoluonpdpy 256K Enter : RTuontal size: 1K.3L9M:Move F5 : Refresh ESC:RFerseeet size:1.14FM10:Power Off DEL : Delete BIOS file in the "Before you begin Step 1 with "Save BIOS to update BIOS?" Please confirm again you have entered the Q-Flash utility, please follow the ...steps below to your motherboard and insert it begins flashing BIOS. - 63 - Please do not take out the floppy disk when it to flash BIOS. Technical Reference Steps: 1. After BIOS file is listed. Press arrow buttons on your keyboard to move the light bar...

