Gigabyte A520M AORUS ELITE Support and Manuals
Get Help and Manuals for this Gigabyte item
View All Support Options Below
Free Gigabyte A520M AORUS ELITE manuals!
Problems with Gigabyte A520M AORUS ELITE?
Ask a Question
Free Gigabyte A520M AORUS ELITE manuals!
Problems with Gigabyte A520M AORUS ELITE?
Ask a Question
Gigabyte A520M AORUS ELITE Videos

???? ??? 5 ?? 4650G, ??? ??? ??????. ??? ?????. GIGABYTE A520M AORUS ELITE ????? ??? ?? ??
Duration: 16:10
Total Views: 2,820
Duration: 16:10
Total Views: 2,820
Popular Gigabyte A520M AORUS ELITE Manual Pages
User Manual - Page 1
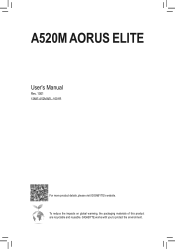
A520M AORUS ELITE
User's Manual
Rev. 1001 12ME-A52MAEL-1001R
For more product details, please visit GIGABYTE's website. To reduce the impacts on global warming, the packaging materials of this product are recyclable and reusable. GIGABYTE works with you to protect the environment.
User Manual - Page 3
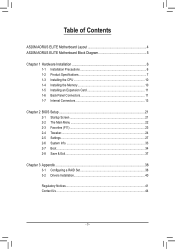
Table of Contents
A520M AORUS ELITE Motherboard Layout 4 A520M AORUS ELITE Motherboard Block Diagram 5
Chapter 1 Hardware Installation 6 1-1 Installation Precautions 6 1-2 Product Specifications 7 1-3 Installing the CPU 10 1-4 Installing the Memory 10 1-5 Installing an Expansion Card 11 1-6 Back Panel Connectors 11 1-7 Internal Connectors 13
Chapter 2 BIOS Setup 21 2-1 Startup Screen ...
User Manual - Page 4

... A520
iTE® Super I/O
CLR_CMOS
QFLED
F_AUDIO
D_LED1
COM
LED_C1
TPM
F_USB1
F_U32
SYS_FAN2
F_PANEL
QFLASH_PLUS
Box Contents
55 A520M AORUS ELITE motherboard 55 Two SATA cables
55 Motherboard driver disc
55 I/O Shield
55 User's Manual
* The box contents above are subject to change without notice.
- 4 - The box contents are for reference only and the...
User Manual - Page 5
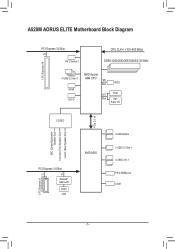
A520M AORUS ELITE Motherboard Block Diagram
1 PCI Express x16
PCI Express 3.0 Bus x16
1 M.2 Socket 3
CPU CLK+/- (100~500 MHz) DDR4 3200/2933/2667/2400/2133 MHz
4 USB 3.2 Gen 1 ...
User Manual - Page 6
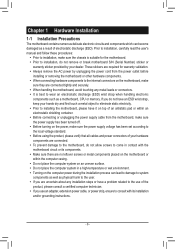
...installation process can become damaged as a motherboard, CPU or memory. Prior to installation, carefully read the user's manual and follow these procedures:
•• Prior to installation..., make sure the power supply voltage has been set according to consult with the motherboard circuit or its installation and/or grounding instructions.
- 6 - If you use of electrostatic ...
User Manual - Page 11
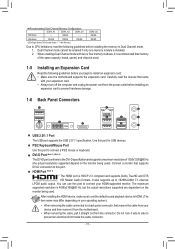
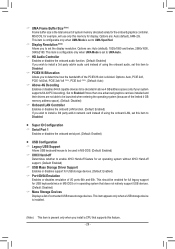
...conforms to the DVI-D specification and supports a maximum resolution of the same capacity, ...supported monitor. Use this port. It also supports up to CPU limitations, read the manual that supports DVI-D connection to connect your expansion card. •• Always turn off the computer and unplug the power cord from the connector. After installing the HDMI device, make sure to set...
User Manual - Page 17
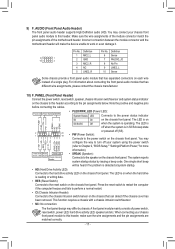
...the motherboard header will be heard if no problem is operating.
The LED is off your chassis...The front panel design may differ by issuing a beep code.
You may connect your system using the power switch
...8226; PLED/PWR_LED (Power LED): System Status LED Connects to Chapter 2, "BIOS Setup," "Settings\Platform Power," for more
information). You may
HD+ HD- 1 23 1
1 23 ...
User Manual - Page 20

...and then you to update the BIOS when your computer before clearing the CMOS values. •• After system restart, go to BIOS Setup to load factory defaults (select Load Optimized Defaults) or manually configure the BIOS settings (refer to Chapter 2, "BIOS Setup," for a few...To clear the CMOS values, use Q-Flash Plus please visit the "Unique Features" webpage of GIGABYTE's website.
- 20 -
User Manual - Page 21
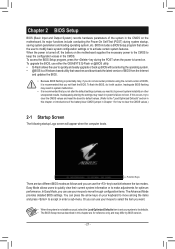
.... •• It is turned off, the battery on . BIOS includes a BIOS Setup program that you not alter the default settings (unless you do it is recommended that searches and downloads the latest version of BIOS from the Internet
and updates the BIOS. •• Because BIOS flashing is turned on the motherboard...
User Manual - Page 29
... disables the onboard LAN function. (Default: Enabled) If you wish to install a 3rd party add-in above 4 GB address space (only if your system supports 64-bit PCI decoding). Set to Enabled if more than one advanced graphics card are installed and their drivers are not able to be decoded in audio card instead of...
User Manual - Page 33
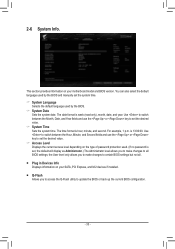
... your motherboard model and BIOS version. 2-6 System Info. This section provides information on the type of password protection used by the BIOS and manually set the desired value. && Access Level Displays the current access level depending on your SATA, PCI Express, and M.2 devices if installed. ƒƒ Q-Flash Allows you to make changes to update the...
User Manual - Page 34
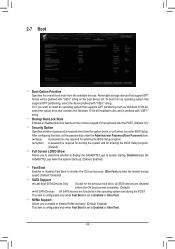
.... This item is configurable only when Fast Boot is set to Enabled or Ultra Fast.
&& NVMe Support Allows you to determine whether to display the GIGABYTE Logo at system startup. Or if you enter BIOS Setup. After configuring this item, set to install an operating system that supports GPT partitioning such as Windows 10 64-bit, select...
User Manual - Page 38
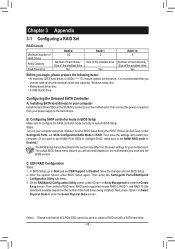
... a SATA hard drive. - 38 - Under Settings\IO Ports, set with identical model and capacity). After the system reboot, enter BIOS Setup again.
Configuring SATA controller mode in system BIOS Setup. Steps: Turn on Array Management to Disabled. Then save the settings and restart your motherboard. Installing SATA hard drive(s) in your computer Install the hard drives/SSDs in...
User Manual - Page 39

... folder under the \BootDrv folder in the RAID array and set the Select CacheTagSize, Read Cache Policy and Write Cache Policy.
5. When the screen requesting
you 'll be installed requires that you install all required drivers from the Windows setup disc and perform standard OS installation steps.
Then select AMD-RAID Controller and click Next to...
User Manual - Page 41
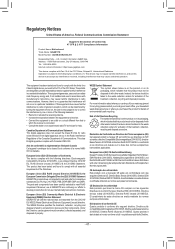
...parts and components have not intended to the waste collection centers for details of Conformity 47 CFR § 2.1077 Compliance Information
Product Name: Motherboard Trade Name: GIGABYTE Model Number: A520M AORUS ELITE... interpreted from digital apparatus set out in a particular installation. U.S.
Déclaration de... household waste disposal service or where you can...
Gigabyte A520M AORUS ELITE Reviews
We have not received any reviews for Gigabyte yet.