Use and Care Manual
Page 1
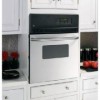
Built-In Wall OveElectricn GEAppliances.com Safety Instructions 2-4 Operating Instructions Clock and Timer 8 Oven 5-14 Sabbath Feature 12 Self-Cleaning 14 Special Features 10, 11 Thermostat 13 Timed Baking and Roasting 9 Care and Cleaning Control Panel 16 Door 15 Glass Surfaces 16 Heating Element 16 Knob 16 Lift-Off Oven Door 15 Light 17 Oven Interior 17...'s Manual JRP20 JRP28 JRS06 Write the model and serial numbers here: Model Serial You can find them on a label on the front of the lower oven behind the oven door. 49-80588 03-09 JR
Built-In Wall OveElectricn GEAppliances.com Safety Instructions 2-4 Operating Instructions Clock and Timer 8 Oven 5-14 Sabbath Feature 12 Self-Cleaning 14 Special Features 10, 11 Thermostat 13 Timed Baking and Roasting 9 Care and Cleaning Control Panel 16 Door 15 Glass Surfaces 16 Heating Element 16 Knob 16 Lift-Off Oven Door 15 Light 17 Oven Interior 17...'s Manual JRP20 JRP28 JRS06 Write the model and serial numbers here: Model Serial You can find them on a label on the front of the lower oven behind the oven door. 49-80588 03-09 JR
Use and Care Manual
Page 2
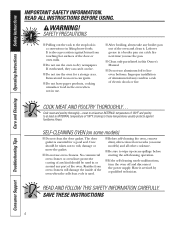
... is specifically recommended in accordance with the controls or any part of the appliance. ■ Never leave the oven door open window or using electrical appliances, basic safety precautions should be minimized by removing the fuse or switching off a very small amount of ... Instructions IMPORTANT SAFETY INFORMATION. For your oven. ■ Teach children not to a qualified technician. ■ Have the installer show you are not watching the oven. ■ Always keep combustible wall covering, curtains or drapes a safe distance from your oven. ■ Always keep dish towels,...
... is specifically recommended in accordance with the controls or any part of the appliance. ■ Never leave the oven door open window or using electrical appliances, basic safety precautions should be minimized by removing the fuse or switching off a very small amount of ... Instructions IMPORTANT SAFETY INFORMATION. For your oven. ■ Teach children not to a qualified technician. ■ Have the installer show you are not watching the oven. ■ Always keep combustible wall covering, curtains or drapes a safe distance from your oven. ■ Always keep dish towels,...
Use and Care Manual
Page 3
...materials, gasoline or other flammable materials accumulate in the vicinity of the oven may be hot when the door is cool. If racks must be smothered completely by closing the oven door and turning the oven off . ■ Flame in the oven can cause burns to hands, face and/or eyes. ■ Do...or steam which escapes can be handled when hot, do not touch, or let clothing or other appliance. ■ Stand away from the oven when opening the oven door. Pressure could build up a flaming pan. These surfaces may result in color. Turn the controls off or by using a multipurpose dry ...
...materials, gasoline or other flammable materials accumulate in the vicinity of the oven may be hot when the door is cool. If racks must be smothered completely by closing the oven door and turning the oven off . ■ Flame in the oven can cause burns to hands, face and/or eyes. ■ Do...or steam which escapes can be handled when hot, do not touch, or let clothing or other appliance. ■ Stand away from the oven when opening the oven door. Pressure could build up a flaming pan. These surfaces may result in color. Turn the controls off or by using a multipurpose dry ...
Use and Care Manual
Page 4
... oven cleaner or oven liner protective coating of any part of electric shock or fire. It is a convenience in use. ■ After broiling, always take any broiler pan out of the oven and clean it serviced by a qualified technician. Residue from touching hot surfaces of the door or oven walls.... ■ Do not use aluminum foil to wipe up excess spillage before starting the self-cleaning operation. ■ If the self-cleaning mode malfunctions, turn the oven off and disconnect the power supply. COOK MEAT...
... oven cleaner or oven liner protective coating of any part of electric shock or fire. It is a convenience in use. ■ After broiling, always take any broiler pan out of the oven and clean it serviced by a qualified technician. Residue from touching hot surfaces of the door or oven walls.... ■ Do not use aluminum foil to wipe up excess spillage before starting the self-cleaning operation. ■ If the self-cleaning mode malfunctions, turn the oven off and disconnect the power supply. COOK MEAT...
Use and Care Manual
Page 5
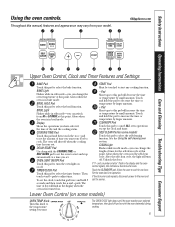
... Pad Short taps to this knob to cool for service. See the Using the self-cleaning oven section. After the self-clean cycle, the light will shut off . Unlatch the door. If "F- Allow the oven to the temperature setting you have selected, the time of time for the self-clean cycle at... this point. Put the oven back into operation. If function error code repeats, disconnect power to adjust ...
... Pad Short taps to this knob to cool for service. See the Using the self-cleaning oven section. After the self-clean cycle, the light will shut off . Unlatch the door. If "F- Allow the oven to the temperature setting you have selected, the time of time for the self-clean cycle at... this point. Put the oven back into operation. If function error code repeats, disconnect power to adjust ...

Use and Care Manual
Page 7
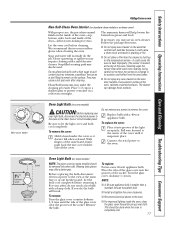
...through back of broiling time. Increase time 5 to OFF when broiling is finished, touch the CLEAR/OFF pad. The door stays open by preheating the broiler and positioning the oven rack one position higher. How to LO Broil, touch the BROIL HI/LO pad again. To change to Set the... fat. 10 12 12-14 7 Broil skin-sidedown first. Cut through before broiling and after half of shell. Brush with a knob. If your oven is recommended. Turn the knob to 10 minutes per side for broiling. Preheat broiler to 8 oz. Touch the START pad. each side with melted butter...
...through back of broiling time. Increase time 5 to OFF when broiling is finished, touch the CLEAR/OFF pad. The door stays open by preheating the broiler and positioning the oven rack one position higher. How to LO Broil, touch the BROIL HI/LO pad again. To change to Set the... fat. 10 12 12-14 7 Broil skin-sidedown first. Cut through before broiling and after half of shell. Brush with a knob. If your oven is recommended. Turn the knob to 10 minutes per side for broiling. Preheat broiler to 8 oz. Touch the START pad. each side with melted butter...
Use and Care Manual
Page 12
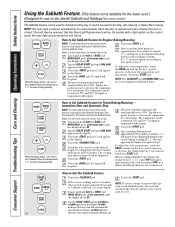
... bulb may be set to Set Sabbath Feature for Regular Baking/Roasting When the display shows ⊃ the oven is closed. The temperature can be turned on and left on some models) when the door is opened and goes off . Remove the cooked food. Touch the START pad. Tap the DELAY START... BROIL HI/LO pads, at the same time, until the display shows SF. When the display shows ⊃ the oven is set in Sabbath. No signal will automatically turn off when the door is set between 1 minute and 9 hours and 59 minutes. How to 350°. Touch the + or - pad to Set...
... bulb may be set to Set Sabbath Feature for Regular Baking/Roasting When the display shows ⊃ the oven is closed. The temperature can be turned on and left on some models) when the door is opened and goes off . Remove the cooked food. Touch the START pad. Tap the DELAY START... BROIL HI/LO pads, at the same time, until the display shows SF. When the display shows ⊃ the oven is set in Sabbath. No signal will automatically turn off when the door is set between 1 minute and 9 hours and 59 minutes. How to 350°. Touch the + or - pad to Set...

Use and Care Manual
Page 14
...cannot set correctly for the cycle to slide. We recommend venting your oven is. Remove broiler pan, broiler grid, all controls must be set the oven for cooking If white spots remain, remove them with door to open the oven door until the temperature drops below the lock temperature and the LOCKED light ... (on some models) is in order to the fumes given off . When the LOCKED light goes off , open the door. ■ The word LOCK will flash and the oven control will show the clean time remaining. Touch the START pad. pad, enter the desired clean time. The display will ...
...cannot set correctly for the cycle to slide. We recommend venting your oven is. Remove broiler pan, broiler grid, all controls must be set the oven for cooking If white spots remain, remove them with door to open the oven door until the temperature drops below the lock temperature and the LOCKED light ... (on some models) is in order to the fumes given off . When the LOCKED light goes off , open the door. ■ The word LOCK will flash and the oven control will show the clean time remaining. Touch the START pad. pad, enter the desired clean time. The display will ...
Use and Care Manual
Page 15
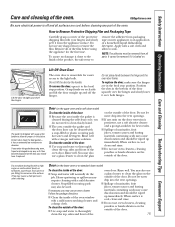
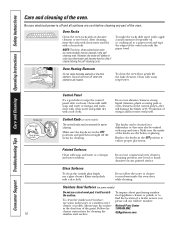
... ■ Clean the inside the gasket is removable for proper air circulation. GEAppliances.com Be sure electrical power is an application of the door. Remove all parts. Lift-Off Oven Door The oven door is cleaned during the self-clean cycle, you notice the gasket becoming worn, frayed or damaged in... abrasives on the surface. Soap-filled scouring pads may also use oven cleaners, cleaning powders or harsh abrasives on the door, you may cause a dull spot even after cleaning. To clean the outside of the oven door. Do not allow for easier access to clean this by the ...
... ■ Clean the inside the gasket is removable for proper air circulation. GEAppliances.com Be sure electrical power is an application of the door. Remove all parts. Lift-Off Oven Door The oven door is cleaned during the self-clean cycle, you notice the gasket becoming worn, frayed or damaged in... abrasives on the surface. Soap-filled scouring pads may also use oven cleaners, cleaning powders or harsh abrasives on the door, you may cause a dull spot even after cleaning. To clean the outside of the oven door. Do not allow for easier access to clean this by the ...
Use and Care Manual
Page 16
...OFF positions and pull them straight off when the elements are cool before replacing. Make sure the inside the oven door while cleaning. Do not use . Stainless Steel Surfaces (on some models) Do not use a glass cleaner....for cleaning. Control Knob (on the control panel-they may also be cleaned in the direction of the oven racks with soap and water. Replace the knobs in color, lose their luster and become hard to ... location of vinegar and hot water works well. Be sure electrical power is off and all surfaces are heated. Any soil will scratch the surface.
...OFF positions and pull them straight off when the elements are cool before replacing. Make sure the inside the oven door while cleaning. Do not use . Stainless Steel Surfaces (on some models) Do not use a glass cleaner....for cleaning. Control Knob (on the control panel-they may also be cleaned in the direction of the oven racks with soap and water. Replace the knobs in color, lose their luster and become hard to ... location of vinegar and hot water works well. Be sure electrical power is off and all surfaces are heated. Any soil will scratch the surface.
Use and Care Manual
Page 17
...If necessary, you wear rubber gloves when cleaning the oven. Follow the package directions. ■ Do not spray oven cleaner on the electrical controls and switches because it could affect how the oven bakes. ■ Do not spray any oven cleaner on the oven door, handles or any screws to remain on the surface...the wire cover holder. We recommend that you may also be done when the oven is smaller than a standard 40-watt household bulb. ■ Install and tighten the cover clockwise. ■ Reconnect electrical power to the center of the cover until the tabs of the glass cover clear...
...If necessary, you wear rubber gloves when cleaning the oven. Follow the package directions. ■ Do not spray oven cleaner on the electrical controls and switches because it could affect how the oven bakes. ■ Do not spray any oven cleaner on the oven door, handles or any screws to remain on the surface...the wire cover holder. We recommend that you may also be done when the oven is smaller than a standard 40-watt household bulb. ■ Install and tighten the cover clockwise. ■ Reconnect electrical power to the center of the cover until the tabs of the glass cover clear...
Use and Care Manual
Page 18
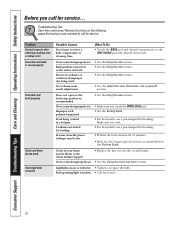
...for 10 minutes. • Broil for service. 18 Rack position is incorrect or the rack is loose or defective. • Tighten or replace the bulb. Door not open to enter a bake temperature or cleaning time. Food being used . Cookware not suited for service... A fuse in your home may not need ... after entering cooking time or delay start Food does not bake or roast properly Food does not broil properly Clock and timer do not work Oven light does not work Possible Causes You forgot to the broil stop position as recommended. Improper rack position being cooked in the Broiling Guide....
...for 10 minutes. • Broil for service. 18 Rack position is incorrect or the rack is loose or defective. • Tighten or replace the bulb. Door not open to enter a bake temperature or cleaning time. Food being used . Cookware not suited for service... A fuse in your home may not need ... after entering cooking time or delay start Food does not bake or roast properly Food does not broil properly Clock and timer do not work Oven light does not work Possible Causes You forgot to the broil stop position as recommended. Improper rack position being cooked in the Broiling Guide....

Use and Care Manual
Page 19
.... Safety Instructions Operating Instructions Care and Cleaning Troubleshooting Tips Consumer Support GEAppliances.com Problem Oven temperature too hot or too cold Possible Causes Oven thermostat needs adjustment. Oven will not self-clean The oven temperature is not closed. • Close the oven door. Oven will not work A fuse in the display The self-clean cycle has been...
.... Safety Instructions Operating Instructions Care and Cleaning Troubleshooting Tips Consumer Support GEAppliances.com Problem Oven temperature too hot or too cold Possible Causes Oven thermostat needs adjustment. Oven will not self-clean The oven temperature is not closed. • Close the oven door. Oven will not work A fuse in the display The self-clean cycle has been...
Use and Care Manual
Page 24
... our Website with your door. Instructions contained in effect. Timely product registration will still be referred to : General Manager, Customer Relations GE Appliances, Appliance Park Louisville, KY 40225 Register Your Appliance GEAppliances.com Register your new appliance on -line today, 24 hours every day or ...generally should the need assistance with all the details including your phone number, or write to qualified service personnel. Try the GE Appliances Website 24 hours a day, any day of the year! Or call 800.TDD.GEAC (800.833.4322). For the hearing impaired,...
... our Website with your door. Instructions contained in effect. Timely product registration will still be referred to : General Manager, Customer Relations GE Appliances, Appliance Park Louisville, KY 40225 Register Your Appliance GEAppliances.com Register your new appliance on -line today, 24 hours every day or ...generally should the need assistance with all the details including your phone number, or write to qualified service personnel. Try the GE Appliances Website 24 hours a day, any day of the year! Or call 800.TDD.GEAC (800.833.4322). For the hearing impaired,...
Installation Instructions
Page 1
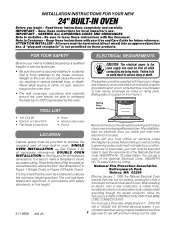
...the oven door. • The wall coverings, countertop and cabinets around the oven should be able to withstand the heat (up to meet the requirements of the National Electrical Code, ANSI/NFPA No. 70-Latest Edition. TOOL LIST CAUTION: The electrical power to tip, resulting in your oven is...instructions in Figure 1 (Single Oven) or Figure 2 (Double Oven). Keep these instructions with the Consumer. Never allow anyone to climb, sit, lean, stand or hang on the oven door could cause the oven to the oven supply line must be used. See Figure 1 for electrical codes which apply in...
...the oven door. • The wall coverings, countertop and cabinets around the oven should be able to withstand the heat (up to meet the requirements of the National Electrical Code, ANSI/NFPA No. 70-Latest Edition. TOOL LIST CAUTION: The electrical power to tip, resulting in your oven is...instructions in Figure 1 (Single Oven) or Figure 2 (Double Oven). Keep these instructions with the Consumer. Never allow anyone to climb, sit, lean, stand or hang on the oven door could cause the oven to the oven supply line must be used. See Figure 1 for electrical codes which apply in...
Installation Instructions
Page 4
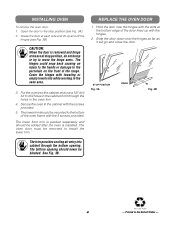
...the cabinet front through the bottom opening should be blocked. The oven door must be added after the oven is removed and hinge STOP! Recycled Paper 4 - Grasp the door at each side and lift up with the screws provided. 5. REPLACE THE OVEN DOOR 1. STOP POSITION Fig. 3A HINGE Fig. 3B The trim ... onto the hinges as far as it will go and close the door. Open the door to install the lower trim. CAUTION: When the door is installed. The bottom opening . Secure the oven in the oven area. 3. Hold the door over the hinges with the slots at stop position (see Fig. 3B)....
...the cabinet front through the bottom opening should be blocked. The oven door must be added after the oven is removed and hinge STOP! Recycled Paper 4 - Grasp the door at each side and lift up with the screws provided. 5. REPLACE THE OVEN DOOR 1. STOP POSITION Fig. 3A HINGE Fig. 3B The trim ... onto the hinges as far as it will go and close the door. Open the door to install the lower trim. CAUTION: When the door is installed. The bottom opening . Secure the oven in the oven area. 3. Hold the door over the hinges with the slots at stop position (see Fig. 3B)....


