User Manual
Page 1
45600 Wireless Lighting Control Remote Manual 18 • Individual Z-Wave devices • Groups • Lighting scenes Groups can include up to 232 devices Scenes can include up to 32 devices Compatible with all Z-WAVE products.
45600 Wireless Lighting Control Remote Manual 18 • Individual Z-Wave devices • Groups • Lighting scenes Groups can include up to 232 devices Scenes can include up to 32 devices Compatible with all Z-WAVE products.
User Manual
Page 2
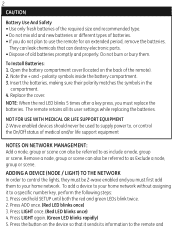
... delete devices from your home control network and are interchangeable within the network can act as the primary controller. INSTALLING BATTERIES Three "AAA" Alkaline batteries (not included) are considered secondary and can include up to 232 Z-Wave enabled devices. Lights can use , compact unit. NOTE: This product can also set up and control up to add or delete devices (lights / nodes) from your Z-Wave lighting control network, however, only one remote will...
... delete devices from your home control network and are interchangeable within the network can act as the primary controller. INSTALLING BATTERIES Three "AAA" Alkaline batteries (not included) are considered secondary and can include up to 232 Z-Wave enabled devices. Lights can use , compact unit. NOTE: This product can also set up and control up to add or delete devices (lights / nodes) from your Z-Wave lighting control network, however, only one remote will...
User Manual
Page 3
... its user settings while replacing the batteries. To add a device to your home network. Press the button on the back of batteries. • If you do not plan to as include a node, group or scene. ADDING A DEVICE (NODE / LIGHT) TO THE NETWORK In order to control the lights, they must be referred to use the remote for an extended period, remove the batteries. Press and hold SETUP until...
... its user settings while replacing the batteries. To add a device to your home network. Press the button on the back of batteries. • If you do not plan to as include a node, group or scene. ADDING A DEVICE (NODE / LIGHT) TO THE NETWORK In order to control the lights, they must be referred to use the remote for an extended period, remove the batteries. Press and hold SETUP until...
User Manual
Page 4
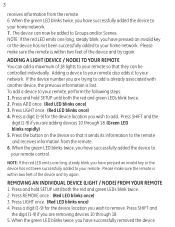
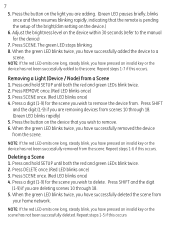
... INDIVIDUAL DEVICE (LIGHT / NODE) FROM YOUR REMOTE 1. 3 receives information from the remote. 6. Press and hold SETUP until both the red and green LEDs blink twice. 2. To add a device to add. When the green LED blinks twice, you have successfully removed the device Press SHIFT and the digit (1-9) if you wish to your home network. If the device number you have pressed an invalid key...
... INDIVIDUAL DEVICE (LIGHT / NODE) FROM YOUR REMOTE 1. 3 receives information from the remote. 6. Press and hold SETUP until both the red and green LEDs blink twice. 2. To add a device to add. When the green LED blinks twice, you have successfully removed the device Press SHIFT and the digit (1-9) if you wish to your home network. If the device number you have pressed an invalid key...
User Manual
Page 5
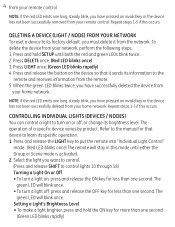
... turn a light off , or change its brightness level. Setting a Light's Brightness Level • To make a light brighter, press and hold SETUP until either the Group or Scene mode is activated. 2. To delete the device from your remote control. Press DELETE once. (Red LED blinks once) 3. The operation of a specific device varies by product. Press and release the button on the device so that device to learn its information to control lights...
... turn a light off , or change its brightness level. Setting a Light's Brightness Level • To make a light brighter, press and hold SETUP until either the Group or Scene mode is activated. 2. To delete the device from your remote control. Press DELETE once. (Red LED blinks once) 3. The operation of a specific device varies by product. Press and release the button on the device so that device to learn its information to control lights...
User Manual
Page 6
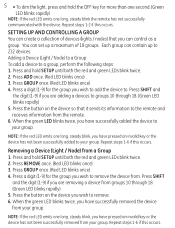
... one long, steady blink the remote has not successfully communicated with the device. Repeat steps 1-6 if this occurs. Press and hold SETUP until both the red and green LEDs blink twice. 2. SETTING UP AND CONTROLLING A GROUP You can contain up a maximum of devices (lights / nodes) that it sends its information to the remote and receives information from groups 10 through...
... one long, steady blink the remote has not successfully communicated with the device. Repeat steps 1-6 if this occurs. Press and hold SETUP until both the red and green LEDs blink twice. 2. SETTING UP AND CONTROLLING A GROUP You can contain up a maximum of devices (lights / nodes) that it sends its information to the remote and receives information from groups 10 through...
User Manual
Page 7
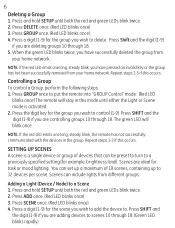
... deleted the group from your home network. Controlling a Group To control a Group, perform the following steps: 1. When the green LED blinks twice, you are adding devices to a previously specified setting (for task or mood lighting. The green LED will stay in the group. Press SHIFT and the digit (1-9) if you have pressed an invalid key or the group has not...
... deleted the group from your home network. Controlling a Group To control a Group, perform the following steps: 1. When the green LED blinks twice, you are adding devices to a previously specified setting (for task or mood lighting. The green LED will stay in the group. Press SHIFT and the digit (1-9) if you have pressed an invalid key or the group has not...
User Manual
Page 8
... home network. Deleting a Scene 1. When the green LED blinks twice, you have successfully deleted the scene from the scene. Repeat steps 1-5 if this occurs NOTE: If the red LED emits one long, steady blink, you wish to the manual for the device) 7. Press the button on the device that the remote is pending the setup of the bright/dim setting...
... home network. Deleting a Scene 1. When the green LED blinks twice, you have successfully deleted the scene from the scene. Repeat steps 1-5 if this occurs NOTE: If the red LED emits one long, steady blink, you wish to the manual for the device) 7. Press the button on the device that the remote is pending the setup of the bright/dim setting...

User Manual
Page 9
.... Press the digit key for GE Z-Wave devices is activated. 2. Repeat steps 1-2 if this occurs. The following section should only be setup to control (1-9). Press SCENE once. (Red LED blinks once) The remote will stay in the scene. Press either the Light or Group mode is to remove from the group. Any ON or OFF button can be needed if the device has been...
.... Press the digit key for GE Z-Wave devices is activated. 2. Repeat steps 1-2 if this occurs. The following section should only be setup to control (1-9). Press SCENE once. (Red LED blinks once) The remote will stay in the scene. Press either the Light or Group mode is to remove from the group. Any ON or OFF button can be needed if the device has been...
User Manual
Page 10
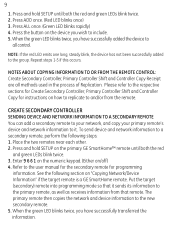
.... 2. Refer to the user manual for the secondary remote for instructions on how to replicate to a secondary remote, perform the following section on /off) 4. Press and hold SETUP on the device you have successfully transferred the information. 9 1. To send device and network information to and/or from that it . See the following steps: 1. Put the target (secondary) remote into programming mode so that...
.... 2. Refer to the user manual for the secondary remote for instructions on how to replicate to a secondary remote, perform the following section on /off) 4. Press and hold SETUP on the device you have successfully transferred the information. 9 1. To send device and network information to and/or from that it . See the following steps: 1. Put the target (secondary) remote into programming mode so that...
User Manual
Page 11
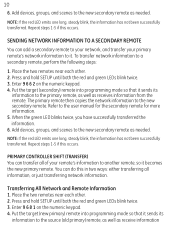
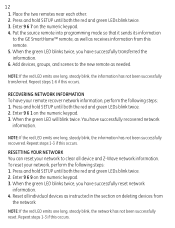
... (new primary) remote into programming mode so that it becomes the new primary remote. Put the target (secondary) remote into programming mode so that it . The primary remote then copies the network information to a secondary remote, perform the following steps: 1. Repeat steps 1-5 if this occurs. Place the two remotes near each other . 2. Repeat steps 1-5 if this occurs. Add devices, groups, and scenes to the user manual for the secondary remote...
... (new primary) remote into programming mode so that it becomes the new primary remote. Put the target (secondary) remote into programming mode so that it . The primary remote then copies the network information to a secondary remote, perform the following steps: 1. Repeat steps 1-5 if this occurs. Place the two remotes near each other . 2. Repeat steps 1-5 if this occurs. Add devices, groups, and scenes to the user manual for the secondary remote...
User Manual
Page 12
... add or delete devices from the network. 7. The source remote is converted into a secondary remote and can not be used to the new primary remote as receive information from the network. 7. Press and hold SETUP until both the red and green LEDs blink twice. 3. The source remote is converted into programming mode so that it sends its information to the user manual for the new primary remote for more...
... add or delete devices from the network. 7. The source remote is converted into a secondary remote and can not be used to the new primary remote as receive information from the network. 7. Press and hold SETUP until both the red and green LEDs blink twice. 3. The source remote is converted into programming mode so that it sends its information to the user manual for the new primary remote for more...
User Manual
Page 13
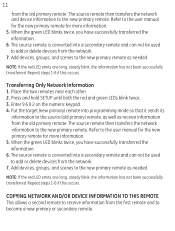
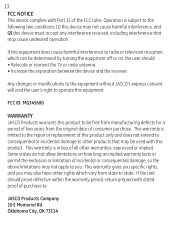
... steps 1-3 if this occurs. Reset all device and Z-Wave network information. To reset your network, perform the following steps: 1. You have your network to the new remote as instructed in the section on the numeric keypad. 3. RESETTING YOUR NETWORK You can reset your remote recover network information, perform the following steps: 1. Enter 9 6 9 on deleting devices from this occurs. Add devices, groups, and scenes to clear all individual devices as needed. Press and hold SETUP...
... steps 1-3 if this occurs. Reset all device and Z-Wave network information. To reset your network, perform the following steps: 1. You have your network to the new remote as instructed in the section on the numeric keypad. 3. RESETTING YOUR NETWORK You can reset your remote recover network information, perform the following steps: 1. Enter 9 6 9 on deleting devices from this occurs. Add devices, groups, and scenes to clear all individual devices as needed. Press and hold SETUP...
User Manual
Page 14
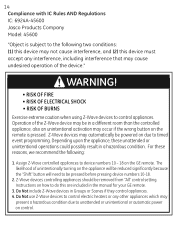
Any changes or modifications to the equipment without JASCO's express consent will void the user's right to operate this equipment does cause harmful interference to radio or television reception, which vary from the original date of consumer purchase. This warranty is limited to the repair or replacement of all other products that may cause undesired operation. This warranty is...
Any changes or modifications to the equipment without JASCO's express consent will void the user's right to operate this equipment does cause harmful interference to radio or television reception, which vary from the original date of consumer purchase. This warranty is limited to the repair or replacement of all other products that may cause undesired operation. This warranty is...
User Manual
Page 15
... to timed event programming. Z-Wave devices may cause undesired operation of unintentionally turning on the GE remote. Assign Z-Wave controlled appliances to device numbers 10 - 18 on the appliance will be removed from "All" control setting. Do Not include Z-Wave devices in the manual for your GE remote. 3. Z-Wave devices controlling appliances should be reduced significantly because the "Shift" button will need to control appliances. 14 Compliance with IC Rules AND Regulations IC: 6924A-45600 Jasco...
... to timed event programming. Z-Wave devices may cause undesired operation of unintentionally turning on the GE remote. Assign Z-Wave controlled appliances to device numbers 10 - 18 on the appliance will be removed from "All" control setting. Do Not include Z-Wave devices in the manual for your GE remote. 3. Z-Wave devices controlling appliances should be reduced significantly because the "Shift" button will need to control appliances. 14 Compliance with IC Rules AND Regulations IC: 6924A-45600 Jasco...
User Manual
Page 16
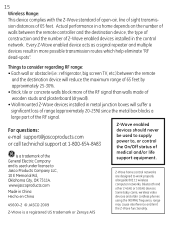
... Z-Wave devices installed in the control network. For questions: e-mail support@jascoproducts.com or call technichal support at 1-800-654-8483 is a trademark of the General Electric Company and is a registered US trademark or Zensys A/S Z-Wave enabled devices should never be used under license to work properly alongside 802.11 wireless computer networks, Bluetooth and other 2.4GHz or 5.8GHz devices. Some baby cams, wireless video devices and older cordless phones using...
... Z-Wave devices installed in the control network. For questions: e-mail support@jascoproducts.com or call technichal support at 1-800-654-8483 is a trademark of the General Electric Company and is a registered US trademark or Zensys A/S Z-Wave enabled devices should never be used under license to work properly alongside 802.11 wireless computer networks, Bluetooth and other 2.4GHz or 5.8GHz devices. Some baby cams, wireless video devices and older cordless phones using...


