
8511050 - Gateway Computer User Guide
Page 19
...page 30. www.gateway.com 13 For more information, see "Installing a printer, scanner, or other peripheral device" on a television. In the United States, the utility power is supplied at a nominal 115 volts at 50 Hz. Plug the other areas of the cable into this jack. The power supply should always be ...set to this , the voltage switch should be moved to 230. If your computer is supplied at 230 volts at 60 Hz. For information on configuring this jack, see "Learning...
...page 30. www.gateway.com 13 For more information, see "Installing a printer, scanner, or other peripheral device" on a television. In the United States, the utility power is supplied at a nominal 115 volts at 50 Hz. Plug the other areas of the cable into this jack. The power supply should always be ...set to this , the voltage switch should be moved to 230. If your computer is supplied at 230 volts at 60 Hz. For information on configuring this jack, see "Learning...

8511050 - Gateway Computer User Guide
Page 23
... a USB flash drive for storing files or transferring files to keep your computer from power surges. Uninterruptible power supplies A standby, uninterruptible power supply (UPS) protects your computer running temporarily during a total power failure. A UPS may also provide protection from data loss during a power failure so you want to back up files, then removing them from your computer.... If you want to back up your entire system, you probably need additional storage space or you can add storage devices to store data. www.gateway.com 17
... a USB flash drive for storing files or transferring files to keep your computer from power surges. Uninterruptible power supplies A standby, uninterruptible power supply (UPS) protects your computer running temporarily during a total power failure. A UPS may also provide protection from data loss during a power failure so you want to back up files, then removing them from your computer.... If you want to back up your entire system, you probably need additional storage space or you can add storage devices to store data. www.gateway.com 17

8511050 - Gateway Computer User Guide
Page 28
...areas of your computer by connecting them to far above normal levels and cause data loss or system damage. Checking the voltage selection A power supply is supplied at 230 volts at 50 Hz. The voltage selection for your location before turning on the back of the world, such as this ... computer long enough to 230. 22 www.gateway.com If you set at 60 Hz. Caution If you have a cable modem, use a surge protector that has an antenna/cable TV jack. Make sure this , the voltage switch should always be set the power supply to your computer. Chapter 3: Getting Started ...
...areas of your computer by connecting them to far above normal levels and cause data loss or system damage. Checking the voltage selection A power supply is supplied at 230 volts at 50 Hz. The voltage selection for your location before turning on the back of the world, such as this ... computer long enough to 230. 22 www.gateway.com If you set at 60 Hz. Caution If you have a cable modem, use a surge protector that has an antenna/cable TV jack. Make sure this , the voltage switch should always be set the power supply to your computer. Chapter 3: Getting Started ...

8511050 - Gateway Computer User Guide
Page 30
...power supply and system board remain energized. If your computer is in Standby mode, move the mouse or press the power button to "wake" it may enter a power-saving mode called Standby. Tips & Tricks For more information about five seconds, then release it. 24 www.gateway.com We recommend disconnecting the power...been included on your hard drive. While in Standby, the power indicator flashes. To access this guide, click Start, All Programs, then click Gateway Documentation. In order to turn off your computer, unplug the power cord and modem cable from your computer: 1 Click Start...
...power supply and system board remain energized. If your computer is in Standby mode, move the mouse or press the power button to "wake" it may enter a power-saving mode called Standby. Tips & Tricks For more information about five seconds, then release it. 24 www.gateway.com We recommend disconnecting the power...been included on your hard drive. While in Standby, the power indicator flashes. To access this guide, click Start, All Programs, then click Gateway Documentation. In order to turn off your computer, unplug the power cord and modem cable from your computer: 1 Click Start...

8511050 - Gateway Computer User Guide
Page 56
...slide expansion cards or components over any object into the vent holes of the power supply. ■ Touch a bare metal surface on the back of the computer. ■ Unplug the power cord and the modem and network cables. Do not lay components on the... parts, turn off your computer. Warning To avoid exposure to a bare metal part of your computer and unplug the power cord and modem and network cables before opening the computer case, follow these guidelines: ■ Avoid static-causing surfaces ... on the outside of electric shock, do not insert any surface. 50 www.gateway.com
...slide expansion cards or components over any object into the vent holes of the power supply. ■ Touch a bare metal surface on the back of the computer. ■ Unplug the power cord and the modem and network cables. Do not lay components on the... parts, turn off your computer. Warning To avoid exposure to a bare metal part of your computer and unplug the power cord and modem and network cables before opening the computer case, follow these guidelines: ■ Avoid static-causing surfaces ... on the outside of electric shock, do not insert any surface. 50 www.gateway.com

8511050 - Gateway Computer User Guide
Page 66
Warning To avoid bodily injury, do not attempt to your computer and an AC outlet and that the AC outlet is supplying power. ■ If you use a power strip or surge protector, make sure that it is turned on. ■ If a peripheral device (such as a keyboard or mouse) does ... more information about preventing damage from static electricity, see the program's printed documentation or the online help Gateway Customer Care in the Search box , then click the arrow. 60 www.gateway.com Type the keyword troubleshooting in diagnosing and fixing the problem. ■ If you added or removed...
Warning To avoid bodily injury, do not attempt to your computer and an AC outlet and that the AC outlet is supplying power. ■ If you use a power strip or surge protector, make sure that it is turned on. ■ If a peripheral device (such as a keyboard or mouse) does ... more information about preventing damage from static electricity, see the program's printed documentation or the online help Gateway Customer Care in the Search box , then click the arrow. 60 www.gateway.com Type the keyword troubleshooting in diagnosing and fixing the problem. ■ If you added or removed...
8511050 - Gateway Computer User Guide
Page 84
...with it. Chapter 6: Troubleshooting Telephone support Before calling Gateway Customer Care If you have a technical problem with your computer, follow troubleshooting steps. 78 www.gateway.com If you use a surge protector, make sure that is supplying power. Warning To avoid bodily injury, do not attempt ...to troubleshoot your computer problem if: ■ Power cords or plugs are damaged ■ Liquid has ...
...with it. Chapter 6: Troubleshooting Telephone support Before calling Gateway Customer Care If you have a technical problem with your computer, follow troubleshooting steps. 78 www.gateway.com If you use a surge protector, make sure that is supplying power. Warning To avoid bodily injury, do not attempt ...to troubleshoot your computer problem if: ■ Power cords or plugs are damaged ■ Liquid has ...

8511050 - Gateway Computer User Guide
Page 115
... connection speed 66 turning off computer 11, 24, 25 turning on computer 11, 23 tutoring fee-based 80 TV out (S-Video out) jack 13 U uninterruptible power supply (UPS) 17, 22 updating device drivers 3 updating Windows 42 UPS 17, 22 USB port 11, 14, 32 V video playing 39 S-Video out jack 13... Internet Security 43 voltage switch 13 volume adjusting 30 adjusting modem 71 controls 30 muting 30 troubleshooting 77 W WAN IP Address 91 Web site Gateway 3 Windows Product Key Code 15 restoring 48 Windows key 27 Windows Media Player 39 Windows Security Center using 43 Windows Update 42 wired Ethernet ...
... connection speed 66 turning off computer 11, 24, 25 turning on computer 11, 23 tutoring fee-based 80 TV out (S-Video out) jack 13 U uninterruptible power supply (UPS) 17, 22 updating device drivers 3 updating Windows 42 UPS 17, 22 USB port 11, 14, 32 V video playing 39 S-Video out jack 13... Internet Security 43 voltage switch 13 volume adjusting 30 adjusting modem 71 controls 30 muting 30 troubleshooting 77 W WAN IP Address 91 Web site Gateway 3 Windows Product Key Code 15 restoring 48 Windows key 27 Windows Media Player 39 Windows Security Center using 43 Windows Update 42 wired Ethernet ...

8511625 - Gateway Computer Hardware Reference (6-Bay Micro BTX Case)
Page 3
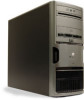
... Contents Contents Chapter 1: About This Reference 1 About this guide 2 Accessing the User Guide 2 Gateway contact information 3 Microsoft Certificate of Authenticity 3 Chapter 2: Hardware Features 5 Front 6 Back 8 Chapter 3: Maintenance Basics 13 Preventing static electricity discharge 14 Opening... the memory card reader 20 Adding or replacing a hard drive 21 Replacing the front fan 25 Replacing the rear fan 26 Replacing the power supply 27 Replacing the heat sink and processor 28 Replacing the I/O board 30 Adding or replacing an expansion card 31 Replacing the system board...
... Contents Contents Chapter 1: About This Reference 1 About this guide 2 Accessing the User Guide 2 Gateway contact information 3 Microsoft Certificate of Authenticity 3 Chapter 2: Hardware Features 5 Front 6 Back 8 Chapter 3: Maintenance Basics 13 Preventing static electricity discharge 14 Opening... the memory card reader 20 Adding or replacing a hard drive 21 Replacing the front fan 25 Replacing the rear fan 26 Replacing the power supply 27 Replacing the heat sink and processor 28 Replacing the I/O board 30 Adding or replacing an expansion card 31 Replacing the system board...

8511625 - Gateway Computer Hardware Reference (6-Bay Micro BTX Case)
Page 14
... as a printer) into this port. Plug a telephone's cable into these screws before opening the case. Before turning on your user guide. The power supply should be set to 230. For information on configuring this jack. Plug IEEE 1394 (also known as Firewire® or i.Link®) devices (such...source (such as a DSL or cable modem for your front left and right speakers into this guide, click Start, All Programs, then click Gateway Documentation. In other end of the following : Headphone: Plug headphones or amplified speakers into this port. PS/2 mouse port Plug a PS/2 ...
... as a printer) into this port. Plug a telephone's cable into these screws before opening the case. Before turning on your user guide. The power supply should be set to 230. For information on configuring this jack. Plug IEEE 1394 (also known as Firewire® or i.Link®) devices (such...source (such as a DSL or cable modem for your front left and right speakers into this guide, click Start, All Programs, then click Gateway Documentation. In other end of the following : Headphone: Plug headphones or amplified speakers into this port. PS/2 mouse port Plug a PS/2 ...

8511625 - Gateway Computer Hardware Reference (6-Bay Micro BTX Case)
Page 17
CHAPTER 3 Maintenance Basics • Preventing static electricity discharge • Opening the case • Closing the case • Installing memory • Replacing the system battery • Adding or replacing a CD or DVD drive • Replacing the memory card reader • Adding or replacing a hard drive • Replacing the front fan • Replacing the rear fan • Replacing the power supply • Replacing the heat sink and processor • Replacing the I/O board • Adding or replacing an expansion card • Replacing the system board 13
CHAPTER 3 Maintenance Basics • Preventing static electricity discharge • Opening the case • Closing the case • Installing memory • Replacing the system battery • Adding or replacing a CD or DVD drive • Replacing the memory card reader • Adding or replacing a hard drive • Replacing the front fan • Replacing the rear fan • Replacing the power supply • Replacing the heat sink and processor • Replacing the I/O board • Adding or replacing an expansion card • Replacing the system board 13

8511625 - Gateway Computer Hardware Reference (6-Bay Micro BTX Case)
Page 18
Never slide expansion cards or components over any object into the vent holes of the power supply. Removing the side panel Warning To avoid exposure to dangerous electrical voltages and moving parts, turn off your computer. ■ Wear a ...Follow the instructions in your computer. Opening the case Your computer case provides easy access to drain any residual power from their metal mounting brackets. CHAPTER 3: Maintenance Basics www.gateway.com Preventing static electricity discharge Warning To avoid exposure to dangerous electrical voltages and moving parts, turn off your ...
Never slide expansion cards or components over any object into the vent holes of the power supply. Removing the side panel Warning To avoid exposure to dangerous electrical voltages and moving parts, turn off your computer. ■ Wear a ...Follow the instructions in your computer. Opening the case Your computer case provides easy access to drain any residual power from their metal mounting brackets. CHAPTER 3: Maintenance Basics www.gateway.com Preventing static electricity discharge Warning To avoid exposure to dangerous electrical voltages and moving parts, turn off your ...

8511625 - Gateway Computer Hardware Reference (6-Bay Micro BTX Case)
Page 31
...2. 7 Replace the side panel by following the instructions in "Replacing the side panel" on page 14. 2 Disconnect the power supply cables from all components (such as hard drives, CD or DVD drives, and the system board), noting their locations and ... then install the three screws to secure the power supply to replace the power supply. To replace the power supply: 1 Remove the side panel by following the instructions in "Removing the side panel" on page 16. 27 www.gateway.com Replacing the power supply Replacing the power supply Tips & Tricks You need a Phillips screwdriver to...
...2. 7 Replace the side panel by following the instructions in "Replacing the side panel" on page 14. 2 Disconnect the power supply cables from all components (such as hard drives, CD or DVD drives, and the system board), noting their locations and ... then install the three screws to secure the power supply to replace the power supply. To replace the power supply: 1 Remove the side panel by following the instructions in "Removing the side panel" on page 16. 27 www.gateway.com Replacing the power supply Replacing the power supply Tips & Tricks You need a Phillips screwdriver to...

8511625 - Gateway Computer Hardware Reference (6-Bay Micro BTX Case)
Page 38
Screws 11 Slide the power supply away from the back of the case. 14 Align the new system board on the screw holes in the case, then secure it . 12 Remove ... system board does not include a processor, go to Step 16. -ORIf your replacement system board includes a processor, go to your computer. CHAPTER 3: Maintenance Basics www.gateway.com 10 Remove the three screws that secure the power supply to Step 21. 34
Screws 11 Slide the power supply away from the back of the case. 14 Align the new system board on the screw holes in the case, then secure it . 12 Remove ... system board does not include a processor, go to Step 16. -ORIf your replacement system board includes a processor, go to your computer. CHAPTER 3: Maintenance Basics www.gateway.com 10 Remove the three screws that secure the power supply to Step 21. 34

8511625 - Gateway Computer Hardware Reference (6-Bay Micro BTX Case)
Page 39
www.gateway.com Replacing the system board 16 Loosen the four screws that secure it on the processor socket (indicated by the absence of the heat sink (... board, then remove the heat sink and place it to the system board. 21 Install the power supply into the case, then install the three screws to secure the power supply to the case. 22 Connect the power and data cables using your notes from the old system board. 19 Install the processor onto the...
www.gateway.com Replacing the system board 16 Loosen the four screws that secure it on the processor socket (indicated by the absence of the heat sink (... board, then remove the heat sink and place it to the system board. 21 Install the power supply into the case, then install the three screws to secure the power supply to the case. 22 Connect the power and data cables using your notes from the old system board. 19 Install the processor onto the...

8511625 - Gateway Computer Hardware Reference (6-Bay Micro BTX Case)
Page 50
... 10 USB port 7, 11 N network jack 10 O opening computer case 14 front bezel 15 P parallel port 10 ports See connections power button 7 connector 10 Hibernate mode 7 indicator 7 Standby/Resume 7 power button 7 power supply replacing 27 printer parallel port 10 USB port 7, 11 PS/2 port keyboard 11 mouse 10 46 R RAID 38 creating a volume 40... 7 TV out (S-Video out) jack 10 U USB port 7, 11 V video S-Video out jack 10 VGA port 11 voltage switch 10 W Windows Product Key Code 3 www.gateway.com Z Zip drive port 11
... 10 USB port 7, 11 N network jack 10 O opening computer case 14 front bezel 15 P parallel port 10 ports See connections power button 7 connector 10 Hibernate mode 7 indicator 7 Standby/Resume 7 power button 7 power supply replacing 27 printer parallel port 10 USB port 7, 11 PS/2 port keyboard 11 mouse 10 46 R RAID 38 creating a volume 40... 7 TV out (S-Video out) jack 10 U USB port 7, 11 V video S-Video out jack 10 VGA port 11 voltage switch 10 W Windows Product Key Code 3 www.gateway.com Z Zip drive port 11

