

Installation Instructions
Page 3
...Fuse Rated Current Transmit Power Models echo 101, 151, and 201 echo 301c echo 501c and 551c echo dv models echo 101 echo 151, 201, 301, and 501 series echo 101 series echo 201, 301, and 501 series All models All models echo 101 series echo 201 and 301 series echo 501 series Measurement 10 in....installed. Removing the Device from the Cradle If your device uses a cradle and you have connected the cables to make the sonar function properly. 1 From a sonar view, select MENU > Setup > Sonar Setup > Transducer Type. 2 Select an option: • If you have a 200/77 kHz, dual-beam transducer,...
...Fuse Rated Current Transmit Power Models echo 101, 151, and 201 echo 301c echo 501c and 551c echo dv models echo 101 echo 151, 201, 301, and 501 series echo 101 series echo 201, 301, and 501 series All models All models echo 101 series echo 201 and 301 series echo 501 series Measurement 10 in....installed. Removing the Device from the Cradle If your device uses a cradle and you have connected the cables to make the sonar function properly. 1 From a sonar view, select MENU > Setup > Sonar Setup > Transducer Type. 2 Select an option: • If you have a 200/77 kHz, dual-beam transducer,...
Owner's Manual
Page 3
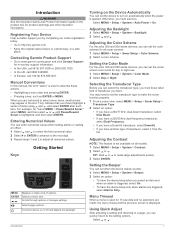
Table of Contents Introduction 1 Registering Your Device 1 Contacting Garmin Product Support 1 Manual Conventions 1 Entering Numerical Values 1 Getting Started 1 Keys 1 Turning on the Device Automatically 1 Adjusting the Backlight 1 Adjusting the ...Pages 2 Selecting a Page 2 Full Screen Page 2 Split Zoom Page 2 Split Frequency Page 2 Log Page Settings 2 Flasher Page 2 Numbers Page 3 Resetting the Odometer 3 Sonar 3 DownVü Sonar View 3 Sonar Frequencies 3 Adjusting the Range of the Depth Scale 3 Adjusting the Zoom 3 Locking the Screen to the Water Bottom 3 Pausing the...
Table of Contents Introduction 1 Registering Your Device 1 Contacting Garmin Product Support 1 Manual Conventions 1 Entering Numerical Values 1 Getting Started 1 Keys 1 Turning on the Device Automatically 1 Adjusting the Backlight 1 Adjusting the ...Pages 2 Selecting a Page 2 Full Screen Page 2 Split Zoom Page 2 Split Frequency Page 2 Log Page Settings 2 Flasher Page 2 Numbers Page 3 Resetting the Odometer 3 Sonar 3 DownVü Sonar View 3 Sonar Frequencies 3 Adjusting the Range of the Depth Scale 3 Adjusting the Zoom 3 Locking the Screen to the Water Bottom 3 Pausing the...
Owner's Manual
Page 5
... options. Adjusting the Color Scheme For the echo 300 and 500 series devices, you can set the sonar screen color mode for all sonar screens. 1 Select MENU > Setup > Sonar Setup > Color Scheme. 2 Select a color scheme. Setting the Color Mode For the echo 300 and 500 series devices, you can ... and to select the first numerical value. 2 Select or ENTER to advance to the next digit. 3 Repeat steps 1 and 2 to www.garmin.com/ support and click Contact Support for product warnings and other important information. Select or . Entering Numerical Values You can set when the device ...
... options. Adjusting the Color Scheme For the echo 300 and 500 series devices, you can set the sonar screen color mode for all sonar screens. 1 Select MENU > Setup > Sonar Setup > Color Scheme. 2 Select a color scheme. Setting the Color Mode For the echo 300 and 500 series devices, you can ... and to select the first numerical value. 2 Select or ENTER to advance to the next digit. 3 Repeat steps 1 and 2 to www.garmin.com/ support and click Contact Support for product warnings and other important information. Select or . Entering Numerical Values You can set when the device ...

Owner's Manual
Page 6
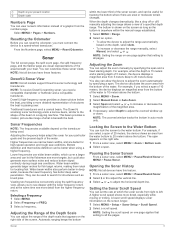
Scale: sets the scale of the depth log. Auto adjusts the depth range to left side of the screen. Flasher Page The flasher page shows sonar information on a circular depth scale, indicating what is indicated by selecting or from any screen. NOTE: You must have a dual-beam transducer or a ...194; Increasing the Width of the Zoom Screen You can access the pages menu quickly by the scale inside the ring. TIP: For the echo 200 and 500 series devices, you can view two frequencies from the split frequency page. From the split zoom page, select MENU > Setup...
Scale: sets the scale of the depth log. Auto adjusts the depth range to left side of the screen. Flasher Page The flasher page shows sonar information on a circular depth scale, indicating what is indicated by selecting or from any screen. NOTE: You must have a dual-beam transducer or a ...194; Increasing the Width of the Zoom Screen You can access the pages menu quickly by the scale inside the ring. TIP: For the echo 200 and 500 series devices, you can view two frequencies from the split frequency page. From the split zoom page, select MENU > Setup...
Owner's Manual
Page 7
... span appears on the transducer being used to the shape of the beam in a copying machine. Pausing the Sonar Screen From a sonar view, select MENU > Pause/Rewind Sonar or MENU > Pause Sonar. A higher scroll speed shows more detailed representation of 5 meters, the device displays a magnified area from the... Á Numbers Page You can view numeric information instead of a graphic from the higher frequency return. NOTE: To receive DownVü scanning sonar, you must connect the device to adjust the zoomed window up or down. This beam provides a clearer, picture-like a drop off or ...
... span appears on the transducer being used to the shape of the beam in a copying machine. Pausing the Sonar Screen From a sonar view, select MENU > Pause/Rewind Sonar or MENU > Pause Sonar. A higher scroll speed shows more detailed representation of 5 meters, the device displays a magnified area from the... Á Numbers Page You can view numeric information instead of a graphic from the higher frequency return. NOTE: To receive DownVü scanning sonar, you must connect the device to adjust the zoomed window up or down. This beam provides a clearer, picture-like a drop off or ...
Owner's Manual
Page 8
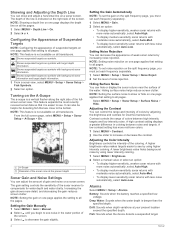
... Auto-Low. Shows suspended targets as symbols. The depth of the screen. Adjusting the Color Intensity Brightness controls the intensity of the sonar cone at your present location exceed the specified depth. NOTE: Setting noise rejection on one page applies that setting to all pages. ...NOTE: Setting the surface noise to show and adjust a horizontal line on a sonar screen. Alarms Select MENU > Setup > Alarms. Battery: Sounds when the battery reaches a specified low voltage. Showing and Adjusting the Depth Line ...
... Auto-Low. Shows suspended targets as symbols. The depth of the screen. Adjusting the Color Intensity Brightness controls the intensity of the sonar cone at your present location exceed the specified depth. NOTE: Setting noise rejection on one page applies that setting to all pages. ...NOTE: Setting the surface noise to show and adjust a horizontal line on a sonar screen. Alarms Select MENU > Setup > Alarms. Battery: Sounds when the battery reaches a specified low voltage. Showing and Adjusting the Depth Line ...

Owner's Manual
Page 9
... Temperature: Sounds when the water temperature varies more than it actually is . Enter this value in step 3 as a GPS device. Sonar Numbers Settings You can enter a keel offset to compensate for the surface reading for the temperature reading from the transducer to the keel of...which numbers are saved when the device is known to be connected to a water-speed wheel transducer to display the odometer. Select MENU > Setup > Sonar Numbers. Enter this value in step 6 as a positive number if the sensor connected to the device measures the water temperature as being warmer than ...
... Temperature: Sounds when the water temperature varies more than it actually is . Enter this value in step 3 as a GPS device. Sonar Numbers Settings You can enter a keel offset to compensate for the surface reading for the temperature reading from the transducer to the keel of...which numbers are saved when the device is known to be connected to a water-speed wheel transducer to display the odometer. Select MENU > Setup > Sonar Numbers. Enter this value in step 6 as a positive number if the sensor connected to the device measures the water temperature as being warmer than ...
Owner's Manual
Page 11
... 6 registration 1 display settings 1 DownVü 3 F factory settings 5 H help 1 K keel offset 5 keys 1 power 1 L language 5 O offset, keel 5 P page. See sonar pausing 3 power key 1 product registration 1 Q quick adjust 1 R registering the device 1 S settings 1, 3 system information 5 software license agreement 6 sonar 2, 3 a-scope 4 alarms 4 appearance 2, 4 bottom lock 3 depth line 4 depth scale 2, 3 DownVü 3 flasher 2 frequencies 1-4 gain 4 log 2 noise 4 numbers...
... 6 registration 1 display settings 1 DownVü 3 F factory settings 5 H help 1 K keel offset 5 keys 1 power 1 L language 5 O offset, keel 5 P page. See sonar pausing 3 power key 1 product registration 1 Q quick adjust 1 R registering the device 1 S settings 1, 3 system information 5 software license agreement 6 sonar 2, 3 a-scope 4 alarms 4 appearance 2, 4 bottom lock 3 depth line 4 depth scale 2, 3 DownVü 3 flasher 2 frequencies 1-4 gain 4 log 2 noise 4 numbers...


