Owner's Manual
Page 5
...Options 79 Flasher Page 84 Map Split Page 85 Appendix 86 Specifications 86 Installing the GPSMAP 492/498 External GPS Antenna..... 87 Mounting the GPSMAP 392/398/492/498 88 Installing the Transducer 90 Connecting the Power/Data Cable 92 Interfacing 93 Installing and Removing ...assignments obtained 97 Navigation Terms 98 Messages and Alarms 100 LORAN TD System 103 Optional Accessories 105 Software License Agreement 106 Product Registration 106 Limited Warranty 107 FCC Compliance 108 Declaration of Conformity (DoC 108 Index 109 GPSMAP 392/398/492/498 Owner's Manual iii
...Options 79 Flasher Page 84 Map Split Page 85 Appendix 86 Specifications 86 Installing the GPSMAP 492/498 External GPS Antenna..... 87 Mounting the GPSMAP 392/398/492/498 88 Installing the Transducer 90 Connecting the Power/Data Cable 92 Interfacing 93 Installing and Removing ...assignments obtained 97 Navigation Terms 98 Messages and Alarms 100 LORAN TD System 103 Optional Accessories 105 Software License Agreement 106 Product Registration 106 Limited Warranty 107 FCC Compliance 108 Declaration of Conformity (DoC 108 Index 109 GPSMAP 392/398/492/498 Owner's Manual iii

Owner's Manual
Page 9
...2. Press ENTER to answer NO to collect satellite data and establish its present location. The GPS Information Page appears as the receiver begins acquiring satellites. To turn on the GPSMAP 392/398/492/498, the receiver must be given an opportunity to the window asking "Do you press either ... The first time you start the Retail Demonstration?". To ensure proper initialization, the GPSMAP 392/398/492/498 is blank, release the POWER key. 1 Before you initialize, make sure the GPSMAP 392/398/492/498 unit and antenna are only asked this the first time you turn off the...
...2. Press ENTER to answer NO to collect satellite data and establish its present location. The GPS Information Page appears as the receiver begins acquiring satellites. To turn on the GPSMAP 392/398/492/498, the receiver must be given an opportunity to the window asking "Do you press either ... The first time you start the Retail Demonstration?". To ensure proper initialization, the GPSMAP 392/398/492/498 is blank, release the POWER key. 1 Before you initialize, make sure the GPSMAP 392/398/492/498 unit and antenna are only asked this the first time you turn off the...
Owner's Manual
Page 94
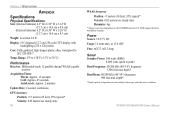
APPENDIX > SPECIFICATIONS APPENDIX Specifications Physical Specifications Size: (Internal Antenna) 6.2" H x 6.30" W x 3.14" D (15.7 cm x 16.0 cm x 8.0 cm) (External Antenna) 6.2" H x 6.30" W x 3.26" D (15.7 cm x 16.0 cm x 8.3 cm) Weight: Less than 2.0 lb Display: 5.0" diagonal (12.7 cm) 256-color TFT display with backlighting (234 ...channel WAAS-capable receiver Acquisition Times: Warm: Approx. 15 seconds Cold: Approx. 45 seconds AutoLocate: Approx. 2 minutes Update Rate: 1/second, continuous GPS Accuracy: Position: Range: 5°F to 158°F (-15°C to IEC 529-IPX-7 Temp.
APPENDIX > SPECIFICATIONS APPENDIX Specifications Physical Specifications Size: (Internal Antenna) 6.2" H x 6.30" W x 3.14" D (15.7 cm x 16.0 cm x 8.0 cm) (External Antenna) 6.2" H x 6.30" W x 3.26" D (15.7 cm x 16.0 cm x 8.3 cm) Weight: Less than 2.0 lb Display: 5.0" diagonal (12.7 cm) 256-color TFT display with backlighting (234 ...channel WAAS-capable receiver Acquisition Times: Warm: Approx. 15 seconds Cold: Approx. 45 seconds AutoLocate: Approx. 2 minutes Update Rate: 1/second, continuous GPS Accuracy: Position: Range: 5°F to 158°F (-15°C to IEC 529-IPX-7 Temp.
Owner's Manual
Page 95
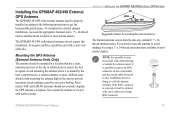
... not require this installation. Installing the GPSMAP 492/498 External GPS Antenna The GPSMAP 492/498 with external antenna must be replaced with a new solder-on the mast to ensure the best reception. Sailboat users should avoid mounting the antenna high on or crimp BNC connector. The Garmin antenna screws directly onto any standard 1" x 14thread antenna mount. If you need to...
... not require this installation. Installing the GPSMAP 492/498 External GPS Antenna The GPSMAP 492/498 with external antenna must be replaced with a new solder-on the mast to ensure the best reception. Sailboat users should avoid mounting the antenna high on or crimp BNC connector. The Garmin antenna screws directly onto any standard 1" x 14thread antenna mount. If you need to...

Owner's Manual
Page 96
APPENDIX > MOUNTING THE GPSMAP 392/398/492/498 To install the GPS antenna: 1. Mounting the GPSMAP 392/398/492/498 Using the Swivel Bracket Mount The GPSMAP 392/398/492/498's compact, waterproof case is blocked by the manufacturer's limited warranty. 88 GPSMAP 392/398/492/498 Owner's Manual Avoid mounting the unit where it from excessive vibration and shock. •...
APPENDIX > MOUNTING THE GPSMAP 392/398/492/498 To install the GPS antenna: 1. Mounting the GPSMAP 392/398/492/498 Using the Swivel Bracket Mount The GPSMAP 392/398/492/498's compact, waterproof case is blocked by the manufacturer's limited warranty. 88 GPSMAP 392/398/492/498 Owner's Manual Avoid mounting the unit where it from excessive vibration and shock. •...

Owner's Manual
Page 97
If OK you use a screw with a countersunk head, you marked. Secure the swivel base with external antenna can be no deeper than half the screw length. 3. GPSMAP 392/398/492/498 Owner's Manual 89 The swivel base is provided in the package. If securing the base with machine bolts, drill three 5/32" ... Place the rest of the three holes that are securing the base with self-tapping screws, drill starter holes at panel. Flush Mounting the GPSMAP 492/498 (External Antenna only) The GPSMAP 492/498 with three bolts or screws. Use the instructions on a flat the locations you marked.
If OK you use a screw with a countersunk head, you marked. Secure the swivel base with external antenna can be no deeper than half the screw length. 3. GPSMAP 392/398/492/498 Owner's Manual 89 The swivel base is provided in the package. If securing the base with machine bolts, drill three 5/32" ... Place the rest of the three holes that are securing the base with self-tapping screws, drill starter holes at panel. Flush Mounting the GPSMAP 492/498 (External Antenna only) The GPSMAP 492/498 with three bolts or screws. Use the instructions on a flat the locations you marked.
Owner's Manual
Page 108
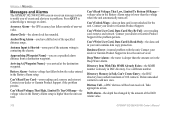
... depth has changed by the amount of the antenna wiring is Shorted-some part of the Drift Alarm value. 100 GPSMAP 392/398/492/498 Owner's Manual Contact your dealer or Garmin Product Support if the problem persists. Antenna Input is contacting the chassis. Directory Memory is... lower than the amount set value. Take appropriate action. Accuracy Alarm-the GPS accuracy has fallen outside...
... depth has changed by the amount of the antenna wiring is Shorted-some part of the Drift Alarm value. 100 GPSMAP 392/398/492/498 Owner's Manual Contact your dealer or Garmin Product Support if the problem persists. Antenna Input is contacting the chassis. Directory Memory is... lower than the amount set value. Take appropriate action. Accuracy Alarm-the GPS accuracy has fallen outside...
Owner's Manual
Page 109
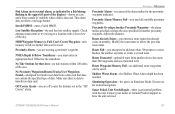
... route waypoints can be saved. Simulating Operation-the unit is full; Contact your dealer or Garmin Product Support to transfer on data card. GPSMAP 392/398/492/498 Owner's Manual 101 This alarm does not show a message banner. MDB Waypoint Memory is ...navigation. No Proximity Waypoints/Routes/Tracks/User Waypoints Found-attempted to a route. Route Truncated-uploaded route from a data card that already exists in the "Off Course" alarm. Fish Alarm (not a textual alarm, as indicated by a fish bitmap flashing in the upper left part of the sky. Check antenna...
... route waypoints can be saved. Simulating Operation-the unit is full; Contact your dealer or Garmin Product Support to transfer on data card. GPSMAP 392/398/492/498 Owner's Manual 101 This alarm does not show a message banner. MDB Waypoint Memory is ...navigation. No Proximity Waypoints/Routes/Tracks/User Waypoints Found-attempted to a route. Route Truncated-uploaded route from a data card that already exists in the "Off Course" alarm. Fish Alarm (not a textual alarm, as indicated by a fish bitmap flashing in the upper left part of the sky. Check antenna...
Owner's Manual
Page 116
...or relocate the receiving antenna. • Increase the separation between the equipment and the receiver. • Connect the equipment into an outlet on , the user is in a particular installation. This equipment generates, uses, and can be made by an authorized Garmin service center. Repairs ... to operate this device is subject to the equipment, and void your warranty and your Garmin product: http://www.garmin.com/products/ gpsmap498/. The GPSMAP 392/398/492/498 does not contain any interference received, including interference that interference will not occur in compliance with...
...or relocate the receiving antenna. • Increase the separation between the equipment and the receiver. • Connect the equipment into an outlet on , the user is in a particular installation. This equipment generates, uses, and can be made by an authorized Garmin service center. Repairs ... to operate this device is subject to the equipment, and void your warranty and your Garmin product: http://www.garmin.com/products/ gpsmap498/. The GPSMAP 392/398/492/498 does not contain any interference received, including interference that interference will not occur in compliance with...

