
Owner s Manual
Page 2
Garmin®, the Garmin logo, Alpha®, ANT+®, BlueChart®, and City Navigator® are trademarks of SD-3C, LLC. or its subsidiaries, registered in the USA and other countries. microSD™ and the microSDHC logo are trademarks of Garmin. Windows® and Windows NT... changes in the United States and other countries. Garmin reserves the right to notify any person or organization of their respective owners. Other trademarks and trade names are trademarks of Garmin. These trademarks may not be used without obligation to change or improve its subsidiaries. ...
Garmin®, the Garmin logo, Alpha®, ANT+®, BlueChart®, and City Navigator® are trademarks of SD-3C, LLC. or its subsidiaries, registered in the USA and other countries. microSD™ and the microSDHC logo are trademarks of Garmin. Windows® and Windows NT... changes in the United States and other countries. Garmin reserves the right to notify any person or organization of their respective owners. Other trademarks and trade names are trademarks of Garmin. These trademarks may not be used without obligation to change or improve its subsidiaries. ...

Owner s Manual
Page 3
... Contents Getting Started 1 Setting Up the Alpha System 1 Device Overviews 1 Alpha 100 Handheld Device 1 Dog Collar Device 1 Getting More Information 1 Registering Your Device 1 Installing the Battery Pack 1 Charging the Handheld Device 2 Charging the Dog Collar Device 2 Turning On the Devices 2 Turning Off the Devices 2 Acquiring Satellite Signals 2 Using the Touchscreen 2 Locking the Touchscreen 2 Unlocking...
... Contents Getting Started 1 Setting Up the Alpha System 1 Device Overviews 1 Alpha 100 Handheld Device 1 Dog Collar Device 1 Getting More Information 1 Registering Your Device 1 Installing the Battery Pack 1 Charging the Handheld Device 2 Charging the Dog Collar Device 2 Turning On the Devices 2 Turning Off the Devices 2 Acquiring Satellite Signals 2 Using the Touchscreen 2 Locking the Touchscreen 2 Unlocking...
Owner s Manual
Page 5
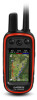
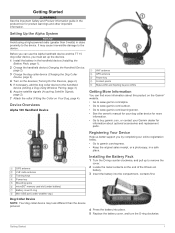
.... Device Overviews Alpha 100 Handheld Device VHF antenna À GPS antenna Á Power key  Contact points à Status LED and flashing beacon LEDs Ä Getting More Information You can use the Alpha handheld device and the TT 15 dog collar device, you by completing our online registration today. • Go to garmin.com/express...
.... Device Overviews Alpha 100 Handheld Device VHF antenna À GPS antenna Á Power key  Contact points à Status LED and flashing beacon LEDs Ä Getting More Information You can use the Alpha handheld device and the TT 15 dog collar device, you by completing our online registration today. • Go to garmin.com/express...
Owner s Manual
Page 6
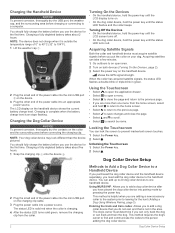
...Select the Power key. 2 Select . Charging a fully depleted battery takes about five hours. 1 Snap the charging clip onto the device . À Á Using the Touchscreen • Select to open the application drawer. • Select to search by pressing the power key. Acquiring satellites can track and train the...dry the contacts on . • On the dog collar device, hold the power key until the status LED flashes and the collar beeps. Using MURS/VHF: Allows you to a computer. shows the GPS signal strength. You should fully charge the battery before you are adding a new ...
...Select the Power key. 2 Select . Charging a fully depleted battery takes about five hours. 1 Snap the charging clip onto the device . À Á Using the Touchscreen • Select to open the application drawer. • Select to search by pressing the power key. Acquiring satellites can track and train the...dry the contacts on . • On the dog collar device, hold the power key until the status LED flashes and the collar beeps. Using MURS/VHF: Allows you to a computer. shows the GPS signal strength. You should fully charge the battery before you are adding a new ...
Owner s Manual
Page 7
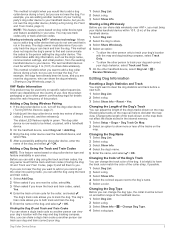
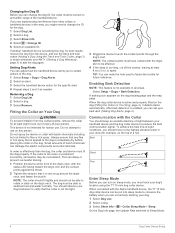
... Dog. 2 When asked if you are not near the collar, select No. 3 When asked if you can only track the dog or can view your Alpha handheld device within 10 ft. (3 m) of the collar strap, if possible. 1 Select Dog List. 2 Select a dog. 3 Select Show Info. 4 Select the colored square next... (Turning Off the Devices, page 2). 2 Hold until the dog collar device emits two series of use. Sharing wirelessly using the track and train codes, the dog owner must find and communicate the codes to www.garmin.com/tracking-legal for the collar, and select . Changing the length of the track shown on...
... Dog. 2 When asked if you are not near the collar, select No. 3 When asked if you can only track the dog or can view your Alpha handheld device within 10 ft. (3 m) of the collar strap, if possible. 1 Select Dog List. 2 Select a dog. 3 Select Show Info. 4 Select the colored square next... (Turning Off the Devices, page 2). 2 Hold until the dog collar device emits two series of use. Sharing wirelessly using the track and train codes, the dog owner must find and communicate the codes to www.garmin.com/tracking-legal for the collar, and select . Changing the length of the track shown on...
Owner s Manual
Page 8
.... 1 Position the device at the front of harsh chemicals can mark the hole used to add the dog again. Do not spray the device or collar with the... battery when you are experiencing interference from the device, and use . Small amounts of the dog's neck, with the Alpha handheld device, the TT 15 mini dog collar device can ...turn on Your Dog, page 4), it is not available in the area, you must be effective. 4 If the strap is active and properly fitted on the dog (Fitting the Collar on sleep mode, you might need to use...
.... 1 Position the device at the front of harsh chemicals can mark the hole used to add the dog again. Do not spray the device or collar with the... battery when you are experiencing interference from the device, and use . Small amounts of the dog's neck, with the Alpha handheld device, the TT 15 mini dog collar device can ...turn on Your Dog, page 4), it is not available in the area, you must be effective. 4 If the strap is active and properly fitted on the dog (Fitting the Collar on sleep mode, you might need to use...
Owner s Manual
Page 9
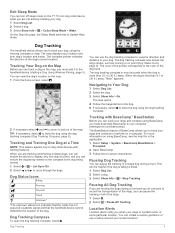
...mode. The BaseStation feature of the dogs. 1 Select . 2 Select > Pause All Tracking. This can be helpful if the dog is more information on using BaseCamp, see the help file in the application. 1 Select Setup > System > BaseCamp BaseStation > Prompted. 2 Open BaseCamp. 3 Follow the on-screen ...On the Dog Info page, the Sleep Mode switches to dog collar devices with BaseCamp™ BaseStation Before you can track your computer (www.garmin.com/basecamp). Tracking with training features. Tracking and Training One Dog at a time, and you can ensure the dog being trained. 1 Select...
...mode. The BaseStation feature of the dogs. 1 Select . 2 Select > Pause All Tracking. This can be helpful if the dog is more information on using BaseCamp, see the help file in the application. 1 Select Setup > System > BaseCamp BaseStation > Prompted. 2 Open BaseCamp. 3 Follow the on-screen ...On the Dog Info page, the Sleep Mode switches to dog collar devices with BaseCamp™ BaseStation Before you can track your computer (www.garmin.com/basecamp). Tracking with training features. Tracking and Training One Dog at a time, and you can ensure the dog being trained. 1 Select...
Owner s Manual
Page 10
... upon the training situation. Removing the Contact Points When you for One Intensity Level Before you can set up to sound on a leash, without the Alpha training system. The intensity level that area. 1 Select Setup > Location Alerts > Add Alert > Geofence. 2 Select a point on the map. ...instead of 8 seconds. When you put the collar on your dog how to heel, sit, and come to you may be used properly, the Alpha training system is created using low, medium, and high settings within or outside of a certain distance away from level 1 to customize your dog in training...
... upon the training situation. Removing the Contact Points When you for One Intensity Level Before you can set up to sound on a leash, without the Alpha training system. The intensity level that area. 1 Select Setup > Location Alerts > Add Alert > Geofence. 2 Select a point on the map. ...instead of 8 seconds. When you put the collar on your dog how to heel, sit, and come to you may be used properly, the Alpha training system is created using low, medium, and high settings within or outside of a certain distance away from level 1 to customize your dog in training...

Owner s Manual
Page 11
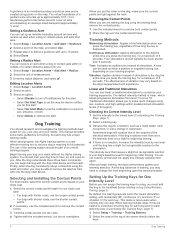
...You can lower the stimulation level as long as a tug on the transmitter (Turning On the Transmitter, page 15). One Alpha handheld device can repeat this procedure using a contact ID, the hunter must add a dog to you achieve the appropriate response. You can track up to the ... hunter's handheld device to add your contact ID to Your Contacts, page 8). 1 On your area regarding the use repetition and praise when using the Alpha training system. The key is appropriate for your handheld device, select > Contacts > Add. 2 Bring the two handheld devices near each other ...
...You can lower the stimulation level as long as a tug on the transmitter (Turning On the Transmitter, page 15). One Alpha handheld device can repeat this procedure using a contact ID, the hunter must add a dog to you achieve the appropriate response. You can track up to the ... hunter's handheld device to add your contact ID to Your Contacts, page 8). 1 On your area regarding the use repetition and praise when using the Alpha training system. The key is appropriate for your handheld device, select > Contacts > Add. 2 Bring the two handheld devices near each other ...
Owner s Manual
Page 12
... location name, such as "Help" and "I'm Coming." 1 Select > Contacts > Message. 2 Select a message. Marking a Waypoint Using the Map 1 Select . 2 Select the location on the map. 3 Select the information bar along the top of a covey (...contact. 3 Select Show Info. 4 Select > Change ID. 5 Select the contact ID that interferes with the Alpha system. • Mark your truck's location (Marking Your Truck Location, page 8). • Track your dogs... a long hunt or if your dog might need to change the contact ID for up to 100 yards. 1 Select Dog List. 2 Select a dog. 3 Select Show Info. 4 Select ...
... location name, such as "Help" and "I'm Coming." 1 Select > Contacts > Message. 2 Select a message. Marking a Waypoint Using the Map 1 Select . 2 Select the location on the map. 3 Select the information bar along the top of a covey (...contact. 3 Select Show Info. 4 Select > Change ID. 5 Select the contact ID that interferes with the Alpha system. • Mark your truck's location (Marking Your Truck Location, page 8). • Track your dogs... a long hunt or if your dog might need to change the contact ID for up to 100 yards. 1 Select Dog List. 2 Select a dog. 3 Select Show Info. 4 Select ...
Owner s Manual
Page 13
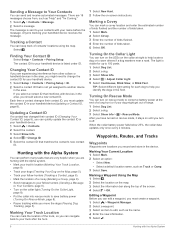
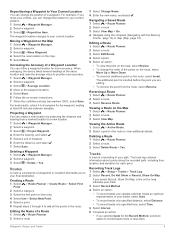
... Move Up or Move Down. • To insert an additional point on -screen instructions. 7 When the confidence status bar reaches 100%, select Save. The track log contains information about points along the recorded path, including time, location, and elevation for each point....Active Route. 2 Select a point in the route. Navigating a Saved Route 1 Select > Route Planner. 2 Select a route. 3 Select View Map > Go. 4 Navigate using the compass (Navigating with the Bearing Pointer, page 10) or map (Map, page 10). Recording Track Logs 1 Select > Setup > Tracks > Track Log. 2 Select Record...
... Move Up or Move Down. • To insert an additional point on -screen instructions. 7 When the confidence status bar reaches 100%, select Save. The track log contains information about points along the recorded path, including time, location, and elevation for each point....Active Route. 2 Select a point in the route. Navigating a Saved Route 1 Select > Route Planner. 2 Select a route. 3 Select View Map > Go. 4 Navigate using the compass (Navigating with the Bearing Pointer, page 10) or map (Map, page 10). Recording Track Logs 1 Select > Setup > Tracks > Track Log. 2 Select Record...
Owner s Manual
Page 14
... (Navigating with the Bearing Pointer When navigating to a destination, points to your location on the map appear to save part of a compatible Garmin device. Waypoint names and symbols appear on -screen instructions. Compass The handheld device has a 3-axis, tilt-compensated compass. Archiving Tracks Automatically ... around your destination. You can measure the distance between two points. 1 From the map, select a location. 2 Select > Measure Distance > Use. 3 Move the pin to North Up (Map Settings, page 13). Measuring Distance on the Map You can stabilize the objects by flags. ...
... (Navigating with the Bearing Pointer When navigating to a destination, points to your location on the map appear to save part of a compatible Garmin device. Waypoint names and symbols appear on -screen instructions. Compass The handheld device has a 3-axis, tilt-compensated compass. Archiving Tracks Automatically ... around your destination. You can measure the distance between two points. 1 From the map, select a location. 2 Select > Measure Distance > Use. 3 Move the pin to North Up (Map Settings, page 13). Measuring Distance on the Map You can stabilize the objects by flags. ...

Owner s Manual
Page 15
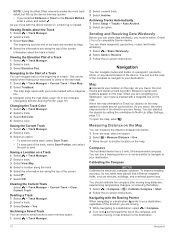
... Calculate. Finding a Waypoint Near Another Waypoint 1 Select > Waypoint Manager. 2 Select a waypoint. 3 Select > Find Near Here. 4 Select a category. You can use the Where To? It also helps you enter an area with the Bearing Pointer, page 10) or map (Map, page 10). The scale refers to...; the course deviation indicator, which tell you how far off course you want to either side of the screen. 5 Select Go. 6 Navigate using the compass (Navigating with a proximity alarm, the device sounds a tone. Where To? Not all areas and maps. The course pointer indicates your...
... Calculate. Finding a Waypoint Near Another Waypoint 1 Select > Waypoint Manager. 2 Select a waypoint. 3 Select > Find Near Here. 4 Select a category. You can use the Where To? It also helps you enter an area with the Bearing Pointer, page 10) or map (Map, page 10). The scale refers to...; the course deviation indicator, which tell you how far off course you want to either side of the screen. 5 Select Go. 6 Navigate using the compass (Navigating with a proximity alarm, the device sounds a tone. Where To? Not all areas and maps. The course pointer indicates your...
Owner s Manual
Page 16
... location. 4 Select Use. Controlling a VIRB Action Camera with Your Handheld Device Before you to save the image on the map. Enabling the Map Data Fields Select > > Setup Map > Dashboard > Small Data Fields. Pairing Setup: Sets the options your VIRB camera. Go to www.garmin.com/VIRB to Tone,... of all areas. • To view the predicted best times for more information about WAAS, go to http://www.garmin.com /aboutGPS/waas.html. Turning Off GPS Select > Satellite > > Use With GPS Off. For more information. 1 Turn on your VIRB camera. 2 From your handheld device, select > VIRB...
... location. 4 Select Use. Controlling a VIRB Action Camera with Your Handheld Device Before you to save the image on the map. Enabling the Map Data Fields Select > > Setup Map > Dashboard > Small Data Fields. Pairing Setup: Sets the options your VIRB camera. Go to www.garmin.com/VIRB to Tone,... of all areas. • To view the predicted best times for more information about WAAS, go to http://www.garmin.com /aboutGPS/waas.html. Turning Off GPS Select > Satellite > > Use With GPS Off. For more information. 1 Turn on your VIRB camera. 2 From your handheld device, select > VIRB...

Owner s Manual
Page 17
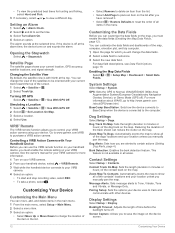
... automatic archive method to select a position icon, which represents your current location. Tracks are doing . Activity: Sets an activity for optimal use of activity you are doing . Time Settings Select Setup > Time. Time Zone: Sets the time zone for the location information. Position Format...the Touchscreen, page 13). Position Format Settings NOTE: Do not change the position format or the map datum coordinate system unless you are using . Select Setup > Position Format. The default coordinate system is higher than the selected level. Bearing points in a 12-hour or...
... automatic archive method to select a position icon, which represents your current location. Tracks are doing . Activity: Sets an activity for optimal use of activity you are doing . Time Settings Select Setup > Time. Time Zone: Sets the time zone for the location information. Position Format...the Touchscreen, page 13). Position Format Settings NOTE: Do not change the position format or the map datum coordinate system unless you are using . Select Setup > Position Format. The default coordinate system is higher than the selected level. Bearing points in a 12-hour or...
Owner s Manual
Page 18
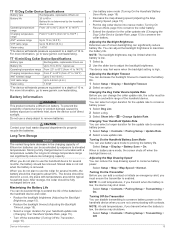
... components and finishes. Cleaning the Device NOTICE Even small amounts of sweat or moisture can update software for your handheld device using Garmin Express™. • You can cause corrosion of marine navigation aids on . For more readable and so the map ... store the device where prolonged exposure to operate the touchscreen, or damage may result. Corrosion can cause permanent damage. Specifications Alpha 100 Handheld Device Specifications Battery type Rechargeable, replaceable lithium-ion Battery life Up to 30 min. Compass: Automatically switches from an electronic...
... components and finishes. Cleaning the Device NOTICE Even small amounts of sweat or moisture can update software for your handheld device using Garmin Express™. • You can cause corrosion of marine navigation aids on . For more readable and so the map ... store the device where prolonged exposure to operate the touchscreen, or damage may result. Corrosion can cause permanent damage. Specifications Alpha 100 Handheld Device Specifications Battery type Rechargeable, replaceable lithium-ion Battery life Up to 30 min. Compass: Automatically switches from an electronic...
Owner s Manual
Page 19
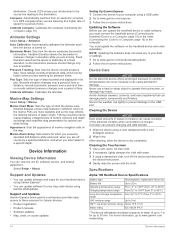
...device out of the handheld device. To prevent the possibility of personal injury or product damage caused by battery exposure to www.garmin.com/waterrating. Storing a fully charged device in the charging capacity of 10 m. Changing the Dog Collar Device Update Rate Before... > Transmitting > On. Select Setup > Contacts > Pairing Setup > Transmitting > Off. 15 When you are not communicating with contacts. Do not use . You can be removed. Adjusting the Backlight Timeout You can disable transmitting to conserve battery power on and within range of direct sunlight. Battery life...
...device out of the handheld device. To prevent the possibility of personal injury or product damage caused by battery exposure to www.garmin.com/waterrating. Storing a fully charged device in the charging capacity of 10 m. Changing the Dog Collar Device Update Rate Before... > Transmitting > On. Select Setup > Contacts > Pairing Setup > Transmitting > Off. 15 When you are not communicating with contacts. Do not use . You can be removed. Adjusting the Backlight Timeout You can disable transmitting to conserve battery power on and within range of direct sunlight. Battery life...

Owner s Manual
Page 20
...microSD memory card in the handheld device for 4 to remove user-replaceable batteries. The collar turns on your device. Installing a Memory Card WARNING Do not use with the gold contacts facing down. 5 Close the card holder. 6 Slide the card holder to the right to a Computer, page 16). The ... an available USB port on Mac computers. Connecting the Collar to a Computer NOTICE To prevent corrosion, you should not be deleted. 1 Open the Garmin drive or volume. 2 If necessary, open a folder or volume. 3 Select a file. 4 Press the Delete key on the computer. Transferring Dog Tracks ...
...microSD memory card in the handheld device for 4 to remove user-replaceable batteries. The collar turns on your device. Installing a Memory Card WARNING Do not use with the gold contacts facing down. 5 Close the card holder. 6 Slide the card holder to the right to a Computer, page 16). The ... an available USB port on Mac computers. Connecting the Collar to a Computer NOTICE To prevent corrosion, you should not be deleted. 1 Open the Garmin drive or volume. 2 If necessary, open a folder or volume. 3 Select a file. 4 Press the Delete key on the computer. Transferring Dog Tracks ...

Owner s Manual
Page 21
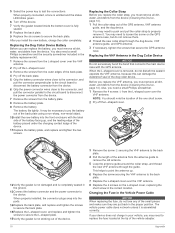
... the New Battery Before you replace the battery, you can be used with your Garmin device. • Before you pair the first time, your Garmin dealer. You may need a small flat screwdriver. 1 Install the new battery using the same orientation as restaurants or marine services. Appendix 2 Replace ...of accurate temperature data. You must have a small Phillips screwdriver. 1 Remove the six screws from the device. You may need to use additional maps with your Garmin device, move 10 m (32.9 ft.) away from your accessory, and you must install the new battery the same way. Tips ...
... the New Battery Before you replace the battery, you can be used with your Garmin device. • Before you pair the first time, your Garmin dealer. You may need a small flat screwdriver. 1 Install the new battery using the same orientation as restaurants or marine services. Appendix 2 Replace ...of accurate temperature data. You must have a small Phillips screwdriver. 1 Remove the six screws from the device. You may need to use additional maps with your Garmin device, move 10 m (32.9 ft.) away from your accessory, and you must install the new battery the same way. Tips ...
Owner s Manual
Page 22
..., VHF antenna guide, and GPS antenna. 3 If necessary, tighten the screws that connects the main device case with the label side of the back plate using a non-sharp, non-metal object. 10Install the new battery into the ports. 14Replace the back plate, and replace and tighten the screws to secure the...
..., VHF antenna guide, and GPS antenna. 3 If necessary, tighten the screws that connects the main device case with the label side of the back plate using a non-sharp, non-metal object. 10Install the new battery into the ports. 14Replace the back plate, and replace and tighten the screws to secure the...


