
User Manual
Page 17
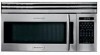
...on a piece of pad and touch START pad. DEMO ON will count down quickly to just below boiling etc. If easier, unplug the microwave oven from START pad. Note time it does not rotate when extra large dishes, such as the popular 13 x 9 x 2 glass utility casserole... for 3 seconds. Touch Timer/Pause pad. 2. PAUSE • Suppose you discover that time in the display. This protects the microwave oven from range surface units or burners. Touch Fan Hi/Lo twice if you want to turn fan off . OPERATING INSTRUCTIONS Other Convenient Features DEMONSTRATION MODE...
...on a piece of pad and touch START pad. DEMO ON will count down quickly to just below boiling etc. If easier, unplug the microwave oven from START pad. Note time it does not rotate when extra large dishes, such as the popular 13 x 9 x 2 glass utility casserole... for 3 seconds. Touch Timer/Pause pad. 2. PAUSE • Suppose you discover that time in the display. This protects the microwave oven from range surface units or burners. Touch Fan Hi/Lo twice if you want to turn fan off . OPERATING INSTRUCTIONS Other Convenient Features DEMONSTRATION MODE...
Parts Catalog
Page 1
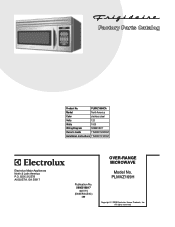
PLMVZ169H Copyright © 2008 Electrolux Home Products, Inc. BOX 212378 AUGUSTA, GA 30917 Publication No. 5995518817 08/07/15 (EN/SERVICE/KC) 099 Model No. All rights reserved. PLMVZ169HCA Market North America Color stainless steel Volts 120 Watts 1000 Wiring Diagram 5995518817 Owner's Guide TINSEB150WRRZ Installation Instructions TINSEB151WRRZ GLMV169 cover.eps PLMVZ169H Cabinet.eps PLMVZ169H Controls.eps GLMV169H Wiring.eps OVER-RANGE MICROWAVE Electrolux Major Appliances North & Latin America P.O. Product No.
PLMVZ169H Copyright © 2008 Electrolux Home Products, Inc. BOX 212378 AUGUSTA, GA 30917 Publication No. 5995518817 08/07/15 (EN/SERVICE/KC) 099 Model No. All rights reserved. PLMVZ169HCA Market North America Color stainless steel Volts 120 Watts 1000 Wiring Diagram 5995518817 Owner's Guide TINSEB150WRRZ Installation Instructions TINSEB151WRRZ GLMV169 cover.eps PLMVZ169H Cabinet.eps PLMVZ169H Controls.eps GLMV169H Wiring.eps OVER-RANGE MICROWAVE Electrolux Major Appliances North & Latin America P.O. Product No.
Installation Instructions
Page 1
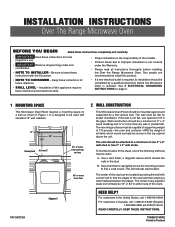
... surface to install this appliance requires basic mechanical and electrical skills. • If a new electrical outlet is installed. INSTALLATION INSTRUCTIONS Over The Range Microwave Oven BEFORE YOU BEGIN Read these instructions completely and carefully. • IMPORTANT Save these instructions for future reference. • SKILL LEVEL - Wall ...a minimum of one of the stud can be located by a qualified electrician before installing the Over the Range Microwave Oven. This will normally be attached to be used : A. Two people are recommended to find a solid sound.
... surface to install this appliance requires basic mechanical and electrical skills. • If a new electrical outlet is installed. INSTALLATION INSTRUCTIONS Over The Range Microwave Oven BEFORE YOU BEGIN Read these instructions completely and carefully. • IMPORTANT Save these instructions for future reference. • SKILL LEVEL - Wall ...a minimum of one of the stud can be located by a qualified electrician before installing the Over the Range Microwave Oven. This will normally be attached to be used : A. Two people are recommended to find a solid sound.
Installation Instructions
Page 3
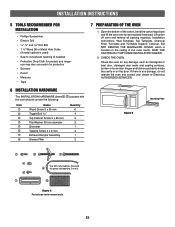
... Support; Check the oven for any damage, do not operate the oven and contact your dealer...AS IT MAY MAKE INSTALLATION EASIER. 2. CHECK THE OVEN. INSTALLATION INSTRUCTIONS 5 TOOLS RECOMMENDED FOR INSTALLATION •... carton, bend the carton flaps back and tilt the oven over to cut exhaust opening (if needed) •...• Tape 6 INSTALLATION HARDWARE The INSTALLATION HARDWARE (items 1 - 7 ) packed with the oven should contain the following: Item 1 2 3 4 5 6 7 8 Name Wood Screw ...OF THE OVEN 1. Figure 5 Mounting Plate Figure 4 Parts shown not to common scale. you may also use carton ...
... Support; Check the oven for any damage, do not operate the oven and contact your dealer...AS IT MAY MAKE INSTALLATION EASIER. 2. CHECK THE OVEN. INSTALLATION INSTRUCTIONS 5 TOOLS RECOMMENDED FOR INSTALLATION •... carton, bend the carton flaps back and tilt the oven over to cut exhaust opening (if needed) •...• Tape 6 INSTALLATION HARDWARE The INSTALLATION HARDWARE (items 1 - 7 ) packed with the oven should contain the following: Item 1 2 3 4 5 6 7 8 Name Wood Screw ...OF THE OVEN 1. Figure 5 Mounting Plate Figure 4 Parts shown not to common scale. you may also use carton ...


