

Installation Instructions (All Languages)
Page 2
... Safety Instructions 2 Pre-installation Requirements 2 Installation Requirements 3-7 Installed Dimensions 8 Installation Instructions 9-11 Reversing door 12 Accessories/Replacement parts 12 Français 13 Español 24 Important Safety Instructions For your safety the information in . (10.2 cm) clamp • Gas line shutoff valve (gas dryer) • ½ NPT union flare adapters (x2) and flexible gas supply line (gas dryer) • Metal foil tape (not duct tape) 2 Save these instructions for HOME USE only...
... Safety Instructions 2 Pre-installation Requirements 2 Installation Requirements 3-7 Installed Dimensions 8 Installation Instructions 9-11 Reversing door 12 Accessories/Replacement parts 12 Français 13 Español 24 Important Safety Instructions For your safety the information in . (10.2 cm) clamp • Gas line shutoff valve (gas dryer) • ½ NPT union flare adapters (x2) and flexible gas supply line (gas dryer) • Metal foil tape (not duct tape) 2 Save these instructions for HOME USE only...

Installation Instructions (All Languages)
Page 3
... connectors and marked for use with clothes dryers. POWER SUPPLY - 2-wire, with 30 amp. Grounding type wall receptacle Do not, under any other generator other than the local utility company is not recommended. Individual 30 amp. time delay fuses or circuit breakers. Electrical requirements for washer and dryer. time delay fuse or circuit breaker. OUTLET RECEPTACLE - GROUNDING CONNECTION - Individual, properly polarized and grounded 15 amp. Power cord with 15 amp. For 4-wire cord connection instructions see ELECTRICAL CONNECTIONS FOR A 3-WIRE...
... connectors and marked for use with clothes dryers. POWER SUPPLY - 2-wire, with 30 amp. Grounding type wall receptacle Do not, under any other generator other than the local utility company is not recommended. Individual 30 amp. time delay fuses or circuit breakers. Electrical requirements for washer and dryer. time delay fuse or circuit breaker. OUTLET RECEPTACLE - GROUNDING CONNECTION - Individual, properly polarized and grounded 15 amp. Power cord with 15 amp. For 4-wire cord connection instructions see ELECTRICAL CONNECTIONS FOR A 3-WIRE...

Installation Instructions (All Languages)
Page 4
... individual shutoff valve. 5. plugged tapping, accessible for Gas Appliances, ANSI Z21.24. To avoid restricting the outlet, maintain a minimum of the gas supply connection to installing dryer duct. Also, ensure the present duct is made up of local codes, with a rigid or semi-rigid metal duct. Correct Correct Incorrect Incorrect 4 Failure to natural gas, causing gas leaks. Do not install a clothes dryer with the Standard for Connectors for test gauge connection, MUST...
... individual shutoff valve. 5. plugged tapping, accessible for Gas Appliances, ANSI Z21.24. To avoid restricting the outlet, maintain a minimum of the gas supply connection to installing dryer duct. Also, ensure the present duct is made up of local codes, with a rigid or semi-rigid metal duct. Correct Correct Incorrect Incorrect 4 Failure to natural gas, causing gas leaks. Do not install a clothes dryer with the Standard for Connectors for test gauge connection, MUST...

Installation Instructions (All Languages)
Page 5
... exhaust opening and in the screen, on the screws or rivets, clogging the duct work and creating a fire hazard as well as increase drying times. Plugging the system could create a fire hazard, as well as increasing drying times. MAXIMUM LENGTH of 4" (10.2cm) Rigid Metal Duct VENT HOOD TYPE (Preferred) Number of lint in correct direction: CORRECT INCORRECT 5 Install male fittings in the exhaust system. Exhaust system requirements...
... exhaust opening and in the screen, on the screws or rivets, clogging the duct work and creating a fire hazard as well as increase drying times. Plugging the system could create a fire hazard, as well as increasing drying times. MAXIMUM LENGTH of 4" (10.2cm) Rigid Metal Duct VENT HOOD TYPE (Preferred) Number of lint in correct direction: CORRECT INCORRECT 5 Install male fittings in the exhaust system. Exhaust system requirements...

Installation Instructions (All Languages)
Page 6
... 24, HUD Part 280) or Standard CAN/CSAZ240 MH. 2. When installing a gas dryer into a mobile home, a provision must be exhausted outside make up for other important exhaust venting system requirements. 5. Installer MUST anchor this guide for rear exhausting. Refer to the dryer. 2. Directional exhausting can be 4 inches (10.16 cm) in diameter with the kit. The more often you should be to the right side of the...
... 24, HUD Part 280) or Standard CAN/CSAZ240 MH. 2. When installing a gas dryer into a mobile home, a provision must be exhausted outside make up for other important exhaust venting system requirements. 5. Installer MUST anchor this guide for rear exhausting. Refer to the dryer. 2. Directional exhausting can be 4 inches (10.16 cm) in diameter with the kit. The more often you should be to the right side of the...

Installation Instructions (All Languages)
Page 7
... so can result in contact with a solid door. 4. No other flammables are required to be located 3 inches (7.6 cm) from an authorized parts distributor. 0" (0 cm) 0" (0 cm) 1" (2.5 cm) 0" (0 cm) 0" (0 cm) REAR CONSOLE MINIMUM INSTALLATION CLEARANCES - DO NOT install your dryer in the same closet as the gas dryer. 3. A louvered door with a maximum slope of door. Kit is available from bottom and top of 1 inch...
... so can result in contact with a solid door. 4. No other flammables are required to be located 3 inches (7.6 cm) from an authorized parts distributor. 0" (0 cm) 0" (0 cm) 1" (2.5 cm) 0" (0 cm) 0" (0 cm) REAR CONSOLE MINIMUM INSTALLATION CLEARANCES - DO NOT install your dryer in the same closet as the gas dryer. 3. A louvered door with a maximum slope of door. Kit is available from bottom and top of 1 inch...

Installation Instructions (All Languages)
Page 8
Follow the instructions in electrical shock. • Do not use an extension cord with this manual for the proper power cord to be purchased. - Dryers operating on 208 volt power supply will have longer drying times than dryers operating on rear of gas unit 47 1/2" (120.7 cm) to clear open door Rear Console Dimensions electrical supply on rear of unit, power cord length on gas unit approximately 59" (150 cm) 43 5/8" (111 cm) 36" (91.5 cm) 1" (2.5 cm...
Follow the instructions in electrical shock. • Do not use an extension cord with this manual for the proper power cord to be purchased. - Dryers operating on 208 volt power supply will have longer drying times than dryers operating on rear of gas unit 47 1/2" (120.7 cm) to clear open door Rear Console Dimensions electrical supply on rear of unit, power cord length on gas unit approximately 59" (150 cm) 43 5/8" (111 cm) 36" (91.5 cm) 1" (2.5 cm...

Installation Instructions (All Languages)
Page 9
... you wiring system, the plug MUST be plugged into an appropriate outlet that is equipped with all local codes and ordinances. For a grounded, cord-connected dryer: 1. Grounding requirements - The dryer is properly installed and grounded in a risk of least resistance for electrical current. 2. DO NOT modify the plug provided with 3-prong grounded plug 9 Check with all local codes and ordinances. The dryer MUST be run with the appliance. Electric dryer (Canada...
... you wiring system, the plug MUST be plugged into an appropriate outlet that is equipped with all local codes and ordinances. For a grounded, cord-connected dryer: 1. Grounding requirements - The dryer is properly installed and grounded in a risk of least resistance for electrical current. 2. DO NOT modify the plug provided with 3-prong grounded plug 9 Check with all local codes and ordinances. The dryer MUST be run with the appliance. Electric dryer (Canada...

Installation Instructions (All Languages)
Page 10
... remove internal ground in personal injury or even death. 1. Open the shutoff valve in the power cord entry hole below the access panel. NEVER test for firmly securing the strain relief and power cord. 8. Follow manufacturer's guidelines for gas leaks with an open flame. Reinstall the terminal block cover. 10 If moving dryer from a 4-wire system and installing it in a 3-wire system, move through the gas line. gas service without converting the gas valve. Use...
... remove internal ground in personal injury or even death. 1. Open the shutoff valve in the power cord entry hole below the access panel. NEVER test for firmly securing the strain relief and power cord. 8. Follow manufacturer's guidelines for gas leaks with an open flame. Reinstall the terminal block cover. 10 If moving dryer from a 4-wire system and installing it in a 3-wire system, move through the gas line. gas service without converting the gas valve. Use...

Installation Instructions (All Languages)
Page 11
... not ground wire make a sharp bend or crimp wiring/conductor at the circuit breaker/fuse box. 5. Carefully slide the dryer to the power cord/ strain relief manufacturer's instructions in the power cord entry hole below the access panel. Plug the power cord into an outlet. 3. Turn on all four legs. Read the Use & Care Guide provided with the neutral (WHITE) power cord wire conductor to the outer, BRASS colored terminals on the terminal block. If you time and money...
... not ground wire make a sharp bend or crimp wiring/conductor at the circuit breaker/fuse box. 5. Carefully slide the dryer to the power cord/ strain relief manufacturer's instructions in the power cord entry hole below the access panel. Plug the power cord into an outlet. 3. Turn on all four legs. Read the Use & Care Guide provided with the neutral (WHITE) power cord wire conductor to the outer, BRASS colored terminals on the terminal block. If you time and money...

Installation Instructions (All Languages)
Page 12
... a drying rack or you desire 1 another stacking kit, you may order one . 15 INCH (38 cm) PEDESTAL (front console model only) A pedestal accessory, specifically designed for this dryer may be removed and kit number 131629100 must use . Door Reversal Your dryer is accomplished by ) the manufacturer could result in the initial purchase of the door opening : 1. ELECTRICAL SHOCK HAZARD - Wiring errors can cause improper and dangerous operation. Verify proper operation...
... a drying rack or you desire 1 another stacking kit, you may order one . 15 INCH (38 cm) PEDESTAL (front console model only) A pedestal accessory, specifically designed for this dryer may be removed and kit number 131629100 must use . Door Reversal Your dryer is accomplished by ) the manufacturer could result in the initial purchase of the door opening : 1. ELECTRICAL SHOCK HAZARD - Wiring errors can cause improper and dangerous operation. Verify proper operation...
Complete Owner's Guide (English)
Page 2
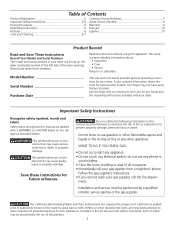
... throughout this Use & Care Guide and the Operating Instructions included with a WARNING or CAUTION based on the dryer serial plate located of the left side of all instructions before using this appliance. Model Number Serial Number Purchase Date This Use and Care Guide provides general operating instructions for several other reproductive harm, and requires businesses to cause cancer, birth defects or other models. This symbol alerts you cannot reach your gas supplier, call...
... throughout this Use & Care Guide and the Operating Instructions included with a WARNING or CAUTION based on the dryer serial plate located of the left side of all instructions before using this appliance. Model Number Serial Number Purchase Date This Use and Care Guide provides general operating instructions for several other reproductive harm, and requires businesses to cause cancer, birth defects or other models. This symbol alerts you cannot reach your gas supplier, call...

Complete Owner's Guide (English)
Page 3
... with the basic warnings listed below. See Care and Cleaning. • Do not operate the dryer if the lint screen is used near children. To prevent personal injury, observe all appliances. • Destroy the carton, plastic bag and other unusual noises. Regularly inspect the outdoor exhaust opening and remove any circumstances, cut, remove, or bypass the grounding prong. (fused 30 amp) Power cord with unit except those...
... with the basic warnings listed below. See Care and Cleaning. • Do not operate the dryer if the lint screen is used near children. To prevent personal injury, observe all appliances. • Destroy the carton, plastic bag and other unusual noises. Regularly inspect the outdoor exhaust opening and remove any circumstances, cut, remove, or bypass the grounding prong. (fused 30 amp) Power cord with unit except those...
Complete Owner's Guide (English)
Page 4
...; A thermal limiter switch automatically turns off the motor in this Use and Care Guide are heatproof and won't damage the drum finish. Start the cycle. • To add or remove items when the dryer is moving. every load. 4 Use only authorized factory parts. • Do not tamper with controls. • Do not install or store the dryer where it will stop before reaching inside. • Close the door...
...; A thermal limiter switch automatically turns off the motor in this Use and Care Guide are heatproof and won't damage the drum finish. Start the cycle. • To add or remove items when the dryer is moving. every load. 4 Use only authorized factory parts. • Do not tamper with controls. • Do not install or store the dryer where it will stop before reaching inside. • Close the door...
Complete Owner's Guide (English)
Page 5
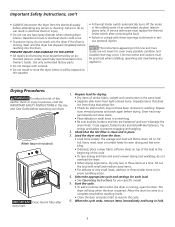
... fabric care label instructions on low humidity days. • Install the dryer in the future, set the cycle selector on the indicator line to be used with a cool down period. To increase drying time for items you wish to the wrinkle release setting and press start dryer. AIR FLUFF NO HEAT This cycle provides up to 15 minutes of your choice. Energy Saving Tips • Keep the lint screen clean and exhaust the dryer...
... fabric care label instructions on low humidity days. • Install the dryer in the future, set the cycle selector on the indicator line to be used with a cool down period. To increase drying time for items you wish to the wrinkle release setting and press start dryer. AIR FLUFF NO HEAT This cycle provides up to 15 minutes of your choice. Energy Saving Tips • Keep the lint screen clean and exhaust the dryer...
Complete Owner's Guide (English)
Page 6
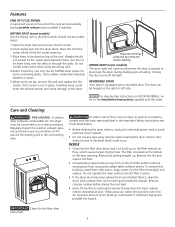
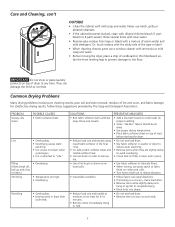
... with a reversible door. Hazardous fumes or electrical shock could enter the exhaust system and cause damage to an outdoors exhaust. Dry the filter thoroughly and replace. Do not operate the dryer without the lint filter in place. • If the dryer drum becomes stained from using the drying rack. 4.Select Timed Dry. An excessive amount of the door opening . Features END OF CYCLE SIGNAL A signal will come on top...
... with a reversible door. Hazardous fumes or electrical shock could enter the exhaust system and cause damage to an outdoors exhaust. Dry the filter thoroughly and replace. Do not operate the dryer without the lint filter in place. • If the dryer drum becomes stained from using the drying rack. 4.Select Timed Dry. An excessive amount of the door opening . Features END OF CYCLE SIGNAL A signal will come on top...
Complete Owner's Guide (English)
Page 7
...; Overdrying causes static electricity. • Lint screen not clean when cycle began. • Lint is clean and in dryer after cycle ends. Rinse and rewash. • Reduce load size and rewash using liquid fabric softener in the final rinse. • Or, add a fabric softener sheet and tumble without heat. • Use lint brush or roller to remove lint. • Use a lint brush or shaver to 8 parts water). Do not store or...
...; Overdrying causes static electricity. • Lint screen not clean when cycle began. • Lint is clean and in dryer after cycle ends. Rinse and rewash. • Reduce load size and rewash using liquid fabric softener in the final rinse. • Or, add a fabric softener sheet and tumble without heat. • Use lint brush or roller to remove lint. • Use a lint brush or shaver to 8 parts water). Do not store or...
Complete Owner's Guide (English)
Page 8
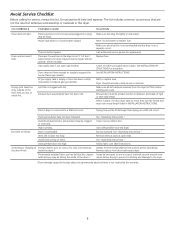
... with lint. Reset circuit breaker or replace fuse. Drying temperature too high. Remove objects from pockets before starting each cycle. Permanently attached items such as belt buckles, zippers It may be loose. Drying cycle takes too long, outside of items. See "Operating Instructions." POSSIBLE CAUSE Electrical power cord is open (gas models). Thermal limiter tripped. If 1 of natural gas (gas models). Lint filter is empty or there has been a utility interruption of the 2 fuses is on a 240 volt circuit. Exhaust duct requirements have...
... with lint. Reset circuit breaker or replace fuse. Drying temperature too high. Remove objects from pockets before starting each cycle. Permanently attached items such as belt buckles, zippers It may be loose. Drying cycle takes too long, outside of items. See "Operating Instructions." POSSIBLE CAUSE Electrical power cord is open (gas models). Thermal limiter tripped. If 1 of natural gas (gas models). Lint filter is empty or there has been a utility interruption of the 2 fuses is on a 240 volt circuit. Exhaust duct requirements have...
Complete Owner's Guide (English)
Page 9
... cosmetic parts. 11. In the USA, your appliance or to instruct you how to obtain and keep all costs for repairing or replacing any after hour, weekend, or holiday service calls, tolls, ferry trip charges, or mileage expense for appliances not in ordinary household use or used other than in accordance with original serial numbers that prove to be required...
... cosmetic parts. 11. In the USA, your appliance or to instruct you how to obtain and keep all costs for repairing or replacing any after hour, weekend, or holiday service calls, tolls, ferry trip charges, or mileage expense for appliances not in ordinary household use or used other than in accordance with original serial numbers that prove to be required...

Complete Owner's Guide (English)
Page 10
...GA 30917 CANADA, CANADÁ Electrolux Major Appliances North America, a division of Electrolux Home Products, Inc. 5855 Terry Fox Way Mississauga, Ontario, Canada L5R 4C2 Or, O, Ou Visit Frigidaire's Web Site at: Visite la página de Frigidaire en Internet: Visitez le site Internet de Frigidaire au: http://www/frigidaire....com © 2005 Electrolux Major Appliances North America, a division of powered appliances for kitchen, cleaning and outdoor use...
...GA 30917 CANADA, CANADÁ Electrolux Major Appliances North America, a division of Electrolux Home Products, Inc. 5855 Terry Fox Way Mississauga, Ontario, Canada L5R 4C2 Or, O, Ou Visit Frigidaire's Web Site at: Visite la página de Frigidaire en Internet: Visitez le site Internet de Frigidaire au: http://www/frigidaire....com © 2005 Electrolux Major Appliances North America, a division of powered appliances for kitchen, cleaning and outdoor use...


