User Manual
Page 5
... cause damage. • DO NOT operate the oven if it is important not to defeat or tampler with the door open since open door operation can result in harmful exposure to microwave energy. door seals and sealing surfaces. • Oven should not be be adjusted or repaired by anyone... except properaly qualified service personnel. door (bent), 2. SAVE THESE INSTRUCTIONS 5 ...
... cause damage. • DO NOT operate the oven if it is important not to defeat or tampler with the door open since open door operation can result in harmful exposure to microwave energy. door seals and sealing surfaces. • Oven should not be be adjusted or repaired by anyone... except properaly qualified service personnel. door (bent), 2. SAVE THESE INSTRUCTIONS 5 ...
User Manual
Page 6
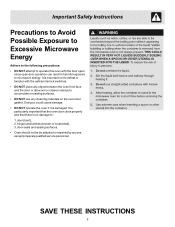
...8226; Keep cord AWAY from paper or plastic bags before placing bag in oven. • If materials inside the oven ignite, keep oven door CLOSED, turn the fan on. • Suitable for use this oven cavity for storage. Important Safety Instructions When using electrical appliances, basic safety ...to excessive microvave energy. • READ ALL instructions before using oven. • READ AND FOLLOW the specific "PRECAUTIONS TO AVOID POSSIBLE EXPOSURE TO EXCESSIVE MICROWAVE ENERGY" on page 5. • Install or locate this oven ONLY in accordance with any vents, openings or filters on the...
...8226; Keep cord AWAY from paper or plastic bags before placing bag in oven. • If materials inside the oven ignite, keep oven door CLOSED, turn the fan on. • Suitable for use this oven cavity for storage. Important Safety Instructions When using electrical appliances, basic safety ...to excessive microvave energy. • READ ALL instructions before using oven. • READ AND FOLLOW the specific "PRECAUTIONS TO AVOID POSSIBLE EXPOSURE TO EXCESSIVE MICROWAVE ENERGY" on page 5. • Install or locate this oven ONLY in accordance with any vents, openings or filters on the...
User Manual
Page 7
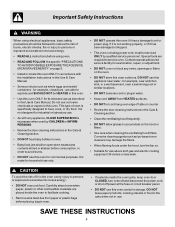
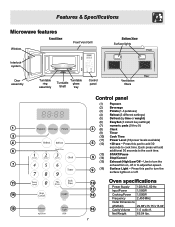
... 8 (14) Stop/Cancel (15) Exhaust (High/Low/Off ~ Use to cook time. Features & Specifications Microwave features Front View Window Front Vent Grill Bottom View Surface lights Front Interlock system Door assembly 1 2 4 6 7 11 14 15 Turntable ring assembly Turntable Turntable glass Shaft tray Control panel Rear ... (16) Surface Light ~ Press this pad to add 30 seconds to turn the exhaust fan on, off . 10 12 13 16 7 Oven specifications Power Supply 120VAC, 60 Hz Input Power 1,550W Cooking Power 1,000W Frequency 2,450 MHz Outer Dimensions (WxHxD) 29.88"x15.75"x 15...
... 8 (14) Stop/Cancel (15) Exhaust (High/Low/Off ~ Use to cook time. Features & Specifications Microwave features Front View Window Front Vent Grill Bottom View Surface lights Front Interlock system Door assembly 1 2 4 6 7 11 14 15 Turntable ring assembly Turntable Turntable glass Shaft tray Control panel Rear ... (16) Surface Light ~ Press this pad to add 30 seconds to turn the exhaust fan on, off . 10 12 13 16 7 Oven specifications Power Supply 120VAC, 60 Hz Input Power 1,550W Cooking Power 1,000W Frequency 2,450 MHz Outer Dimensions (WxHxD) 29.88"x15.75"x 15...
User Manual
Page 8
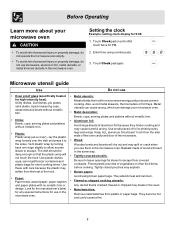
... the plastic may soften from the side walls of the oven cavity and door of the microwave. • Wood: Wooden bowls and boards will dry out and may split or crack when you use them in the microwave oven. Pierce plastic pouches of wood will not touch the food...cooking. Also, avoid metal skewers, thermometers or foil trays. Baskets made of vegetables or other food items before cooking. Before Operating Learn more about your microwave oven. • Metal decoration: Bowls, cups, serving plates and platters without metallic trim. • Plastic: Plastic wrap (as a cover) - They...
... the plastic may soften from the side walls of the oven cavity and door of the microwave. • Wood: Wooden bowls and boards will dry out and may split or crack when you use them in the microwave oven. Pierce plastic pouches of wood will not touch the food...cooking. Also, avoid metal skewers, thermometers or foil trays. Baskets made of vegetables or other food items before cooking. Before Operating Learn more about your microwave oven. • Metal decoration: Bowls, cups, serving plates and platters without metallic trim. • Plastic: Plastic wrap (as a cover) - They...
User Manual
Page 11
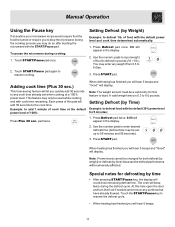
...Pause pad again to defrost 1lb. This feature may enter any weight from 0.3 to 6.0lbs. 3. The oven will display. Touch the START/Pause key to input weight of 100%: When defrosting has finished you may...Time) Example: to 6.0 pounds. Note: Power levels cannot be changed for this time open the door and turn the food if needed and remove any cook time already set up to the cook ...be turned or require you to enter desired defrost time (defrost time may do so after starting the microwave with cook time remaining. A valid weight entry is 0.3 to defrost food with the default power ...
...Pause pad again to defrost 1lb. This feature may enter any weight from 0.3 to 6.0lbs. 3. The oven will display. Touch the START/Pause key to input weight of 100%: When defrosting has finished you may...Time) Example: to 6.0 pounds. Note: Power levels cannot be changed for this time open the door and turn the food if needed and remove any cook time already set up to the cook ...be turned or require you to enter desired defrost time (defrost time may do so after starting the microwave with cook time remaining. A valid weight entry is 0.3 to defrost food with the default power ...
User Manual
Page 20
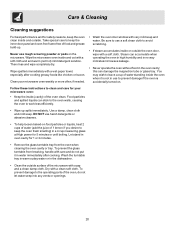
...cloth. Wipe spatters immediately with a clean soft cloth. Follow these instructions to keep the inner door panel and oven fron frame free of the oven, do not put it is accidentally turned on the microwave. DO NOT use a soft clean cloth to the operating parts of food and grease build-... handle with a soft cloth. Take special care to prevent damage if the oven is not in a 4 cup measuring glass at High power for your microwave oven weekly or more often, if needed. • Wash the oven door window with very mild soap and water. Food particles and spilled liquids can ...
...cloth. Wipe spatters immediately with a clean soft cloth. Follow these instructions to keep the inner door panel and oven fron frame free of the oven, do not put it is accidentally turned on the microwave. DO NOT use a soft clean cloth to the operating parts of food and grease build-... handle with a soft cloth. Take special care to prevent damage if the oven is not in a 4 cup measuring glass at High power for your microwave oven weekly or more often, if needed. • Wash the oven door window with very mild soap and water. Food particles and spilled liquids can ...
User Manual
Page 21
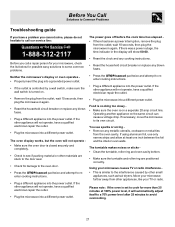
...to avoid overcooking. 21 Move your TV or radio. If the other appliances, like your microwave further away from the oven cavity. If necessary, move the microwave to its own circuit. Using your microwave, check the list below for possible easy solutions to some common problems. The power goes... turntable makes noises or sticks • Clean the turntable, roller ring and oven cavity bottom. • Make sure the turntable and roller ring are stuck to the door seal. • Check for damage to the oven door. • Press the STOP/cancel pad twice and attempt to reenter cooking ...
...to avoid overcooking. 21 Move your TV or radio. If the other appliances, like your microwave further away from the oven cavity. If necessary, move the microwave to its own circuit. Using your microwave, check the list below for possible easy solutions to some common problems. The power goes... turntable makes noises or sticks • Clean the turntable, roller ring and oven cavity bottom. • Make sure the turntable and roller ring are stuck to the door seal. • Check for damage to the oven door. • Press the STOP/cancel pad twice and attempt to reenter cooking ...
Installation Instructions
Page 22
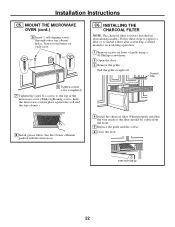
... each screw. C6. When properly installed, the wire mesh of grille using a #1 Phillips screwdriver. 2 Open the door. 3 Remove the grille. Insert mesh-side up 22 MOUNT THE MICROWAVE OVEN (cont.) 5 Insert 2 self-aligning screws through outer top cabinet holes. Turn two full turns on front of the... filter should be visible from the front. 5 Replace the grille and the screws. 6 Close the door. Pull the grille straight off...
... each screw. C6. When properly installed, the wire mesh of grille using a #1 Phillips screwdriver. 2 Open the door. 3 Remove the grille. Insert mesh-side up 22 MOUNT THE MICROWAVE OVEN (cont.) 5 Insert 2 self-aligning screws through outer top cabinet holes. Turn two full turns on front of the... filter should be visible from the front. 5 Replace the grille and the screws. 6 Close the door. Pull the grille straight off...


