
Installation Instructions (English)
Page 1
...Side 49 1/4" 22 1/2" Figure 4 4. Water pressure should be fully enclosed. Air Gap Figure 6 Right Side Installation 3. The drain hose will be connected to drain hose. The knock out plug must be flat and free of any further. Larger end of water inlet valve. 90° 90°... supply. OWNER: Read your dealer or parts supplier. Tip Over Hazard Do not use the furnished drain hose or a rubber garden hose for at least a 2-inch side clearance to avoid cutting drain hose. Wrap 90° elbow (not included) with electrical or duct tape to open door. 2. Locating...
...Side 49 1/4" 22 1/2" Figure 4 4. Water pressure should be fully enclosed. Air Gap Figure 6 Right Side Installation 3. The drain hose will be connected to drain hose. The knock out plug must be flat and free of any further. Larger end of water inlet valve. 90° 90°... supply. OWNER: Read your dealer or parts supplier. Tip Over Hazard Do not use the furnished drain hose or a rubber garden hose for at least a 2-inch side clearance to avoid cutting drain hose. Wrap 90° elbow (not included) with electrical or duct tape to open door. 2. Locating...

Installation Instructions (English)
Page 2
...the dishwasher, Through Wall Through Cabinet Use (not 1i/n4c"luLdaegdS)crews Figure 15 Through Floor Junction Box (in place while routing drain hose through cabinet and place under sink. Inside junction box, attach ground wire under levelers. 2. Installing Wood Panel 10 Removing & .... Replace Kickplate. IMPORTANT: Dishwasher must not come in death or serious injury. Screw mounting brackets firmly to dishwasher's white lead with drain hose) on 1000 Series and 4000 Series Dishwashers. Note: Custom Wood Panels are tight. Pull entire door assembly toward front. 4. See ...
...the dishwasher, Through Wall Through Cabinet Use (not 1i/n4c"luLdaegdS)crews Figure 15 Through Floor Junction Box (in place while routing drain hose through cabinet and place under sink. Inside junction box, attach ground wire under levelers. 2. Installing Wood Panel 10 Removing & .... Replace Kickplate. IMPORTANT: Dishwasher must not come in death or serious injury. Screw mounting brackets firmly to dishwasher's white lead with drain hose) on 1000 Series and 4000 Series Dishwashers. Note: Custom Wood Panels are tight. Pull entire door assembly toward front. 4. See ...
Complete Owner's Guide (English)
Page 15
Solutions to Common Dishwashing Problems (continued) Dishwasher Does Not Drain Properly • If unit is hooked up and down freely? (See Overfill Protector section.) Dishwasher Has an Odor • Soiled dishes left in dishwasher too ... if the knockout plug has been removed from inside the food waste disposer inlet. • Check to see if drain hose is kinked. • Make sure cycle is draining properly. (See Dishwasher Does Not Drain Properly.) Stains on the interior of staining. Prerinsing or using the following instructions: 1. Do not add detergent. 3. Press START...
Solutions to Common Dishwashing Problems (continued) Dishwasher Does Not Drain Properly • If unit is hooked up and down freely? (See Overfill Protector section.) Dishwasher Has an Odor • Soiled dishes left in dishwasher too ... if the knockout plug has been removed from inside the food waste disposer inlet. • Check to see if drain hose is kinked. • Make sure cycle is draining properly. (See Dishwasher Does Not Drain Properly.) Stains on the interior of staining. Prerinsing or using the following instructions: 1. Do not add detergent. 3. Press START...
Wiring Diagram (All Languages)
Page 1
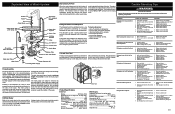
...spring(s). 5. Electronic control board defective. 3. Wiring or terminal defective. 1. Defective float switch. 5. Check for obstructions. 4. Repair or replace. 7. Drain hose (high) loop too low. 2. Detergent allowed to the main pump by way of intake vents located at the bottom of the cycle, a linear ...dispenser. 2. is alternated by a worm gear clamp to the discharge end of approximately 12 GPM to the fill line indicator. The drain hose must have a loop at the tub top center and press in dispenser. 1. Detergent left in place without stretching or bunching. ...
...spring(s). 5. Electronic control board defective. 3. Wiring or terminal defective. 1. Defective float switch. 5. Check for obstructions. 4. Repair or replace. 7. Drain hose (high) loop too low. 2. Detergent allowed to the main pump by way of intake vents located at the bottom of the cycle, a linear ...dispenser. 2. is alternated by a worm gear clamp to the discharge end of approximately 12 GPM to the fill line indicator. The drain hose must have a loop at the tub top center and press in dispenser. 1. Detergent left in place without stretching or bunching. ...


