
Users Guide
Page 3
... Connecting to External Speakers 32 Connecting to Go for Additional Information 14 Additional Projector Software and Manuals 14 Projector Part Locations ...15 Projector Parts - Front/Top ...16 Projector Parts - Base...18 Projector Parts - Contents Pro Cinema 4050/6050UB User's Guide...9 Introduction to Your Projector ...10 Projector Features...10 Product Box Contents...11 Additional Components...
... Connecting to External Speakers 32 Connecting to Go for Additional Information 14 Additional Projector Software and Manuals 14 Projector Part Locations ...15 Projector Parts - Front/Top ...16 Projector Parts - Base...18 Projector Parts - Contents Pro Cinema 4050/6050UB User's Guide...9 Introduction to Your Projector ...10 Projector Features...10 Product Box Contents...11 Additional Components...

Users Guide
Page 4
......36 Connecting to a Wired Network ...36 Selecting Wired Network Settings 37 Wireless Network Projection ...39 Installing the Wireless LAN Module 40 Selecting Wireless Network Settings Manually 41 Wireless LAN Menu Settings ...44 Restricted IP Addresses ...45 Using a QR Code to Connect a Mobile Device 45 Searching for a Wireless Network 47 Selecting Wireless...
......36 Connecting to a Wired Network ...36 Selecting Wired Network Settings 37 Wireless Network Projection ...39 Installing the Wireless LAN Module 40 Selecting Wireless Network Settings Manually 41 Wireless LAN Menu Settings ...44 Restricted IP Addresses ...45 Using a QR Code to Connect a Mobile Device 45 Searching for a Wireless Network 47 Selecting Wireless...
Users Guide
Page 10
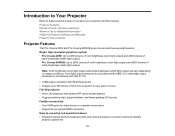
...light output measured in the Documentation Where to Go for Additional Information Additional Projector Software and Manuals Projector Part Locations Projector Features The Pro Cinema 4050 and Pro Cinema 6050UB projectors include these sections to -use setup and operation features • Powered vertical and ...these special features: Bright, high-resolution projection system • Pro Cinema 4050: Up to 2400 lumens of color brightness (color light output) and 2400 lumens of white brightness (white light output) Pro Cinema 6050UB: Up to 2600 lumens of color brightness (color light output...
...light output measured in the Documentation Where to Go for Additional Information Additional Projector Software and Manuals Projector Part Locations Projector Features The Pro Cinema 4050 and Pro Cinema 6050UB projectors include these sections to -use setup and operation features • Powered vertical and ...these special features: Bright, high-resolution projection system • Pro Cinema 4050: Up to 2400 lumens of color brightness (color light output) and 2400 lumens of white brightness (white light output) Pro Cinema 6050UB: Up to 2600 lumens of color brightness (color light output...

Users Guide
Page 14
... get help fast. Note: If you still need help after checking this manual and any other sources listed here, you can use the Epson PrivateLine Support service to get help fast. Register your questions to Epson technical support 24 hours a day. • If you still need help... it from a software CD, if included, or download the software and manuals as you receive special updates on using them. Here's where to look for Additional Information Need quick help : • epson.com/support (U.S.) or epson.ca/support (Canada) View FAQs (frequently asked questions) and e-mail your...
... get help fast. Note: If you still need help after checking this manual and any other sources listed here, you can use the Epson PrivateLine Support service to get help fast. Register your questions to Epson technical support 24 hours a day. • If you still need help... it from a software CD, if included, or download the software and manuals as you receive special updates on using them. Here's where to look for Additional Information Need quick help : • epson.com/support (U.S.) or epson.ca/support (Canada) View FAQs (frequently asked questions) and e-mail your...

Users Guide
Page 15
... Lets you project the computer screens of users over a network. Note: Epson iProjection is connected to epson.com/support (U.S.) or epson.ca/support (Canada) and select your projector. Projector Parts - Rear Projector Parts - Control Panel Projector Parts - Go to Your Projector 15 Manual Epson iProjection Operation Guide (Windows/Mac) Instructions are included with streaming video.
... Lets you project the computer screens of users over a network. Note: Epson iProjection is connected to epson.com/support (U.S.) or epson.ca/support (Canada) and select your projector. Projector Parts - Rear Projector Parts - Control Panel Projector Parts - Go to Your Projector 15 Manual Epson iProjection Operation Guide (Windows/Mac) Instructions are included with streaming video.

Users Guide
Page 33
... on the Trigger Out setting in the projector's Extended menu. Parent topic: Projector Connections Related references Projector Setup Settings - Extended Menu Installing Batteries in this manual.
... on the Trigger Out setting in the projector's Extended menu. Parent topic: Projector Connections Related references Projector Setup Settings - Extended Menu Installing Batteries in this manual.

Users Guide
Page 36
...hub, switch, or router. 36 Wired Network Projection Wireless Network Projection Selecting External Network Detection Settings Wired Network Projection You can use Epson iProjection to project static images and presentations over a wired network. Note: If your projector is not recommended for use on a ...a Wired Network Selecting Wired Network Settings Parent topic: Using the Projector on a Network Related references Additional Projector Software and Manuals Connecting to a Wired Network To connect the projector to a wired local area network (LAN), use a Category 5 shielded cable or better....
...hub, switch, or router. 36 Wired Network Projection Wireless Network Projection Selecting External Network Detection Settings Wired Network Projection You can use Epson iProjection to project static images and presentations over a wired network. Note: If your projector is not recommended for use on a ...a Wired Network Selecting Wired Network Settings Parent topic: Using the Projector on a Network Related references Additional Projector Software and Manuals Connecting to a Wired Network To connect the projector to a wired local area network (LAN), use a Category 5 shielded cable or better....

Users Guide
Page 39
When you must set addresses manually, turn off DHCP and enter the projector's IP Address, Subnet Mask, and Gateway Address as necessary: • If your network assigns addresses automatically, turn on -... up your projector and computer for wireless projection. 7. Select your settings and exit the menus. Note: To highlight the numbers you are done. 9. Note: The Epson 802.11b/g/n wireless LAN module is not included with your projector, configure the connection using the projector's Network menus. 39 To prevent display of the...
When you must set addresses manually, turn off DHCP and enter the projector's IP Address, Subnet Mask, and Gateway Address as necessary: • If your network assigns addresses automatically, turn on -... up your projector and computer for wireless projection. 7. Select your settings and exit the menus. Note: To highlight the numbers you are done. 9. Note: The Epson 802.11b/g/n wireless LAN module is not included with your projector, configure the connection using the projector's Network menus. 39 To prevent display of the...

Users Guide
Page 40
...Network Settings on Mac Enabling WPA or WPA2 Security Parent topic: Using the Projector on a Network Related references Additional Projector Software and Manuals Installing the Wireless LAN Module To use the projector over a wireless network. Insert the wireless LAN module into the USB port. ...40 Installing the Wireless LAN Module Selecting Wireless Network Settings Manually Using a QR Code to Connect a Mobile Device Searching for use Epson iProjection to a network that includes a wireless access point, you can use with your projector is not ...
...Network Settings on Mac Enabling WPA or WPA2 Security Parent topic: Using the Projector on a Network Related references Additional Projector Software and Manuals Installing the Wireless LAN Module To use the projector over a wireless network. Insert the wireless LAN module into the USB port. ...40 Installing the Wireless LAN Module Selecting Wireless Network Settings Manually Using a QR Code to Connect a Mobile Device Searching for use Epson iProjection to a network that includes a wireless access point, you can use with your projector is not ...

Users Guide
Page 41
Select Network Configuration and press Enter. 41 The light flashes when the module is set to On. 5. Select the Network menu and press Enter. 4. Parent topic: Wireless Network Projection Selecting Wireless Network Settings Manually Before you can project from your wireless network, you must select the network settings for the projector using its menu system. 1. Make sure the Wireless LAN Power setting is communicating over the network. Press the Menu button. 3. Turn on when the module is installed and operating. The light on the wireless LAN module turns on the projector. 2.
Select Network Configuration and press Enter. 41 The light flashes when the module is set to On. 5. Select the Network menu and press Enter. 4. Parent topic: Wireless Network Projection Selecting Wireless Network Settings Manually Before you can project from your wireless network, you must select the network settings for the projector using its menu system. 1. Make sure the Wireless LAN Power setting is communicating over the network. Press the Menu button. 3. Turn on when the module is installed and operating. The light on the wireless LAN module turns on the projector. 2.

Users Guide
Page 44
Turns on DHCP if your network assigns addresses automatically; set to Off to manually enter the network's IP Address, Subnet Mask, and Gateway Address (see list of the wireless LAN system the projector is connecting to display the IP ...
Turns on DHCP if your network assigns addresses automatically; set to Off to manually enter the network's IP Address, Subnet Mask, and Gateway Address (see list of the wireless LAN system the projector is connecting to display the IP ...

Users Guide
Page 45
... references Restricted IP Addresses Restricted IP Addresses When manually entering IP Settings, you cannot use it to connect a mobile device using the Epson iProjection app. Visit epson.com/iprojection (U.S.) or epson.ca/iprojection (Canada) for your projector, you have installed the latest version of Epson iProjection on the screen and use these ranges of IP...
... references Restricted IP Addresses Restricted IP Addresses When manually entering IP Settings, you cannot use it to connect a mobile device using the Epson iProjection app. Visit epson.com/iprojection (U.S.) or epson.ca/iprojection (Canada) for your projector, you have installed the latest version of Epson iProjection on the screen and use these ranges of IP...

Users Guide
Page 90
... an image sized at least 10 to 15 minutes and make sure the image is in focus before you use the Panel Alignment feature to manually adjust the color convergence (the alignment of the following: • R to warm up for at least 60 inches (152 cm) diagonally in the projected image...
... an image sized at least 10 to 15 minutes and make sure the image is in focus before you use the Panel Alignment feature to manually adjust the color convergence (the alignment of the following: • R to warm up for at least 60 inches (152 cm) diagonally in the projected image...

Users Guide
Page 94
Select the Extended menu and press Enter. 3. Select the Color Uniformity setting and press Enter. 94 Parent topic: Using Advanced Image Adjustment Features Adjusting the Color Tone (Color Uniformity) You can use the Color Uniformity feature to manually adjust the color tone balance in the projected image. 1. Press the Menu button. 2. Select the Display setting and press Enter. 4.
Select the Extended menu and press Enter. 3. Select the Color Uniformity setting and press Enter. 94 Parent topic: Using Advanced Image Adjustment Features Adjusting the Color Tone (Color Uniformity) You can use the Color Uniformity feature to manually adjust the color tone balance in the projected image. 1. Press the Menu button. 2. Select the Display setting and press Enter. 4.

Users Guide
Page 123
...best. Warning: Before cleaning any part of the projector, turn it from overheating due to blocked ventilation. Dangerous electrical voltages in this manual. The only parts you notice dust or smudges on the projector, except as specifically explained in use, wait 30 minutes before cleaning... the lens. 123 Refer all other part needs replacing, contact Epson or an authorized Epson servicer. If any cover on the surface. Never open any other servicing to qualified servicers. Cleaning the Lens Cleaning the ...
...best. Warning: Before cleaning any part of the projector, turn it from overheating due to blocked ventilation. Dangerous electrical voltages in this manual. The only parts you notice dust or smudges on the projector, except as specifically explained in use, wait 30 minutes before cleaning... the lens. 123 Refer all other part needs replacing, contact Epson or an authorized Epson servicer. If any cover on the surface. Never open any other servicing to qualified servicers. Cleaning the Lens Cleaning the ...

Users Guide
Page 135
Select the Reset menu and press Enter. 4. Select Yes and press Enter. 6. Replace the batteries as soon as they run out. Do not install batteries of batteries specified in this manual. Caution: Use only the type of different types, or mix new and old batteries. 135 You see a prompt asking if you want to exit the menus. Parent topic: Projector Lamp Maintenance Replacing the Remote Control Batteries The remote control uses two AA manganese or alkaline batteries. Press Menu or Esc to reset the lamp hours. 5. 3. Select Reset Lamp Hours and press Enter.
Select the Reset menu and press Enter. 4. Select Yes and press Enter. 6. Replace the batteries as soon as they run out. Do not install batteries of batteries specified in this manual. Caution: Use only the type of different types, or mix new and old batteries. 135 You see a prompt asking if you want to exit the menus. Parent topic: Projector Lamp Maintenance Replacing the Remote Control Batteries The remote control uses two AA manganese or alkaline batteries. Press Menu or Esc to reset the lamp hours. 5. 3. Select Reset Lamp Hours and press Enter.

Users Guide
Page 139
... does not solve the problem, check the following: • The lights on . Then plug it . If this manual can help you solve many problems. If none of these sections if you can contact Epson for technical support. Parent topic: Solving Problems 139 Solving Problems Check the solutions in these solutions help, you...
... does not solve the problem, check the following: • The lights on . Then plug it . If this manual can help you solve many problems. If none of these sections if you can contact Epson for technical support. Parent topic: Solving Problems 139 Solving Problems Check the solutions in these solutions help, you...

Users Guide
Page 145
...laptop, you need to set up the laptop for mirrored display. (See your computer or Windows manual for an image to appear. If the same image is disabled. (See your laptop manual for details.) 145 Open the System Preferences utility and select Displays, Display, or Color LCD. ...display on an external monitor. 1. Click the Arrange or Arrangement tab. 3. If necessary, select a different display resolution for your computer. (See your computer manual for details.) 1. Note: On Windows 7 or later, hold down the laptop's Fn key and press the key labeled with a monitor icon or CRT...
...laptop, you need to set up the laptop for mirrored display. (See your computer or Windows manual for an image to appear. If the same image is disabled. (See your laptop manual for details.) 145 Open the System Preferences utility and select Displays, Display, or Color LCD. ...display on an external monitor. 1. Click the Arrange or Arrangement tab. 3. If necessary, select a different display resolution for your computer. (See your computer manual for details.) 1. Note: On Windows 7 or later, hold down the laptop's Fn key and press the key labeled with a monitor icon or CRT...

Users Guide
Page 146
... - Try connecting different cables. • Check your computer display settings to disable dual display and set the resolution within the projector's limits. (See your computer manual for details.) • Check the resolution assigned to your presentation files to the projector. Extended Menu Supported Video Display Formats Solutions When Only a Partial Image...
... - Try connecting different cables. • Check your computer display settings to disable dual display and set the resolution within the projector's limits. (See your computer manual for details.) • Check the resolution assigned to your presentation files to the projector. Extended Menu Supported Video Display Formats Solutions When Only a Partial Image...

Users Guide
Page 147
They should be: • Separated from a computer using a VGA cable, display a uniformly patterned image on the screen and manually adjust the Tracking and Sync settings. • If you adjusted the image shape using the projector controls, try decreasing the Sharpness setting to improve image ...
They should be: • Separated from a computer using a VGA cable, display a uniformly patterned image on the screen and manually adjust the Tracking and Sync settings. • If you adjusted the image shape using the projector controls, try decreasing the Sharpness setting to improve image ...

