
Start Here
Page 1
... this sheet for ordering information, and the online User's Guide for more information on the remote control, then unplug it. Connect the projector Choose from the viewing area. PowerLite® Home Cinema 3010/3010e Quick Setup Before using a laptop, switch it at a height where its lens is located over 16.5 feet (5 m) from the following connections...
... this sheet for ordering information, and the online User's Guide for more information on the remote control, then unplug it. Connect the projector Choose from the viewing area. PowerLite® Home Cinema 3010/3010e Quick Setup Before using a laptop, switch it at a height where its lens is located over 16.5 feet (5 m) from the following connections...
Start Here
Page 2
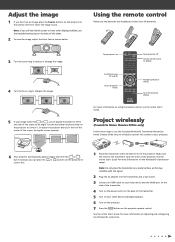
... adjusting and configuring the WirelessHD connection. For more information on Turn projector off to sharpen the image. Or place the projector directly in front of the center of the projector. Project wirelessly (PowerLite Home Cinema 3010e only) Follow these steps to use the included WirelessHD Transmitter (PowerLite Home Cinema 3010e only) to wirelessly transmit HD content to your video...
... adjusting and configuring the WirelessHD connection. For more information on Turn projector off to sharpen the image. Or place the projector directly in front of the center of the projector. Project wirelessly (PowerLite Home Cinema 3010e only) Follow these steps to use the included WirelessHD Transmitter (PowerLite Home Cinema 3010e only) to wirelessly transmit HD content to your video...

Start Here
Page 3
... promotions, and customer-only offers. Records maintained continue to 47CFR, Part 2 and 15, Class B Personal Computers and Peripherals; Trade Name: EPSON Type of Product: LCD Projector Model: H421A/H450A Marketing Name: PowerLite Home Cinema 3010/PowerLite Home Cinema 3010e Trade Name: EPSON Type of Conformity According to reflect the equipment being produced can purchase screens or other accessories from the...
... promotions, and customer-only offers. Records maintained continue to 47CFR, Part 2 and 15, Class B Personal Computers and Peripherals; Trade Name: EPSON Type of Product: LCD Projector Model: H421A/H450A Marketing Name: PowerLite Home Cinema 3010/PowerLite Home Cinema 3010e Trade Name: EPSON Type of Conformity According to reflect the equipment being produced can purchase screens or other accessories from the...

Start Here
Page 4
...in XXXXXX CPD-34999 In Canada, warranties include both warranties and conditions. Epson and PowerLite are your responsibility. Epson disclaims any and all freight charges if you , please visit www.epson.com/support. What Epson Will Do To Correct Problems: If your product requires service during the ...THEORY. Box 93012, Long Beach, CA 90809-3012. This limited warranty applies only to the projector and not to the projector lamp, which vary from jurisdiction to the Epson standard of original purchase. When warranty service involves the exchange of the product or of original...
...in XXXXXX CPD-34999 In Canada, warranties include both warranties and conditions. Epson and PowerLite are your responsibility. Epson disclaims any and all freight charges if you , please visit www.epson.com/support. What Epson Will Do To Correct Problems: If your product requires service during the ...THEORY. Box 93012, Long Beach, CA 90809-3012. This limited warranty applies only to the projector and not to the projector lamp, which vary from jurisdiction to the Epson standard of original purchase. When warranty service involves the exchange of the product or of original...

User's Guide
Page 1
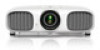
PowerLite® Home Cinema 3010/3010e Home Theater Projector User's Guide
PowerLite® Home Cinema 3010/3010e Home Theater Projector User's Guide

User's Guide
Page 2
... 18 Connecting Video and Computer Equipment 18 Making Other Connections 20 Installing Batteries in the Remote Control 21 Turning the Projector On and Off 21 Turning On the Projector 21 Turning Off the Projector 22 Selecting the Image Source 22 Positioning the Image 24 Making Basic Adjustments 26 Focusing and Zooming 26 Choosing...
... 18 Connecting Video and Computer Equipment 18 Making Other Connections 20 Installing Batteries in the Remote Control 21 Turning the Projector On and Off 21 Turning On the Projector 21 Turning Off the Projector 22 Selecting the Image Source 22 Positioning the Image 24 Making Basic Adjustments 26 Focusing and Zooming 26 Choosing...

User's Guide
Page 3
Advanced Color Adjustments Adjusting the Gamma Setting Adjusting RGBCMY Locking the Projector Making Detailed Adjustments Using the Menu System Changing How the Menus Display Adjusting the Picture Quality Input Brightness ... for Computer Images WirelessHD Settings Split Screen Setup Selecting Memory Settings and Resetting the Projector Creating Memory Settings Selecting Memory Settings Renaming Memory Settings Deleting Saved Memory Settings Resetting the Projector Customizing Projector Features Image Sizing Screen Options Other Setup Options Using WirelessHD Placing the WirelessHD Transmitter ...
Advanced Color Adjustments Adjusting the Gamma Setting Adjusting RGBCMY Locking the Projector Making Detailed Adjustments Using the Menu System Changing How the Menus Display Adjusting the Picture Quality Input Brightness ... for Computer Images WirelessHD Settings Split Screen Setup Selecting Memory Settings and Resetting the Projector Creating Memory Settings Selecting Memory Settings Renaming Memory Settings Deleting Saved Memory Settings Resetting the Projector Customizing Projector Features Image Sizing Screen Options Other Setup Options Using WirelessHD Placing the WirelessHD Transmitter ...
User's Guide
Page 4
...Replacing the Air Filter 62 Replacing the Lamp 64 Resetting the Lamp Usage Timer 67 Checking the Projector Status 67 Storing the Projector 68 Transporting the Projector 68 Problem Solving 69 What To Do When the Lights Come On or Flash 69 Solving ...Picture Problems 71 Solving Remote Control Problems 75 Solving WirelessHD Problems 75 Where to Get Help 77 Specifications 78 General 78 Lamp 78 Remote Control 79 WirelessHD Transmitter (Home Cinema...
...Replacing the Air Filter 62 Replacing the Lamp 64 Resetting the Lamp Usage Timer 67 Checking the Projector Status 67 Storing the Projector 68 Transporting the Projector 68 Problem Solving 69 What To Do When the Lights Come On or Flash 69 Solving ...Picture Problems 71 Solving Remote Control Problems 75 Solving WirelessHD Problems 75 Where to Get Help 77 Specifications 78 General 78 Lamp 78 Remote Control 79 WirelessHD Transmitter (Home Cinema...

User's Guide
Page 6
Introduction The PowerLite® Home Cinema 3010/3010e projector lets you enjoy theater-quality 3D ... including front projection and ceiling mounted, with horizontal keystone slider for offset placement 6 Introduction Designed especially for home cinema use, it offers these outstanding features: ■ Native 1080p (1920 × 1080) resolution, dynamic ... in the relaxing environment of your projected content, for perfectly adjusted images and deepest blacks ■ Epson C2Fine® 3LCD technology for reliable picture quality, increased contrast ratio and uniform colors ■ 1080Perfect...
Introduction The PowerLite® Home Cinema 3010/3010e projector lets you enjoy theater-quality 3D ... including front projection and ceiling mounted, with horizontal keystone slider for offset placement 6 Introduction Designed especially for home cinema use, it offers these outstanding features: ■ Native 1080p (1920 × 1080) resolution, dynamic ... in the relaxing environment of your projected content, for perfectly adjusted images and deepest blacks ■ Epson C2Fine® 3LCD technology for reliable picture quality, increased contrast ratio and uniform colors ■ 1080Perfect...

User's Guide
Page 8
Bottom Mounting bracket attachment points Front adjustable feet Projector Control Panel Brightness sensor Power light Power button Volume/horizontal keystone buttons Escape button Vertical keystone buttons Source button Lamp light Temperature light 8 Introduction
Bottom Mounting bracket attachment points Front adjustable feet Projector Control Panel Brightness sensor Power light Power button Volume/horizontal keystone buttons Escape button Vertical keystone buttons Source button Lamp light Temperature light 8 Introduction

User's Guide
Page 9
... Menu navigation buttons Default button Resets menu selection to default values Menu button Displays the projector's menus Auto Iris button Toggles the Auto Iris function on or off Standby button Turns projector off Illumination button Lights the remote control buttons for easy viewing Source buttons Switch between ...equipment connected to the projector HDMI Link control buttons Control playback of a linked video device Color Mode button Quickly change color settings to match room lighting...
... Menu navigation buttons Default button Resets menu selection to default values Menu button Displays the projector's menus Auto Iris button Toggles the Auto Iris function on or off Standby button Turns projector off Illumination button Lights the remote control buttons for easy viewing Source buttons Switch between ...equipment connected to the projector HDMI Link control buttons Control playback of a linked video device Color Mode button Quickly change color settings to match room lighting...

User's Guide
Page 10
... carry-in the United States, Canada, or Puerto Rico. Optional Accessories Epson provides the following optional accessories for details. In the unlikely event of an equipment failure, you won't have to wait for your Extra Care Home Service brochure for the projector: Product Replacement lamp Air filter replacement Kensington security lock (anti-theft...
... carry-in the United States, Canada, or Puerto Rico. Optional Accessories Epson provides the following optional accessories for details. In the unlikely event of an equipment failure, you won't have to wait for your Extra Care Home Service brochure for the projector: Product Replacement lamp Air filter replacement Kensington security lock (anti-theft...

User's Guide
Page 11
...800) 637-7661 and enter the PIN on the PrivateLine support card that came with your projector. Take advantage of Epson's automated support services 24 hours a day at epson.com/support (U.S.) or epson.ca/support (Canada). Introduction 11 Tip: Contains helpful projection tips. Please follow these guidelines... as you can use the projector, in addition to use the Epson PrivateLine® Support service. Caution: Must be followed carefully to view FAQs or product information and e-mail Epson. Using This Manual This book contains all the information you ...
...800) 637-7661 and enter the PIN on the PrivateLine support card that came with your projector. Take advantage of Epson's automated support services 24 hours a day at epson.com/support (U.S.) or epson.ca/support (Canada). Introduction 11 Tip: Contains helpful projection tips. Please follow these guidelines... as you can use the projector, in addition to use the Epson PrivateLine® Support service. Caution: Must be followed carefully to view FAQs or product information and e-mail Epson. Using This Manual This book contains all the information you ...

User's Guide
Page 12
Setting Up the Projector Follow the instructions in this section to choose a location for the viewing setups shown below, as well as rear projection. Choose a Location You can install the projector for the projector, connect the cables, and display an image. Center Side Ceiling 12 Setting Up the Projector
Setting Up the Projector Follow the instructions in this section to choose a location for the viewing setups shown below, as well as rear projection. Choose a Location You can install the projector for the projector, connect the cables, and display an image. Center Side Ceiling 12 Setting Up the Projector

User's Guide
Page 13
... on your display settings and how you use the horizontal keystone slider and vertical keystone buttons to adjust the image (see page 24). Keep the projector level and place it at a height where its lens is determined by the distance from bottom of image to center of the screen. Use these... 17.5 to 28.4 feet 533 to the screen. Note: Image quality may differ. Diagonal image size Projection distance Offset Offset refers to distance from the projector's lens to 866 cm Diagonal image size (width × height) 40 in. (35 × 20 in.) 101.6 cm (89 × 50 cm) 60 in. (51...
... on your display settings and how you use the horizontal keystone slider and vertical keystone buttons to adjust the image (see page 24). Keep the projector level and place it at a height where its lens is determined by the distance from bottom of image to center of the screen. Use these... 17.5 to 28.4 feet 533 to the screen. Note: Image quality may differ. Diagonal image size Projection distance Offset Offset refers to distance from the projector's lens to 866 cm Diagonal image size (width × height) 40 in. (35 × 20 in.) 101.6 cm (89 × 50 cm) 60 in. (51...

User's Guide
Page 14
... the exact projection distance when you know the desired image size), you can use the Image Size Calculator. Do not set the projector on the Epson website at epson.com/support (U.S.) or epson.ca/support (Canada). This program is available on top of loose materials that could block the vents underneath. ■ Make sure...
... the exact projection distance when you know the desired image size), you can use the Image Size Calculator. Do not set the projector on the Epson website at epson.com/support (U.S.) or epson.ca/support (Canada). This program is available on top of loose materials that could block the vents underneath. ■ Make sure...

User's Guide
Page 15
Setting Up the Projector 15 Use the image below to view 3D images correctly, 3D glasses must be worn within proper range of the projector. See "Optional Accessories" on page 10 for 3D projection (the shading represents the 3D viewing area): 60º 13 ft (4 m) 16.5 ft (5 m) Use the optional external 3D emitter if you cannot view the 3D image normally or if the projector is located more than 16.5 feet (5 m) from the viewing area. In order to determine the ideal distance for ordering information.
Setting Up the Projector 15 Use the image below to view 3D images correctly, 3D glasses must be worn within proper range of the projector. See "Optional Accessories" on page 10 for 3D projection (the shading represents the 3D viewing area): 60º 13 ft (4 m) 16.5 ft (5 m) Use the optional external 3D emitter if you cannot view the 3D image normally or if the projector is located more than 16.5 feet (5 m) from the viewing area. In order to determine the ideal distance for ordering information.

User's Guide
Page 16
... menu, then select Projection. 3. Warning: When installing or adjusting the ceiling mount, do not use adhesives to install the projector. Select Front/Ceiling. 4. To suspend the projector from loosening and do not use any type of your screen (maximum diagonal image size). Follow the instructions included with the mount... to prevent the screws from a ceiling, you will need to exit the menu system. 16 Setting Up the Projector If you install the projector on the size of oil or lubricant. Press the Menu button to invert the picture so that it appears right side up...
... menu, then select Projection. 3. Warning: When installing or adjusting the ceiling mount, do not use adhesives to install the projector. Select Front/Ceiling. 4. To suspend the projector from loosening and do not use any type of your screen (maximum diagonal image size). Follow the instructions included with the mount... to prevent the screws from a ceiling, you will need to exit the menu system. 16 Setting Up the Projector If you install the projector on the size of oil or lubricant. Press the Menu button to invert the picture so that it appears right side up...

User's Guide
Page 17
The following illustrations show the dimensions of the projector: 16.5 in. (420 mm) Center of lens 8.3 in. (210 mm) 3.2 in. (80 mm) 5.5 in. (139.6 mm) 11.8 in. (300 mm) 2.4 in. (60 mm) 5.9 in. (150 mm) 2.8 in. (70 mm) 14.4 in. (365 mm) 6.3 in. (160 mm) Setting Up the Projector 17
The following illustrations show the dimensions of the projector: 16.5 in. (420 mm) Center of lens 8.3 in. (210 mm) 3.2 in. (80 mm) 5.5 in. (139.6 mm) 11.8 in. (300 mm) 2.4 in. (60 mm) 5.9 in. (150 mm) 2.8 in. (70 mm) 14.4 in. (365 mm) 6.3 in. (160 mm) Setting Up the Projector 17

User's Guide
Page 18
... (PowerLite Home Cinema 3010e only). For details on connecting with RCA-style connectors): Connect the cable to a desktop or laptop PC or Apple® Mac® system. You can also connect it to the three component video ports. For audio, use a stereo RCA audio cable: 18 Setting Up the Projector You... See page 57 for information on compatible video formats, see page 81. Connecting the Cables Connecting Video and Computer Equipment You can connect the projector to six pieces of equipment at the same time, using any of video equipment, such as a Blu-ray Disc™/DVD player, digital...
... (PowerLite Home Cinema 3010e only). For details on connecting with RCA-style connectors): Connect the cable to a desktop or laptop PC or Apple® Mac® system. You can also connect it to the three component video ports. For audio, use a stereo RCA audio cable: 18 Setting Up the Projector You... See page 57 for information on compatible video formats, see page 81. Connecting the Cables Connecting Video and Computer Equipment You can connect the projector to six pieces of equipment at the same time, using any of video equipment, such as a Blu-ray Disc™/DVD player, digital...


