Reference Guide
Page 4
...using shared printers in Windows 2000 and NT 4.0 44 Choosing the printer port 49 Using Printer Driver with Macintosh 55 Accessing the printer driver 55 EPSON Status Monitor 3 Utility 55 Chapter 4 Installing and Removing Options Printer Options ...61 500-Sheet Lower Paper Cassette Unit 62 Installing 62 Removing 63 Face-up Tray 64 Installing 65 Using 66 Removing 66 Memory Module 67 Installing 67 Removing 72 Chapter 5 Replacing Consumables Replacing the Developer Cartridge...
...using shared printers in Windows 2000 and NT 4.0 44 Choosing the printer port 49 Using Printer Driver with Macintosh 55 Accessing the printer driver 55 EPSON Status Monitor 3 Utility 55 Chapter 4 Installing and Removing Options Printer Options ...61 500-Sheet Lower Paper Cassette Unit 62 Installing 62 Removing 63 Face-up Tray 64 Installing 65 Using 66 Removing 66 Memory Module 67 Installing 67 Removing 72 Chapter 5 Replacing Consumables Replacing the Developer Cartridge...
Reference Guide
Page 6
... 500-Sheet Lower Paper Cassette Unit (C81336 125 Face-up Tray (C813372 126 Developer cartridge (S050010 126 Photoconductor unit (S051055 127 Appendix B Working with Fonts EPSON BarCode Fonts 129 System requirements 130 Installing EPSON BarCode fonts 131 Printing with EPSON BarCode fonts 133 BarCode Font specifications 136 Appendix C Contacting Customer Support For Users in...
... 500-Sheet Lower Paper Cassette Unit (C81336 125 Face-up Tray (C813372 126 Developer cartridge (S050010 126 Photoconductor unit (S051055 127 Appendix B Working with Fonts EPSON BarCode Fonts 129 System requirements 130 Installing EPSON BarCode fonts 131 Printing with EPSON BarCode fonts 133 BarCode Font specifications 136 Appendix C Contacting Customer Support For Users in...

Reference Guide
Page 10
It cannot be refilled. ❏ Avoid touching the toner or getting it apart. Getting Started 10 ❏ When removing the developer cartridge, never touch the developing roller under the flap; otherwise, print quality will decline. ❏ Do not turn the cartridge upside down or stand it on its ends. ❏ When handling the cartridge, always place it on a clean, smooth surface. ❏ Do not attempt to modify the cartridge or take it in your eyes.
It cannot be refilled. ❏ Avoid touching the toner or getting it apart. Getting Started 10 ❏ When removing the developer cartridge, never touch the developing roller under the flap; otherwise, print quality will decline. ❏ Do not turn the cartridge upside down or stand it on its ends. ❏ When handling the cartridge, always place it on a clean, smooth surface. ❏ Do not attempt to modify the cartridge or take it in your eyes.

Reference Guide
Page 11
... photoconductor units in temperature or humidity. ❏ Wait for at least one hour before using a developer cartridge or a photoconductor unit after moving it from a cool to a warm environment to local regulations. The light-sensitive drum is the green cylinder visible through the ... can explode and cause injury. Avoid locations subject to extreme or rapid changes in fire, as ammonia). When you remove the photoconductor unit from the printer, always place the unit on the printed page and may shorten the service life of the unit. ❏ Be careful not to light any longer...
... photoconductor units in temperature or humidity. ❏ Wait for at least one hour before using a developer cartridge or a photoconductor unit after moving it from a cool to a warm environment to local regulations. The light-sensitive drum is the green cylinder visible through the ... can explode and cause injury. Avoid locations subject to extreme or rapid changes in fire, as ammonia). When you remove the photoconductor unit from the printer, always place the unit on the printed page and may shorten the service life of the unit. ❏ Be careful not to light any longer...
Reference Guide
Page 17
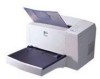
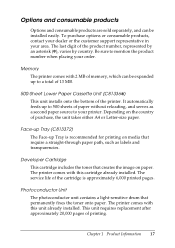
... MB. 500-Sheet Lower Paper Cassette Unit (C81336✽) This unit installs onto the bottom of the printer. Developer Cartridge This cartridge includes the toner that permanently fixes the toner onto paper. Face-up Tray (C813372) The Face-up... Tray is approximately 6,000 printed pages. The service life of the cartridge is recommended for printing on the country of purchase, the unit takes either A4 or Letter-size paper.... product number when placing your area. Chapter 1 Product Information 17 The printer comes with this cartridge already installed.
... MB. 500-Sheet Lower Paper Cassette Unit (C81336✽) This unit installs onto the bottom of the printer. Developer Cartridge This cartridge includes the toner that permanently fixes the toner onto paper. Face-up Tray (C813372) The Face-up... Tray is approximately 6,000 printed pages. The service life of the cartridge is recommended for printing on the country of purchase, the unit takes either A4 or Letter-size paper.... product number when placing your area. Chapter 1 Product Information 17 The printer comes with this cartridge already installed.

Reference Guide
Page 75
Chapter 5 Replacing Consumables Replacing the Developer Cartridge 77 Replacing the Photoconductor Unit 82 Chapter 5 Replacing Consumables 75
Chapter 5 Replacing Consumables Replacing the Developer Cartridge 77 Replacing the Photoconductor Unit 82 Chapter 5 Replacing Consumables 75

Reference Guide
Page 76
... at 5% print ratio. You can view the condition of the developer cartridge. Replace the developer cartridge if you notice a decline in print quality. Chapter 5 Replacing Consumables 76 Your printer uses two consumable components, which are listed below along with their approximate service... lives. Replace the photoconductor unit only if print quality problems remain after replacement of the consumables using the EPSON Status Monitor 3 utility. Developer cartridge (S050010) Up...
... at 5% print ratio. You can view the condition of the developer cartridge. Replace the developer cartridge if you notice a decline in print quality. Chapter 5 Replacing Consumables 76 Your printer uses two consumable components, which are listed below along with their approximate service... lives. Replace the photoconductor unit only if print quality problems remain after replacement of the consumables using the EPSON Status Monitor 3 utility. Developer cartridge (S050010) Up...

Reference Guide
Page 77
Replacing the Developer Cartridge Follow these steps to replace the developer cartridge: 1. otherwise, you may damage the printer. Make sure the output tray on the left side of the printer is turned off. 2. Open the printer cover by pressing the latch on top of the printer and lifting the cover up all the way. c Caution: You must completely open the printer cover when replacing the developer cartridge; Chapter 5 Replacing Consumables 77 Make sure the printer is lowered. 3.
Replacing the Developer Cartridge Follow these steps to replace the developer cartridge: 1. otherwise, you may damage the printer. Make sure the output tray on the left side of the printer is turned off. 2. Open the printer cover by pressing the latch on top of the printer and lifting the cover up all the way. c Caution: You must completely open the printer cover when replacing the developer cartridge; Chapter 5 Replacing Consumables 77 Make sure the printer is lowered. 3.

Reference Guide
Page 78
4. Dispose of the printer. If toner is marked CAUTION Hot Surface Avoid Contact. c Caution: Be careful not to spill any remaining toner from the used developer cartridge properly. Hold the cartridge by the handle and pull it with a clean, dry, lint-free cloth or with a vacuum-cleaning device. 5. w Warning: Do not touch the fuser, which is spilled inside the printer, clean it straight up and out of the used developer cartridge. If the printer has been in use, the fuser may be very hot. Chapter 5 Replacing Consumables 78
4. Dispose of the printer. If toner is marked CAUTION Hot Surface Avoid Contact. c Caution: Be careful not to spill any remaining toner from the used developer cartridge properly. Hold the cartridge by the handle and pull it with a clean, dry, lint-free cloth or with a vacuum-cleaning device. 5. w Warning: Do not touch the fuser, which is spilled inside the printer, clean it straight up and out of the used developer cartridge. If the printer has been in use, the fuser may be very hot. Chapter 5 Replacing Consumables 78

Reference Guide
Page 79
While holding the cartridge horizontally, gently shake it a few times from side to distribute the toner evenly. 7. otherwise, print quality may decline. c Caution: Never touch the developing roller under the flap; Remove the new developer cartridge from front to back to side and then from its bag. Remove the protective tape seal from the developer cartridge completely. Chapter 5 Replacing Consumables 79 6.
While holding the cartridge horizontally, gently shake it a few times from side to distribute the toner evenly. 7. otherwise, print quality may decline. c Caution: Never touch the developing roller under the flap; Remove the new developer cartridge from front to back to side and then from its bag. Remove the protective tape seal from the developer cartridge completely. Chapter 5 Replacing Consumables 79 6.

Reference Guide
Page 80
Press it gently until it locks into the grooves inside the printer. Lower the printer cover. Slide the cartridge gently into the opening until it into the printer, making sure that the pins on both sides of the cartridge fit into place. 9. Chapter 5 Replacing Consumables 80 8. Hold the cartridge by its handle and lower it clicks shut.
Press it gently until it locks into the grooves inside the printer. Lower the printer cover. Slide the cartridge gently into the opening until it into the printer, making sure that the pins on both sides of the cartridge fit into place. 9. Chapter 5 Replacing Consumables 80 8. Hold the cartridge by its handle and lower it clicks shut.

Reference Guide
Page 82
... lowered. 3. c Caution: You must completely open the printer cover to reset the toner level counter. Remove the developer cartridge. Chapter 5 Replacing Consumables 82 Make sure the output tray at the top of the printer and lifting the cover up all the way. otherwise, you should clean ...the paper roller as described in "Cleaning the Printer" on the left side of the printer is turned off. 2. Click OK to replace the photoconductor unit; Whenever you replace the developer cartridge, you may damage the printer. 4. Open the printer cover by pressing the latch button on page 113....
... lowered. 3. c Caution: You must completely open the printer cover to reset the toner level counter. Remove the developer cartridge. Chapter 5 Replacing Consumables 82 Make sure the output tray at the top of the printer and lifting the cover up all the way. otherwise, you should clean ...the paper roller as described in "Cleaning the Printer" on the left side of the printer is turned off. 2. Click OK to replace the photoconductor unit; Whenever you replace the developer cartridge, you may damage the printer. 4. Open the printer cover by pressing the latch button on page 113....

Reference Guide
Page 85
Press it gently until it clicks shut. Chapter 5 Replacing Consumables 85 Reinstall the developer cartridge. 10. Lower the printer cover. 9.
Press it gently until it clicks shut. Chapter 5 Replacing Consumables 85 Reinstall the developer cartridge. 10. Lower the printer cover. 9.

Reference Guide
Page 92
Remove the developer cartridge. otherwise, print quality may decline. 3. c Caution: When removing the developer cartridge, never touch the developing roller under the flap; Chapter 6 Troubleshooting 92
Remove the developer cartridge. otherwise, print quality may decline. 3. c Caution: When removing the developer cartridge, never touch the developing roller under the flap; Chapter 6 Troubleshooting 92

Reference Guide
Page 95
Tap the edges of the stack of jam looks like: Follow the steps below to clear the error. Close the printer cover. 8. Feed jam occurs at the MP tray The following illustration shows what this type of paper on a flat surface and carefully reload ... curled or wrinkled sheets.) Printing automatically restarts from the page that jammed. Reinstall the photoconductor unit, and then the developer cartridge. 7. If the error light (red) continues flashing after removing all jammed paper, open and close the printer cover to clear a feed jam at the MP tray: Chapter 6 Troubleshooting 95 6.
Tap the edges of the stack of jam looks like: Follow the steps below to clear the error. Close the printer cover. 8. Feed jam occurs at the MP tray The following illustration shows what this type of paper on a flat surface and carefully reload ... curled or wrinkled sheets.) Printing automatically restarts from the page that jammed. Reinstall the photoconductor unit, and then the developer cartridge. 7. If the error light (red) continues flashing after removing all jammed paper, open and close the printer cover to clear a feed jam at the MP tray: Chapter 6 Troubleshooting 95 6.

Reference Guide
Page 96
Be sure to remove any sheets that may have fed part way into the printer. 3. Chapter 6 Troubleshooting 96 Gently pull out any pieces of paper that have torn off or are remaining in the paper feed path. Open the printer cover. 1. If necessary, take out the developer cartridge and the photoconductor unit and remove any stacked paper. 2. Remove the MP tray cover and any paper left in the printer. Reinsert the unit and then the cartridge.
Be sure to remove any sheets that may have fed part way into the printer. 3. Chapter 6 Troubleshooting 96 Gently pull out any pieces of paper that have torn off or are remaining in the paper feed path. Open the printer cover. 1. If necessary, take out the developer cartridge and the photoconductor unit and remove any stacked paper. 2. Remove the MP tray cover and any paper left in the printer. Reinsert the unit and then the cartridge.

Reference Guide
Page 100
... "Connecting to check whether the outlet is turned on. Check both ends of the cable between the printer and the electrical outlet. To replace the cartridge, see "Replacing the Developer Cartridge" on but nothing prints Your computer may not be plugged in length. The interface cable may be ...sure to the printer. If connecting through the parallel interface, be empty. The developer cartridge may not be properly connected to secure the connector using the wire retaining clips. If the electrical ...
... "Connecting to check whether the outlet is turned on. Check both ends of the cable between the printer and the electrical outlet. To replace the cartridge, see "Replacing the Developer Cartridge" on but nothing prints Your computer may not be plugged in length. The interface cable may be ...sure to the printer. If connecting through the parallel interface, be empty. The developer cartridge may not be properly connected to secure the connector using the wire retaining clips. If the electrical ...
Reference Guide
Page 102
... the paper path inside the printer using the correct type of your printer. There may appear distorted or broken. Print quality problems The background is recommended for best results. See "Specifications" on page 119 for instructions. Remove the cartridge and shake it gently from...free cloth. See "Replacing the Photoconductor Unit" on page 82 for information on page 77. Clean the internal printer components by printing three pages with the developer cartridge. You may need to distribute the toner evenly, then reinstall it. For more information, see "Replacing the ...
... the paper path inside the printer using the correct type of your printer. There may appear distorted or broken. Print quality problems The background is recommended for best results. See "Specifications" on page 119 for instructions. Remove the cartridge and shake it gently from...free cloth. See "Replacing the Photoconductor Unit" on page 82 for information on page 77. Clean the internal printer components by printing three pages with the developer cartridge. You may need to distribute the toner evenly, then reinstall it. For more information, see "Replacing the ...

Reference Guide
Page 103
... may be moist or damp. For more information, see "Replacing the Developer Cartridge" on . ❏ Confirm that the Toner Save mode is light. ❏ Turn off the printer. Then print several pages to distribute the toner evenly, and then reinstall it . Uneven image density ❏ Your paper ...may be a problem with only one character per page. Take out the developer cartridge, shake it gently from side to side...
... may be moist or damp. For more information, see "Replacing the Developer Cartridge" on . ❏ Confirm that the Toner Save mode is light. ❏ Turn off the printer. Then print several pages to distribute the toner evenly, and then reinstall it . Uneven image density ❏ Your paper ...may be a problem with only one character per page. Take out the developer cartridge, shake it gently from side to side...

Reference Guide
Page 104
... store paper in a humid or damp environment. You may not be using the correct type of your printer. See "Specifications" on page 119 for information on page 77. Remove the developer cartridge, shake it from side to side to moisture absorbed by printing three pages with a clean, dry,...paper. Do not store paper in a humid or damp environment. The higher the moisture content of your printer. Clean the paper path inside the printer using the correct type of the cartridge with only one character per page. Smooth, high-quality copier paper is too rough, printed characters may ...
... store paper in a humid or damp environment. You may not be using the correct type of your printer. See "Specifications" on page 119 for information on page 77. Remove the developer cartridge, shake it from side to side to moisture absorbed by printing three pages with a clean, dry,...paper. Do not store paper in a humid or damp environment. The higher the moisture content of your printer. Clean the paper path inside the printer using the correct type of the cartridge with only one character per page. Smooth, high-quality copier paper is too rough, printed characters may ...

