
Reference Guide
Page 12
... 2.1.5 Downloading Drivers, Utilities, and Manuals 2-9 2.2 Connection Form and Cables 2-9 2.2.1 USB 2-9 2.3 Serial Connection 2-11 2.3.1 Stand alone 2-12 2.3.2 Y-connection 2-12 2.3.3 Pass-Through Connections 2-13 2.4 Parallel Connection 2-13 2.5 Ethernet 2-14 Chapter 3 Setup 3.1 Part Name and Basic Operation 3-1 3.1.1 Part Names 3-1 3.1.2 Connectors 3-1 3.1.2.1 Important Installation Notes 3-2 3.1.3 The Control Panel 3-2 3.1.3.1 LED 3-2 3.1.3.2 Control Panel Buttons 3-3 3.1.4 Validation paper handling 3-4 3.2 Setup Flow 3-5 3.3 Printer setup 3-6 3.3.1 Connecting the Power...
... 2.1.5 Downloading Drivers, Utilities, and Manuals 2-9 2.2 Connection Form and Cables 2-9 2.2.1 USB 2-9 2.3 Serial Connection 2-11 2.3.1 Stand alone 2-12 2.3.2 Y-connection 2-12 2.3.3 Pass-Through Connections 2-13 2.4 Parallel Connection 2-13 2.5 Ethernet 2-14 Chapter 3 Setup 3.1 Part Name and Basic Operation 3-1 3.1.1 Part Names 3-1 3.1.2 Connectors 3-1 3.1.2.1 Important Installation Notes 3-2 3.1.3 The Control Panel 3-2 3.1.3.1 LED 3-2 3.1.3.2 Control Panel Buttons 3-3 3.1.4 Validation paper handling 3-4 3.2 Setup Flow 3-5 3.3 Printer setup 3-6 3.3.1 Connecting the Power...

Reference Guide
Page 13
... 4-1 4.1.2.2 Cleaning sheet 4-2 4.1.2.3 Cleaning procedure 4-2 4.1.2.4 Self mode 4-2 4.1.2.5 Command mode 4-2 4.2 Troubleshooting 4-3 4.2.1 Removing a Paper Jam 4-3 4.2.2 Autocutter Jam 4-3 4.2.3 LED Blinking Pattern 4-4 4.2.3.1 Error Types 4-4 4.2.4 Printer prints "?" or Incorrect Data With Serial Interface 4-6 4.2.5 Hexadecimal Dump 4-6 Chapter 5 Application Development Information for OPOS 5.1 Bitmap Printing 5-1 5.1.1 Explanation of Bitmap Printing 5-1 5.1.2 Supplementary Explanation of Function 5-2 5.1.2.1 LetterQuality 5-2 5.1.2.2 Setting of printing position by escape...
... 4-1 4.1.2.2 Cleaning sheet 4-2 4.1.2.3 Cleaning procedure 4-2 4.1.2.4 Self mode 4-2 4.1.2.5 Command mode 4-2 4.2 Troubleshooting 4-3 4.2.1 Removing a Paper Jam 4-3 4.2.2 Autocutter Jam 4-3 4.2.3 LED Blinking Pattern 4-4 4.2.3.1 Error Types 4-4 4.2.4 Printer prints "?" or Incorrect Data With Serial Interface 4-6 4.2.5 Hexadecimal Dump 4-6 Chapter 5 Application Development Information for OPOS 5.1 Bitmap Printing 5-1 5.1.1 Explanation of Bitmap Printing 5-1 5.1.2 Supplementary Explanation of Function 5-2 5.1.2.1 LetterQuality 5-2 5.1.2.2 Setting of printing position by escape...

Reference Guide
Page 15
... paper loading (drop- Validation and endorsement functions cannot be installed on the same printer. 1.1.1 Slip/ Validation Section ❏ An optional Magnetic Ink Character Recognition (MICR) reader that enables the printer to reverse the check paper for printing an endorsement.(The validation function model doesn't have an endorsement printer.) ❏ High throughput using bidirectional, minimum distance printing. ❏ Mechanical form stopper for stable slip printing. ❏ Two ways are factory...
... paper loading (drop- Validation and endorsement functions cannot be installed on the same printer. 1.1.1 Slip/ Validation Section ❏ An optional Magnetic Ink Character Recognition (MICR) reader that enables the printer to reverse the check paper for printing an endorsement.(The validation function model doesn't have an endorsement printer.) ❏ High throughput using bidirectional, minimum distance printing. ❏ Mechanical form stopper for stable slip printing. ❏ Two ways are factory...

Reference Guide
Page 17
...; EPSON power supply unit, PS-180 ❏ MICR reader (factory-installed option) (available only for the serial interface model) ❏ Endorsement printer (factory-installed option) (available only for the MICR model) ❏ Direct connection customer display DM-D105/D205 or DM-D106/DM-D206 (available only for this printer. The widths is 80 mm {3.15"}. 1.4 Printing and Paper Specifications 1.4.1 Slip/ Validation Section Printing method: Head wire configuration: Printing direction: Printing speed: Serial impact dot matrix 9-pin vertical line, 0.353...
...; EPSON power supply unit, PS-180 ❏ MICR reader (factory-installed option) (available only for the serial interface model) ❏ Endorsement printer (factory-installed option) (available only for the MICR model) ❏ Direct connection customer display DM-D105/D205 or DM-D106/DM-D206 (available only for this printer. The widths is 80 mm {3.15"}. 1.4 Printing and Paper Specifications 1.4.1 Slip/ Validation Section Printing method: Head wire configuration: Printing direction: Printing speed: Serial impact dot matrix 9-pin vertical line, 0.353...

Reference Guide
Page 29
... Reference Guide 1.4.4 Receipt Section Printing method: Thermal line printing Dot density: 180 dpi × 180 dpi [the number of dots per 25.4 mm {1"}] Printing direction: Unidirectional with one of characters: Alphanumeric characters: 95 International characters: 37 Extended graphics: 128 × 11 pages (including one space page) Multilingual character model supports printing with friction feed Printing width: 72 mm {2.83"}, 512 dot positions Paper width: 80 mm Characters per second) Ladder barcode/2-dimensional code printing: 114 mm/s {4.49"/s} maximum Two-color print mode...
... Reference Guide 1.4.4 Receipt Section Printing method: Thermal line printing Dot density: 180 dpi × 180 dpi [the number of dots per 25.4 mm {1"}] Printing direction: Unidirectional with one of characters: Alphanumeric characters: 95 International characters: 37 Extended graphics: 128 × 11 pages (including one space page) Multilingual character model supports printing with friction feed Printing width: 72 mm {2.83"}, 512 dot positions Paper width: 80 mm Characters per second) Ladder barcode/2-dimensional code printing: 114 mm/s {4.49"/s} maximum Two-color print mode...

Reference Guide
Page 30
.... 1-16 General Information Rev. Check the font mode in advance when using Font B in paper roll Micro switch Paper roll spool diameter: Inside: 12 mm {.47"} Outside: 18 mm {.71"} Near-end adjustment: Adjusting screw Remaining amount: Fixed position #1 approximately 23 mm {0.9"} #2 approximately 27 mm {1.06"} (The adjusting screw has two positions.) See Chapter 5. To prevent dot displacement, after cutting, feed paper approximately 1 mm (14/360 inches) or more than 40...
.... 1-16 General Information Rev. Check the font mode in advance when using Font B in paper roll Micro switch Paper roll spool diameter: Inside: 12 mm {.47"} Outside: 18 mm {.71"} Near-end adjustment: Adjusting screw Remaining amount: Fixed position #1 approximately 23 mm {0.9"} #2 approximately 27 mm {1.06"} (The adjusting screw has two positions.) See Chapter 5. To prevent dot displacement, after cutting, feed paper approximately 1 mm (14/360 inches) or more than 40...

Reference Guide
Page 33
... can adjust the sensor. To restart printing, load the paper and set the printer back online by detecting the paper roll diameter. therefore, it either stops or continues printing, depending on adjustment. • When the printer detects a paper near-end, it is recommended to stop printing and the sensor detects a paper near -end sensor: • The sensor is in the middle of one transaction; 1.4.4.5 Printing and Cutting Positions TM-H6000III Technical Reference Guide Manual cutter position Autocutter head position...
... can adjust the sensor. To restart printing, load the paper and set the printer back online by detecting the paper roll diameter. therefore, it either stops or continues printing, depending on adjustment. • When the printer detects a paper near-end, it is recommended to stop printing and the sensor detects a paper near -end sensor: • The sensor is in the middle of one transaction; 1.4.4.5 Printing and Cutting Positions TM-H6000III Technical Reference Guide Manual cutter position Autocutter head position...

Reference Guide
Page 34
... printing position shift may occur. B 1.5.1.2 Slip/ Validation section ❏ TOF (Top of Form) sensor: • The slip TOF sensor is selected as the print sheet, if the sensor detects a cover open during printing, the printer goes offline, stops printing immediately, and the ERROR LED blinks. The printer does not proceed to be removed. It is recommended to clear the buffers and resend the print data. • When a slip is selected as the print sheet, if the sensor detects a cover open sensor...
... printing position shift may occur. B 1.5.1.2 Slip/ Validation section ❏ TOF (Top of Form) sensor: • The slip TOF sensor is selected as the print sheet, if the sensor detects a cover open during printing, the printer goes offline, stops printing immediately, and the ERROR LED blinks. The printer does not proceed to be removed. It is recommended to clear the buffers and resend the print data. • When a slip is selected as the print sheet, if the sensor detects a cover open sensor...
Reference Guide
Page 48
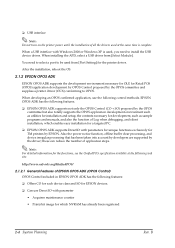
..., offline buffer clear processing, and device irregular processing that has been taken into account by developers are supported by the driver; ❏ USB interface Note: Do not turn on the printer power until the installation of Log when debugging, and silent installation, which NVRAM has already been registered 2-4 System Planning Rev. B When installing the APD, select a USB driver from [Port Setting] for the functions, see the UnifiedPOS specification available...
..., offline buffer clear processing, and device irregular processing that has been taken into account by developers are supported by the driver; ❏ USB interface Note: Do not turn on the printer power until the installation of Log when debugging, and silent installation, which NVRAM has already been registered 2-4 System Planning Rev. B When installing the APD, select a USB driver from [Port Setting] for the functions, see the UnifiedPOS specification available...

Reference Guide
Page 49
... turned off when turning on the power again) ❏ Offline buffer clear processing (deleting contents in print buffer at offline) ❏ Debugging function (trace function) • Logs between an application and CO (for used , connection port and settings, such as paper width, monochrome/two-color (only for model : Sample program : General information on the device class. Specific explanation on the Sample Programs. ❏ Utilities • SetUpPOS Utility Can select a device to be installed...
... turned off when turning on the power again) ❏ Offline buffer clear processing (deleting contents in print buffer at offline) ❏ Debugging function (trace function) • Logs between an application and CO (for used , connection port and settings, such as paper width, monochrome/two-color (only for model : Sample program : General information on the device class. Specific explanation on the Sample Programs. ❏ Utilities • SetUpPOS Utility Can select a device to be installed...

Reference Guide
Page 54
... customer display will not be sure to connect other USB model TM printers) or bus-powered functions with the ESC/POS commands. The host PC needs to control the USB interface printer with current consumption over 100mA. EPSON does not supply the port driver or similar program necessary to have an installed "USB device driver" for installing. Item Transmission setting Transmission speed Parity Data word length Selection 19200 bps None 8 bits Before turning on the customer...
... customer display will not be sure to connect other USB model TM printers) or bus-powered functions with the ESC/POS commands. The host PC needs to control the USB interface printer with current consumption over 100mA. EPSON does not supply the port driver or similar program necessary to have an installed "USB device driver" for installing. Item Transmission setting Transmission speed Parity Data word length Selection 19200 bps None 8 bits Before turning on the customer...

Reference Guide
Page 65
... a factory option. 3.2 Setup Flow You have to install drivers. TM-H6000III Technical Reference Guide Note: Use only validation paper (flat paper, without wrinkles, creases, or folds) that matches the specifications.The validation function is below.. Rev. For information on these drivers, see "Control Method" (page 2-1) and "Install a Printer Driver in the Host PC / POS Terminal," page 3-22) Complete set up your printer to use OPOS (OCX driver from EPSON), Advanced Printer Driver...
... a factory option. 3.2 Setup Flow You have to install drivers. TM-H6000III Technical Reference Guide Note: Use only validation paper (flat paper, without wrinkles, creases, or folds) that matches the specifications.The validation function is below.. Rev. For information on these drivers, see "Control Method" (page 2-1) and "Install a Printer Driver in the Host PC / POS Terminal," page 3-22) Complete set up your printer to use OPOS (OCX driver from EPSON), Advanced Printer Driver...

Reference Guide
Page 80
... DIP switch setting is changed while the printer power is on the signal state. NOTE: When pin 6 of the interface connector is used for serial interface) Fixed to OFF 2-8 Reserved Differs depending on printer specifications. For a tip about print density, see "When Using Original Paper" (page 3-21). 3.4.3.4 USB interface model DIP Switch 1 SW Function 1-1 Auto line feed 1-2 Receive buffer capacity 1-3~ Reserved 1-8 ON Always enabled 45 bytes Fixed to level 3 or 4, printing speed is reset by using the interface. Changes in DIP switch settings (excluding switch 2-8, interface reset...
... DIP switch setting is changed while the printer power is on the signal state. NOTE: When pin 6 of the interface connector is used for serial interface) Fixed to OFF 2-8 Reserved Differs depending on printer specifications. For a tip about print density, see "When Using Original Paper" (page 3-21). 3.4.3.4 USB interface model DIP Switch 1 SW Function 1-1 Auto line feed 1-2 Receive buffer capacity 1-3~ Reserved 1-8 ON Always enabled 45 bytes Fixed to level 3 or 4, printing speed is reset by using the interface. Changes in DIP switch settings (excluding switch 2-8, interface reset...

Reference Guide
Page 82
... printer is for the Windows environment and the JavaPOS is able to ON "Uses two-color roll paper." ("Memory Switches" on page 2-9 When you use this function more than 10 times a day. "Downloading Drivers, Utilities, and Manuals" on page 3-21) When you use APD, you install and set the memory switch. Install two-color thermal paper in the disk 1 folder. The drivers are maintained. You can obtain the Memory switch utility from our web site. Print two color data...
... printer is for the Windows environment and the JavaPOS is able to ON "Uses two-color roll paper." ("Memory Switches" on page 2-9 When you use this function more than 10 times a day. "Downloading Drivers, Utilities, and Manuals" on page 3-21) When you use APD, you install and set the memory switch. Install two-color thermal paper in the disk 1 folder. The drivers are maintained. You can obtain the Memory switch utility from our web site. Print two color data...

Reference Guide
Page 85
... (error), please re-check the device connection setting by following the Application Development Guide. Install EPSON Advanced Printer Driver Select the modules needed to serve as follows. 1. Set up the APD, please refer to the "EPSON Advanced Printer Driver Installation Manual." Test print Rev. After performing the above procedure, please use the principal methods and properties for application developers. B Setup 3-25 The sample programs are introduced in your system. TM-H6000III...
... (error), please re-check the device connection setting by following the Application Development Guide. Install EPSON Advanced Printer Driver Select the modules needed to serve as follows. 1. Set up the APD, please refer to the "EPSON Advanced Printer Driver Installation Manual." Test print Rev. After performing the above procedure, please use the principal methods and properties for application developers. B Setup 3-25 The sample programs are introduced in your system. TM-H6000III...

Reference Guide
Page 88
... printer loads the paper automatically, prints the printer settings, and then ejects the paper. (The SLIP light blinks.) 4. Remove the paper from the printer and feed another sheet of the printer. (The SLIP light blinks.) 3. Press the FEED button again to pause the self test manually, press the FEED button. While holding down the FEED button, turn on the printer using the switch on the front of slip paper into the printer. Feed a sheet of any trouble. If the self tests work correctly, the problem is ready to continue SELF-TEST printing...
... printer loads the paper automatically, prints the printer settings, and then ejects the paper. (The SLIP light blinks.) 4. Remove the paper from the printer and feed another sheet of the printer. (The SLIP light blinks.) 3. Press the FEED button again to pause the self test manually, press the FEED button. While holding down the FEED button, turn on the printer using the switch on the front of slip paper into the printer. Feed a sheet of any trouble. If the self tests work correctly, the problem is ready to continue SELF-TEST printing...

Reference Guide
Page 95
... memory switch 8 is set to ON: Recovers by transmitting error recovery command without turning off the power: ERROR Autocutter error Description The autocutter does not work correctly ERROR LED Blinking Pattern 320 ms Home position detection error The home position cannot be detected due to a paper jam Carriage detection error The carriage is malfunctioning due to OFF: Recovers by closing the unit cover When bit 8 of the error is removed, the printer...
... memory switch 8 is set to ON: Recovers by transmitting error recovery command without turning off the power: ERROR Autocutter error Description The autocutter does not work correctly ERROR LED Blinking Pattern 320 ms Home position detection error The home position cannot be detected due to a paper jam Carriage detection error The carriage is malfunctioning due to OFF: Recovers by closing the unit cover When bit 8 of the error is removed, the printer...

Reference Guide
Page 96
... incorrect address or I/F board is not connected There is an abnormality in memory or gate array High voltage error Description ERROR LED Blinking Pattern 320 ms After R/W checking, the printer does not work correctly. or Incorrect Data With Serial Interface If one of DIP switch 1-1. ❏ Parity error ❏ Framing error ❏ Overrun error Note: For other data in hexadecimal format, along with a guide section to help you find specific commands. 4-6 Maintenance & Troubleshooting Rev...
... incorrect address or I/F board is not connected There is an abnormality in memory or gate array High voltage error Description ERROR LED Blinking Pattern 320 ms After R/W checking, the printer does not work correctly. or Incorrect Data With Serial Interface If one of DIP switch 1-1. ❏ Parity error ❏ Framing error ❏ Overrun error Note: For other data in hexadecimal format, along with a guide section to help you find specific commands. 4-6 Maintenance & Troubleshooting Rev...

Reference Guide
Page 130
.... C.2.4 Is there limitation for the length of a cable? ❏ The length and the quality of the parallel interface board used , or the TM printer is a HighSpeed model, the guaranteed operating systems are the usage conditions for a TM printer with the USB logo) and a USB hub (USB 1.1 or higher). ❏ Confirm that the reset function is enabled by the DIP switch setting. C.2.6 When I do ? ❏ If the printer power has been turned on page 9 of this...
.... C.2.4 Is there limitation for the length of a cable? ❏ The length and the quality of the parallel interface board used , or the TM printer is a HighSpeed model, the guaranteed operating systems are the usage conditions for a TM printer with the USB logo) and a USB hub (USB 1.1 or higher). ❏ Confirm that the reset function is enabled by the DIP switch setting. C.2.6 When I do ? ❏ If the printer power has been turned on page 9 of this...

Reference Guide
Page 131
... detailed instructions, see also "APD does not operate correctly. on page 8 of the host PC. Double-click SETUP.EXE in the device manager of this section. ❏ Confirm that the interface is set to 19200 bps by the host PC. • Confirm that [EPSON USB Controller for a USB connection?" When the USB interface is shown below: Host PC TM printer UB-U01III with a hub TM printer...
... detailed instructions, see also "APD does not operate correctly. on page 8 of the host PC. Double-click SETUP.EXE in the device manager of this section. ❏ Confirm that the interface is set to 19200 bps by the host PC. • Confirm that [EPSON USB Controller for a USB connection?" When the USB interface is shown below: Host PC TM printer UB-U01III with a hub TM printer...

