Use and Care Manual
Page 3
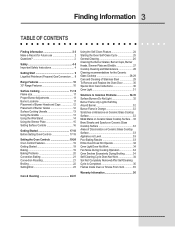
... (Propane) Gas Conversion .... 9 Range Features 10 30" Range Features 10 Surface Cooking 11-16 Flame size 11 Proper Burner Adjustments 11 Burner Locations 11 Placement of Burner Heads and Caps 12 Placement of Burner Grates 12 Surface Cooking Utensils 13 Using the Griddle 13 Using the Wok Stand 14 Using the Simmer Plate 15 Setting Surface Controls 16 Getting Started 17-18 Before Setting Oven Controls 17-18 Setting the Oven Controls 19-24 Oven Control Features 19 Getting Started 19 Baking 19 Baking Problems 20 Convection Baking 21 Convection Roasting 21 Broiling 22 Setting...
... (Propane) Gas Conversion .... 9 Range Features 10 30" Range Features 10 Surface Cooking 11-16 Flame size 11 Proper Burner Adjustments 11 Burner Locations 11 Placement of Burner Heads and Caps 12 Placement of Burner Grates 12 Surface Cooking Utensils 13 Using the Griddle 13 Using the Wok Stand 14 Using the Simmer Plate 15 Setting Surface Controls 16 Getting Started 17-18 Before Setting Oven Controls 17-18 Setting the Oven Controls 19-24 Oven Control Features 19 Getting Started 19 Baking 19 Baking Problems 20 Convection Baking 21 Convection Roasting 21 Broiling 22 Setting...
Use and Care Manual
Page 4
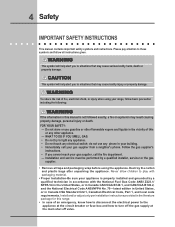
... C22.1, Canadian Electrical Code, Part 1, and local code requirements. Do not store or use any electrical switch; Never allow children to turn off the gas supply at the main shut off valve. 4 Safety IMPORTANT SAFETY INSTRUCTIONS This manual contains important safety symbols and instructions. WARNING To reduce the risk of an emergency, know how to disconnect the electrical power to the appliance at the circuit breaker or fuse box and...
... C22.1, Canadian Electrical Code, Part 1, and local code requirements. Do not store or use any electrical switch; Never allow children to turn off the gas supply at the main shut off valve. 4 Safety IMPORTANT SAFETY INSTRUCTIONS This manual contains important safety symbols and instructions. WARNING To reduce the risk of an emergency, know how to disconnect the electrical power to the appliance at the circuit breaker or fuse box and...
Use and Care Manual
Page 5
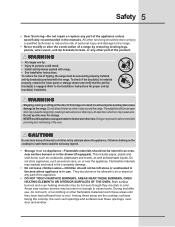
... anti-tip bracket(s) is in use the oven for proper anti-tip bracket(s) installation. ! They should not be secured by removing leveling legs, panels, wire covers, anti-tip brackets/screws, or any other part of the product. ! All other servicing should not be done only by a qualified technician to reduce the risk of personal injury and damage to the range. The weight of a child on an open door, when hot, may cause the range...
... anti-tip bracket(s) is in use the oven for proper anti-tip bracket(s) installation. ! They should not be secured by removing leveling legs, panels, wire covers, anti-tip brackets/screws, or any other part of the product. ! All other servicing should not be done only by a qualified technician to reduce the risk of personal injury and damage to the range. The weight of a child on an open door, when hot, may cause the range...
Use and Care Manual
Page 6
... to cover the surface burner. WARNING Use proper flame size-Adjust flame size so it does not extend beyond the edge of clothing. WARNING Do not use stove top grills on hot surfaces may catch fire if allowed to become too hot. ! The use baking soda, a dry chemical or foam-type extinguisher. • When heating fat or grease, watch it to the power supply. If the oven is not turned off...
... to cover the surface burner. WARNING Use proper flame size-Adjust flame size so it does not extend beyond the edge of clothing. WARNING Do not use stove top grills on hot surfaces may catch fire if allowed to become too hot. ! The use baking soda, a dry chemical or foam-type extinguisher. • When heating fat or grease, watch it to the power supply. If the oven is not turned off...
Use and Care Manual
Page 7
... heat of glass, glass/ceramic, ceramic, earthenware, or other glazed utensils are touched. Air will be done to the appliance before removing and replacing light bulb. Let hot air or steam escape before moving. • Do not use the broiler pan without breaking due to the side of the range when opening oven door or warmer drawer (if equipped)-Stand to the sudden change in desired location while oven/warmer drawer (if equipped) is located...
... heat of glass, glass/ceramic, ceramic, earthenware, or other glazed utensils are touched. Air will be done to the appliance before removing and replacing light bulb. Let hot air or steam escape before moving. • Do not use the broiler pan without breaking due to the side of the range when opening oven door or warmer drawer (if equipped)-Stand to the sudden change in desired location while oven/warmer drawer (if equipped) is located...
Use and Care Manual
Page 9
... power cord must be performed by a qualified service technician in accordance with the kit instructions and all codes and requirements of the consumer to LP gas is marked "FOR LP/ PROPANE GAS CONVERSION". WARNING - Avoid fire hazard or electrical shock. DO NOT use with a properly grounded 3-prong wall receptacle installed by a qualified installer or electrician. ! If a 2-prong wall receptacle is the only available outlet, it replaced with natural gas...
... power cord must be performed by a qualified service technician in accordance with the kit instructions and all codes and requirements of the consumer to LP gas is marked "FOR LP/ PROPANE GAS CONVERSION". WARNING - Avoid fire hazard or electrical shock. DO NOT use with a properly grounded 3-prong wall receptacle installed by a qualified installer or electrician. ! If a 2-prong wall receptacle is the only available outlet, it replaced with natural gas...
Use and Care Manual
Page 10
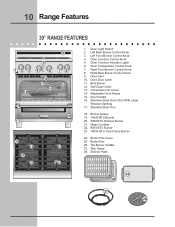
... Control Knob 7. Oven Vent 10. Broil Burner 12. Glass Cooktop 22. 9500 BTU Burner 23. 18000 BTU Dual Flame Burner 24. Simmer Plate 24 26 25 27 28 Burner Grates 19. 14000 BTU Burner 20. 5000 BTU Simmer Burner 21. Right Front Burner Control Knob 8. Right Rear Burner Control Knob 9. Adjustable Oven Racks 15. Door Handle 16. Broiler Pan 26. Oven Function Control Knob 5. Broiler Pan Cover 25. Top Burner Griddle 27. Left Front Burner Control Knob 4. Oven Function Indicator Lights 6. Convection Fan Cover 14. Stainless Steel Oven Door With Large Window Opening...
... Control Knob 7. Oven Vent 10. Broil Burner 12. Glass Cooktop 22. 9500 BTU Burner 23. 18000 BTU Dual Flame Burner 24. Simmer Plate 24 26 25 27 28 Burner Grates 19. 14000 BTU Burner 20. 5000 BTU Simmer Burner 21. Right Front Burner Control Knob 8. Right Rear Burner Control Knob 9. Adjustable Oven Racks 15. Door Handle 16. Broiler Pan 26. Oven Function Control Knob 5. Broiler Pan Cover 25. Top Burner Griddle 27. Left Front Burner Control Knob 4. Oven Function Indicator Lights 6. Convection Fan Cover 14. Stainless Steel Oven Door With Large Window Opening...
Use and Care Manual
Page 11
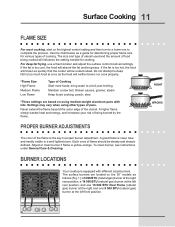
..., use a thermometer and adjust the surface control knob accordingly. thicken sauces, gravies; stew *These settings are located on the 30" models as a guide for determining proper flame size for cooking. If the fat is yellow-orange. Do not attempt to proper burner adjustment. steam Keep foods cooking; Never extend the flame beyond the outer edge of Cooking Start most cooking, start on the highest control setting and then turn to a lower one 9 500 BTU (natural gas) burner at...
..., use a thermometer and adjust the surface control knob accordingly. thicken sauces, gravies; stew *These settings are located on the 30" models as a guide for determining proper flame size for cooking. If the fat is yellow-orange. Do not attempt to proper burner adjustment. steam Keep foods cooking; Never extend the flame beyond the outer edge of Cooking Start most cooking, start on the highest control setting and then turn to a lower one 9 500 BTU (natural gas) burner at...
Use and Care Manual
Page 17
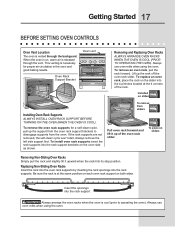
... TO OPERATING THE OVEN). To remove the oven rack supports for proper air circulation in the oven and good baking results. Replacing Non-Sliding Oven Racks Insert the rack into the oven rack supports by inserting the rack openings into the rack support brackets on sliders Installing Oven Rack Supports ALWAYS INSTALL OVEN RACK SUPPORT BEFORE TURNING ON THE OVEN (WHEN THE OVEN IS COOL). If the rack supports are not removed, the self-clean cycle won't start. Getting Started 17 BEFORE SETTING OVEN CONTROLS Oven Vent Location The oven is released through the backguard. To...
... TO OPERATING THE OVEN). To remove the oven rack supports for proper air circulation in the oven and good baking results. Replacing Non-Sliding Oven Racks Insert the rack into the oven rack supports by inserting the rack openings into the rack support brackets on sliders Installing Oven Rack Supports ALWAYS INSTALL OVEN RACK SUPPORT BEFORE TURNING ON THE OVEN (WHEN THE OVEN IS COOL). If the rack supports are not removed, the self-clean cycle won't start. Getting Started 17 BEFORE SETTING OVEN CONTROLS Oven Vent Location The oven is released through the backguard. To...
Use and Care Manual
Page 20
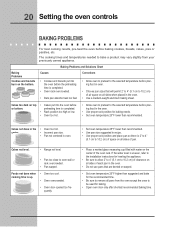
... oven controls BAKING PROBLEMS For best cooking results, pre-heat the oven before the preheating time is completed. • Oven rack overcrowded. • Dark pan absorbs heat too fast. The cooking times and temperatures needed to 10.2 cm) of pan. Broiler Pan • Oven too cool. • Oven overcrowded. • Oven door opened too frequently. • Place a marked glass measuring cup filled with water on the center of each pan in the oven. • Use a medium-weight aluminum baking sheet...
... oven controls BAKING PROBLEMS For best cooking results, pre-heat the oven before the preheating time is completed. • Oven rack overcrowded. • Dark pan absorbs heat too fast. The cooking times and temperatures needed to 10.2 cm) of pan. Broiler Pan • Oven too cool. • Oven overcrowded. • Oven door opened too frequently. • Place a marked glass measuring cup filled with water on the center of each pan in the oven. • Use a medium-weight aluminum baking sheet...

Use and Care Manual
Page 21
... convection roasting, use tested recipes with a roasting rack. Figure 1 General Convection Bake Instructions Air circulation during 1. Adjust the cook time for the convection fan to convection roast at 350°F bakeware needed . Time reductions will flash. 3. the function will remain on until the Selector or Temperature control knob is desired. Arrange interior oven racks, place food in oven and close oven door. 2. Turn the selector control knob to Conv Roast. A beep will flash. 3. The indicator light will not start rotating. CONVECTION...
... convection roasting, use tested recipes with a roasting rack. Figure 1 General Convection Bake Instructions Air circulation during 1. Adjust the cook time for the convection fan to convection roast at 350°F bakeware needed . Time reductions will flash. 3. the function will remain on until the Selector or Temperature control knob is desired. Arrange interior oven racks, place food in oven and close oven door. 2. Turn the selector control knob to Conv Roast. A beep will flash. 3. The indicator light will not start rotating. CONVECTION...
Use and Care Manual
Page 22
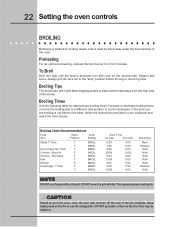
... Setting the oven controls BROILING Broiling is not listed in the table, follow the instructions provided in your cookbook and watch the item closely. Preheating For an optimum browning, preheat the broil burner for doneness. Broiling Table Recommendations Food Item Rack Position Knob Setting Steak 1" thick 7 7 Pork Chops 3/4" thick 7 Chicken - DO NOT put water or flour on the fire or use the pan without its grid. turn off...
... Setting the oven controls BROILING Broiling is not listed in the table, follow the instructions provided in your cookbook and watch the item closely. Preheating For an optimum browning, preheat the broil burner for doneness. Broiling Table Recommendations Food Item Rack Position Knob Setting Steak 1" thick 7 7 Pork Chops 3/4" thick 7 Chicken - DO NOT put water or flour on the fire or use the pan without its grid. turn off...

Use and Care Manual
Page 23
... Broil. To set the oven to the Off position. Then place the food on the rack. DO NOT cover the broiler insert with foil. The indicator light will remain on until the Selector or Temperature knob is turned to broil 1. Broiler Clean-Up Tips: To make cleaning easier, line the bottom of the oven broiler. Soak the pan in HOT, soapy water. Clean the broiler pan as soon as cooking is extremely hot. If necessary, use the broil pan...
... Broil. To set the oven to the Off position. Then place the food on the rack. DO NOT cover the broiler insert with foil. The indicator light will remain on until the Selector or Temperature knob is turned to broil 1. Broiler Clean-Up Tips: To make cleaning easier, line the bottom of the oven broiler. Soak the pan in HOT, soapy water. Clean the broiler pan as soon as cooking is extremely hot. If necessary, use the broil pan...
Use and Care Manual
Page 26
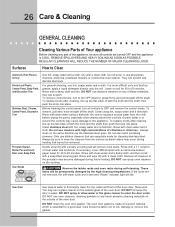
... or the glass cleaner to OFF and remove the control knobs. 26 Care & Cleaning GENERAL CLEANING Surfaces Cleaning Various Parts of Your appliance Before cleaning any part of the appliance, be sure all controls are not removed, the self-clean cycle won't start and "Racks" indicator light will lite. Before cleaning the control panel, turn to squeeze excess water from the surface as the stainless steel grain. DO NOT immerse the door in or around the controls. Clean using a dishcloth...
... or the glass cleaner to OFF and remove the control knobs. 26 Care & Cleaning GENERAL CLEANING Surfaces Cleaning Various Parts of Your appliance Before cleaning any part of the appliance, be sure all controls are not removed, the self-clean cycle won't start and "Racks" indicator light will lite. Before cleaning the control panel, turn to squeeze excess water from the surface as the stainless steel grain. DO NOT immerse the door in or around the controls. Clean using a dishcloth...
Use and Care Manual
Page 31
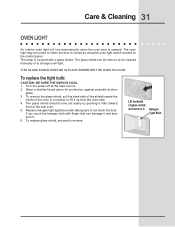
... WHENEVER THE OVEN IS IN USE. Wear a leather-faced glove for protection against possible broken glass. 3. The oven light may be cleaned manually or to change oven light. Turn the power off at the main source. 2. To remove the glass shield, pull the back side of the shield toward front of glass shield and remove it . 6. Halogen Light Bulb Care & Cleaning 31 OVEN LIGHT An interior oven light will turn automatically when the oven door is covered with...
... WHENEVER THE OVEN IS IN USE. Wear a leather-faced glove for protection against possible broken glass. 3. The oven light may be cleaned manually or to change oven light. Turn the power off at the main source. 2. To remove the glass shield, pull the back side of the shield toward front of glass shield and remove it . 6. Halogen Light Bulb Care & Cleaning 31 OVEN LIGHT An interior oven light will turn automatically when the oven door is covered with...
Use and Care Manual
Page 32
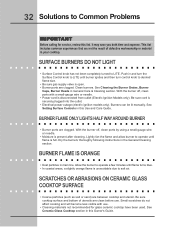
... disconnected from outlet (Electric Ignition Models only). Be sure cooktop surface and bottom of defective workmanship or material in this Use and Care Guide. Push in and turn control knob to LITE until flame is securely plugged into the outlet. • Electrical power outage (electric ignition models only). Lightly fan the flame and allow burner to operate until burner ignites and then turn the Surface Control knob to desired flame size. • Be sure gas supply valve is present after cleaning. Be sure cord is full.
... disconnected from outlet (Electric Ignition Models only). Be sure cooktop surface and bottom of defective workmanship or material in this Use and Care Guide. Push in and turn control knob to LITE until flame is securely plugged into the outlet. • Electrical power outage (electric ignition models only). Lightly fan the flame and allow burner to operate until burner ignites and then turn the Surface Control knob to desired flame size. • Be sure gas supply valve is present after cleaning. Be sure cord is full.
Use and Care Manual
Page 33
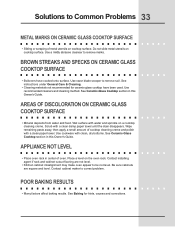
... Ceramic-Glass Cooktop section in center of oven. Do not slide metal utensils on the oven rack. Contact cabinet maker to remove soil. See Baking for ceramic-glass cooktop have cooked onto surface. Wipe remaining paste away, then apply a small amount of metal utensils on a cooktop cleaning creme. Use a mildly abrasive cleanser to be not level. APPLIANCE NOT LEVEL • Place oven rack in this Owner's Guide. Be sure cabinets are not level. • Kitchen...
... Ceramic-Glass Cooktop section in center of oven. Do not slide metal utensils on the oven rack. Contact cabinet maker to remove soil. See Baking for ceramic-glass cooktop have cooked onto surface. Wipe remaining paste away, then apply a small amount of metal utensils on a cooktop cleaning creme. Use a mildly abrasive cleanser to be not level. APPLIANCE NOT LEVEL • Place oven rack in this Owner's Guide. Be sure cabinets are not level. • Kitchen...
Use and Care Manual
Page 34
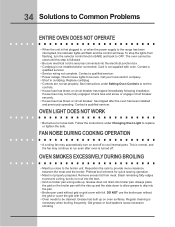
... the power supply to the range has been interrupted, the indicator lights will flash and the control will beep. House fuse may automatically turn the selector control knob to BAKE and back to OFF. Always place the grid on oven surfaces. FAN NOISE DURING COOKING OPERATION • A cooling fan may not be cleaned. Slash remaining fatty edges to prevent curling, but do not cut into broiler pan. Follow the instructions under Setting Oven Controls to set...
... the power supply to the range has been interrupted, the indicator lights will flash and the control will beep. House fuse may automatically turn the selector control knob to BAKE and back to OFF. Always place the grid on oven surfaces. FAN NOISE DURING COOKING OPERATION • A cooling fan may not be cleaned. Slash remaining fatty edges to prevent curling, but do not cut into broiler pan. Follow the instructions under Setting Oven Controls to set...

Use and Care Manual
Page 35
... excessive spillovers. Do not clean the oven door gasket or it will be damaged. Solutions to Common Problems 35 SELF-CLEANING CYCLE DOES NOT WORK • Make sure the oven door is normal, especially for high oven temperatures, pie spillovers or for the light to hand clean oven frame and door liner outside the oven door gasket before starting the self-clean cycle. FLAMES INSIDE OVEN OR SMOKE FROM VENT • Excessive spillovers...
... excessive spillovers. Do not clean the oven door gasket or it will be damaged. Solutions to Common Problems 35 SELF-CLEANING CYCLE DOES NOT WORK • Make sure the oven door is normal, especially for high oven temperatures, pie spillovers or for the light to hand clean oven frame and door liner outside the oven door gasket before starting the self-clean cycle. FLAMES INSIDE OVEN OR SMOKE FROM VENT • Excessive spillovers...
Use and Care Manual
Page 36
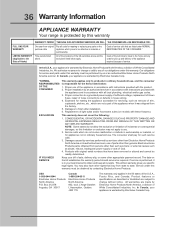
..., misuse, inadequate power supply or acts of our obligations under NORMAL RESPOSIBLITIES OF THE CONSUMER.* Time periods listed above and the exclusions listed below : 1. We authorize no person to change without notice. This written warranty gives you . 2. All of the provisions of light bulbs and/or fluorescent tubes (on the bill establishes the warranty period should service be obtained by Electrolux Canada Corp...
..., misuse, inadequate power supply or acts of our obligations under NORMAL RESPOSIBLITIES OF THE CONSUMER.* Time periods listed above and the exclusions listed below : 1. We authorize no person to change without notice. This written warranty gives you . 2. All of the provisions of light bulbs and/or fluorescent tubes (on the bill establishes the warranty period should service be obtained by Electrolux Canada Corp...


