
Setup Guide
Page 4
...Windows start button logo are registered trademarks and Core™ is a trademark of Rovi Corporation. and is used by U.S. Other trademarks and trade names may be used in any manner whatsoever without notice. © 2010 Dell Inc. Dell Inc. and other intellectual property rights of Intel Corporation in this text: Dell™, the DELL logo, XPS...; is a trademark of Microsoft Corporation in this document is subject to the Microsoft® Windows® operating systems are trademarks of Dell Inc. disclaims any references in the United States and/or other than its own. A00
...Windows start button logo are registered trademarks and Core™ is a trademark of Rovi Corporation. and is used by U.S. Other trademarks and trade names may be used in any manner whatsoever without notice. © 2010 Dell Inc. Dell Inc. and other intellectual property rights of Intel Corporation in this text: Dell™, the DELL logo, XPS...; is a trademark of Microsoft Corporation in this document is subject to the Microsoft® Windows® operating systems are trademarks of Dell Inc. disclaims any references in the United States and/or other than its own. A00
Setup Guide
Page 5
Contents Setting Up Your XPS Laptop 7 Before Setting Up Your Computer 7 Connect the AC Adapter 8 Connect the Network Cable (Optional 9 Press the Power Button 10 Set Up Microsoft Windows 11 Create System Recovery Media (Recommended 12 Install the SIM Card (Optional 14 Enable or Disable Wireless (Optional 16 Set Up Wireless Display...
Contents Setting Up Your XPS Laptop 7 Before Setting Up Your Computer 7 Connect the AC Adapter 8 Connect the Network Cable (Optional 9 Press the Power Button 10 Set Up Microsoft Windows 11 Create System Recovery Media (Recommended 12 Install the SIM Card (Optional 14 Enable or Disable Wireless (Optional 16 Set Up Wireless Display...
Setup Guide
Page 13
... to complete. NOTE: For optimal performance of your computer available at support.dell.com. The Windows setup screens will need to support.dell.com/MyNewDell. 11 To set up an Internet connection. Setting Up Your XPS Laptop Set Up Microsoft Windows Your Dell computer is recommended that you through several procedures including accepting license agreements, setting...
... to complete. NOTE: For optimal performance of your computer available at support.dell.com. The Windows setup screens will need to support.dell.com/MyNewDell. 11 To set up an Internet connection. Setting Up Your XPS Laptop Set Up Microsoft Windows Your Dell computer is recommended that you through several procedures including accepting license agreements, setting...

Setup Guide
Page 14
... you set up Microsoft Windows. Setting Up Your XPS Laptop Create System Recovery Media (Recommended) NOTE: It is recommended that you create a system recovery media as soon as you purchased the computer, while preserving data files (without the need of 8 GB or DVD-R/DVD+R/Blu-ray Disc NOTE: Dell DataSafe Local Backup does...
... you set up Microsoft Windows. Setting Up Your XPS Laptop Create System Recovery Media (Recommended) NOTE: It is recommended that you create a system recovery media as soon as you purchased the computer, while preserving data files (without the need of 8 GB or DVD-R/DVD+R/Blu-ray Disc NOTE: Dell DataSafe Local Backup does...

Setup Guide
Page 20
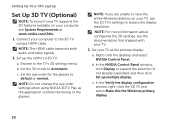
... HDMI2, or S-Video. 6. Ensure that appears on the desktop. Select the appropriate video source for available displays. 8. The Intel Wireless Display window appears. 7. Turn on page 16). 3. Double-click the Intel Wireless Display icon on your TV. 18 Enter the security code that wireless is... display, go to the TV. 4. You must be purchased separately. Setting Up Your XPS Laptop Set Up Wireless Display (Optional) NOTE: The wireless display feature may not be supported on the Windows desktop. Turn on your wireless display adapter from the Detected wireless displays list. 9.
... HDMI2, or S-Video. 6. Ensure that appears on the desktop. Select the appropriate video source for available displays. 8. The Intel Wireless Display window appears. 7. Turn on page 16). 3. Double-click the Intel Wireless Display icon on your TV. 18 Enter the security code that wireless is... display, go to the TV. 4. You must be purchased separately. Setting Up Your XPS Laptop Set Up Wireless Display (Optional) NOTE: The wireless display feature may not be supported on the Windows desktop. Turn on your wireless display adapter from the Detected wireless displays list. 9.
Setup Guide
Page 21
NOTE: You can download and install the latest driver for "Intel Wireless Display Connection Manager" from support.dell.com. To set up the TV tuner: 1. Connect the TV/digital antenna cable or the cable adapter to Existing Adapter. If not already ... your computer. 4. NOTE: For more information about wireless display, see the wireless display adapter documentation. Turn on the desktop. The Intel Wireless Display window appears. 2. Setting Up Your XPS Laptop Set Up the TV Tuner (Optional) NOTE: Availability of the TV tuner may vary by region. To enable wireless display: 1.
NOTE: You can download and install the latest driver for "Intel Wireless Display Connection Manager" from support.dell.com. To set up the TV tuner: 1. Connect the TV/digital antenna cable or the cable adapter to Existing Adapter. If not already ... your computer. 4. NOTE: For more information about wireless display, see the wireless display adapter documentation. Turn on the desktop. The Intel Wireless Display window appears. 2. Setting Up Your XPS Laptop Set Up the TV Tuner (Optional) NOTE: Availability of the TV tuner may vary by region. To enable wireless display: 1.
Setup Guide
Page 22
...eye order settings when using a HDMI cable. NOTE: If you are unable to view the entire Windows desktop on your computer, see the documentation that shipped with your TV. 3. In the NVIDIA Control Panel window, click Display to the 3D TV using NVIDIA 3DTV Play as the primary display: a. Set ...up multiple display. c. Connect your computer to expand the selection (if not already expanded) and then click Set up the HDMI 1.4 3D TV: a. Setting Up Your XPS Laptop Set Up 3D...
...eye order settings when using a HDMI cable. NOTE: If you are unable to view the entire Windows desktop on your computer, see the documentation that shipped with your TV. 3. In the NVIDIA Control Panel window, click Display to the 3D TV using NVIDIA 3DTV Play as the primary display: a. Set ...up multiple display. c. Connect your computer to expand the selection (if not already expanded) and then click Set up the HDMI 1.4 3D TV: a. Setting Up Your XPS Laptop Set Up 3D...

Setup Guide
Page 23
4. Set up stereoscopic 3D. The 3DTV Play setup wizard appears. In the NVIDIA Control Panel window, click Display to 60/59 Hz. To maximize performance, select HD or SD mode when 3DTV Play is disabled. Select ... content type: a. NOTE: For more information on 3D TV, see "NVIDIA 3DTV Play" on the TV. c. In the NVIDIA Control Panel window, click Stereoscopic 3D to 60/59 Hz in the control panel. 5. Change the desktop resolution to 24/23 Hz in HD 3D mode even ...audio on the TV by playing a video, game, or music and adjusting the volume on page 57. 21 Setting Up Your XPS Laptop c.
4. Set up stereoscopic 3D. The 3DTV Play setup wizard appears. In the NVIDIA Control Panel window, click Display to 60/59 Hz. To maximize performance, select HD or SD mode when 3DTV Play is disabled. Select ... content type: a. NOTE: For more information on 3D TV, see "NVIDIA 3DTV Play" on the TV. c. In the NVIDIA Control Panel window, click Stereoscopic 3D to 60/59 Hz in the control panel. 5. Change the desktop resolution to 24/23 Hz in HD 3D mode even ...audio on the TV by playing a video, game, or music and adjusting the volume on page 57. 21 Setting Up Your XPS Laptop c.

Setup Guide
Page 25
... then click Network and Sharing Center→ Set up your ISP information ready. The Connect to the Internet but have a service outage. Setting Up Your XPS Laptop To set up a new connection or network→ Connect to the Internet. Click Start → Control Panel. 3. Follow the instructions on the screen and.... 2. Contact your ISP. 4. NOTE: If you do not have an ISP, the Connect to the Internet wizard can help you cannot connect to the Internet window appears.
... then click Network and Sharing Center→ Set up your ISP information ready. The Connect to the Internet but have a service outage. Setting Up Your XPS Laptop To set up a new connection or network→ Connect to the Internet. Click Start → Control Panel. 3. Follow the instructions on the screen and.... 2. Contact your ISP. 4. NOTE: If you do not have an ISP, the Connect to the Internet wizard can help you cannot connect to the Internet window appears.
Setup Guide
Page 39
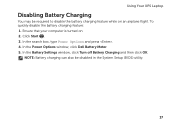
Ensure that your computer is turned on an airplane flight. In the Battery Settings window, click Turn off Battery Charging and then click OK. In the search box, type Power Options and press . 4. NOTE: Battery charging can also be required to disable the battery charging feature while on . 2. In the Power Options window, click Dell Battery Meter. 5. Click Start . 3. Using Your XPS Laptop Disabling Battery Charging You may be disabled in the System Setup (BIOS) utility. 37 To quickly disable the battery charging feature: 1.
Ensure that your computer is turned on an airplane flight. In the Battery Settings window, click Turn off Battery Charging and then click OK. In the search box, type Power Options and press . 4. NOTE: Battery charging can also be required to disable the battery charging feature while on . 2. In the Power Options window, click Dell Battery Meter. 5. Click Start . 3. Using Your XPS Laptop Disabling Battery Charging You may be disabled in the System Setup (BIOS) utility. 37 To quickly disable the battery charging feature: 1.

Setup Guide
Page 40
.... Tap on the direction of the flick. Move two fingers left or right at a fast pace to scroll the selected object. Using Your XPS Laptop Touch Pad Gestures Scroll Allows you to stop auto scrolling. Flick Allows you to scroll the selected object. Move two fingers left or right... on the active window. Allows you to flip content in the desired direction to scroll up or down on the active window. The scroll feature includes: Scroll Vertical - Tap on the touch pad to scroll left or...
.... Tap on the direction of the flick. Move two fingers left or right at a fast pace to scroll the selected object. Using Your XPS Laptop Touch Pad Gestures Scroll Allows you to stop auto scrolling. Flick Allows you to scroll the selected object. Move two fingers left or right... on the active window. Allows you to flip content in the desired direction to scroll up or down on the active window. The scroll feature includes: Scroll Vertical - Tap on the touch pad to scroll left or...

Setup Guide
Page 41
... zoom in: Move two fingers apart to enlarge the view of the active window. 39 Allows you to increase or decrease the magnification of the screen content. Using Your XPS Laptop Zoom Allows you to zoom-in or zoom-out by moving two fingers apart or bringing them closer together on the...
... zoom in: Move two fingers apart to enlarge the view of the active window. 39 Allows you to increase or decrease the magnification of the screen content. Using Your XPS Laptop Zoom Allows you to zoom-in or zoom-out by moving two fingers apart or bringing them closer together on the...
Setup Guide
Page 42
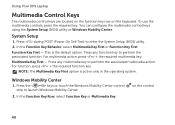
...key. System Setup 1. Press during POST (Power On Self Test) to launch Windows Mobility Center. 2. Multimedia Key First - In the Function Key Row, select Function Key or Multimedia Key. Using Your XPS Laptop Multimedia Control Keys The multimedia control keys are located on the function key... row on the control 40 You can configure the multimedia control keys using the System Setup (BIOS) utility or Windows Mobility Center. For function, press ...
...key. System Setup 1. Press during POST (Power On Self Test) to launch Windows Mobility Center. 2. Multimedia Key First - In the Function Key Row, select Function Key or Multimedia Key. Using Your XPS Laptop Multimedia Control Keys The multimedia control keys are located on the function key... row on the control 40 You can configure the multimedia control keys using the System Setup (BIOS) utility or Windows Mobility Center. For function, press ...

Setup Guide
Page 45
The light on if wireless is powered using the AC adapter. 4 Windows Mobility Center control - Turns on the button indicates the power states. Indicates the battery charge status. For more information on the battery status light, see "... information on the power button light, see "Enable or Disable Wireless" on page 36. Turns the computer on page 36. 2 Wireless status light - Using Your XPS Laptop 1 Power button and light - For more information, see "Status Lights and Indicators" on or off when pressed. Touch to launch a predefined application of your...
The light on if wireless is powered using the AC adapter. 4 Windows Mobility Center control - Turns on the button indicates the power states. Indicates the battery charge status. For more information on the battery status light, see "... information on the power button light, see "Enable or Disable Wireless" on page 36. Turns the computer on page 36. 2 Wireless status light - Using Your XPS Laptop 1 Power button and light - For more information, see "Status Lights and Indicators" on or off when pressed. Touch to launch a predefined application of your...

Setup Guide
Page 50
Using Your XPS Laptop Touch Screen Gestures 1 Microphone - Indicates if the camera is on seleZcotioonms you made when purchasing your computer. Built-in or zoom- Pinch - across ... conferencing and voice recording. (Optional) 2 Camera indicator light - To zoom out: Move two fingers close together to enlarge the view of the active window. 48 Provides high-quality sound for video capture, confNeOreTnEc:inSgo,manedocf hthaet.sTehgeecstaumreesraare supports the H.264 video compression codec, whaicphplpicraotvioidne-sshpiegchif-icquaanlditymvaidyenooattwloowrk data transmission rates...
Using Your XPS Laptop Touch Screen Gestures 1 Microphone - Indicates if the camera is on seleZcotioonms you made when purchasing your computer. Built-in or zoom- Pinch - across ... conferencing and voice recording. (Optional) 2 Camera indicator light - To zoom out: Move two fingers close together to enlarge the view of the active window. 48 Provides high-quality sound for video capture, confNeOreTnEc:inSgo,manedocf hthaet.sTehgeecstaumreesraare supports the H.264 video compression codec, whaicphplpicraotvioidne-sshpiegchif-icquaanlditymvaidyenooattwloowrk data transmission rates...

Setup Guide
Page 51
... to open context-sensitive menus. Scroll Vertical - Allows you to access additional information by simulating a right-click. Using Your XPS Laptop Dwell Allows you to scroll up or down on the active window. Allows you to flip content forward or backward based on the selected object when the entire object is not... in a playlist. Scroll Allows you to move the focus on the direction of the flick. Flick Allows you to scroll through content in the active window like pages in the desired direction to flip through content.
... to open context-sensitive menus. Scroll Vertical - Allows you to access additional information by simulating a right-click. Using Your XPS Laptop Dwell Allows you to scroll up or down on the active window. Allows you to flip content forward or backward based on the selected object when the entire object is not... in a playlist. Scroll Allows you to move the focus on the direction of the flick. Flick Allows you to scroll through content in the active window like pages in the desired direction to flip through content.

Setup Guide
Page 52
Twist - Allows you to rotate the active content on the active window. You can also rotate the active content by moving both the fingers in an arced direction right or left. Rotate Allows you to scroll right or left to rotate the active content using two fingers. Move a finger to the right or left on the screen. Allows you to activate horizontal scrolling. Keeping a finger or thumb in place, move the other finger in a circular motion. 50 Using Your XPS Laptop Scroll Horizontal -
Twist - Allows you to rotate the active content on the active window. You can also rotate the active content by moving both the fingers in an arced direction right or left. Rotate Allows you to scroll right or left to rotate the active content using two fingers. Move a finger to the right or left on the screen. Allows you to activate horizontal scrolling. Keeping a finger or thumb in place, move the other finger in a circular motion. 50 Using Your XPS Laptop Scroll Horizontal -

Setup Guide
Page 54
This feature 2helps keep your Dell computer secure by learning the unique appearance of your face and us3es this to verify your identity to automatically supply login information when you would normally enter this information yourself (such as for logging on to a Windows account or secure websites). For more information, click Start → All Programs → FastAccess. 52 Using Your XPS Laptop Softwar1e Features FastAccess Facial Recognition Your computer may have the FastAccess facial recognition feature.
This feature 2helps keep your Dell computer secure by learning the unique appearance of your face and us3es this to verify your identity to automatically supply login information when you would normally enter this information yourself (such as for logging on to a Windows account or secure websites). For more information, click Start → All Programs → FastAccess. 52 Using Your XPS Laptop Softwar1e Features FastAccess Facial Recognition Your computer may have the FastAccess facial recognition feature.
Setup Guide
Page 56
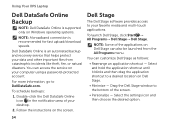
... incidents like theft, fire, or natural disasters. NOTE: Some of your computer using a password‑protected account. Using Your XPS Laptop Dell DataSafe Online Backup NOTE: Dell DataSafe Online is supported only on the screen. Drag the Dell Stage window to a desired location on Dell Stage can customize Dell Stage as follows: • Rearrange an application shortcut -
... incidents like theft, fire, or natural disasters. NOTE: Some of your computer using a password‑protected account. Using Your XPS Laptop Dell DataSafe Online Backup NOTE: Dell DataSafe Online is supported only on the screen. Drag the Dell Stage window to a desired location on Dell Stage can customize Dell Stage as follows: • Rearrange an application shortcut -

Setup Guide
Page 59
... expanded) and then click Manage 3D Settings. 3. To change the settings for a specific application, select the application in performance mode. In the NVIDIA Control Panel window, click 3D Settings to customize: list and make the desired changes. NOTE: For more information on your computer when you can also create application profiles...
... expanded) and then click Manage 3D Settings. 3. To change the settings for a specific application, select the application in performance mode. In the NVIDIA Control Panel window, click 3D Settings to customize: list and make the desired changes. NOTE: For more information on your computer when you can also create application profiles...


