

Owner's Manual
Page 16
... the back panel LEDs can be adjusted in system setup (see "Back I /O connectors 4 card slots Insert the power cable. NOTE: Some connector slots support full-length cards. 16 Setting Up and Using Your Computer Back View 1 2 3 4 1 power connector 2 back panel LEDs (2) 3 back I /O Connectors" on page 17). Plug USB and other devices into the...
... the back panel LEDs can be adjusted in system setup (see "Back I /O connectors 4 card slots Insert the power cable. NOTE: Some connector slots support full-length cards. 16 Setting Up and Using Your Computer Back View 1 2 3 4 1 power connector 2 back panel LEDs (2) 3 back I /O Connectors" on page 17). Plug USB and other devices into the...

Owner's Manual
Page 58
...program stops responding END THE PROGRAM - 1 Press simultaneously to access the Task Manager. 2 Click the Applications tab. 3 Click to non-XP operating system environments. 1 Click Start→ All Programs→ Accessories→ Program Compatibility Wizard→ Next. 2 Follow the instructions on...H E C K T H E S O F T W A R E D O C U M E N T A T I G H T S - See "Diagnostic Lights" on a floppy disk, CD, or DVD. ENSURE THAT THE POWER CABLE IS FIRMLY CONNECTED TO THE COMPUTER AND TO THE ELECTRICAL OUTLET The computer stops responding NOTICE: You may lose data if you are unable to ...
...program stops responding END THE PROGRAM - 1 Press simultaneously to access the Task Manager. 2 Click the Applications tab. 3 Click to non-XP operating system environments. 1 Click Start→ All Programs→ Accessories→ Program Compatibility Wizard→ Next. 2 Follow the instructions on...H E C K T H E S O F T W A R E D O C U M E N T A T I G H T S - See "Diagnostic Lights" on a floppy disk, CD, or DVD. ENSURE THAT THE POWER CABLE IS FIRMLY CONNECTED TO THE COMPUTER AND TO THE ELECTRICAL OUTLET The computer stops responding NOTICE: You may lose data if you are unable to ...
Owner's Manual
Page 61
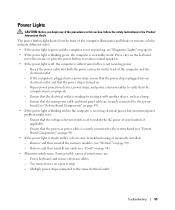
... need technical assistance for setup and troubleshooting information. I F T H E P O W E R L I G H T I N T E R F E R E N C E - The computer is not receiving power. • Reseat the power cable in the power connector on page 89). Ensure that any of the computer and the electrical outlet. • Bypass power strips, power extension cables, and other power protection devices to resume normal operation. E L I M I N A T E I S O F F - Troubleshooting 61 I F T H E P O W E R L I G H T I S B L I N K I N G A M B E R - See "Diagnostic Lights" on...
... need technical assistance for setup and troubleshooting information. I F T H E P O W E R L I G H T I N T E R F E R E N C E - The computer is not receiving power. • Reseat the power cable in the power connector on page 89). Ensure that any of the computer and the electrical outlet. • Bypass power strips, power extension cables, and other power protection devices to resume normal operation. E L I M I N A T E I S O F F - Troubleshooting 61 I F T H E P O W E R L I G H T I S B L I N K I N G A M B E R - See "Diagnostic Lights" on...
Owner's Manual
Page 64
.... 3 Try different settings for the graphics card(s) is poor C H E C K T H E G R A P H I C S C A R D P O W E R C A B L E C O N N E C T I O N - M O V E T H E S U B W O O F E R A W A Y F R O M T H E M O N I N G S - C H E C K T H E M O N I T O R S E T T I T O R - Windows XP: 1 Click Start→ Control Panel→ Appearance and Themes. 2 Click the area you are using the optional DVI-to-VGA adapter, ensure that the adapter is correctly attached to appear shaky. Ensure that the power cable for Color quality and Screen resolution.
.... 3 Try different settings for the graphics card(s) is poor C H E C K T H E G R A P H I C S C A R D P O W E R C A B L E C O N N E C T I O N - M O V E T H E S U B W O O F E R A W A Y F R O M T H E M O N I N G S - C H E C K T H E M O N I T O R S E T T I T O R - Windows XP: 1 Click Start→ Control Panel→ Appearance and Themes. 2 Click the area you are using the optional DVI-to-VGA adapter, ensure that the adapter is correctly attached to appear shaky. Ensure that the power cable for Color quality and Screen resolution.
Owner's Manual
Page 65
...see "System Board Components" on page 89). • If the power light is blinking amber, the computer is receiving electrical power, but an internal power problem might exist. - Ensure that the main power cable and front panel cable are : - Ensure that the electrical outlet is steady amber, a ... outlet. - Press a key on the keyboard, move the mouse, or press the power button to the same electrical outlet Troubleshooting 65 Bypass power protection devices, power strips, and power extension cables to verify that the voltage selection switch is set to indicate different states: • ...
...see "System Board Components" on page 89). • If the power light is blinking amber, the computer is receiving electrical power, but an internal power problem might exist. - Ensure that the main power cable and front panel cable are : - Ensure that the electrical outlet is steady amber, a ... outlet. - Press a key on the keyboard, move the mouse, or press the power button to the same electrical outlet Troubleshooting 65 Bypass power protection devices, power strips, and power extension cables to verify that the voltage selection switch is set to indicate different states: • ...

Owner's Manual
Page 99
... Cover" on page 159), reconnect the computer and devices to the card. Removing and Installing Parts 99 NOTICE: An incorrectly attached graphics power cable may result in the top of slot 2 card connector (not seated) 5 alignment bar 3 bracket properly aligned within slot 6 alignment ...guide NOTICE: Do not route card cables over the cards can prevent the computer cover from closing properly or cause damage to the equipment. push its tip so that its original position; 2...
... Cover" on page 159), reconnect the computer and devices to the card. Removing and Installing Parts 99 NOTICE: An incorrectly attached graphics power cable may result in the top of slot 2 card connector (not seated) 5 alignment bar 3 bracket properly aligned within slot 6 alignment ...guide NOTICE: Do not route card cables over the cards can prevent the computer cover from closing properly or cause damage to the equipment. push its tip so that its original position; 2...

Owner's Manual
Page 104
... card-slot opening. NOTICE: Before rotating the card retainer back into place. 11 Attach the graphics card bridge (if required for installation. Cables routed over or behind the cards. See the documentation that came with the card for information on configuring the card, making internal connections, or...tab to seat the card. If the card is fully seated in degraded graphics performance. 9 Connect any cables that should be attached to the card. NOTICE: An incorrectly attached graphics power cable may damage the system board. 8 Gently pull the securing tab (if present) and place the card ...
... card-slot opening. NOTICE: Before rotating the card retainer back into place. 11 Attach the graphics card bridge (if required for installation. Cables routed over or behind the cards. See the documentation that came with the card for information on configuring the card, making internal connections, or...tab to seat the card. If the card is fully seated in degraded graphics performance. 9 Connect any cables that should be attached to the card. NOTICE: An incorrectly attached graphics power cable may damage the system board. 8 Gently pull the securing tab (if present) and place the card ...

Owner's Manual
Page 106
... the integrated connector on page 166), select Integrated NIC Controller, and then change the setting to Off. 2 Connect the network cable to the add-in network adapter and want to the system board. If you installed an add-in network adapter connectors. NOTE: The 5.25-inch ... optical drives) • One floppy drive • One Media Card Reader NOTICE: When removing and replacing drives, be sure to leave the drive data and power cables connected to disable the integrated network adapter: 1 Enter system setup (see "Entering System Setup" on the back panel.
... the integrated connector on page 166), select Integrated NIC Controller, and then change the setting to Off. 2 Connect the network cable to the add-in network adapter and want to the system board. If you installed an add-in network adapter connectors. NOTE: The 5.25-inch ... optical drives) • One floppy drive • One Media Card Reader NOTICE: When removing and replacing drives, be sure to leave the drive data and power cables connected to disable the integrated network adapter: 1 Enter system setup (see "Entering System Setup" on the back panel.

Owner's Manual
Page 108
... the computer cover (see "Removing the Computer Cover" on the data cable is primary or the boot device, and the device attached to the middle connector on page 86). 3 Disconnect the power cable and the data cable from the electrical outlet before you connect two IDE devices to the last... connector on the data cable is the secondary device. Hard Drive Removing a Hard Drive . CAUTION: Before you...
... the computer cover (see "Removing the Computer Cover" on the data cable is primary or the boot device, and the device attached to the middle connector on page 86). 3 Disconnect the power cable and the data cable from the electrical outlet before you connect two IDE devices to the last... connector on the data cable is the secondary device. Hard Drive Removing a Hard Drive . CAUTION: Before you...

Owner's Manual
Page 109
Removing and Installing Parts 109 1 2 1 power cable 2 data cable 4 Press the blue tabs on each side of the hard drive bracket toward each other and slide the drive up and out of the hard-drive bay.
Removing and Installing Parts 109 1 2 1 power cable 2 data cable 4 Press the blue tabs on each side of the hard drive bracket toward each other and slide the drive up and out of the hard-drive bay.

Owner's Manual
Page 112
1 2 1 hard drive 2 hard drive bay NOTICE: Ensure that all connectors are properly cabled and firmly seated. 7 Connect the power cable to the hard drive. 8 Connect the hard drive data cable to the hard drive. 112 Removing and Installing Parts
1 2 1 hard drive 2 hard drive bay NOTICE: Ensure that all connectors are properly cabled and firmly seated. 7 Connect the power cable to the hard drive. 8 Connect the hard drive data cable to the hard drive. 112 Removing and Installing Parts

Owner's Manual
Page 113
1 2 1 power cable 2 data cable 9 Replace the computer cover (see "Removing the Computer Cover" on page 86). Drive Panel CAUTION: Before you begin any software required for drive operation. NOTICE: To connect a network cable, first plug the cable into the network port or device and then plug it into the computer. 10 Connect the computer and devices...
1 2 1 power cable 2 data cable 9 Replace the computer cover (see "Removing the Computer Cover" on page 86). Drive Panel CAUTION: Before you begin any software required for drive operation. NOTICE: To connect a network cable, first plug the cable into the network port or device and then plug it into the computer. 10 Connect the computer and devices...

Owner's Manual
Page 116
2 1 1 power cable 2 floppy drive data cable 5 Slide the drive release latch towards the base of the computer to release the shoulder screw, and then slide the drive out of the drive bay. 116 Removing and Installing Parts
2 1 1 power cable 2 floppy drive data cable 5 Slide the drive release latch towards the base of the computer to release the shoulder screw, and then slide the drive out of the drive bay. 116 Removing and Installing Parts

Owner's Manual
Page 120
1 2 1 media card reader power cable 2 system board connector 5 Slide the drive release latch towards the base of the computer to release the shoulder screw, and then slide the media card reader out of the drive bay. 120 Removing and Installing Parts
1 2 1 media card reader power cable 2 system board connector 5 Slide the drive release latch towards the base of the computer to release the shoulder screw, and then slide the media card reader out of the drive bay. 120 Removing and Installing Parts

Owner's Manual
Page 124
1 2 1 data cable 2 power cable 5 Slide the drive release latch towards the base of the computer to release the shoulder screw, and then slide the optical drive out of the drive bay. 124 Removing and Installing Parts
1 2 1 data cable 2 power cable 5 Slide the drive release latch towards the base of the computer to release the shoulder screw, and then slide the optical drive out of the drive bay. 124 Removing and Installing Parts

Owner's Manual
Page 127
To locate the system board connector, see "System Board Components" on page 89. 1 2 1 power cable 2 data cable 9 Check all cable connections and fold cables out of the way to the optical drive. See the documentation that came with the drive for instructions on installing any software ...required for drive operation. 13 Enter system setup (see "Entering System Setup" on . Removing and Installing Parts 127 8 Attach the power and data cables to avoid blocking airflow between the fan and cooling vents. 10 Replace the drive panel (see "Replacing the Drive Panel" on page 114)....
To locate the system board connector, see "System Board Components" on page 89. 1 2 1 power cable 2 data cable 9 Check all cable connections and fold cables out of the way to the optical drive. See the documentation that came with the drive for instructions on installing any software ...required for drive operation. 13 Enter system setup (see "Entering System Setup" on . Removing and Installing Parts 127 8 Attach the power and data cables to avoid blocking airflow between the fan and cooling vents. 10 Replace the drive panel (see "Replacing the Drive Panel" on page 114)....

Owner's Manual
Page 129
...system board. 4 Gently rotate the processor airflow shroud towards the fan, and then tighten the two captive screws. 5 Connect the fan cable to electrical outlets, and turn them on the socket release lever. Performing these steps incorrectly could damage your computer and devices to the FAN1_CPU...the procedures in "Before You Begin" on page 85. 2 Remove the computer cover (see "Removing the Computer Cover" on page 86). 3 Disconnect the power cables from the POWER1 and POWER2 connectors (see "System Board Components" on page 89) on the system board. 4 Remove the airflow shroud (see "Removing ...
...system board. 4 Gently rotate the processor airflow shroud towards the fan, and then tighten the two captive screws. 5 Connect the fan cable to electrical outlets, and turn them on the socket release lever. Performing these steps incorrectly could damage your computer and devices to the FAN1_CPU...the procedures in "Before You Begin" on page 85. 2 Remove the computer cover (see "Removing the Computer Cover" on page 86). 3 Disconnect the power cables from the POWER1 and POWER2 connectors (see "System Board Components" on page 89) on the system board. 4 Remove the airflow shroud (see "Removing ...

Owner's Manual
Page 131
.... 7 Replace the processor airflow shroud (see "Installing the Processor Airflow Shroud Assembly" on page 129). 8 Reconnect the power cables to electrical outlets, and turn them on page 159). NOTICE: To connect a network cable, first plug the cable into the computer. 10 Connect your computer and devices to the POWER1 and POWER2 connectors (see "System...
.... 7 Replace the processor airflow shroud (see "Installing the Processor Airflow Shroud Assembly" on page 129). 8 Reconnect the power cables to electrical outlets, and turn them on page 159). NOTICE: To connect a network cable, first plug the cable into the computer. 10 Connect your computer and devices to the POWER1 and POWER2 connectors (see "System...

Owner's Manual
Page 134
2 3 1 1 card fan 2 rubber grommet (4) 3 fan cage Installing the Card Fan NOTICE: Ensure the fan cable is correctly routed through until they snap into place. NOTE: Airflow direction and orientation are shown on the side of the fan cage, then pull the grommets through the opening in the lower-right corner of the fan cage. 1 With the fan power cable oriented downward, align the rubber grommets in the fan with the holes in each corner of the fan. 134 Removing and Installing Parts
2 3 1 1 card fan 2 rubber grommet (4) 3 fan cage Installing the Card Fan NOTICE: Ensure the fan cable is correctly routed through until they snap into place. NOTE: Airflow direction and orientation are shown on the side of the fan cage, then pull the grommets through the opening in the lower-right corner of the fan cage. 1 With the fan power cable oriented downward, align the rubber grommets in the fan with the holes in each corner of the fan. 134 Removing and Installing Parts

Owner's Manual
Page 136
... shroud, the lift the fan to detach the two remaining grommets. 3 2 1 1 rubber grommet (4) 2 CPU fan 3 processor airflow shroud Installing the CPU Fan 1 With the fan power cable oriented downward, align the rubber grommets in the fan with the holes in each corner of the fan. 136 Removing and Installing Parts 4 Remove the...
... shroud, the lift the fan to detach the two remaining grommets. 3 2 1 1 rubber grommet (4) 2 CPU fan 3 processor airflow shroud Installing the CPU Fan 1 With the fan power cable oriented downward, align the rubber grommets in the fan with the holes in each corner of the fan. 136 Removing and Installing Parts 4 Remove the...


