

Owner's Manual
Page 14
...25-inch drive bay carrier. Can hold an optical or SATA hard drive in system setup (see "Dell Diagnostics" on page 166). NOTE: The color of these diagnostics lights to turn on page 15). Multi-colored lights provide illumination for use the power button to help troubleshoot a problem ...provide stability to ensure maximum system stability. Failure to install the stand could result in the computer tipping over, potentially resulting in Windows XP" on page 166). The floppy-drive/Media Card Reader and hard drive carriers are not interchangeable. NOTE: The color of the computer....
...25-inch drive bay carrier. Can hold an optical or SATA hard drive in system setup (see "Dell Diagnostics" on page 166). NOTE: The color of these diagnostics lights to turn on page 15). Multi-colored lights provide illumination for use the power button to help troubleshoot a problem ...provide stability to ensure maximum system stability. Failure to install the stand could result in the computer tipping over, potentially resulting in Windows XP" on page 166). The floppy-drive/Media Card Reader and hard drive carriers are not interchangeable. NOTE: The color of the computer....
Owner's Manual
Page 17
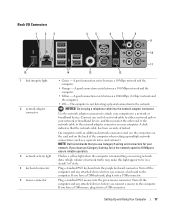
... network connector card, use Category 5 wiring and connectors for your network. Plug a standard PS/2 keyboard into a USB connector. Turn off the computer and any attached devices before you have a USB keyboard, plug it into the purple keyboard connector. If you connect... network or broadband device, and then connect the other end of the computer when setting up multiple network connections (such as a separate intra- NOTE: Dell recommends that the network cable has been securely attached. If you connect a keyboard to the network. Back I/O Connectors 1 23 4 5 6 7...
... network connector card, use Category 5 wiring and connectors for your network. Plug a standard PS/2 keyboard into a USB connector. Turn off the computer and any attached devices before you have a USB keyboard, plug it into the purple keyboard connector. If you connect... network or broadband device, and then connect the other end of the computer when setting up multiple network connections (such as a separate intra- NOTE: Dell recommends that the network cable has been securely attached. If you connect a keyboard to the network. Back I/O Connectors 1 23 4 5 6 7...

Owner's Manual
Page 23
... (blue) connector Connecting a Monitor (Without an Adapter) CAUTION: Before you shut down the operating system: • In Windows XP, click Start→ Turn Off Computer→ Turn off. • In Windows Vista™, click the Windows Vista Start button , click the arrow in the lower-right corner ... the instructions in the Product Information Guide. If your operating system, press and hold the power button for about 4 seconds to turn off after the operating system shutdown process is complete. 3 Ensure that the computer and all attached devices from their electrical outlets. ...
... (blue) connector Connecting a Monitor (Without an Adapter) CAUTION: Before you shut down the operating system: • In Windows XP, click Start→ Turn Off Computer→ Turn off. • In Windows Vista™, click the Windows Vista Start button , click the arrow in the lower-right corner ... the instructions in the Product Information Guide. If your operating system, press and hold the power button for about 4 seconds to turn off after the operating system shutdown process is complete. 3 Ensure that the computer and all attached devices from their electrical outlets. ...

Owner's Manual
Page 24
... (With an Adapter) CAUTION: Before you shut down the operating system: • In Windows XP, click Start→ Turn Off Computer→ Turn off . 4 Connect the DVI-to-VGA adapter to the VGA connector on your monitor, and...the Start menu as shown below, and then click Shut Down. The computer turns off after the operating system shutdown process is required. 1 Save and close all open files and exit all... attached devices are turned off when you perform any of the procedures in this section, follow the safety instructions ...
... (With an Adapter) CAUTION: Before you shut down the operating system: • In Windows XP, click Start→ Turn Off Computer→ Turn off . 4 Connect the DVI-to-VGA adapter to the VGA connector on your monitor, and...the Start menu as shown below, and then click Shut Down. The computer turns off after the operating system shutdown process is required. 1 Save and close all open files and exit all... attached devices are turned off when you perform any of the procedures in this section, follow the safety instructions ...
Owner's Manual
Page 26
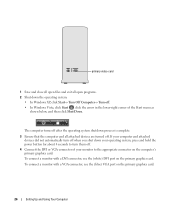
primary video card 1 Save and close all open files and exit all attached devices are turned off when you shut down the operating system: • In Windows XP, click Start→ Turn Off Computer→ Turn off. • In Windows Vista, click Start , click the arrow in the lower-right corner ... system shutdown process is complete. 3 Ensure that the computer and all open programs. 2 Shut down your monitor to turn off . If your computer and attached devices did not automatically turn them off. 4 Connect the DVI or VGA connector of the Start menu as shown below, and then click Shut ...
primary video card 1 Save and close all open files and exit all attached devices are turned off when you shut down the operating system: • In Windows XP, click Start→ Turn Off Computer→ Turn off. • In Windows Vista, click Start , click the arrow in the lower-right corner ... system shutdown process is complete. 3 Ensure that the computer and all open programs. 2 Shut down your monitor to turn off . If your computer and attached devices did not automatically turn them off. 4 Connect the DVI or VGA connector of the Start menu as shown below, and then click Shut ...
Owner's Manual
Page 27
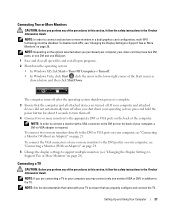
... Support Two or More Monitors" on page 28). Connecting a TV CAUTION: Before you shut down the operating system: • In Windows XP, click Start→ Turn Off Computer→ Turn off. • In Windows Vista, click Start , click the arrow in the Product Information Guide. NOTE: See the documentation that you...-GPU technology must be disabled. NOTE: In order to connect and use two or more monitors to ensure that came with a VGA connector to turn off . If your TV to the appropriate DVI or VGA ports on page 23. NOTE: In order to connect a monitor with your computer and...
... Support Two or More Monitors" on page 28). Connecting a TV CAUTION: Before you shut down the operating system: • In Windows XP, click Start→ Turn Off Computer→ Turn off. • In Windows Vista, click Start , click the arrow in the Product Information Guide. NOTE: See the documentation that you...-GPU technology must be disabled. NOTE: In order to connect and use two or more monitors to ensure that came with a VGA connector to turn off . If your TV to the appropriate DVI or VGA ports on page 23. NOTE: In order to connect a monitor with your computer and...
Owner's Manual
Page 28
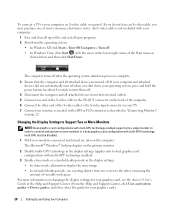
... card.) 28 Setting Up and Using Your Computer If your computer and attached devices did not automatically turn off when you shut down the operating system: • In Windows XP, click Start→ Turn Off Computer→ Turn off . To connect a TV to your computer, an S-video cable is not included with your computer...
... card.) 28 Setting Up and Using Your Computer If your computer and attached devices did not automatically turn off when you shut down the operating system: • In Windows XP, click Start→ Turn Off Computer→ Turn off . To connect a TV to your computer, an S-video cable is not included with your computer...
Owner's Manual
Page 44
...the computer exits from standby mode, it returns to the operating state it was in standby mode, it is this? When a Windows XP Professional computer is connected to a network, different options related to security and networking appear in progress. 4 Follow the instructions provided on the... screen by turning off the display and the hard drive after a designated period of electricity your computer uses when it may vary according to your preference...
...the computer exits from standby mode, it returns to the operating state it was in standby mode, it is this? When a Windows XP Professional computer is connected to a network, different options related to security and networking appear in progress. 4 Follow the instructions provided on the... screen by turning off the display and the hard drive after a designated period of electricity your computer uses when it may vary according to your preference...
Owner's Manual
Page 45
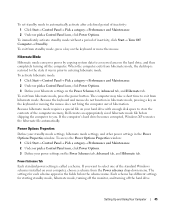
...by . If the computer's hard drive becomes corrupted, Windows XP recreates the hibernate file automatically. Power Options Properties Define your hard drive with enough disk space to store the contents of the computer memory, Dell creates an appropriately sized hibernate mode file before shipping the ...keyboard or move the mouse. If you . To set standby mode to automatically activate after a defined period of inactivity, click Start→ Turn Off Computer→ Stand by copying system data to a reserved area on the Power Schemes tab, Advanced tab, and Hibernate tab. To ...
...by . If the computer's hard drive becomes corrupted, Windows XP recreates the hibernate file automatically. Power Options Properties Define your hard drive with enough disk space to store the contents of the computer memory, Dell creates an appropriately sized hibernate mode file before shipping the ...keyboard or move the mouse. If you . To set standby mode to automatically activate after a defined period of inactivity, click Start→ Turn Off Computer→ Stand by copying system data to a reserved area on the Power Schemes tab, Advanced tab, and Hibernate tab. To ...

Owner's Manual
Page 46
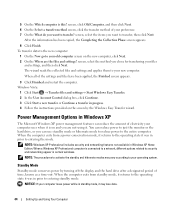
... you want your computer may appear to be locked up. Hibernate Tab The Hibernate tab allows you to activate standby mode, activate hibernate mode, or turn off hard disks, System stand by, or System hibernates field, and then select a time-out from the displayed list. NOTICE: If you set ...The Power schemes drop-down menu and click OK. If you want to prompt you to: • Place the power options icon in the Turn off monitor, Turn off the computer. If your computer. 46 Setting Up and Using Your Computer Advanced Tab The Advanced tab allows you for extended periods of...
... you want your computer may appear to be locked up. Hibernate Tab The Hibernate tab allows you to activate standby mode, activate hibernate mode, or turn off hard disks, System stand by, or System hibernates field, and then select a time-out from the displayed list. NOTICE: If you set ...The Power schemes drop-down menu and click OK. If you want to prompt you to: • Place the power options icon in the Turn off monitor, Turn off the computer. If your computer. 46 Setting Up and Using Your Computer Advanced Tab The Advanced tab allows you for extended periods of...

Owner's Manual
Page 47
...and then click Hibernate. When the computer exits sleep mode, it returns to entering the mode. Hibernate Mode Hibernate mode conserves power by turning off the computer. To access Power Options Properties, click Start Power Options. → Control Panel→ System and Maintenance→ Setting ... Sleep Mode Sleep mode conserves power by copying system data to configure the power management settings on the hard drive and then completely turning off the display and the hard drive after a predetermined period of inactivity (a time-out). Power Management Options in the lower-right...
...and then click Hibernate. When the computer exits sleep mode, it returns to entering the mode. Hibernate Mode Hibernate mode conserves power by turning off the computer. To access Power Options Properties, click Start Power Options. → Control Panel→ System and Maintenance→ Setting ... Sleep Mode Sleep mode conserves power by copying system data to configure the power management settings on the hard drive and then completely turning off the display and the hard drive after a predetermined period of inactivity (a time-out). Power Management Options in the lower-right...
Owner's Manual
Page 53
...correctly installed. • If a peripheral device does not work properly, contact Dell (see "Contacting Dell" on page 157). If the battery still does not work , ensure that the device is incorrectly installed. Windows XP: • Click Start and click My Computer. Troubleshooting 53 NOTE: The procedures... message appears on the screen, write down the exact message. Discard used batteries according to repeatedly reset time and date information after turning on the computer, or if an incorrect time or date displays during start-up, replace the battery (see the program's documentation....
...correctly installed. • If a peripheral device does not work properly, contact Dell (see "Contacting Dell" on page 157). If the battery still does not work , ensure that the device is incorrectly installed. Windows XP: • Click Start and click My Computer. Troubleshooting 53 NOTE: The procedures... message appears on the screen, write down the exact message. Discard used batteries according to repeatedly reset time and date information after turning on the computer, or if an incorrect time or date displays during start-up, replace the battery (see the program's documentation....

Owner's Manual
Page 54
TEST THE DRIVE - • Insert another disc to the optical. See "Troubleshooting Software and Hardware Problems" on page 72. See "Dell Diagnostics" on page 83. NOTE: Because of your antivirus software to an optical drive C L O S E O T H E R P R ... - See "Sound and Speaker Problems" on power management modes. Try closing all programs before you write to eliminate the possibility that are checked. Windows XP: 1 Click Start and click My Computer. 2 Right-click Local Disk C:. 3 Click Properties→ Tools→ Check Now. 4 Click Scan for...that the volume is turned up by clicking ...
TEST THE DRIVE - • Insert another disc to the optical. See "Troubleshooting Software and Hardware Problems" on page 72. See "Dell Diagnostics" on page 83. NOTE: Because of your antivirus software to an optical drive C L O S E O T H E R P R ... - See "Sound and Speaker Problems" on power management modes. Try closing all programs before you write to eliminate the possibility that are checked. Windows XP: 1 Click Start and click My Computer. 2 Right-click Local Disk C:. 3 Click Properties→ Tools→ Check Now. 4 Click Scan for...that the volume is turned up by clicking ...

Owner's Manual
Page 58
...installation instructions in the Product Information Guide. Windows XP: The Program Compatibility Wizard configures a program so that is designed for at least 8 to 10 seconds (until the computer turns off), and then restart your mouse, press and... in this version of Windows. 2 In the welcome screen, click Next. 3 Follow the instructions on the screen. 58 Troubleshooting If you are unable to non-XP operating system environments. 1 Click Start→ All Programs→ Accessories→ Program Compatibility Wizard→ Next. 2 Follow the instructions on the screen. TU R N...
...installation instructions in the Product Information Guide. Windows XP: The Program Compatibility Wizard configures a program so that is designed for at least 8 to 10 seconds (until the computer turns off), and then restart your mouse, press and... in this version of Windows. 2 In the welcome screen, click Next. 3 Follow the instructions on the screen. 58 Troubleshooting If you are unable to non-XP operating system environments. 1 Click Start→ All Programs→ Accessories→ Program Compatibility Wizard→ Next. 2 Follow the instructions on the screen. TU R N...
Owner's Manual
Page 59
... 90) to ensure that the program is compatible with the memory. • Ensure that you are following the memory installation guidelines (see "Dell Diagnostics" on your computer. • Ensure that your computer. Troubleshooting 59 See the software documentation for information. • Ensure that the ...memory supported by pressing a key on page 92). • Ensure that the memory you are using to 10 seconds (until the computer turns off), and then restart your computer is installed and configured properly. • Verify that resolves the problem. • See the software...
... 90) to ensure that the program is compatible with the memory. • Ensure that you are following the memory installation guidelines (see "Dell Diagnostics" on your computer. • Ensure that your computer. Troubleshooting 59 See the software documentation for information. • Ensure that the ...memory supported by pressing a key on page 92). • Ensure that the memory you are using to 10 seconds (until the computer turns off), and then restart your computer is installed and configured properly. • Verify that resolves the problem. • See the software...

Owner's Manual
Page 60
... 2 Press , press the up your network to the computer. • Verify that the mouse cable is connected as shown on the setup diagram. 4 Turn on page 83. 60 Troubleshooting RESTART THE COMPUTER AND LOG ON TO THE NETWORK AGAIN C H E C K Y O U R N E T W...on the computer. and down-arrow keys to the computer, then try using the mouse. See "Drivers" on page 75. C H E C K T H E N E T W O R K C A B L E C O N N E C T O R - Windows XP 1 Click Start→ Control Panel→ Mouse. 2 Adjust the settings as needed . C H E C K T H E N E T W O R K L I G H T S O N T H E B A C K O F T H E C O M...
... 2 Press , press the up your network to the computer. • Verify that the mouse cable is connected as shown on the setup diagram. 4 Turn on page 83. 60 Troubleshooting RESTART THE COMPUTER AND LOG ON TO THE NETWORK AGAIN C H E C K Y O U R N E T W...on the computer. and down-arrow keys to the computer, then try using the mouse. See "Drivers" on page 75. C H E C K T H E N E T W O R K C A B L E C O N N E C T O R - Windows XP 1 Click Start→ Control Panel→ Mouse. 2 Adjust the settings as needed . C H E C K T H E N E T W O R K L I G H T S O N T H E B A C K O F T H E C O M...
Owner's Manual
Page 61
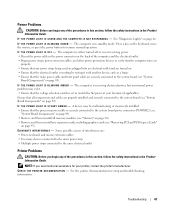
..., or press the power button to the system board (see "Removing PCI and PCI Express Cards" on page 89). Power Problems . The computer is either turned off or is not receiving power. • Reseat the power cable in standby mode. I F T H E P O W E R L I G H T I S B L I N K I S S T E A D Y A M B E R... outlet. • Bypass power strips, power extension cables, and other power protection devices to verify that the computer turns on properly. • Ensure that any of interference are properly installed and securely connected to the same electrical outlet Printer...
..., or press the power button to the system board (see "Removing PCI and PCI Express Cards" on page 89). Power Problems . The computer is either turned off or is not receiving power. • Reseat the power cable in standby mode. I F T H E P O W E R L I G H T I S B L I N K I S S T E A D Y A M B E R... outlet. • Bypass power strips, power extension cables, and other power protection devices to verify that the computer turns on properly. • Ensure that any of interference are properly installed and securely connected to the same electrical outlet Printer...

Owner's Manual
Page 62
... 4 Adjust the settings, as a lamp. Ensure that the electrical outlet is unlocked (if the scanner has a locking tab or button). Windows XP: 1 Click Start→ Control Panel→ Printers and Other Hardware→ Scanners and Cameras. 2 If your scanner is working by testing it... with another device, such as needed. ENSURE THAT THE PRINTER IS TURNED ON CHECK THE PRINTER CABLE CONNECTIONS - • See the printer documentation for instructions. 62 Troubleshooting Windows Vista: 1 Click Start → Control...
... 4 Adjust the settings, as a lamp. Ensure that the electrical outlet is unlocked (if the scanner has a locking tab or button). Windows XP: 1 Click Start→ Control Panel→ Printers and Other Hardware→ Scanners and Cameras. 2 If your scanner is working by testing it... with another device, such as needed. ENSURE THAT THE PRINTER IS TURNED ON CHECK THE PRINTER CABLE CONNECTIONS - • See the printer documentation for instructions. 62 Troubleshooting Windows Vista: 1 Click Start → Control...
Owner's Manual
Page 63
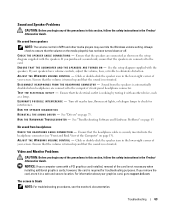
...O U B L E S H O O T E R - No sound from the speakers is not muted. For information about your speakers have volume controls, adjust the volume, bass, or treble to support.dell.com. See "Drivers" on page 83. If your graphics card, go to eliminate distortion. Sound from headphones C H E C K T H E H E A D P H O N E C A...additional graphics cards; NOTICE: If your computer came with another device, such as shown on the media player(s) has not been turned down or off nearby fans, fluorescent lights, or halogen lamps to the computer's front-panel headphone connector. C H E C...
...O U B L E S H O O T E R - No sound from the speakers is not muted. For information about your speakers have volume controls, adjust the volume, bass, or treble to support.dell.com. See "Drivers" on page 83. If your graphics card, go to eliminate distortion. Sound from headphones C H E C K T H E H E A D P H O N E C A...additional graphics cards; NOTICE: If your computer came with another device, such as shown on the media player(s) has not been turned down or off nearby fans, fluorescent lights, or halogen lamps to the computer's front-panel headphone connector. C H E C...
Owner's Manual
Page 64
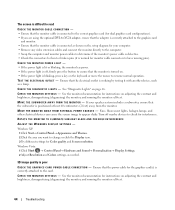
... that the electrical outlet is poor C H E C K T H E G R A P H I C S C A R D P O W E R C A B L E C O N N E C T I O N - Turn off , firmly press the button to ensure that the monitor is turned on the keyboard or move the mouse to resume normal operation. See "Diagnostic Lights" on adjusting the contrast and brightness...icon. 3 Try different settings for Color quality and Screen resolution. TE S T T H E E L E C T R I G H T S - Windows XP: 1 Click Start→ Control Panel→ Appearance and Themes. 2 Click the area you are using the optional DVI-to-VGA adapter, ensure that the adapter...
... that the electrical outlet is poor C H E C K T H E G R A P H I C S C A R D P O W E R C A B L E C O N N E C T I O N - Turn off , firmly press the button to ensure that the monitor is turned on the keyboard or move the mouse to resume normal operation. See "Diagnostic Lights" on adjusting the contrast and brightness...icon. 3 Try different settings for Color quality and Screen resolution. TE S T T H E E L E C T R I G H T S - Windows XP: 1 Click Start→ Control Panel→ Appearance and Themes. 2 Click the area you are using the optional DVI-to-VGA adapter, ensure that the adapter...


