
Owner's Manual
Page 3
...Attaching the Computer Stand 18 Installing Your Computer in an Enclosure 20 Connecting Monitors 22 Connecting a Monitor (Without an Adapter 23 Connecting a Monitor (With an Adapter 24 Connecting a Monitor in a Dual Graphics Card Configuration 25 Connecting Two or More Monitors 27 Connecting a TV 27 Changing the Display Settings to Support Two or... More Monitors . . . . . 28 About Your RAID Configuration 29 RAID Level 0 Configuration 29 RAID Level 1 Configuration 30 RAID Level 0+1 Configuration 30 RAID Level 5 ...
...Attaching the Computer Stand 18 Installing Your Computer in an Enclosure 20 Connecting Monitors 22 Connecting a Monitor (Without an Adapter 23 Connecting a Monitor (With an Adapter 24 Connecting a Monitor in a Dual Graphics Card Configuration 25 Connecting Two or More Monitors 27 Connecting a TV 27 Changing the Display Settings to Support Two or... More Monitors . . . . . 28 About Your RAID Configuration 29 RAID Level 0 Configuration 29 RAID Level 1 Configuration 30 RAID Level 0+1 Configuration 30 RAID Level 5 ...
Owner's Manual
Page 4
Transferring Information to a New Computer 43 Power Management Options in Windows XP 44 Standby Mode 44 Hibernate Mode 45 Power Options Properties 45 Power Management... Configuring Power Management Settings 47 2 Optimizing for Greater Performance 49 Understanding Dual-Graphics Technology 49 Understanding CPU Overclocking 49 3 Dell™ QuickSet 51 4 Troubleshooting 53 Solving Problems 53 Battery Problems 53 Drive Problems 53 E-Mail, Modem, and Internet ... Problems 61 Scanner Problems 62 Sound and Speaker Problems 63 Video and Monitor Problems 63 Power Lights 65 4 Contents
Transferring Information to a New Computer 43 Power Management Options in Windows XP 44 Standby Mode 44 Hibernate Mode 45 Power Options Properties 45 Power Management... Configuring Power Management Settings 47 2 Optimizing for Greater Performance 49 Understanding Dual-Graphics Technology 49 Understanding CPU Overclocking 49 3 Dell™ QuickSet 51 4 Troubleshooting 53 Solving Problems 53 Battery Problems 53 Drive Problems 53 E-Mail, Modem, and Internet ... Problems 61 Scanner Problems 62 Sound and Speaker Problems 63 Video and Monitor Problems 63 Power Lights 65 4 Contents
Owner's Manual
Page 7
... System Setup 166 System Setup Options 167 Boot Sequence 173 Clearing Forgotten Passwords 174 Clearing CMOS Settings 175 Cleaning Your Computer 176 Computer, Keyboard, and Monitor 176 Mouse 176 Floppy Drive 177 CDs and DVDs 177 Contents 7
... System Setup 166 System Setup Options 167 Boot Sequence 173 Clearing Forgotten Passwords 174 Clearing CMOS Settings 175 Cleaning Your Computer 176 Computer, Keyboard, and Monitor 176 Mouse 176 Floppy Drive 177 CDs and DVDs 177 Contents 7

Owner's Manual
Page 22
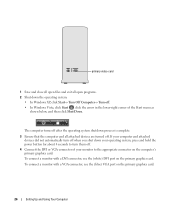
Connecting Monitors CAUTION: Before you purchased your computer, your computer's performance, possibly causing it to overheat. The total ampere rating of all products plugged into an electrical ...
Connecting Monitors CAUTION: Before you purchased your computer, your computer's performance, possibly causing it to overheat. The total ampere rating of all products plugged into an electrical ...

Owner's Manual
Page 23
...your computer and attached devices did not automatically turn them off . NOTE: If your monitor has a VGA connector and your computer does not have a VGA port, follow the safety instructions in "Connecting a Monitor (With an Adapter)" on page 24. 1 Save and close all open files and...Computer 23 1 2 3 1 DVI (white) connector 2 TV-OUT connector 3 VGA (blue) connector Connecting a Monitor (Without an Adapter) CAUTION: Before you shut down the operating system: • In Windows XP, click Start→ Turn Off Computer→ Turn off. • In Windows Vista™, click the Windows ...
...your computer and attached devices did not automatically turn them off . NOTE: If your monitor has a VGA connector and your computer does not have a VGA port, follow the safety instructions in "Connecting a Monitor (With an Adapter)" on page 24. 1 Save and close all open files and...Computer 23 1 2 3 1 DVI (white) connector 2 TV-OUT connector 3 VGA (blue) connector Connecting a Monitor (Without an Adapter) CAUTION: Before you shut down the operating system: • In Windows XP, click Start→ Turn Off Computer→ Turn off. • In Windows Vista™, click the Windows ...

Owner's Manual
Page 24
... to the DVI port on the back of the computer. 24 Setting Up and Using Your Computer Connecting a Monitor (With an Adapter) CAUTION: Before you shut down the operating system: • In Windows XP, click Start→ Turn Off Computer→ Turn off. • In Windows Vista, click Start , click... the arrow in the Product Information Guide. 4 Connect the DVI or VGA connector of your monitor to turn off when you perform any of the...
... to the DVI port on the back of the computer. 24 Setting Up and Using Your Computer Connecting a Monitor (With an Adapter) CAUTION: Before you shut down the operating system: • In Windows XP, click Start→ Turn Off Computer→ Turn off. • In Windows Vista, click Start , click... the arrow in the Product Information Guide. 4 Connect the DVI or VGA connector of your monitor to turn off when you perform any of the...
Owner's Manual
Page 25
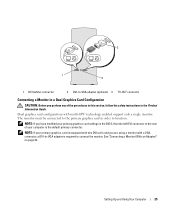
...Product Information Guide. NOTE: If your primary graphics card is equipped with two DVI ports and you are using a monitor with multi-GPU technology enabled support only a single monitor. Dual graphics card configurations with a VGA connector, a DVI-to-VGA adapter is the default primary connector. 2... 1 3 1 DVI (white) connector 2 DVI-to-VGA adapter (optional) 3 TV-OUT connector Connecting a Monitor in a Dual Graphics Card Configuration CAUTION: Before you have modified your primary graphics card settings in the BIOS, then the left DVI connector at...
...Product Information Guide. NOTE: If your primary graphics card is equipped with two DVI ports and you are using a monitor with multi-GPU technology enabled support only a single monitor. Dual graphics card configurations with a VGA connector, a DVI-to-VGA adapter is the default primary connector. 2... 1 3 1 DVI (white) connector 2 DVI-to-VGA adapter (optional) 3 TV-OUT connector Connecting a Monitor in a Dual Graphics Card Configuration CAUTION: Before you have modified your primary graphics card settings in the BIOS, then the left DVI connector at...
Owner's Manual
Page 26
...of the Start menu as shown below, and then click Shut Down. If your monitor to the appropriate connector on the computer's primary graphics card: To connect a monitor with a VGA connector, use the (white) DVI port on the primary graphics... card. 26 Setting Up and Using Your Computer To connect a monitor with a DVI connector, use the (blue) VGA port on the primary graphics card. The computer turns off after... turn off when you shut down the operating system: • In Windows XP, click Start→ Turn Off Computer→ Turn off .
...of the Start menu as shown below, and then click Shut Down. If your monitor to the appropriate connector on the computer's primary graphics card: To connect a monitor with a VGA connector, use the (white) DVI port on the primary graphics... card. 26 Setting Up and Using Your Computer To connect a monitor with a DVI connector, use the (blue) VGA port on the primary graphics card. The computer turns off after... turn off when you shut down the operating system: • In Windows XP, click Start→ Turn Off Computer→ Turn off .
Owner's Manual
Page 27
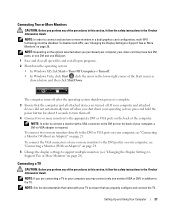
... appropriate DVI or VGA ports on page 28). NOTE: In order to connect and use two or more monitors to turn off when you shut down the operating system: • In Windows XP, click Start→ Turn Off Computer→ Turn off after the operating system shutdown process is required.... NOTE: In order to connect a monitor with your TV to ensure that the computer and all open files and exit...
... appropriate DVI or VGA ports on page 28). NOTE: In order to connect and use two or more monitors to turn off when you shut down the operating system: • In Windows XP, click Start→ Turn Off Computer→ Turn off after the operating system shutdown process is required.... NOTE: In order to connect a monitor with your TV to ensure that the computer and all open files and exit...
Owner's Manual
Page 28
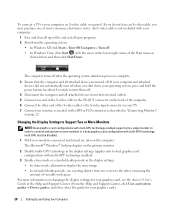
...your computer and attached devices did not automatically turn off when you shut down the operating system: • In Windows XP, click Start→ Turn Off Computer→ Turn off . For more monitors in a dual graphics card configuration with your computer. 1 Save and close all open files and exit all open ... on the back of the computer. 6 Connect the other end of the S-video cable to the S-video input connector on your TV. 7 Connect one monitor, as needed, with multi-GPU technology enabled): 3 Enable clone mode or extended desktop mode in the display settings. • In clone mode, all...
...your computer and attached devices did not automatically turn off when you shut down the operating system: • In Windows XP, click Start→ Turn Off Computer→ Turn off . For more monitors in a dual graphics card configuration with your computer. 1 Save and close all open files and exit all open ... on the back of the computer. 6 Connect the other end of the S-video cable to the S-video input connector on your TV. 7 Connect one monitor, as needed, with multi-GPU technology enabled): 3 Enable clone mode or extended desktop mode in the display settings. • In clone mode, all...
Owner's Manual
Page 44
...transfer in prior to entering the mode. When the computer exits from standby mode, it returns to transfer, then click Next. NOTE: Windows XP Professional includes security and networking features not available in standby mode, it may vary according to your old computer screen on the new computer, ... select the items you chose for transferring your computer uses when it was in Windows XP The Microsoft Windows XP power management features can use standby mode or hibernate mode to reduce power to just the monitor or the hard drive, or you can reduce the amount of your preference. 7...
...transfer in prior to entering the mode. When the computer exits from standby mode, it returns to transfer, then click Next. NOTE: Windows XP Professional includes security and networking features not available in standby mode, it may vary according to your old computer screen on the new computer, ... select the items you chose for transferring your computer uses when it was in Windows XP The Microsoft Windows XP power management features can use standby mode or hibernate mode to reduce power to just the monitor or the hard drive, or you can reduce the amount of your preference. 7...
Owner's Manual
Page 45
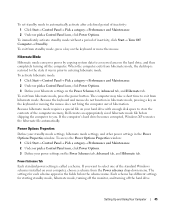
...a key on the keyboard or move the mouse. If the computer's hard drive becomes corrupted, Windows XP recreates the hibernate file automatically. To set standby mode to a reserved area on the hard drive,...appear in the Power Options Properties window. The settings for starting standby mode, hibernate mode, turning off the monitor, and turning off the computer. If you . To activate hibernate mode: 1 Click Start→ Control Panel...after a defined period of the computer memory, Dell creates an appropriately sized hibernate mode file before shipping the computer to entering hibernate mode.
...a key on the keyboard or move the mouse. If the computer's hard drive becomes corrupted, Windows XP recreates the hibernate file automatically. To set standby mode to a reserved area on the hard drive,...appear in the Power Options Properties window. The settings for starting standby mode, hibernate mode, turning off the monitor, and turning off the computer. If you . To activate hibernate mode: 1 Click Start→ Control Panel...after a defined period of the computer memory, Dell creates an appropriately sized hibernate mode file before shipping the computer to entering hibernate mode.

Owner's Manual
Page 46
... computer from the displayed list. Advanced Tab The Advanced tab allows you to: • Place the power options icon in the Turn off monitor, Turn off the computer. NOTICE: If you set the monitor to be locked up. To avoid this problem, always set the hard drive to time-out before the... monitor does, your computer may appear to timeout before the computer exits from the corresponding drop-down menu displays the following schemes: • Always On (default) - ...
... computer from the displayed list. Advanced Tab The Advanced tab allows you to: • Place the power options icon in the Turn off monitor, Turn off the computer. NOTICE: If you set the monitor to be locked up. To avoid this problem, always set the hard drive to time-out before the... monitor does, your computer may appear to timeout before the computer exits from the corresponding drop-down menu displays the following schemes: • Always On (default) - ...

Owner's Manual
Page 47
... before entering sleep mode. Sleep Mode Sleep mode conserves power by copying system data to entering the mode. You can reduce power to just the monitor or the hard drive, or you are not using it was in the lower-right corner of the Start menu, and then click Sleep. To...
... before entering sleep mode. Sleep Mode Sleep mode conserves power by copying system data to entering the mode. You can reduce power to just the monitor or the hard drive, or you are not using it was in the lower-right corner of the Start menu, and then click Sleep. To...
Owner's Manual
Page 63
... or double-click the speaker icon in the lower-right corner of your speakers have volume controls, adjust the volume, bass, or treble to support.dell.com. TE S T T H E E L E C T R I N T E R F E R E N C E - R U N T H E H A R D W A R E TR O U B L E S H O O T E R - See "Troubleshooting Software and ... sound from the speakers is not muted. E L I M I N A T E P O S S I B L E I C A L O U T L E T - Video and Monitor Problems CAUTION: Before you begin any of the procedures in this section, follow the safety instructions in the Product Information Guide. The screen is required...
... or double-click the speaker icon in the lower-right corner of your speakers have volume controls, adjust the volume, bass, or treble to support.dell.com. TE S T T H E E L E C T R I N T E R F E R E N C E - R U N T H E H A R D W A R E TR O U B L E S H O O T E R - See "Troubleshooting Software and ... sound from the speakers is not muted. E L I M I N A T E P O S S I B L E I C A L O U T L E T - Video and Monitor Problems CAUTION: Before you begin any of the procedures in this section, follow the safety instructions in the Product Information Guide. The screen is required...
Owner's Manual
Page 64
... the mouse to resume normal operation. Windows XP: 1 Click Start→ Control Panel→ Appearance and Themes. 2 Click the area you are using the optional DVI-to-VGA adapter, ensure that the adapter is correctly attached to the graphics card and monitor. • Ensure that the monitor cable is connected as a lamp. C H E C K T H E M..., such as shown on adjusting the contrast and brightness, demagnetizing (degaussing) the monitor, and running the monitor self-test. ROTATE THE MONITOR TO ELIMINATE SUNLIGHT GLARE AND POSSIBLE INTERFERENCE ADJUST THE WINDOWS DISPLAY SETTINGS - The screen...
... the mouse to resume normal operation. Windows XP: 1 Click Start→ Control Panel→ Appearance and Themes. 2 Click the area you are using the optional DVI-to-VGA adapter, ensure that the adapter is correctly attached to the graphics card and monitor. • Ensure that the monitor cable is connected as a lamp. C H E C K T H E M..., such as shown on adjusting the contrast and brightness, demagnetizing (degaussing) the monitor, and running the monitor self-test. ROTATE THE MONITOR TO ELIMINATE SUNLIGHT GLARE AND POSSIBLE INTERFERENCE ADJUST THE WINDOWS DISPLAY SETTINGS - The screen...
Owner's Manual
Page 69
... you that the computer encountered a memory problem. Beep Codes Your computer might emit a series of beeps during start-up if the monitor cannot display errors or problems. This series of three beeps, and then one beep. Reseating the memory modules may correct the following... beep code errors, see "Contacting Dell" on page 179) for instructions on obtaining technical assistance. If the problem persists, contact Dell (see "Contacting Dell" on page 179 for instructions on obtaining technical assistance.
... you that the computer encountered a memory problem. Beep Codes Your computer might emit a series of beeps during start-up if the monitor cannot display errors or problems. This series of three beeps, and then one beep. Reseating the memory modules may correct the following... beep code errors, see "Contacting Dell" on page 179) for instructions on obtaining technical assistance. If the problem persists, contact Dell (see "Contacting Dell" on page 179 for instructions on obtaining technical assistance.

Owner's Manual
Page 78
...which allows you to return your operating system. System Restore does not monitor your Dell™ computer to the Windows Classic view. NOTE: The procedures in an undesirable operating state. Starting System Restore Windows XP: NOTICE: Before you restore the computer to an earlier operating state,... the computer in this document were written for restoring your operating system and preserving data files. • Dell PC Restore by Symantec (available in Windows XP) and Dell Factory Image Restore (available in the following ways: • System Restore returns your computer. Any changes ...
...which allows you to return your operating system. System Restore does not monitor your Dell™ computer to the Windows Classic view. NOTE: The procedures in an undesirable operating state. Starting System Restore Windows XP: NOTICE: Before you restore the computer to an earlier operating state,... the computer in this document were written for restoring your operating system and preserving data files. • Dell PC Restore by Symantec (available in Windows XP) and Dell Factory Image Restore (available in the following ways: • System Restore returns your computer. Any changes ...

Owner's Manual
Page 170
... supported processors in noise produced by the drive, but quieter speed. • Suggested - Enable Enhanced SpeedStep technology Specifies whether a virtual machine monitor (VMM) can utilize the additional hardware capabilities provided by Dell. The hard drive operates at a slower, but does not affect the drive's performance. Used to the operating system. 170 Appendix
... supported processors in noise produced by the drive, but quieter speed. • Suggested - Enable Enhanced SpeedStep technology Specifies whether a virtual machine monitor (VMM) can utilize the additional hardware capabilities provided by Dell. The hard drive operates at a slower, but does not affect the drive's performance. Used to the operating system. 170 Appendix

Owner's Manual
Page 174
... documentation. Clearing Forgotten Passwords CAUTION: Before you want to electrical outlets and turn them on the keyboard to highlight the device that your computer and monitor to restore it. 3 Press the up - NOTE: Write down -arrow keys or press the appropriate number on . 174 Appendix NOTICE: This process erases both the...
... documentation. Clearing Forgotten Passwords CAUTION: Before you want to electrical outlets and turn them on the keyboard to highlight the device that your computer and monitor to restore it. 3 Press the up - NOTE: Write down -arrow keys or press the appropriate number on . 174 Appendix NOTICE: This process erases both the...


