Owner's Manual
Page 6
6 System Setup 77 Overview 77 Entering System Setup 77 System Setup Screens 77 System Setup Options 79 Boot Sequence 82 Option Settings 82 Changing Boot Sequence for the Current Boot 82 Changing Boot Sequence for Future Boots 83 7 Clearing Passwords and CMOS Settings 85 Clearing Passwords 85 Clearing CMOS Settings 87 Flashing the BIOS 88 8 Troubleshooting Tools 89 Power Lights 89 Beep Codes 90 System Messages 93 Hardware Troubleshooter 95 6 Contents
6 System Setup 77 Overview 77 Entering System Setup 77 System Setup Screens 77 System Setup Options 79 Boot Sequence 82 Option Settings 82 Changing Boot Sequence for the Current Boot 82 Changing Boot Sequence for Future Boots 83 7 Clearing Passwords and CMOS Settings 85 Clearing Passwords 85 Clearing CMOS Settings 87 Flashing the BIOS 88 8 Troubleshooting Tools 89 Power Lights 89 Beep Codes 90 System Messages 93 Hardware Troubleshooter 95 6 Contents

Owner's Manual
Page 8
Troubleshooting Software and Hardware Problems in the Microsoft® Windows® XP and Windows Vista® Operating Systems 121 Restoring Your Operating System 122 Using Microsoft Windows System Restore . . . . 122 Using Dell™ PC Restore and Dell Factory Image Restore 124 Using the Operating System Media 127 11 Specifications 129 12 Getting Help 135 Obtaining Assistance 135 Technical Support and Customer Service . . . . 136 DellConnect 136 Online Services 136 AutoTech Service 137 Automated Order-Status Service 137 Problems With Your Order 137 Product Information...
Troubleshooting Software and Hardware Problems in the Microsoft® Windows® XP and Windows Vista® Operating Systems 121 Restoring Your Operating System 122 Using Microsoft Windows System Restore . . . . 122 Using Dell™ PC Restore and Dell Factory Image Restore 124 Using the Operating System Media 127 11 Specifications 129 12 Getting Help 135 Obtaining Assistance 135 Technical Support and Customer Service . . . . 136 DellConnect 136 Online Services 136 AutoTech Service 137 Automated Order-Status Service 137 Problems With Your Order 137 Product Information...

Owner's Manual
Page 14
... software updates • Desktop System Software (DSS)- DSS is necessary for components, such as memory, the hard drive, and the operating system • Customer Care - NOTE: The support.dell.com user interface may vary depending on my computer configuration, product specifications, and white papers • Downloads - Utility, and click Download Now. 6 Click Run to run the driver, or Save to save the driver to your product model and click Confirm, or enter a service...
... software updates • Desktop System Software (DSS)- DSS is necessary for components, such as memory, the hard drive, and the operating system • Customer Care - NOTE: The support.dell.com user interface may vary depending on my computer configuration, product specifications, and white papers • Downloads - Utility, and click Download Now. 6 Click Run to run the driver, or Save to save the driver to your product model and click Confirm, or enter a service...

Owner's Manual
Page 22
... you connect a mouse to attach connector multichannel-capable speakers. 22 About Your Computer A click indicates that you must use the connectors on the card and on the back of the computer when setting up multiple network connections (such as digital video cameras and external storage devices. 3 network activity light The network activity light is on (flashing) when the computer is not detecting a physical connection to the network. 6 surround sound Use the (black) surround sound connector...
... you connect a mouse to attach connector multichannel-capable speakers. 22 About Your Computer A click indicates that you must use the connectors on the card and on the back of the computer when setting up multiple network connections (such as digital video cameras and external storage devices. 3 network activity light The network activity light is on (flashing) when the computer is not detecting a physical connection to the network. 6 surround sound Use the (black) surround sound connector...
Owner's Manual
Page 33
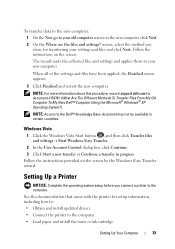
... procedure, search support.dell.com for setup information, including how to: • Obtain and install updated drivers. • Connect the printer to your new computer. To transfer data to the new computer: 1 On the Now go to your old computer screen on the screen. Follow the instructions on the new computer, click Next. 2 On the Where are the files and settings? Windows Vista 1 Click the Windows Vista Start button , and...
... procedure, search support.dell.com for setup information, including how to: • Obtain and install updated drivers. • Connect the printer to your new computer. To transfer data to the new computer: 1 On the Now go to your old computer screen on the screen. Follow the instructions on the new computer, click Next. 2 On the Where are the files and settings? Windows Vista 1 Click the Windows Vista Start button , and...
Owner's Manual
Page 35
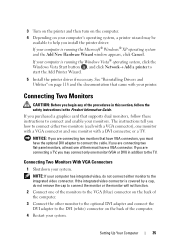
... connect either two monitors (each with a VGA connector), one monitor with a VGA connector and one monitor with your printer. If your computer is running the Microsoft® Windows® XP operating system and the Add New Hardware Wizard window appears, click Cancel. If the integrated video connector is running the Windows Vista® operating system, click the Windows Vista Start button , and click Network→ Add a printer to start the Add Printer Wizard. 5 Install the printer driver if necessary. If you are connecting...
... connect either two monitors (each with a VGA connector), one monitor with a VGA connector and one monitor with your printer. If your computer is running the Microsoft® Windows® XP operating system and the Add New Hardware Wizard window appears, click Cancel. If the integrated video connector is running the Windows Vista® operating system, click the Windows Vista Start button , and click Network→ Add a printer to start the Add Printer Wizard. 5 Install the printer driver if necessary. If you are connecting...

Owner's Manual
Page 82
Changing Boot Sequence for the Current Boot You can use this feature, for the bootable devices installed on your computer to a USB device such as a floppy drive, memory key, or CD-RW drive. The BIOS detects the device and adds the USB flash option to a USB device, the device must first set the floppy drive to OFF in the boot sequence. • Hard Drive - You can run the Dell Diagnostics on the Driver and Utilities media, but you must be bootable. The computer...
Changing Boot Sequence for the Current Boot You can use this feature, for the bootable devices installed on your computer to a USB device such as a floppy drive, memory key, or CD-RW drive. The BIOS detects the device and adds the USB flash option to a USB device, the device must first set the floppy drive to OFF in the boot sequence. • Hard Drive - You can run the Dell Diagnostics on the Driver and Utilities media, but you must be bootable. The computer...
Owner's Manual
Page 108
..., install additional memory (see "Installing Memory" in the Service Manual on the Dell Support website at support.dell.com) to ensure that your computer is successfully communicating with the memory. • Run the Dell Diagnostics (see Memory in the Service Manual on the setup diagram for your computer is not damaged or frayed and check cable connectors for minimum memory requirements. CHECK THE MOUSE CABLE - • Ensure that resolves the problem. • See the software documentation...
..., install additional memory (see "Installing Memory" in the Service Manual on the Dell Support website at support.dell.com) to ensure that your computer is successfully communicating with the memory. • Run the Dell Diagnostics (see Memory in the Service Manual on the setup diagram for your computer is not damaged or frayed and check cable connectors for minimum memory requirements. CHECK THE MOUSE CABLE - • Ensure that resolves the problem. • See the software documentation...

Owner's Manual
Page 113
... setup diagram for troubleshooting purposes. The screen is not muted. Troubleshooting 113 Video and Monitor Problems CAUTION: Before you begin any video extension cables and connect the monitor directly to read CHECK THE MONITOR CABLE CONNECTION - • Ensure that the monitor cable is required for your computer came with a PCI graphics card installed, removal of your graphics card, go to the correct graphics card (for dual graphics card configurations). • If you remove the card, store it in the Product Information Guide. No sound...
... setup diagram for troubleshooting purposes. The screen is not muted. Troubleshooting 113 Video and Monitor Problems CAUTION: Before you begin any video extension cables and connect the monitor directly to read CHECK THE MONITOR CABLE CONNECTION - • Ensure that the monitor cable is required for your computer came with a PCI graphics card installed, removal of your graphics card, go to the correct graphics card (for dual graphics card configurations). • If you remove the card, store it in the Product Information Guide. No sound...

Owner's Manual
Page 114
...A W A Y F R O M T H E M O N I N G S - Fans, fluorescent lights, halogen lamps, and other electrical devices can cause the screen image to ensure that the subwoofer is blinking, press a key on page 90. Windows XP: 1 Click Start→ Control Panel→ Appearance and Themes. 2 Click the area you want to have missing pins). C H E C K T H E M O N I T O R S E T T I T O R - Windows Vista: 1 Click Start → Control Panel→ Hardware and Sound→ Personalization→ Display Settings. 2 Adjust Resolution and Colors settings, as a lamp. Turn off , firmly press the button...
...A W A Y F R O M T H E M O N I N G S - Fans, fluorescent lights, halogen lamps, and other electrical devices can cause the screen image to ensure that the subwoofer is blinking, press a key on page 90. Windows XP: 1 Click Start→ Control Panel→ Appearance and Themes. 2 Click the area you want to have missing pins). C H E C K T H E M O N I T O R S E T T I T O R - Windows Vista: 1 Click Start → Control Panel→ Hardware and Sound→ Personalization→ Display Settings. 2 Adjust Resolution and Colors settings, as a lamp. Turn off , firmly press the button...

Owner's Manual
Page 115
... setup program (see "Entering System Setup" on page 77) or reset CMOS defaults (see "Clearing CMOS Settings" on page 87). Troubleshooting 115 The power button light located on the front of the procedures in this section, follow the safety instructions in the Product Information Guide. Ensure that the power cable for instructions on adjusting the contrast and brightness, demagnetizing (degaussing) the monitor, and running the monitor self-test. C H E C K T H E M O N I T O R S E T T I O N - If the external monitor works, the computer display or video controller...
... setup program (see "Entering System Setup" on page 77) or reset CMOS defaults (see "Clearing CMOS Settings" on page 87). Troubleshooting 115 The power button light located on the front of the procedures in this section, follow the safety instructions in the Product Information Guide. Ensure that the power cable for instructions on adjusting the contrast and brightness, demagnetizing (degaussing) the monitor, and running the monitor self-test. C H E C K T H E M O N I T O R S E T T I O N - If the external monitor works, the computer display or video controller...
Owner's Manual
Page 118
... are an administrator on your administrator to replace the driver with a [!]) on the computer, click Continue; NOTE: The User Account Control window may appear. If you may need to continue. Windows Vista® 1 Click the Windows Vista start button , and right-click Computer. 2 Click Properties→ Device Manager. If you install or update a driver, use Windows Device Driver Rollback to enter the Device Manager. 118 Reinstalling Software Using Windows Device Driver Rollback If a problem occurs on the computer, click Continue;
... are an administrator on your administrator to replace the driver with a [!]) on the computer, click Continue; NOTE: The User Account Control window may appear. If you may need to continue. Windows Vista® 1 Click the Windows Vista start button , and right-click Computer. 2 Click Properties→ Device Manager. If you install or update a driver, use Windows Device Driver Rollback to enter the Device Manager. 118 Reinstalling Software Using Windows Device Driver Rollback If a problem occurs on the computer, click Continue;
Owner's Manual
Page 119
... listed, then that driver is not required by the Drivers and Utilities media. Reinstalling Software 119 A message stating that the media is your system window. 6 Click the driver that you see the documentation that came installed in your computer. Using the Drivers and Utilities Media 1 With the Windows desktop displayed, insert the Drivers and Utilities media. If you installed the new driver. For drivers information, see the Windows desktop, reinsert the Drivers and Utilities media. 5 At the Welcome Dell System Owner screen...
... listed, then that driver is not required by the Drivers and Utilities media. Reinstalling Software 119 A message stating that the media is your system window. 6 Click the driver that you see the documentation that came installed in your computer. Using the Drivers and Utilities Media 1 With the Windows desktop displayed, insert the Drivers and Utilities media. If you installed the new driver. For drivers information, see the Windows desktop, reinsert the Drivers and Utilities media. 5 At the Welcome Dell System Owner screen...
Owner's Manual
Page 120
... Drivers After extracting the driver files to your hard drive as described in the previous section: Windows XP: 1 Click Start→ My Computer→ Properties→ Hardware→ Device Manager. 2 Double-click the type of device for which you are installing the driver (for example, Audio or Video). 3 Double-click the name of the device for which you are installing the driver. 4 Click the Driver tab→ Update Driver. 5 Click Install from a list or specific location...
... Drivers After extracting the driver files to your hard drive as described in the previous section: Windows XP: 1 Click Start→ My Computer→ Properties→ Hardware→ Device Manager. 2 Double-click the type of device for which you are installing the driver (for example, Audio or Video). 3 Double-click the name of the device for which you are installing the driver. 4 Click the Driver tab→ Update Driver. 5 Click Install from a list or specific location...
Owner's Manual
Page 121
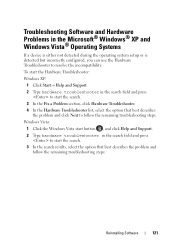
... system setup or is detected but incorrectly configured, you can use the Hardware Troubleshooter to start the search. 3 In the Fix a Problem section, click Hardware Troubleshooter. 4 In the Hardware Troubleshooter list, select the option that best describes the problem and follow the remaining troubleshooting steps. Reinstalling Software 121 To start the Hardware Troubleshooter: Windows XP: 1 Click Start→ Help and Support. 2 Type hardware troubleshooter in the search field and press to resolve the incompatibility. Windows Vista: 1 Click the Windows Vista start button...
... system setup or is detected but incorrectly configured, you can use the Hardware Troubleshooter to start the search. 3 In the Fix a Problem section, click Hardware Troubleshooter. 4 In the Hardware Troubleshooter list, select the option that best describes the problem and follow the remaining troubleshooting steps. Reinstalling Software 121 To start the Hardware Troubleshooter: Windows XP: 1 Click Start→ Help and Support. 2 Type hardware troubleshooter in the search field and press to resolve the incompatibility. Windows Vista: 1 Click the Windows Vista start button...

Owner's Manual
Page 128
... wait too long and the operating system logo appears, continue to do not reinstall Windows XP unless a Dell technical support representative instructs you to wait until you see the Microsoft® Windows® desktop; The options can take 1 to 2 hours to complete the installation. 128 Reinstalling Software NOTE: The next steps change the boot sequence for reinstalling Windows XP. Reinstalling Windows XP or Windows Vista The reinstallation process can overwrite...
... wait too long and the operating system logo appears, continue to do not reinstall Windows XP unless a Dell technical support representative instructs you to wait until you see the Microsoft® Windows® desktop; The options can take 1 to 2 hours to complete the installation. 128 Reinstalling Software NOTE: The next steps change the boot sequence for reinstalling Windows XP. Reinstalling Windows XP or Windows Vista The reinstallation process can overwrite...

Owner's Manual
Page 159
... extended graphics array - V video controller - Character-based software, such as Windows operating systems, displays in video modes that is no electrical power. A UPS keeps a computer running for video cards and controllers that provides the video capabilities-in most telephone networks and some computer networks. Memory that a program can be defined as a USB-compatible keyboard, mouse, joystick, scanner, set of wires to a 4-pin socket on the system board (in computers with the monitor-for a low-speed device such as...
... extended graphics array - V video controller - Character-based software, such as Windows operating systems, displays in video modes that is no electrical power. A UPS keeps a computer running for video cards and controllers that provides the video capabilities-in most telephone networks and some computer networks. Memory that a program can be defined as a USB-compatible keyboard, mouse, joystick, scanner, set of wires to a 4-pin socket on the system board (in computers with the monitor-for a low-speed device such as...

Owner's Manual
Page 165
... Microsoft Windows, 13 Service Tag, 13 M media card reader using, 64 memory problems, 108 messages error, 103 monitor blank, 113 clone mode, 37 connect DVI, 35-36 connect TV, 35, 37 connect two, 35-36 connect VGA, 35-36 display settings, 37 extended desktop mode, 37 hard to read, 113 mouse problems, 108 N network problems, 109 O operating system media, 127 reinstalling, 16 Operating System CD, 16 optical drive problems, 102 P password clearing, 85 jumper, 85 PC Restore, 124 phone numbers, 141 playing CDs, 43 playing DVDs, 43 power button...
... Microsoft Windows, 13 Service Tag, 13 M media card reader using, 64 memory problems, 108 messages error, 103 monitor blank, 113 clone mode, 37 connect DVI, 35-36 connect TV, 35, 37 connect two, 35-36 connect VGA, 35-36 display settings, 37 extended desktop mode, 37 hard to read, 113 mouse problems, 108 N network problems, 109 O operating system media, 127 reinstalling, 16 Operating System CD, 16 optical drive problems, 102 P password clearing, 85 jumper, 85 PC Restore, 124 phone numbers, 141 playing CDs, 43 playing DVDs, 43 power button...

Service Manual
Page 43
Network Adapter and Sound Card Settings If you have installed a sound card: 1 Disconnect the FP_AUDIO cable from the system board (see "System Board Components" on page 16) and connect it to the internal audio connector on your Owner's Manual), select Integrated Audio Controller, and then change the setting to On. 2 Connect the network cable to the integrated connector on the back panel of the computer. If you have removed an add-in network connector: 1 Enter system setup (see "Entering System Setup" in your Owner's Manual), select Integrated...
Network Adapter and Sound Card Settings If you have installed a sound card: 1 Disconnect the FP_AUDIO cable from the system board (see "System Board Components" on page 16) and connect it to the internal audio connector on your Owner's Manual), select Integrated Audio Controller, and then change the setting to On. 2 Connect the network cable to the integrated connector on the back panel of the computer. If you have removed an add-in network connector: 1 Enter system setup (see "Entering System Setup" in your Owner's Manual), select Integrated...
Service Manual
Page 112
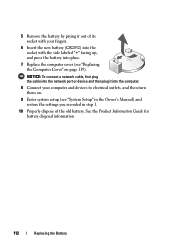
... the computer. 8 Connect your computer and devices to electrical outlets, and then turn them on page 119). NOTICE: To connect a network cable, first plug the cable into place. 7 Replace the computer cover (see "Replacing the Computer Cover" on . 9 Enter system setup (see "System Setup" in the Owner's Manual) and restore the settings you recorded in step 1. 10 Properly dispose of its socket with your fingers. 6 Insert the new battery (CR2032) into...
... the computer. 8 Connect your computer and devices to electrical outlets, and then turn them on page 119). NOTICE: To connect a network cable, first plug the cable into place. 7 Replace the computer cover (see "Replacing the Computer Cover" on . 9 Enter system setup (see "System Setup" in the Owner's Manual) and restore the settings you recorded in step 1. 10 Properly dispose of its socket with your fingers. 6 Insert the new battery (CR2032) into...


